TOPIC:
Re: 58024 Sand Rover resto 12 years 9 months ago #1763
|
Oh man, it looks spanking gorgeous already It should take four coats - but I had to _really_ resist laying it all on in one hit & risking runs ... I reckon one more coat from 180 degrees to where I just sprayed it, later on tonight, then two more tomorrow morning, laquering on Sunday ... then leave it until next weekend before handling |
|
Please Log in to join the conversation. |
Re: 58024 Sand Rover resto 12 years 9 months ago #1764
|
Loving the hard work and ideas going into this re-build.
Some very usful tips for repairing parts and keeping the cost down Looking forward to seeing some updated pics soon Keep up the good work and posts GING |
|
Please Log in to join the conversation. |
Re: 58024 Sand Rover resto 12 years 9 months ago #1770
|
I got all the coats of colour sprayed on Friday, today I’ve been laying on the clear ... and wow, it looked good before, but it looks even shinier now, and you can actually see the flakes of metal catching the light now ... photos really don’t it justice – I really struggled (thanks to poor light & it being too shiny for the camera to focus on) to get a decent shot – this is the best one, and it’s still a very poor representation TBH.
Unfortunately, I did get a bit of a run on one side of the bonnet (hood) where it goes vertical & runs into the wing (fender) – but I‘ve learned the best thing you can do when something like that happens is _nothing_ - sometimes they just settle out when they cure. If not, I’ll leave it for at least a week before I think about gently sanding it back. I’ve also been mixing up paint for the seats, the manual says they should be XF-9 “Hull Red”, but I didn’t have any of that, and besides, I’d like them semi-gloss / satin, more like “real” leatherette. After a little experimentation, I mixed up a small pot worth of 5ml X-7 Red (gloss), 2ml XF-68 NATO Brown (flat), 0.5ml XF-1 Flat Black, and 3.75ml of X-21 Flat Base. I used the same stuff on the driver’s hat (with a bit of extra Flat Base added) – no-one wants a shiny hat. |
|
Please Log in to join the conversation.
Last edit: by larbut.
|
Re: 58024 Sand Rover resto 12 years 9 months ago #1772
|
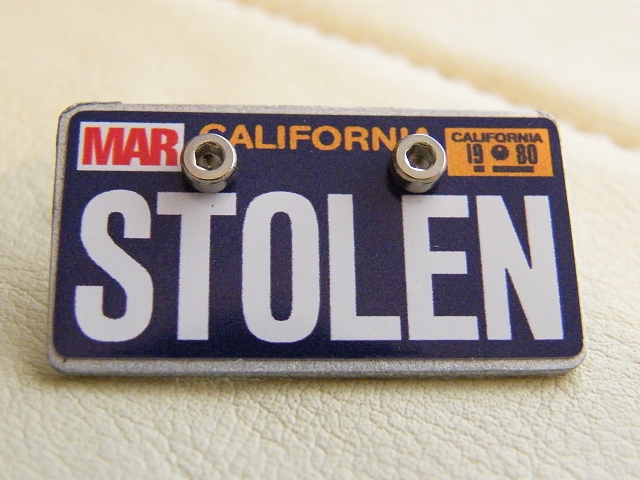
Changed my mind on the number plate ... I swear it doesn't look quite as rough at normal size ... I cleaned the last few bits on the running gear, so all I've have left to do is paint the floor of the shell & the seats, but that will have to wait a few days. In the meantime, I've layed everything out to rebuild the chassis (edges of the photo have been fiddled to hide the surrounding chaos |
|
Please Log in to join the conversation.
Last edit: by Jonny Retro.
|
Re: 58024 Sand Rover resto 12 years 9 months ago #1773
|
Looking good, love the full layout picture showing it before the re-build
GING |
|
Please Log in to join the conversation. |
Re: 58024 Sand Rover resto 12 years 9 months ago #1775
|
Got the chassis together this morning, starting with the servos ... I was a bit sceptical about the value of these “servo tester” widgets, but now they’ve got very cheap I thought I’d have a try – I got to say it was very much easier than having to faff about with the rest of the radio gear at that early stage - £6.50 well spent
I’ve had trouble with the driveshafts on UJ-equipped cars before – the load exerted by the grub screw seems to make the half ground ends spread a little – meaning you can get old, worn nylon bearings off no problem, but new ballraces jam up. These were no different, but a quick tickle with a file & a spin in a drill to polish with wet & dry paper soon had them sized correctly. Rear end underside built up (note the damage caused by Blue Hylomar (threadlock): Rear end topside done ... .... everything else. The blue/green wiring at the front end is a kludge until I can get some more JST (aka BEC) connectors to extend the RX power lead, when I’ve done that I can tidy the wiring properly. My repair to the left hand front strut top didn’t even last long enough to get the rubber piping through edit - I should add I've given it a quick razz around indoors to "test" the chassis - it wheelspins nicely on carpet Maybe I should use a 6V battery when it comes to actual driving outdoors with the shell on, just to try & preserve the car ... obviously I won't be able to drive it part throttle beacause of the risk of overheating the MSC |
|
Please Log in to join the conversation.
Last edit: by larbut.
|
Re: 58024 Sand Rover resto 12 years 9 months ago #1776
|
What a job nice work, I have had one of these buggy's in the loft for years so I am going to do the same, I know the main gear A is no good and can not get one from anywhere trust me I have been trying for weeks, I see your using the 540 motor which I can get but not been able to find the motor mount anywhere unless anyone knows of some where?.
Keep up the good work I have found this very helpful for when I get to do mine will post some pics at some point. P.s have got the 2010 Holiday buggy on the way so will have fun building that up and hope to keep that for 30 years!!!!!!!!! |
|
|
Please Log in to join the conversation. |
Re: 58024 Sand Rover resto 12 years 9 months ago #1777
|
Great work there Jonny,
I have a vintage HB which is awaiting a re-build etc. Liking this for hints etc when i get to do mine, also my front struts are both broken so will have to do a mod to get them to work. Also one of the rear 'A' frame (C part) is broken so will have to replace. Looking forward to the next update GING |
|
Please Log in to join the conversation. |
Re: 58024 Sand Rover resto 12 years 9 months ago #1801
|
|
|
Please Log in to join the conversation. |
Time to create page: 0.192 seconds


