TOPIC:
Battery re-heatshrinking 12 years 7 months ago #3094
|
Some of my batteries have got pretty manky thanks to driving in dirty & wet conditions, so I’ve given them a bit of a tidy up with new heatshrink.
If you want to do the same, things you’ll need are a hot air gun (naked flames tend to leave soot marks), a hot glue gun, and obviously some heatshrink tubing. I bought mine from this seller on eBay – 50.8mm clear for the outside of stick pack batteries, which also just about fits hump packs too (though I did have to turn it inside out so the less grippy side was on the inside; 38.1mm can also be used on stick packs, but is a fairly tight fit), and some 25.4mm red for individual lines of cells. Once I’d taken off the battery connector (don’t cut both wires at once, and make sure you insulate at the end of at least one of the wires), removed the plastic end caps & cut off the damaged outer sleeving, a couple of my batteries turned out to have card sleeves, not a good idea IMO as once they get wet, they take a long time to dry out & encourage rust in the meantime... decent quality batteries use more heatshrink, unfortunately you can’t always tell quality by the price... Note that any sleeving here is not just to hold the cells in line, it’s also to insulate them – only do one side at a time to avoid short circuits. Here I’ve put some heatshrink on – note the flattened edges of the tube are top and bottom, as they’ll need the most attention with the heat gun... Here’s both rows heatshrunk ... I think I missed out a couple of photos here ... Refit the end caps, and run a line of hot melt glue to join the cell rows ... Here I’ve fitted the outer (clear) heatshrink with the flattened edges outer most –concentrating the heat gun on the edges, starting at one end & working along gave me the best results. Fit a new battery connector of your choice (I mostly use Anderson Powerpoles) & you’re done |
|
Please Log in to join the conversation.
Last edit: by larbut.
|
Re: Battery re-heatshrinking 12 years 7 months ago #3096
|
I've done some refurbishing of my older packs a while ago also.
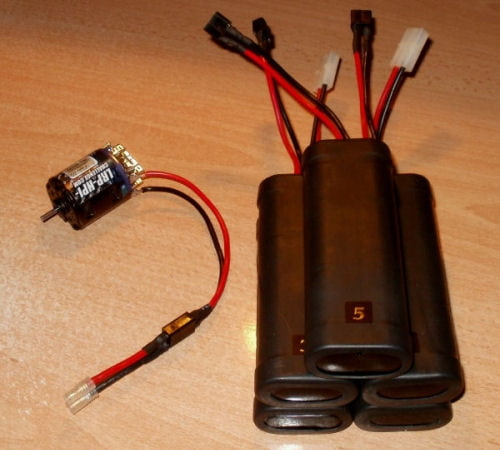
Didn't want to resolder the connection plates so I kept it to adding caps and shrink tube on the outside. Great quality by Turnigy - very thick and grippy stuff. Fitted some new black Deans connectors (not all of them yet) and wiring too. Also numbered them so I can keep them apart... Just had to take care to heat them the right way so the text didn't turn out crooked. Did the upper one again. Too much of a freak for detail. Btw - bought a (cheapo) heat gun back then for this especially. But it's a great tool to have available. |
|
|
Please Log in to join the conversation.
Last edit: by Edou.
|
Re: Battery re-heatshrinking 12 years 6 months ago #3415
|
For people having trouble with disconnecting Deans plugs (like I used) there is a trick to make this easier...
Try not to pull the two halves apart but put your thumbs against each other and push to get the connection loose. |
|
|
Please Log in to join the conversation.
Last edit: by Edou.
|
Time to create page: 0.128 seconds


