Keyword

TOPIC:

58024 Sand Rover resto 12 years 9 months ago #1680

I know this is the “build thread” section, but if Larbut already has a restoration thread going, I’m not going to feel too guilty ;)
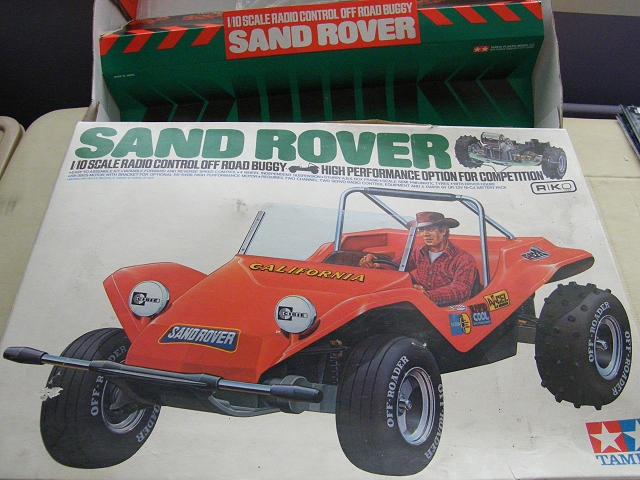
I just bought a Sand Rover off one of my colleagues at work – he paid £5, yes, 5 GBP (6 Euros, or 8 USD/CAD/AUD...) ... I paid him £40 for it & don’t resent it in the slightest – he makes an unseemly percentage profit, I get a great bargain :D I’ve been keeping an eye on Sand Rover (& Holiday Buggy) prices on ebay (UK anyway) & know the average (mean) price for a ‘Rover is £150 shipped (170 EUR, 240 USD).
I’ve also agreed to build, paint & decal up his re-re Grasshopper – but that’s not really much of a chore :)

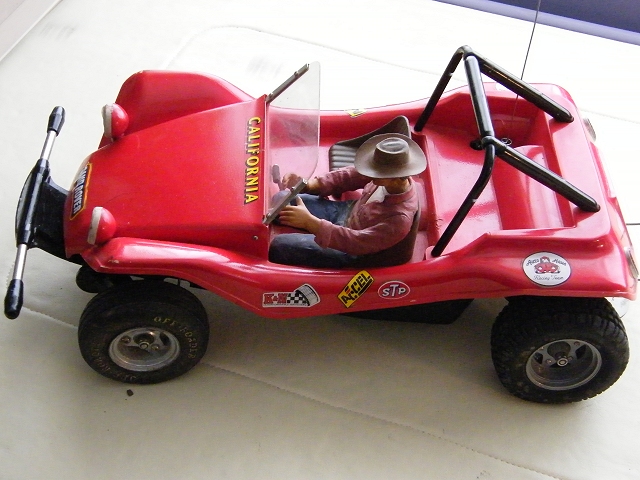
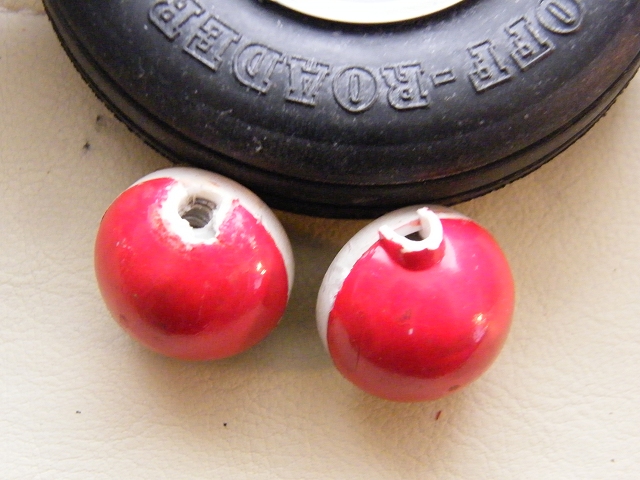
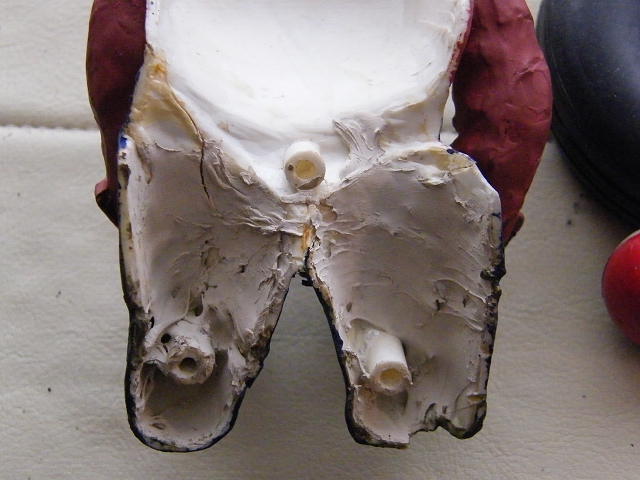
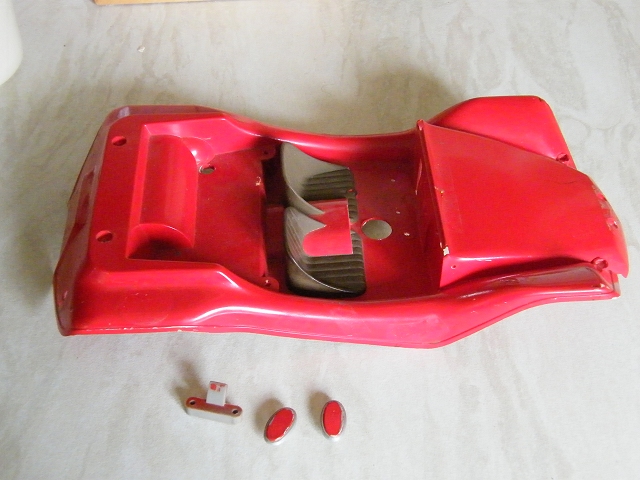
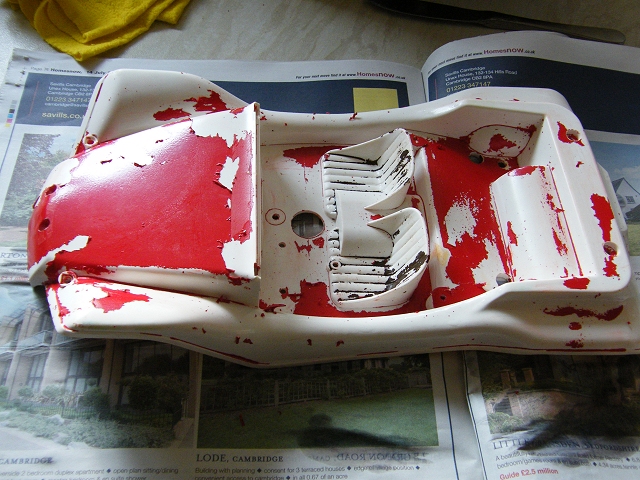
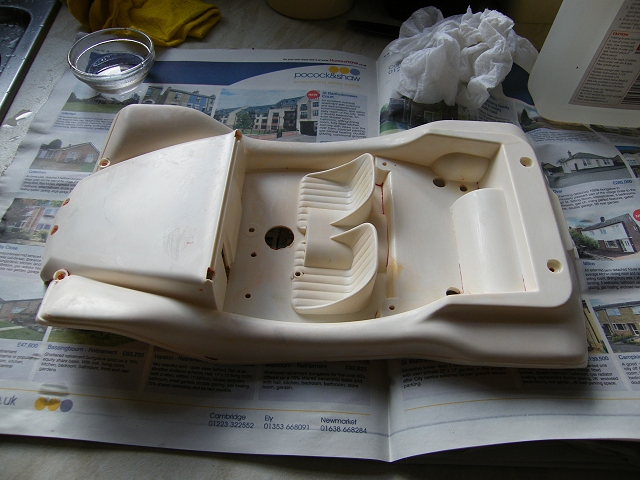
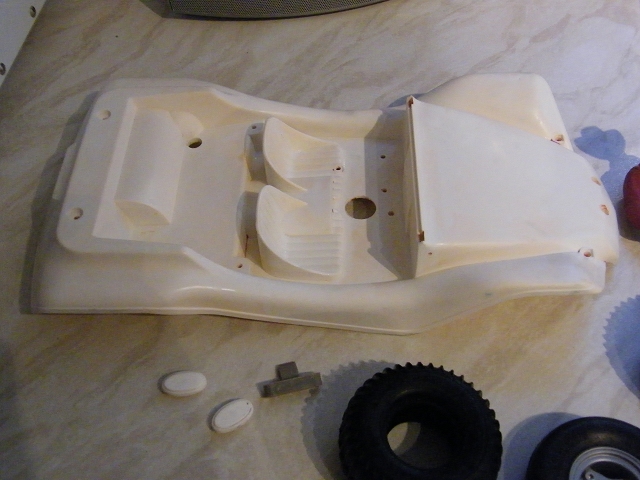
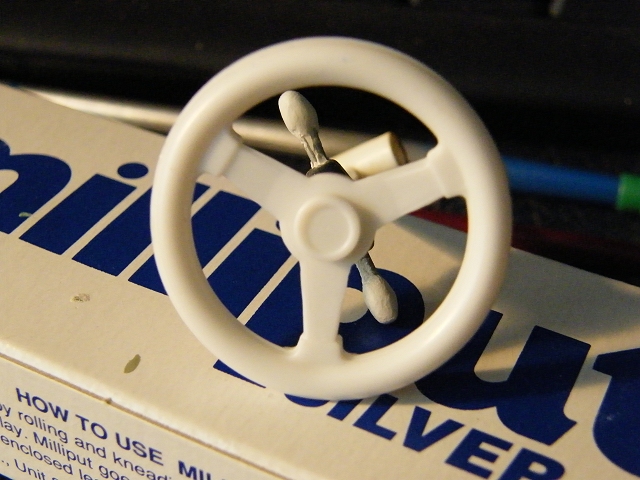
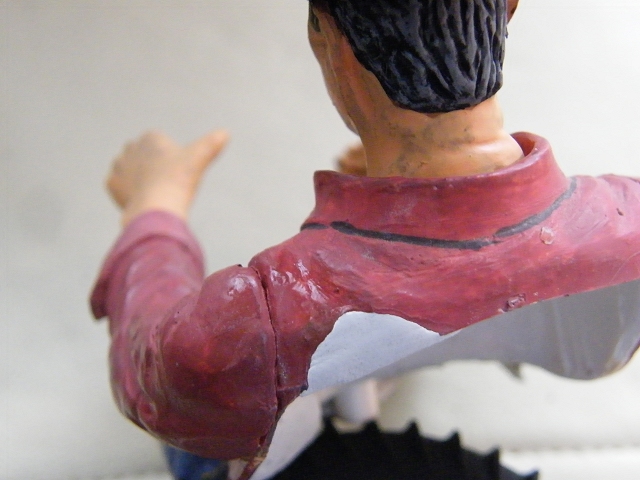
The body is excellent apart from missing the steering wheel, but I have a Wild Willy wheel I can substitute, and the roll cage is slightly warped. The driver figure has been painted well, but is not really to my taste, so I’ll repaint it to make the car more mine, headlamps are a little tatty & the headlamp shells are the wrong colour so I’ll also paint them, the body has been sprayed middling well, but as I have a repro sticker set doing nothing I’ll strip it, fill the small bits of damage & repaint – again, it’ll make it “more mine”, + I’d like to do it in a slightly darker metallic/pearlescent red – something like Ford “Pepper Red”, MG/Rover “Nightfire Red”, or maybe Daewoo “Ruby Red” as I already have that on my ‘Scorcher & know it looks good ... Ford “Tango Red” (which looks orange in bright sunlight) is also tempting ...

It also came with a box, which is in pretty good shape, the internal divider is also present, though it has been torn off :( There’s not manual or other paperwork though.
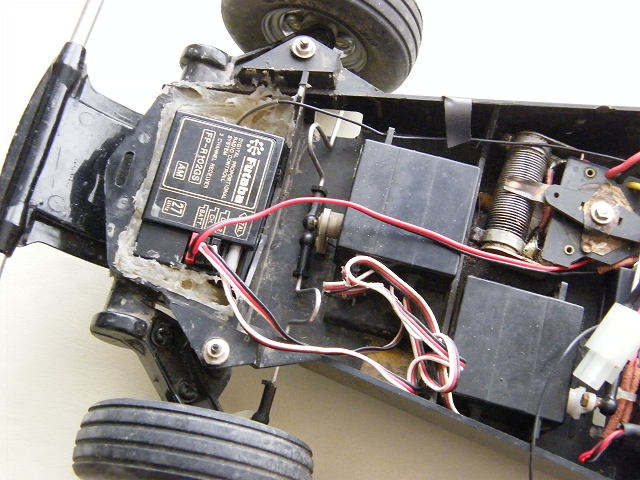
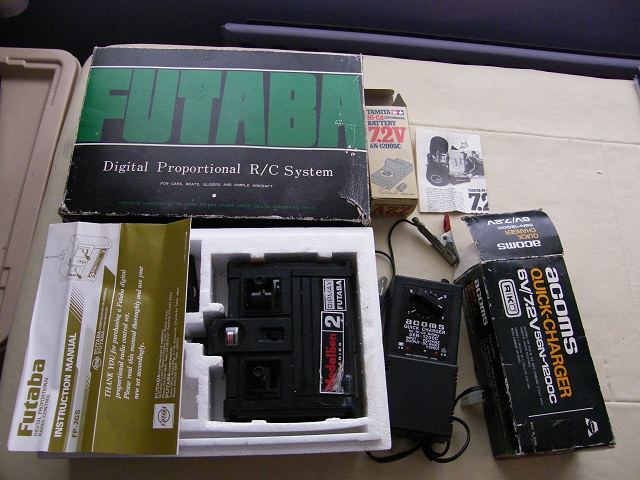
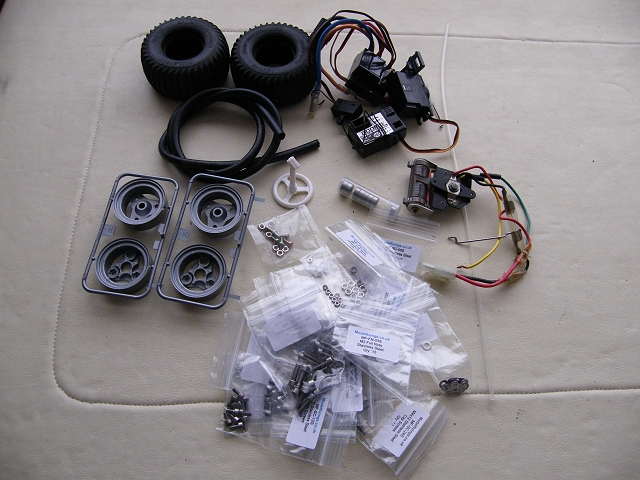
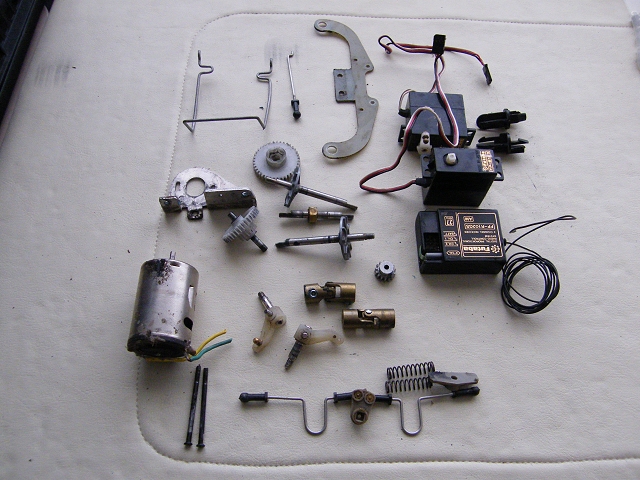
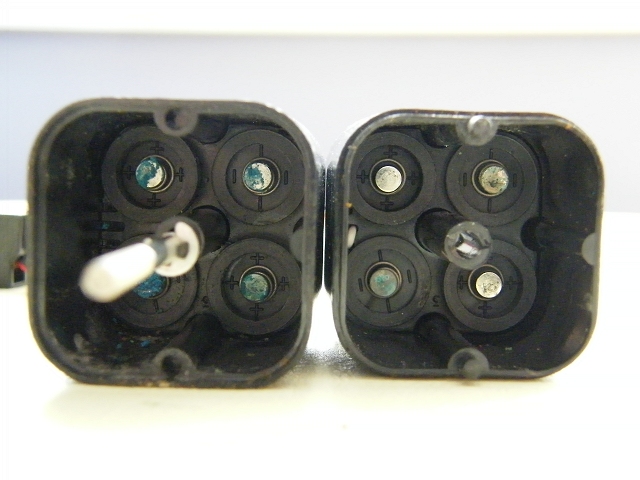
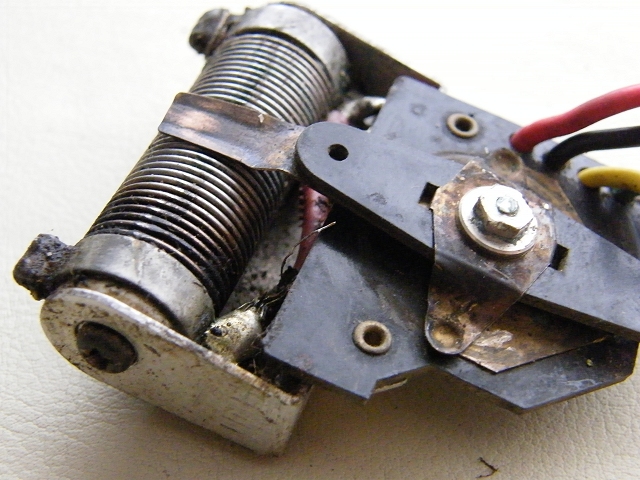
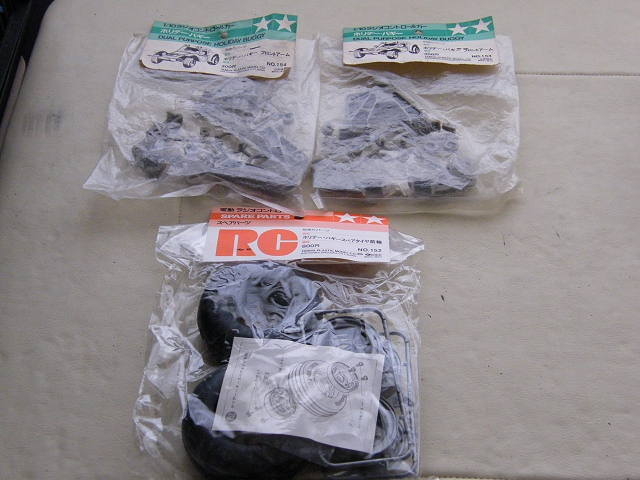
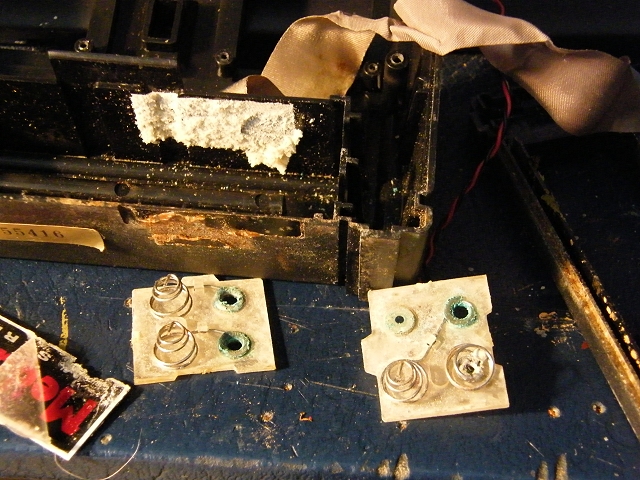
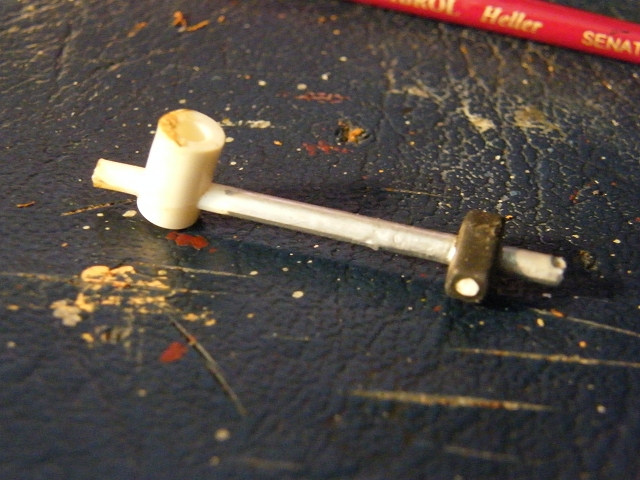
There’s also a pretty decent 7.2v hump pack battery box (£14.99 written on the side) with leaflet, (but no battery), an early Acoms clockwork fast charger with box, which has the price (£17.50) written on the RIKO sticker, and the original Futaba radio gear – the servos, battery box & receiver are on the car & look sound, but the transmitter has evidently been left in the box with batteries in, which have leaked & made a real mess – the alloy front plate has parted company after having a fingernail size hole eaten away ...

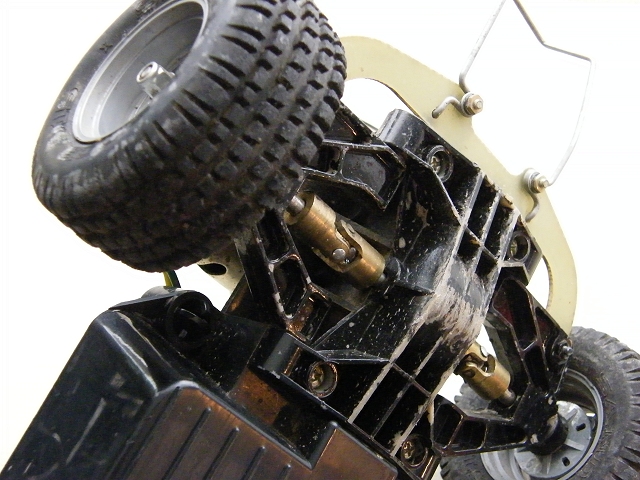
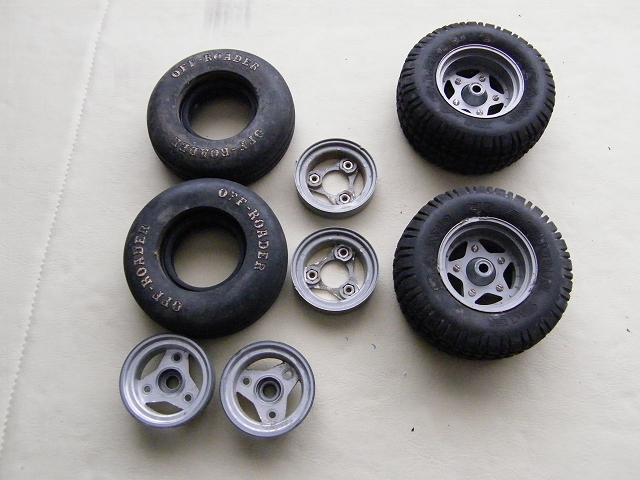
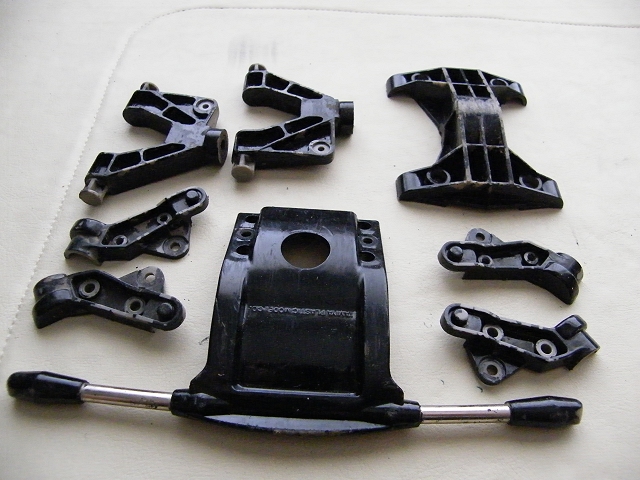
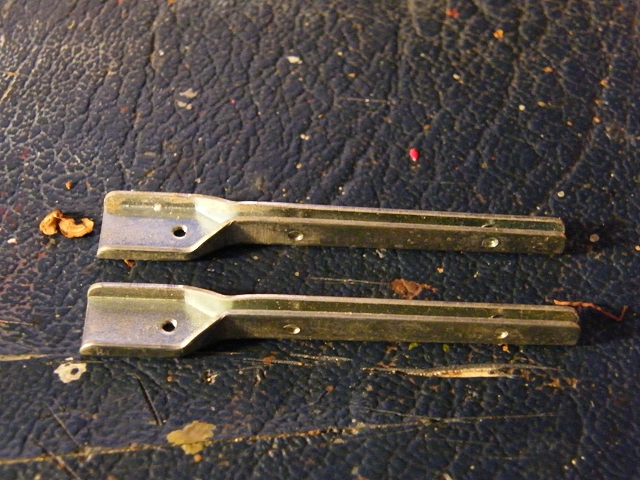
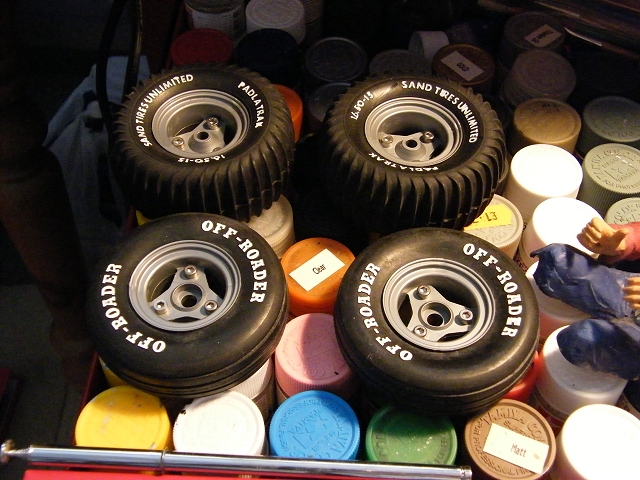
Moving on to the chassis, that’s a bit of a let-down in comparison – the rear wheels & tyres are wrong (off a Rough Rider by the look of it), and the front tyres look very dry, but are probably salvageable. The front wheels are in poor order & have been painted, but I have a new set somewhere.

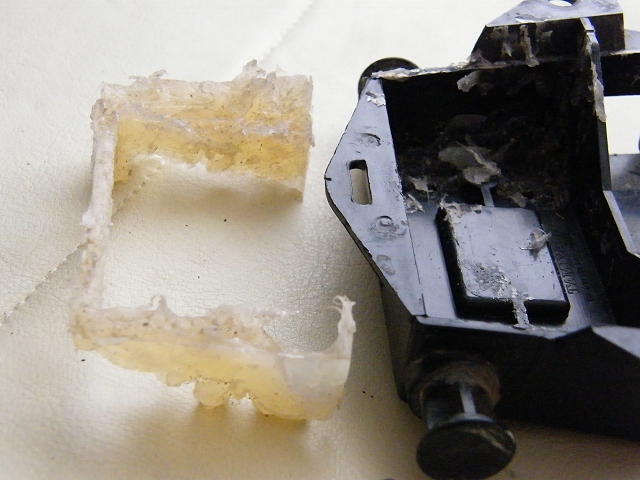
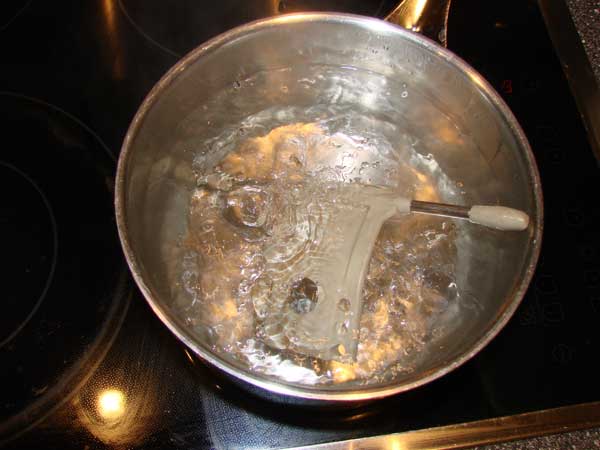
The front body clip area is sound, and both rear body clips are present and unbroken. The front strut tops are cracked in the usual place, but the bits are still attached & it hasn’t been “repaired” at any point. The RX is held in with clear sealant, which will come off easily, but I’m not so sure about the paint on the grey plastic bits (front arms & bumper, rear arms & gearbox lower), the gearbox lower itself is also pretty scarred. The speed controller, although showing little wear, is very corroded.

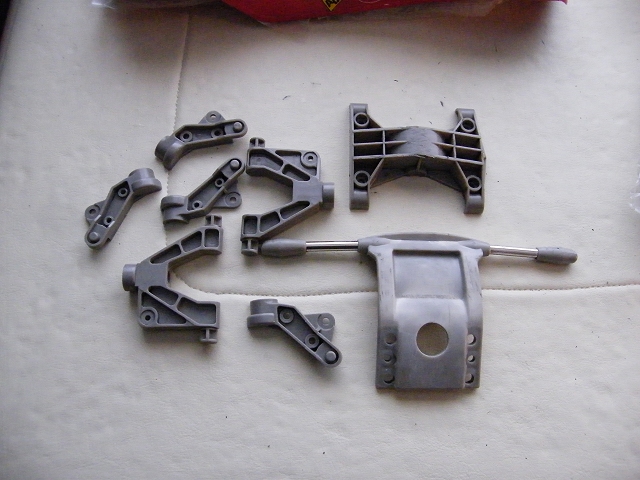
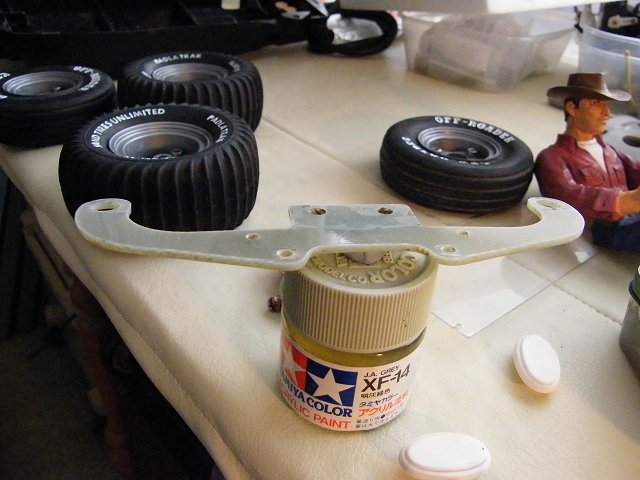
Overall, I’m not quite sure where to go with the chassis – I’ll try & get a cheap (vintage) Holiday Buggy to donate the rear wheels, bumper, suspension arms & gearbox lower (or get those parts on their own), decent, correct rear tyres are probably too much to hope for – you can still get NIP tyres, but at £50 or so, they’re out of my price range, I have a spare pair of Grasshopper/’Scorcher Padlatraks though – they’re not a perfect fit, but they do look in keeping.

Whatever I decide, I know I’ll be using new stainless fasteners wherever possible, and the old radio gear will get replaced with a more modern set & ESC.

Sorry for the essay btw ;) ... more posts when I actually do some work on it.


Please Log in to join the conversation.

Last edit: by larbut.

Re: 58024 Sand Rover resto 12 years 9 months ago #1681

I defo look forward to following this "build" :-)
I like the Sand Rover a lot, and it seem like you have a very good starting point in yours.

The best buys I do is always like this one. A used car with box and a lot of little bits inside.

Keep us posted! :cheer:

-Lars
Signature now gets correct formatting if you edit it in your Profile. Use normal BBcode if you want.
www.tamiyabase.com was formatted automatically.

Please Log in to join the conversation.

Re: 58024 Sand Rover resto 12 years 9 months ago #1705

Ok, part two – I’ve mostly been digging through boxes & spending some wonga ...

“Finds” are a TEU101BK ESC, an Acoms 27Mhz RX & an AS17 servo, the original, unused clear aerial pipe (still in the Sand Rover box), most of a bottle of graffiti remover, a pair of Padlatrak rear tyres, a set of repro stickers, a steering wheel of a fake Wild Willy, eight 1150 bearings, plastic primer, silver paint, clearcoat, and finally – that the front wheels I thought I had were actually _rear_ wheels – which was a good thing really :)

I also dug out a used Holiday Buggy MSC, because the one in the car is worse than I thought ... and I might want to use the existing radio gear – the car is not going to get used very much, after all – it’s going to depend on whether I can salvage the transmitter, and/or find a new steering servo doodad – the existing one has a square hole to match the servos.

“Buys” are 2 cans of Rover “Nightfire” red paint (not arrived yet, so I’ve put in a photo of a car I had in that colour ;) , NIP front wheels & tyres (not too expensive, really), and two sets of “C” parts – the suspension arms (pants wettingly expensive IMO), and a load of stainless fasteners (which I bought from modelfixings.com, who I thoroughly recommend).

I’ve done a little work – just a quick strip of the chassis to check things over. There’s a hairline crack in the chassis itself, under the MSC ... unless I find anything else wrong, I’ll probably just ignore it & use it as is. Front wheels & tyres are definitely not up to the standard of the rest of the car (well, the standard I’m _hoping_ it will be when it’s finished), even after a bit of sanding work, so will be replaced, the motor I’ll clean up & rewire & see what it sounds like before deciding.

Most of the gunge in the front part of the chassis came out in one lump ... I’m still not clear why it was there TBH ... maybe someone ran out of servo tape?

Talking of servo tape, I don’t know what brand the original builder used (I’m not sure if any came in the kit – I’m looking at a Japanese language manual & can’t tell!) but after thirty years the grip it had was incredible – I had to saw it off with some thread!

The battery box shows signs of having cells left in it, I’m hoping the contacts will clean up enough with a fibreglass pen ... I’m still not sure about the suspension arms cleaning up – hence the new set. I’ll try graffiti remover on them & see what happens, the bumper may come up ok, but I’m pretty sure I’m in the market for new gearbox underside (B parts sprue)...


Please Log in to join the conversation.

Last edit: by larbut.

Re: 58024 Sand Rover resto 12 years 9 months ago #1706

Just had a quick “test” with De-Solv-It Graffitti Remover ... and it went very well :D

It did soften the plastic a little, but I think the trick is to not use any sharp tools or abrasives on it, I found with my Pajero shell that it stiffened up properly after 24 hours, by which time the solvent stink had gone too.

Of course, stripping the paint off (Tamiya X-1 Black acrylic, and a lot more recent than 1981, if I’m any judge) does reveal the damage underneath, and in particular the stress marks on the bumper ... anyone else noticed just how expensive genuine beige SRB bumpers are, now that the re-re’s mean the black one is no longer rare?

BTW, having thought about it, this really isn't a "restoration", it's more of a "rebuild & repaint" - I can'f afford to replace anything else on it! :)

Attachments:

Please Log in to join the conversation.

Last edit: by larbut.

Re: 58024 Sand Rover resto 12 years 9 months ago #1707

...and in particular the stress marks on the bumper ...


Boil the bumper in water for a minute or two, and the white stress marks dissappear!
I have done it myself, and it works!


-Lars
Signature now gets correct formatting if you edit it in your Profile. Use normal BBcode if you want.
www.tamiyabase.com was formatted automatically.
Attachments:
The following user(s) Liked this: Jonny Retro

Please Log in to join the conversation.

Last edit: by larbut.

Re: 58024 Sand Rover resto 12 years 9 months ago #1711

...and in particular the stress marks on the bumper ...


Boil the bumper in water for a minute or two, and the white stress marks dissappear!
I have done it myself, and it works!

...

-Lars


Thanks for the tip Lars, I tried it and it's certainly evened up the colour :)

Please Log in to join the conversation.

Re: 58024 Sand Rover resto 12 years 9 months ago #1712

Did a bit of work on the shell earlier - the headlamps are in a bad way, and I have _no idea_ what's happened to the driver's legs ...


The shell itself is pretty good - evidently it wasn't primed or sanded before painting, so getting the paint off with graffiti remover was easy ... well, I say "easy", two hours / 4 attempts wasn't that easy, but how long would it have taken with brake fluid?

Anyway, after slapping it on, waiting five minutes, agitating with an old toothbrush, waiting another five minutes & then washing off with the toothbrush & plently of cold water:


Another slap on/5 mins/agitate/5 mins/wash off cycle:


And a third cycle:


At four cycles I was well into "diminishing returns" territory, so I'll leave it like this for now:


:)

Please Log in to join the conversation.

Re: 58024 Sand Rover resto 12 years 9 months ago #1714

Well done!
That Grafitti Remover really works well. Please upload a picture of the box/can or whatever. I need to see if I can get this stuff in Norway :cheer:

On a side note: I can't help for thinking that the Sand Rover body is one of the nicest from Tamiya. The simplicty and the beatiful curves are up there.

-Lars
Signature now gets correct formatting if you edit it in your Profile. Use normal BBcode if you want.
www.tamiyabase.com was formatted automatically.

Please Log in to join the conversation.

Re: 58024 Sand Rover resto 12 years 9 months ago #1715

Well done!
That Grafitti Remover really works well. Please upload a picture of the box/can or whatever. I need to see if I can get this stuff in Norway :cheer: ...


Link: De-Solv-It Graffiti Remover

I hope you can find it - it really is great stuff. It's not really an option to send you some - I think the Post Office would go into conniptions if I sent it through the mail.

I had a look at the MSDS , but there's no chance of reverse engineering it from that - the fact that they don't even identify most of the chemicals it it, just general classes & very wide percentage shouts "proprietory recipe" to me - it may be quite a while before there are any equivalent products :(


...
On a side note: I can't help for thinking that the Sand Rover body is one of the nicest from Tamiya. The simplicty and the beatiful curves are up there.

-Lars


I don't know if I'd wax quite so lyrical about it myself, but I do think the proportions & deeper sides make it better looking than the Meyers Manx it's based on :)

Please Log in to join the conversation.

Re: 58024 Sand Rover resto 12 years 9 months ago #1717

A bit more work this morning:
The bent windscreen pillar ...


... is now straight:


I stripped the transmitter, and found it to be in a pretty poor state – rotted/broken wire joints, lots of corrosion on the terminals, the aeriel ribbon is badly bleached (it’s supposed to be green!) and rotted at one end, and one spring is broken & not attached:


... so far I’ve just given everything a good scrub with fairy liquid & lots of water to get rid of any lingering nasty chemicals.

I also finished assembling the wheels & did the tyre lettering ... not very well on this set, unfortunately :(


I know Padlatraks on the rears are not correct, but I don’t have a lot of more to spend on this resto (especially after buying the suspension arms I turned out not to need, and also “accidentally” buying a Bigwig & an FF01 Mondeo this week), and can’t justify £50 on a set of the “correct” rears.

The rear “spring” has had some attention too – dremelling/filing/sanding the muck off the sides & sealing with X-22 Clear acrylic:


I’ve done a little work on the broken/incomplete steering column – the missing stalks I’ve started to deal with by drilling a 1.5mm hole all the way through, cutting/filing down some small split pins & doing a little remodelling on the ends with “Milliput” 2-part epoxy putty ...


... and as I had a lot left over, I filled the missing bits on the driver’s knee & shoulder:


Please Log in to join the conversation.

Last edit: by larbut.
Moderators: caprinutstingray-63AndyAus
Time to create page: 0.231 seconds
Cookies are required to make this site work. If you continue to use this site you permit us to use cookies.