

Previously ... ... I covered removing sprues & flash, washing, keying, hole filling, and choosing primer colours.
Moving on ...
Guide Coat
If you’ve done any filling on the shell, or had to do a lot of rubbing down to remove flash from obvious places (like the tops of the front wings on the example re-re Bruiser here) I’d suggest applying a “guide coat”.
In 1:1 car & custom body shops, guide coat used to be a thin, black aerosol paint with limited “grip” on primer or filler, but has now mostly been supplanted by very black carbon pigment put on by hand with a pad.
I’d suggest you don’t use either of those – or a light coat of regular black paint – as there will be large areas of the body that really don’t need checking, but would nevertheless may need all the guide coat sanding off.
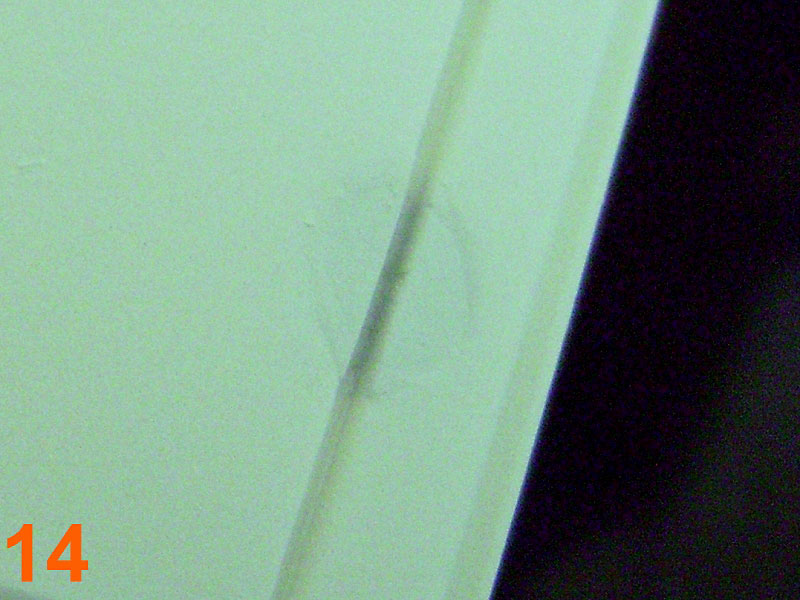
Instead, use whatever primer you are going to use later – even white primer on a white body with white filler will show up any flaws. It really doesn’t need to be a full coat of primer – just a light dusting over the areas you’ve worked on. See pic 14 for an example of a flaw on a bit of hole filling that I thought was perfectly filled – a dusting of primer shows it wasn’t.
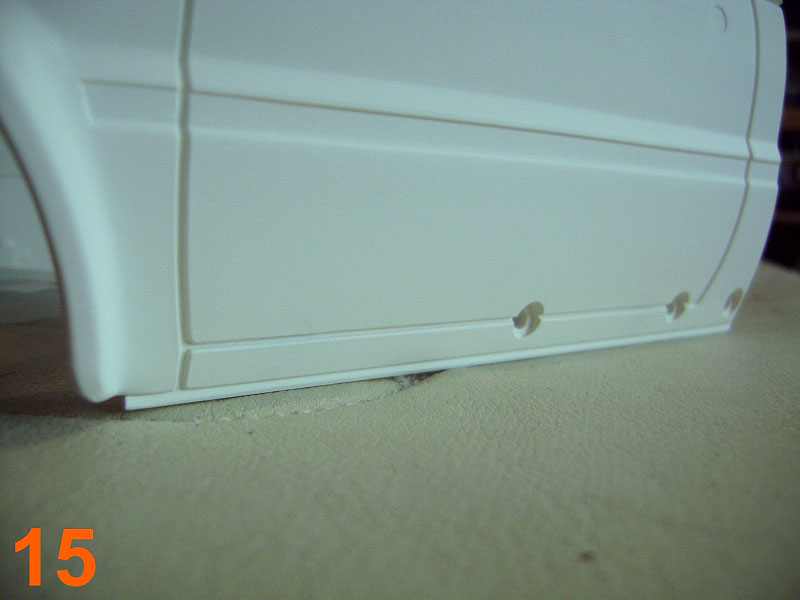
Deal with any flaws by refilling and resanding, spraying a further guide coat of primer to check again. With patient rework, your filling/sanding should look “perfect” again – see pic 15.
Priming
Apologies if some of this seems very basic, but this is potentially going to be read by people of all skill levels from “never picked up a rattle can” to “expert”.
I also apologise that there are no pictures for this section – that’s really down to my unfortunate choice of white primer on a white body not really showing the build up over a number of coats ... or at all really. I’d hoped the section on undercoating would be more illuminating in that regard, but I managed to overwrite the pics of the various coats :(
Think about the weather – humidity isn’t much of an issue with primer, but temperature is – I wouldn’t spray much below 10 Celsius.
- Hang the body on a bit of wire or similar through one of the many holes Tamiya tend to provide – off the top of my head I can’t think of any bodies where there isn’t a suitable hole;
- Shake the can thoroughly – and I don’t mean “one, two, miss a few, ninety nine, one hundred” type of counting for two minutes, I mean for two minutes after the ball has started rattling. I don’t tend to do it all in one hit – I tend to give it 30 seconds, invert the can for a while, shake again, put it in my back pocket, shake again when I get to the shed, then again just before I start painting;
- Test before use– you could have picked up the wrong can, the manufacturer could have put the wrong label on it, or it might be lacking propellant;
- Keep the nozzle a decent distance away from the piece you’re spraying. There will be a distance recommended on the can (for example 20cm to 25cm 8” to 10” in old money). I’d suggest you stick to this initially, I tend to go closer, but it’s amazing how quickly 6” can go down to 4” & cause problems;
- Spray in light puffs across the body, starting just before the piece you’re spraying & finishing just after (note that spraying small pieces does use a disproportionate amount of paint);
- Don’t try to cover the body in one coat, it really should look pretty rough after the first coat, improving slightly with each coat until, after 4 coats, it looks even;
- Invert the can & spray until there’s no pigment coming out to clear the nozzle;
- Leave adequate drying time between coats ... just how long is dependent on the temperature & how thick you sprayed, but in general, on a warm day (say 25C) you could spray over a light coat after an hour, but at 10C you might be pushing it to get two coats on in a day;
- Find a hole at the opposite end of the body & spray again (bearing in mind the note on drying time);
- Repeat twice more (if necessary), remember that you’re aiming for an even shade & thickness all over, without losing details.
- Leave adequate curing time – again this will depend on temperature & coat thickness, it might be one day, it might be less, it might be a week. Don’t touch it to find out though – your sense of smell (assuming you have a half decent one) is your friend here – if it still smells of paint, it’s still giving off fumes & isn’t cured.
I’ll be submitting a piece on paint faults sometime soon, but to pre-empt that somewhat, my main bit of advice is that if something does go wrong (a run, a fly landing, etc) is to stop & do nothing for a while – immediate “corrective” actions only make things worse.
Rubbing Down
Taking the time to give the primed surfaces a very light rub down before moving on to undercoating and/or colour coating is ABSOLUTELY KEY to getting a super shiny finish. The trick is rubbing the surface down just enough to smooth out the irregularities of the primer, without going through to the plastic underneath – not easy with lots of detail edges.
It’s not so much of a problem if you’re using white primer on a white body, but where the colours are quite divergent you may need to re-prime & try again, or there may be variations in the final colour of the car.
In practice, you’d probably get away with one or two patches of light thinning, but in general it’s better not to push your luck.
Use a fine grade of wet & dry paper for this step – my current favourites are 2000 and 2500 grit as they’re very fine – but not so fine as to be harder & more expensive to obtain. 1200 grit is also an option, especially if you smooth it out before use – rub two sheets together, face to face, wet, and with a little washing up detergent – you’ll hear the scratchy sound diminish quite rapidly.
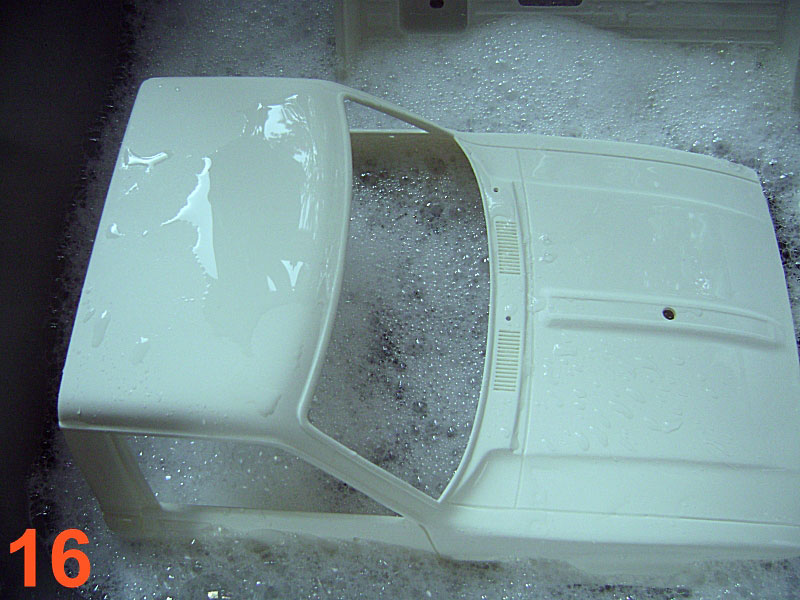
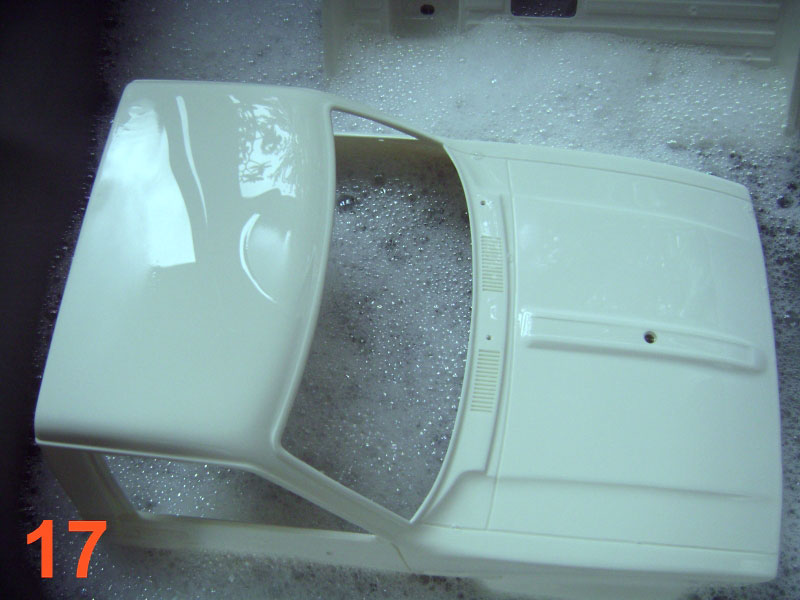
When rubbing down the body, use very light round or oval strokes – both the feel of the paper under your fingers & the sound will quickly change as you take the “peaks” off the primer, going from a bit scratchy to very smooth. To confirm, rinse off & observe the way water sticks to the surface – it will bead & edge visibly on unsanded primer, but will stick in much thinner layers (if at all) when you’ve smoothed it off enough. Check out pics 16 & 17 for “before” & “after” shots.
Undercoat
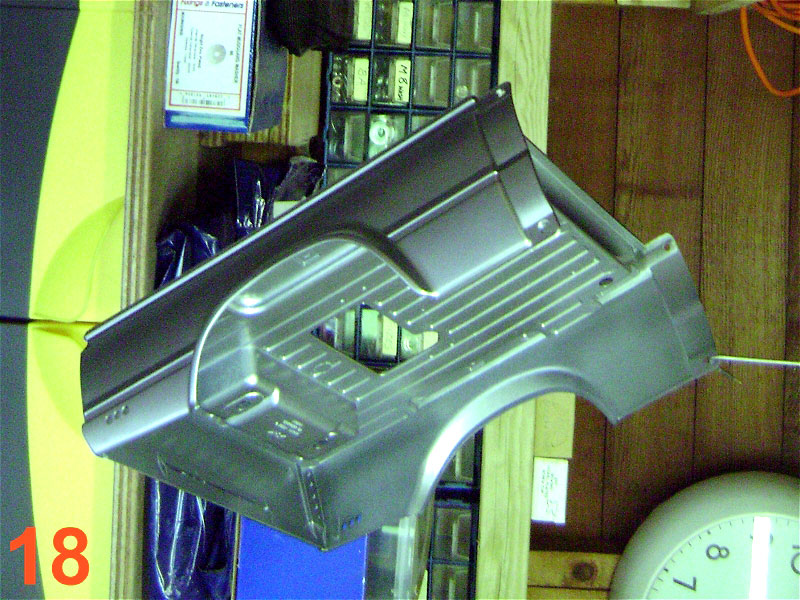
This is an “if necessary” step – I’ve found it very worthwhile for paints described as “pearlescent”, as it’ll mean you need to put fewer coats of colour on to obtain an even colour – which preserves details on the body better.
This isn’t a special paint by the way – it’s just something suitable from the same paint system. In the example here (see pic 18) I sprayed on 2 coats of Hycote Ford “Machine Silver”.
End Note
In conclusion, with the exception of removing sprues, you may ask if any of this is necessary, as it won’t be visible ... well, it’s up to you, but a hard body that’s been prepared in this way will have a paintjob that’s slightly more resistant to knocks and will look very much more shiny than one that’s been sprayed with the same colour straight out of the box.
If you know the car is going to have a hard life, then I’d suggest you go with the very “basic” method; if you want it to look good but you’re still going to use the car & don’t want to be heartbroken when you roll it, then go for the “Intermediate” prep. If it’s going to spend all of its life on a shelf, with maybe the odd gentle Sunday afternoon run, then consider the “advanced” method :)
- Basic: sprue cutting, wash
- Intermediate: sprue cutting, wash, key, prime
- Advanced: sprue cutting & flash sanding, wash, key, hole fill & guide coat, prime, rub down
________________________
Written by TB member Jonny Retro