


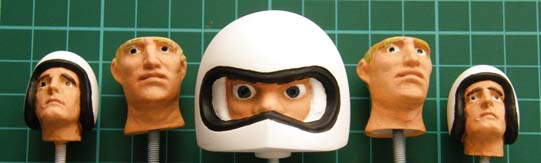
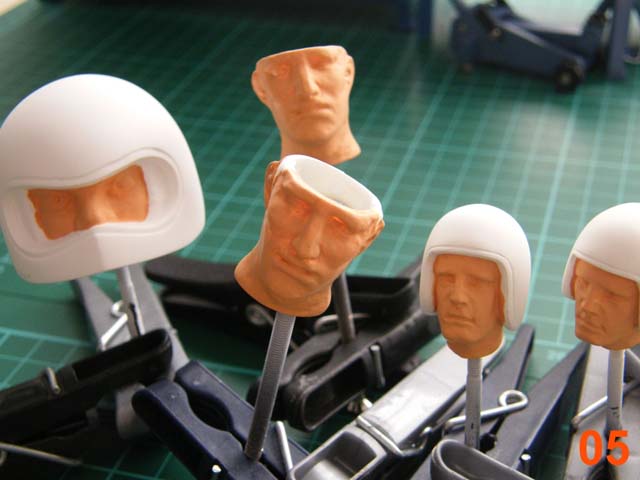
Last time we looked at plaid shirts & jeans. Ok, the number of Tamiya RC cars who need to look like a lumberjack is pretty low, but the section on jeans applies equally to any cloth, details you can work out for yourself – so this time I’m covering driver heads. My volunteers are a Wild Willy 2 and a couple of re-hash Sand Rover drivers – which as luck would have it cover pretty much any permutation of assembly, face, hair & helmet that you’ll find on any Tamiya driver. A pair of XR311 driver heads joined the party later on too ;
I should say right at the beginning that I’m not that good at painting faces – so you should probably look at this article as an intermediate stage – a lot better than just putting on a couple of coats of “flesh”, but nowhere near the ultra steady hand painting with a single bristle under a magnifying glass that true realism requires.
I also apologise for the long delay between the last part and this one. I tackled the various pieces in the order I fancied doing them, rather than the order they needed to be published, and this one rather got left out – even more so as I didn’t feel like doing it for a long time & waited until I did – this hobby is supposed to be fun, after all :)
Moving on, preparation. This just important here as on driver bodies and hard car bodies. You could check out previous articles (Painting Prep pt.1 and Painting Prep pt.2) , but to summarise:
- Separate the parts from the sprues, sanding off any remains & obvious flash;
- Wash (to remove any mould release agent) and allow to dry;
- Assemble/glue. Check the instructions to see if any part needs to be inside the helmet shells, for instance on the Wild Willy an M3 nut needs to be included, on the common “Frog type” helm, two inserts have to be included. Use tape if necessary to “clamp” the parts together. Allow plenty of time for the glue & the partially melted areas either side of the joint to set – leaving them overnight is best;
- Get the worst of any join lines off by sanding gently, and apply filler to the outside of the joints to fill any gaps. Again, leave overnight to set;
- Sand off excess filler making the joints as invisible as possible. I’d suggest starting with something like 800 grit wet & dry, and going up in steps to as fine as you’ve got. You may need to apply further filler & sand again if you spot any imperfections;
- Spray a “guide coat” of primer – this may well highlight further flaws that need to be addressed, if so, fill, sand & guide coat again;
- Spray several light coats of primer.
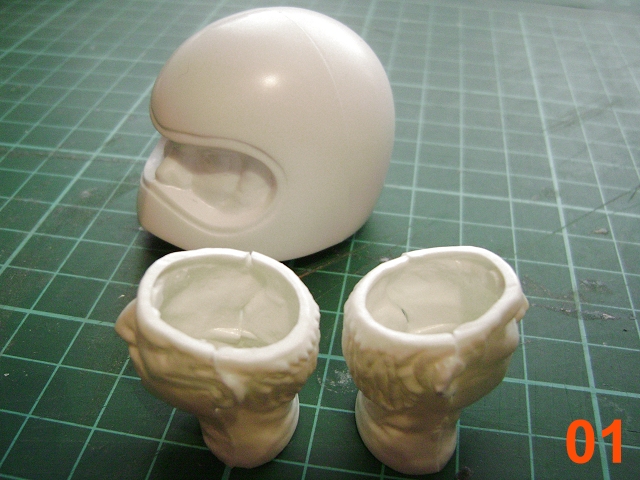
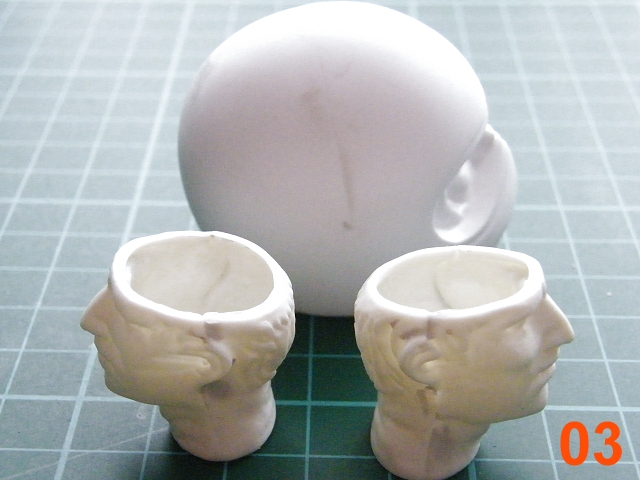
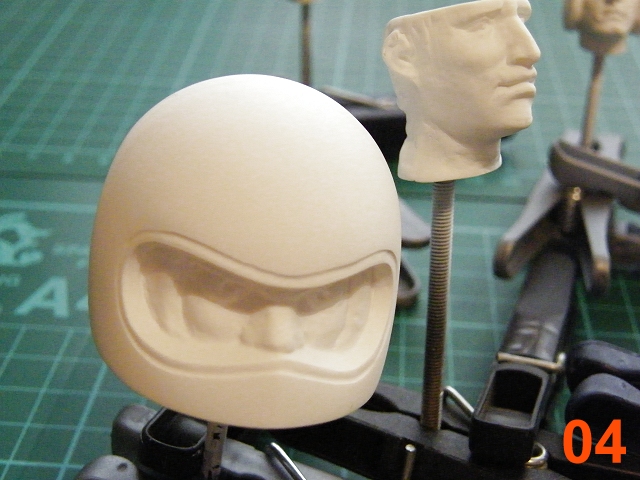
You should now have a head that’s ready for painting – see pics 01 to 04 for examples. These steps might seem to be “invisible” – and therefore not worth doing – but I assure you, put anything that has been prepared properly alongside an example that hasn’t & the difference will be very obvious. Of course, you might decide it’s not really worth the bother for a runner :)

So....
Step 1: Base Coat
Apply two coats of a “flesh” colour (e.g. Tamiya XF-15 Flesh) – see pic 05. You may think the way the paint settles after the first coat creates subtle variations in tone, and that it looks fine like that, but no – it just looks like you couldn’t be bothered to do any more ;)
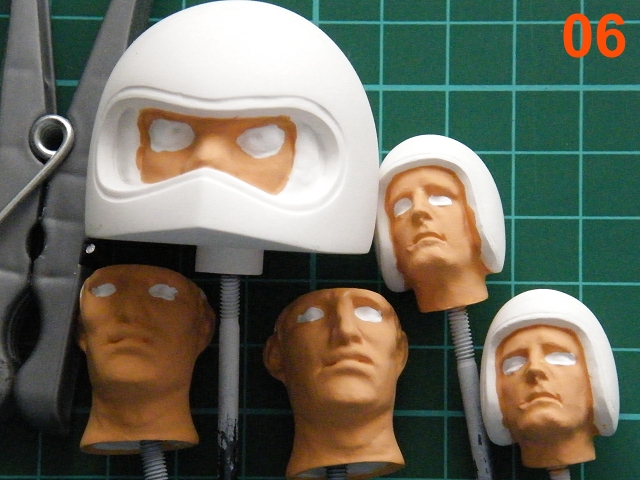
Step 2: Eyes
Firstly, put on two coats of white (e.g. XF-2 Flat White) , going slightly over the edges ... this will make your drive look very creepy ... (see pic 06)
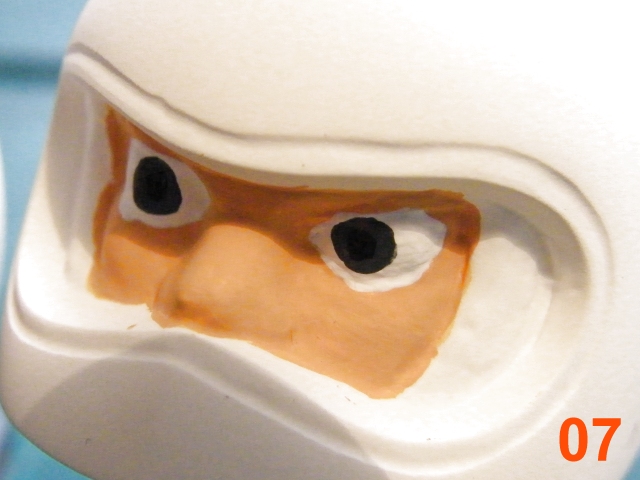
Once that’s dry, apply a small dab of colour as the iris, (e.g. XF-52 Flat Earth, XF-18 Medium Blue, XF-67 NATO Green), then apply a smaller dab of black to represent the pupil (e.g. XF-1 Flat Black) (see pic 07);
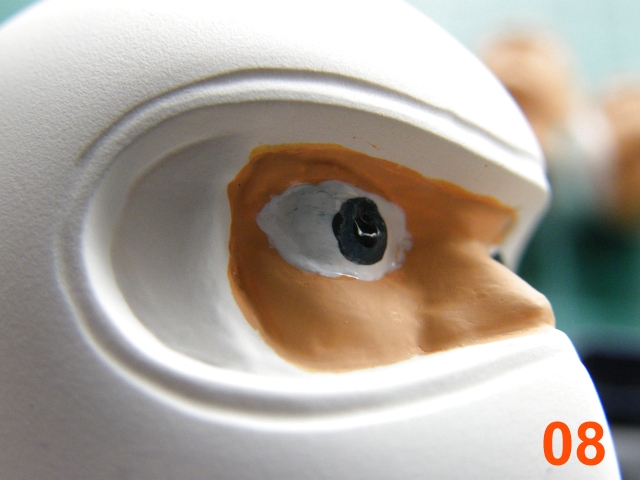
Overcoat with gloss clear (e.g. X-22 Clear) – eyeballs are wet, after all (see pic 08).
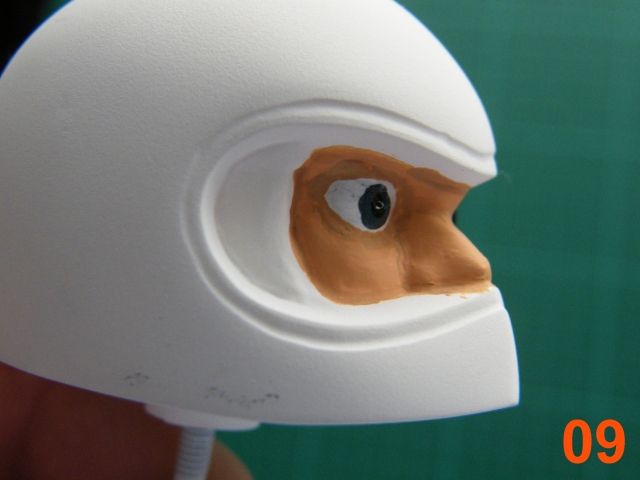
Step 3: Eyelids, & “Lowlights”
For the eyelids, paint over any white & clear painted outside the boundaries of the eyes with your chosen “flesh” colour, mixed with a touch of brown (e.g. 10 drops of XF-15 + 2 drops XF-52 Flat Earth).
For the “lowlights” – i.e. the opposite of highlights - edges & recessed areas - with the leftovers from doing the eyelids with 2-3 drops of water. This will make the edges look a bit more blended & not quite as stark (see pic 09).
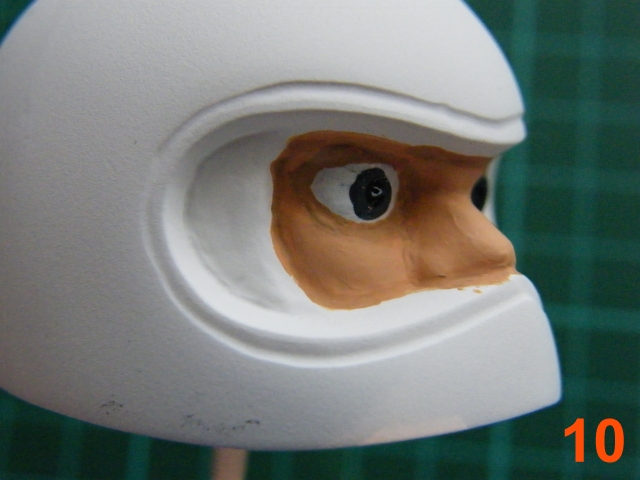
Step 4: Highlights
Paint highlights on any raised /exposed areas – on a face this will principally be the cheekbones & the top of the nose – using your “flesh” colour, mixed with white + water (e.g. 10 drops XF-15 + 3 drops XF-2 Flat White + 2 drops water) (see pic 10).
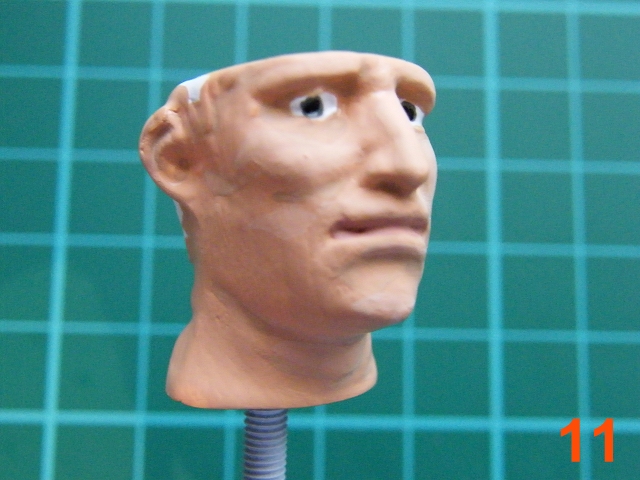
Step 5: Lips
IMO lips do needs a little definition – but be careful not to overdo it. Paint “flesh” mixed with red, blue + water in the recess (e.g. 10 drops XF-15, 3 drops XF-7 Flat Red, a tiny, tiny dab of XF-8 Flat Blue + 2 drops water) (see pic 11).
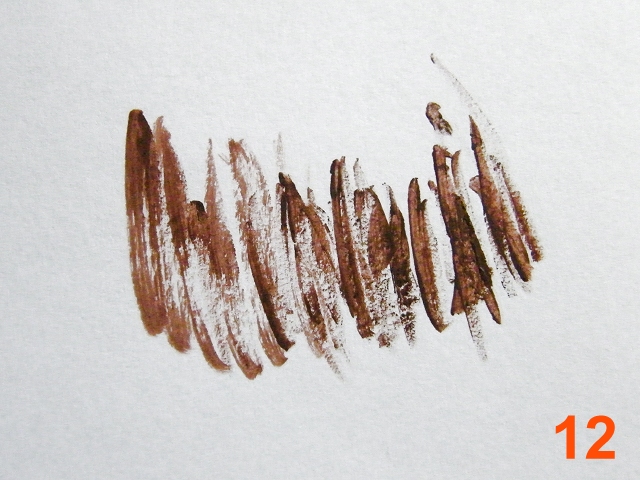
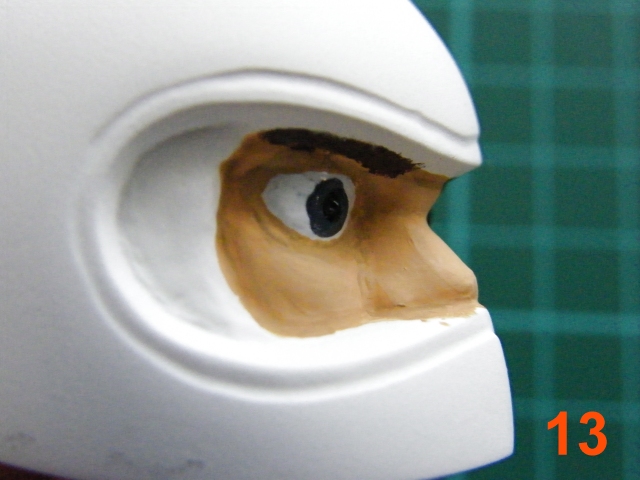
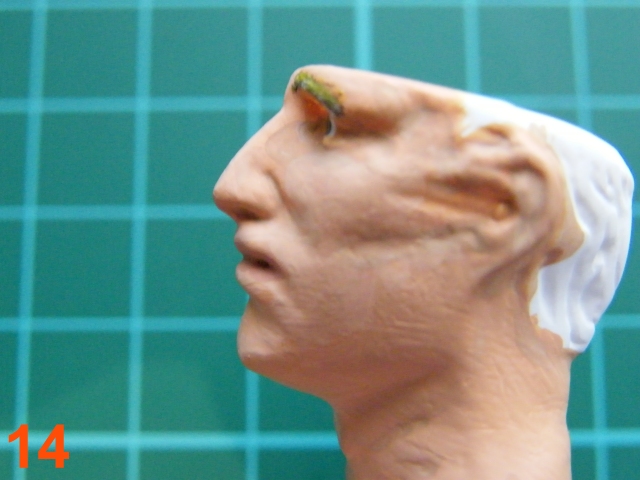
Step 6: Eyebrows
A solid line of paint for the eyebrows looks rather unconvincing - they really need fuzzy edges. To achieve this, dry brush layers of various colours. “Dry” brushing is something of a misnomer – if the brush is entirely dry no paint will come off it – but it should have very little on it: dry most of the paint off on a bit of paper.
I started with a “base” of XF-9 Hull Red for both, then finished Willy’s eyebrows with XF-68 NATO Brown. The Sand Rover driver got layers of XF-52 Flat Earth, XF-3 Flat Yellow and XF-4 Yellow Green (see pics 12 to 14).
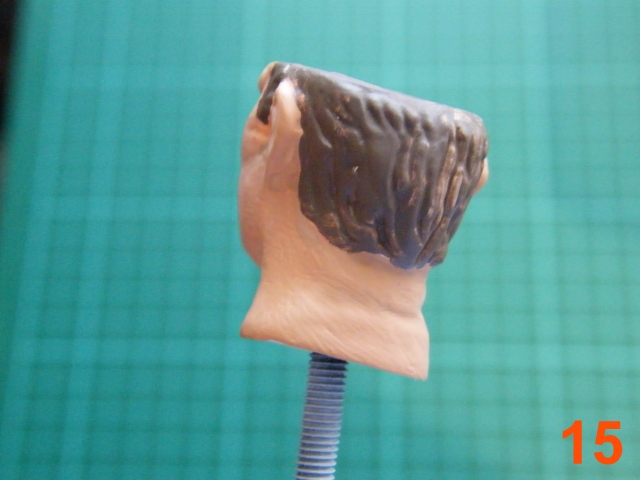
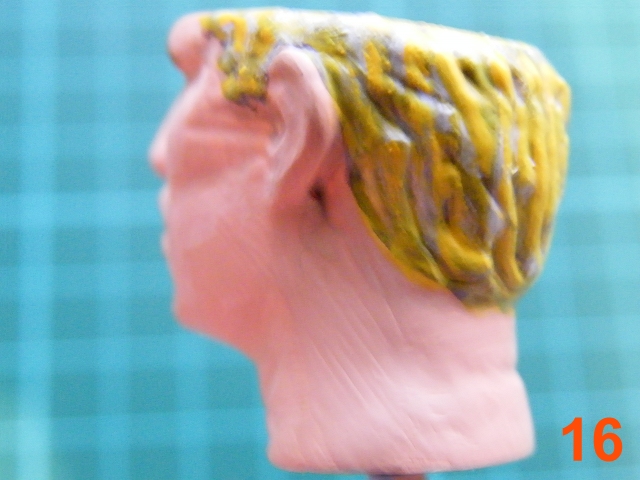
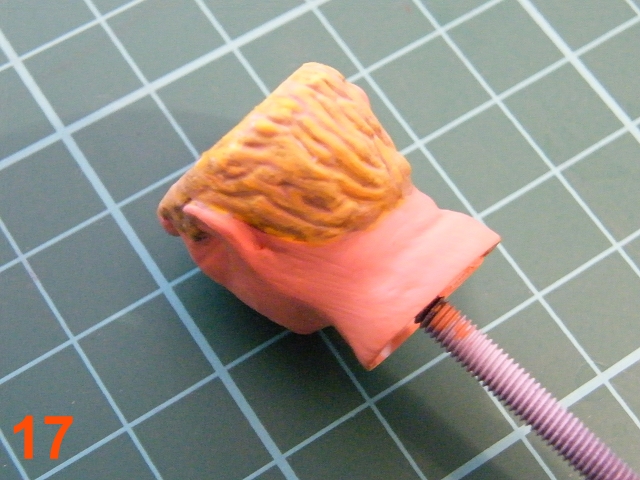
Step 7: Hair
Blonde probably wasn’t the best choice for the example here (see pics 15 to 17) – I’ve got my technique down, but I think I need to work on my colour choices a bit ...
Start with a base coat, and then move on to lowlights & highlights. Dry brushing over that will give a better illusion of fineness and fuzziness around the edges.
I finished with a light “wash” of a lighter colour (i.e. 1 drop of paint in 10 drops of water) to even the colours out a little & add depth.
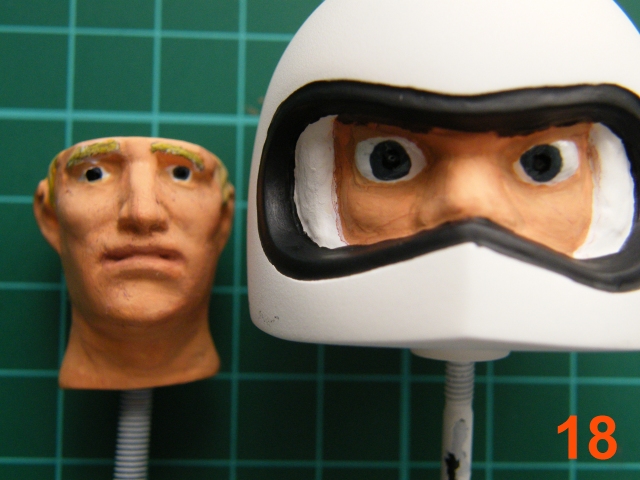
Step 8: Helmet Details
I’ve just put this in as a step because it really needs doing before the next one. Nomex balaclavas are usually white, helmet inners & rubber edges are usually black, so paint them appropriately. One tip though – don’t use a true black colour as it can look to stark, and therefore a bit toylike. I’d suggest you use XF-69 NATO Black (more like a very dark grey) and/or XF-85 Rubber Black (a greenish/blue black) instead.
Step 9: Colour Wash
Finishing with a very light colour wash will add a little depth, define edges & even out the flesh base colour and the low/ highlights. Mix a tiny bit of brown with water (e.g. 1 drop of XF-9 Hull Red in 10 drops of water), apply carefully to avoid any white bits (apart from the edges) & dabbing off any excess from the high/flat points (cheekbones, nose, etc) (see pic 18).
That’s it for faces, you can now paint your helmet :D ;)
Next time I’ll be back on track with a piece on spraying bodies.
________________________
Written by TB member Jonny Retro