
Moving on with our series on scratchbuilding RC accessories and vehicle bodies (previously, we covered material choices), this time we'll cover tools. Assuming you're working primarily with styrene sheet, you can do a lot with a very small selection of tools, but as the complexity of the things you want to attempt increases, your toolbox will need to expand too.
I know I've used the term "tools", but inevitably the lines will blur back into materials and also into techniques.
"Basic" Toolkit
Let's start with the basic end of things:
The minimum toolkit I'd suggest is:
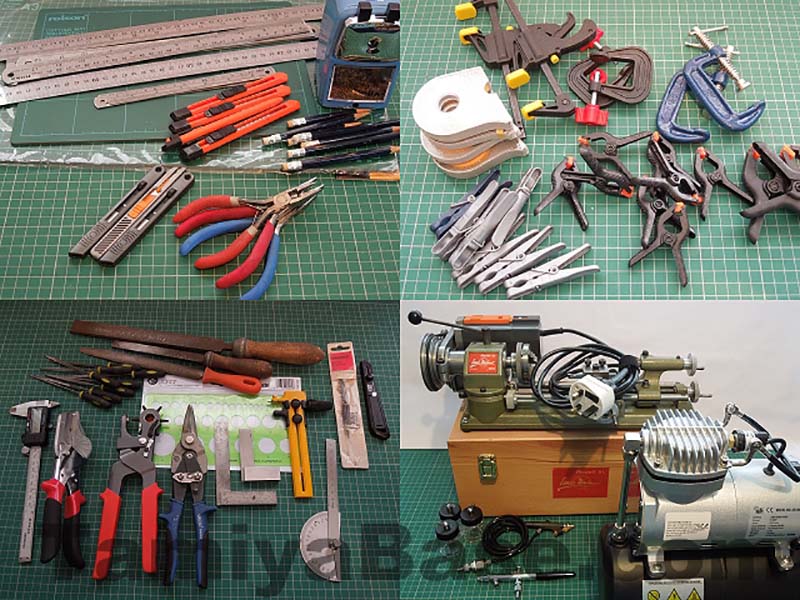
- Craft Knife - I bought a handful of the small (9mm) snap off type several years ago & have only just had to buy replacement blades - these all the most all-around useful type I think, though pointed scalpel blades and a suitable holder also comes in very hand for more intricate (or curved) cuts;
- Small Radio Pliers or Flat Bladed Pliers - for safely snapping off/changing blades;
- Cutting Mat - these are available in all sorts of sizes at all sorts of prices - I'd suggest cheap A3 mats, replaced regularly are the best option;
- Steel Rulers - I seem to have amassed something of a collection - 150mm (6") and 1m rules have their uses, but 300mm (12") and 600mm (24") are most useful;
- Pencils & a sharpener - there's no point accurately measuring if making marks you make are indistinct. There's nothing wrong with cheap pencils, but they really need to have an excellent point - I'm still using a packet of 24 pencils I got from Tesco for a quid - but with a metal bodied Helix desk sharpener.
Moving on to materials:
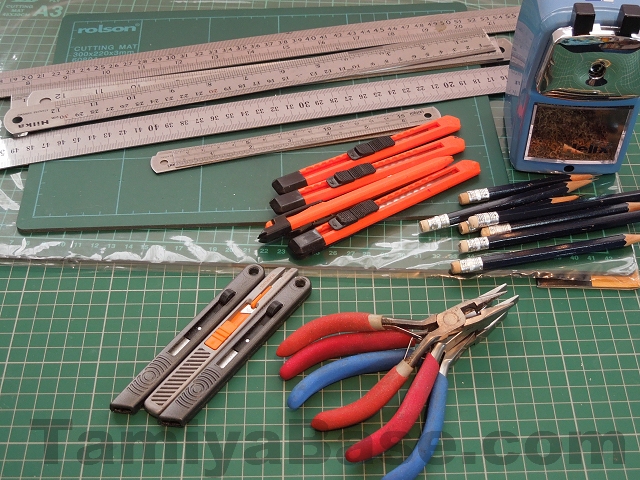
A stock of styrene sheet - I'm now trying to use 2mm for "structural" pieces and 1mm for panels (compared to the 3mm and 1.5mm respectively I used to use - very tough, but do you really need to be able to stand on the things you make? - there's also a cost & weight benefit to going lighter) - plus 0.5mm and 0.25mm for very fine details and/or curved surfaces. Larger A3 or A3+ sheets don't work out cheaper than two A4/A4+ sheets, but do allow you to make bigger items - and seem to produce less waste. Do compare prices and sizes very carefully - larger panels can appear attractive (although they are unwieldy), but by the time you add in post & do the area maths, well, I keep going back to stationroadbaseboards.co.uk.
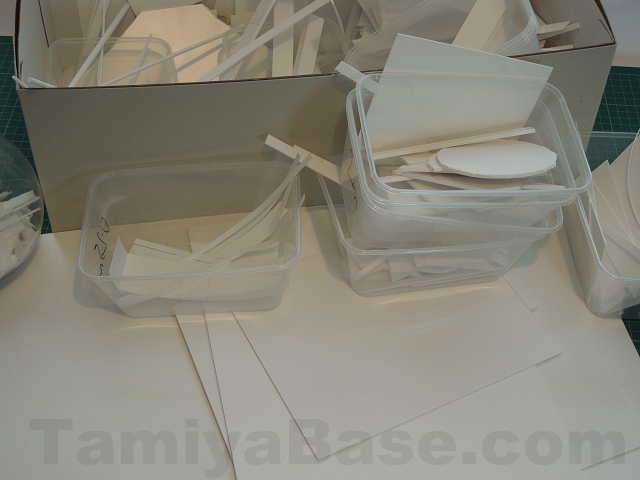
Solvent/Adhesive(e.g. EMA Plastic Weld, bulk Dichloromethane or equivalent), plus small brushes to apply it with, and some masking tape to hold things together while they stick (e.g. Tamiya 10mm tape).
Filler (e.g. Squadron White Putty) & things to apply it with - pound shop craft knife sets often have a couple of useful sizes of chisel point blades, plus holders.
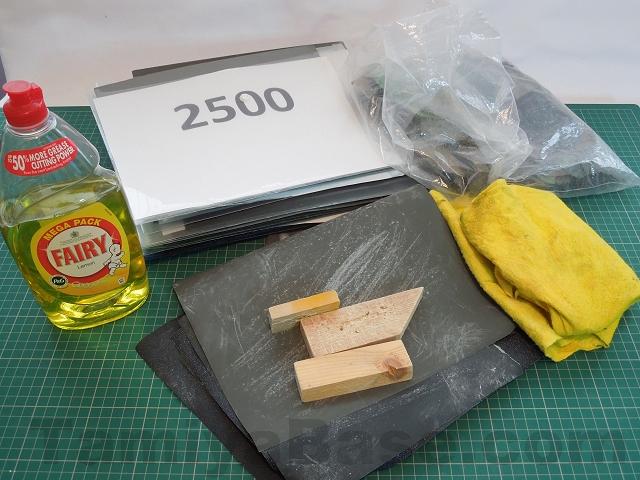
Wet & dry paper of various grades. Get a decent brand (e.g. Klingspor): the cost differential is more than offset by lasting a lot longer than cheap unbranded/own brand stuff. Grades are down to personal preference - but I like a really low grit (60, 80, 100, 120) for fast initial shaping, I use a lot of the medium grades (180, 240, 320, 400) for smoothing, 600 & 800 don't get used that often, and the finer grits (1000, 1200) for final prep. Really fine grades (1500, 2000, 2500) I tend to only use for paint correction. If you really had to pin me down to recommendations I'd suggest a 100, 240, 400 and 1200 or thereabouts are a reasonable selection to start out with. Scrap small blocks of wood are handy for hand sanding.
I'll mention Fairy liquid as not only does a drop of it as a surfactant to help wet sanding, I tend to do a lot of my wet sanding by the kitchen sink - and having a separate supply (plus a washing up brush to scrub the sink first, and dedicated cleanup cloths) is often a good idea.
And, although it's taken my an awful lot of years to appreciate it, the sort of mental arithmetic I was forced fed at school in the late 1970's (times tables up to 12s, etc) has actually come in quite handy - for example being able to add a string on 37s (or any other number) in my head while marking out a strip of styrene without resorting to pencil & paper (or a calculator).
"Intermediate" Level
All the above will actually take you some way in scratchbuilding scale styrene stuff (boxes for scaler roof racks in particular), but if you keep at it for any time you'll find a few more things are very useful. An intermediate level model tool kit is likely to include all the above, plus at least some of the following:
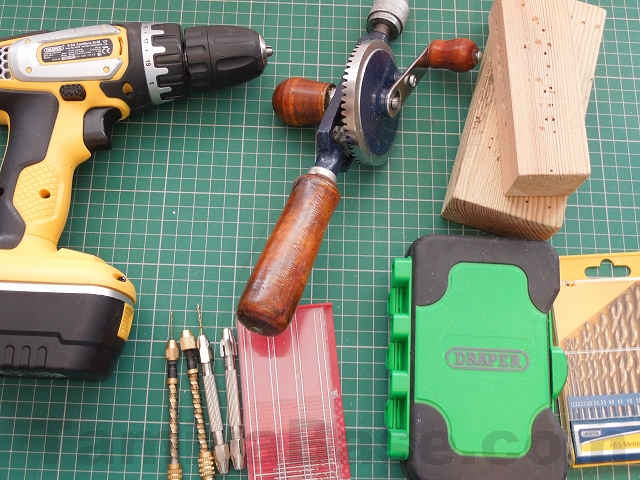
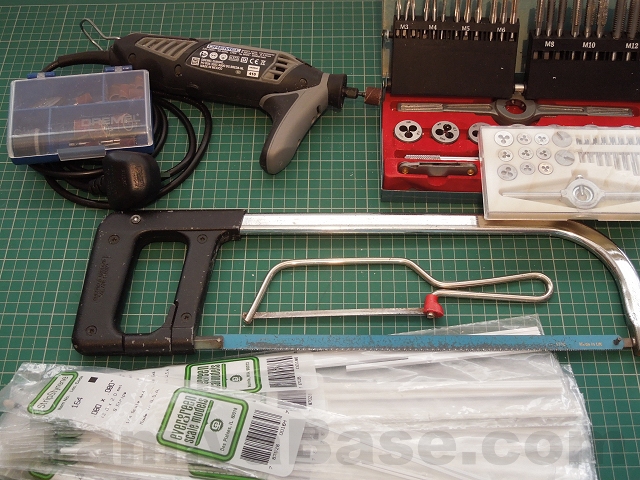
Drill & bits: including power drill, hand drill, archimedes drill + pin vises, regular size bits + micro bits, possibly flat cutting bits, countersink bits;
Files: from micro (or "diamond" files, regular types & really rough cutting files;
Dremel & bits: such as a straight burr, spherical burr, sanding drums;
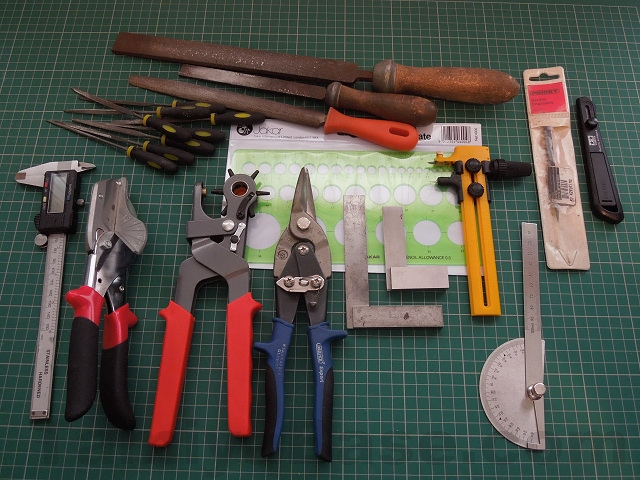
Electronic vernier: cheap ones are ok as long as you keep an eye on the zero;
Small engineers square, protractor & circle template for checking the squareness of joints, and measuring drawing angles & small circles.
Scriber - both the pointed type for scribing very fine lines, and the craft knife type for making wider & deeper lines. The first type is better for marking for later cutting, the second (e.g. the Tamiya Scriber II) for deep lines you want to be visible permanently - e.g. fake small air vents, etc.
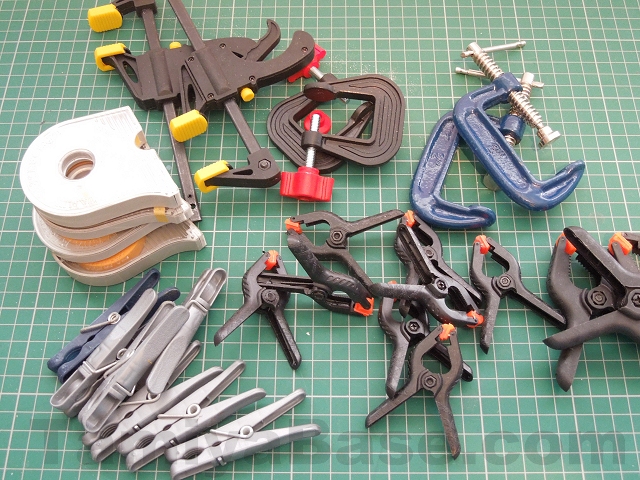
A variety of small clamps for holding things together while the glue sets - plus clothes pegs & masking tape;
A number of other small hand tools, such as a rotary Leather punch (if you ever need to made a lot of small circles), compass cutter (for big circles), rubber profile cutter (think Stanley knife blade meets big pair of pliers), aviation snips (tin snips meets secateurs), flat bladed pliers (for snapping off short thick sections without marking them);
Fasteners: I've found M2 & M3 the most useful, but bigger sometimes is useful, lengths of studding (allthread) too;
Stock of "found" parts: I can't tell you exactly what will come in handy, but I've used CO2 sparklet bottles, paperclips, sewing & wigmaking pins, small scale truck wheels & tyres, sprues & bits from kits, garden wire, various cloths, supermarket veg net bags, etc etc;
Styrene Forms: Evergreen (and some others) make a huge variety of tubes, rods, I-beams & so on - you're bound to collect a few;
Other glues & potions: Cyanoacrylate (superglue), synthetic rubber adhesive (e..g Stormsure & Stormsure black), 2 part epoxy adhesive (e.g. Araldite), epoxy putty (e.g. Milliput), and so on;
Self adhesive vinyl of various colours & textures;
Brass forms, plus a soldering iron to stick them together;
Aluminium sections/forms, for when plastic doesn't quite cut it, but brass would be too heavy or difficult;
Saws: including hacksaw, junior hacksaw, razor saws, fret saw, etc;
Bench vice: It'd be nice to have a permanent set up indoors, but mine is a simple portable version secured by a turnscrew;
Taps/dies for making your own threads in/on things.
 |
 |
 |
 |
"Advanced" Level
You can do a lot with an "intermediate" level toolkit (look out for the V8 engine I'll be using as a worked example when I get to intermediate level build techniques) - but you may well find you get to the point you can't make things or include details you'd like to, and no amount of ingenuity will get the job done. The only way round that is more tools - but now we're talking bigger/more complicated, and more expensive ...
Airbrush + Small Compressor
I was put off getting an airbrush for a long time by the apparent difficulty of use, time consuming clean up, expense, and bewildering number of choices, but in the end I got to the point where I couldn't get an aerosol the right colour or finish for a project & had to get one.
In the end none of my concerns were justified, a generic Chinese small compressor (with tank) and two airbrush kit off eBay for around 65 GBP has got me dipping my toe in the water.
A good stock of Tamiya acrylics (X and XF range) + thinners & small glass jars are a good basis for mixing your own finishes, and a small glass goldfish bowl is a great help in initial clean up.
Lathes
You can make a lot of things by viewing them as a series of boxes & cylinders, but sooner or later you're going to want to make something round that can't be achieved with an off the shelf form - that's where a lathe comes in. A micro lathe such as the Unimat SL have the advantages of size, weight and portability so can be put away after use (note: I can't vouch for the current, modular Unimat offering - but I can tell you the cheaper copies from Hobbyking & the like are awful) but a mini lathe such as the generic Chinese 7x19 will let you do a whole lot more, if you've got a permanent spot for it.

PC + Photoshop + Printer
A licence for Photoshop can be a bit on the expensive side, and a cheaper package may well give you the features you need anyway. I use an ancient version of Paint Shop Pro & it's more than adequate for resizing, cleaning up & redrawing RC & model graphics, and making 2D drawings from photos.
A big monitor is very useful, and your PC needs to have enough processing power & memory - but TBH anything just above current entry level should cope.
A half decent colour inkjet printer/scanner combination can be had for 40 GBP or less - but do be aware of the cost of keeping it supplied with ink - some brands are more expensive than others. Also look for non-genuine ink cartridges: the ink tends not to be as colour fast as genuine so it's up to you whether or not to use it, but at least it's an option on more popular models. Having suffered a leak from using a refill kit I wouldn't recommend that approach.
In order to fully take advantage of all that, a supply of specialist printing materials is needed - clear and white inkjet waterslide transfer paper, clear and white self adhesive inkjet vinyl, light card (160gsm or so), self adhesive sticker paper, photo paper, etc.
________________________
Written by TB member Jonny Retro