

Introduction
If you don’t know long-term TamiyaBase forum member stingray-63, let me tell you that he recently hit 10,000 posts - some technical, a lot helpful, and many along the lines of “waaaoooou!!!” or similar enthusiastic support for other members work. He’s an avid collector of Tamiya and RC in general (electric and IC), has his own French language RC blog at http://rcmodelstory.over-blog.com/, and regularly turns out builds, restorations and imaginative projects – the Fire Department themed Wild Willy 2 and pink VW bus on an extended M-series chassis (a long time before Tamiya did anything like that) stand out particularly for me.
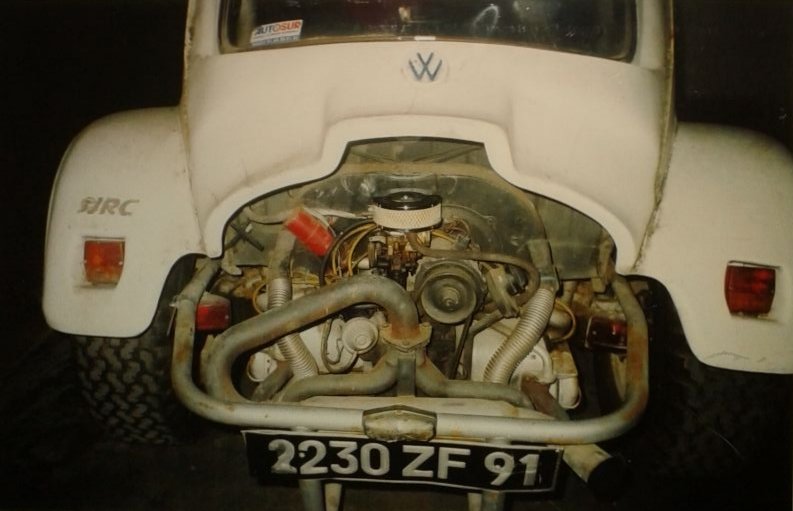
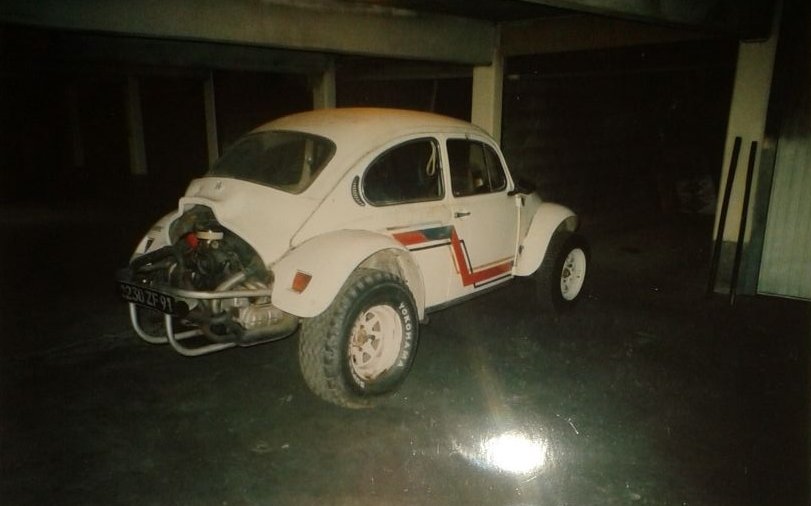
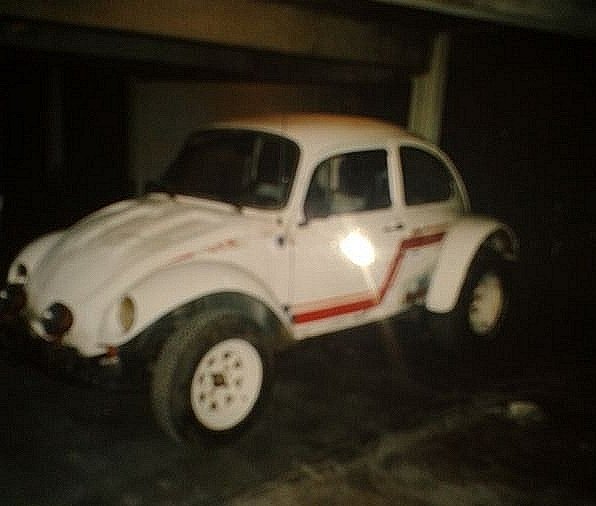
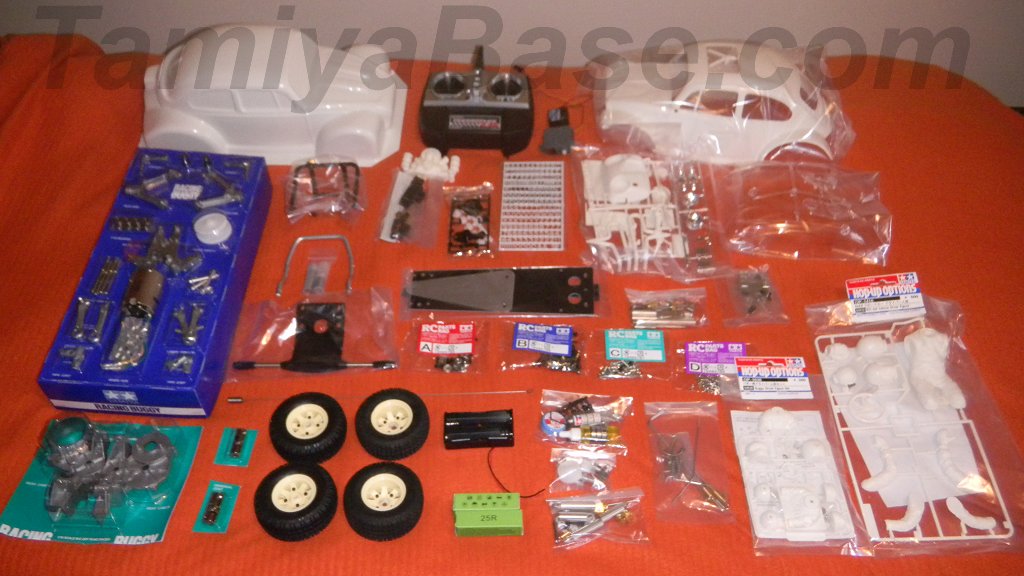
That’s the “why” we wanted to do it - the “what” we wanted to do was a Tamiya-based 1:10 scale replica of the real Beetle he’d owned in his youth. Unfortunately, the only information still extant was the 3 rather sad photographs seen below.
You may ask why we didn’t get details from stingray-63 himself; the answer is we wanted to keep this build a secret if possible.
Having got the agreement of Ichiban larbut & fellow staffer AndyAus, the project began at the end of 2019. In order to avoid the cost of sending parts around the world, we agreed that I’d source the parts & do the building, and anyone wanting to help could do so with a financial donation & get it recognised by a mention on a plaque.
A private forum section was set up, and a number of members were invited to join at various points in the process – some by recommendation, some by an algorithm based on recent activity and/or post count to cut down the 12,000+ Tamiyabase members to more manageable numbers.
We began to work out the 1:1 cars details, and what was achievable with standard off the shelf parts within a reasonable budget. Compromises would also have to be made as I wanted it to have full underbody and interior detail, but also be a fully functioning RC car (even though I kind of hope it stays on the shelf).
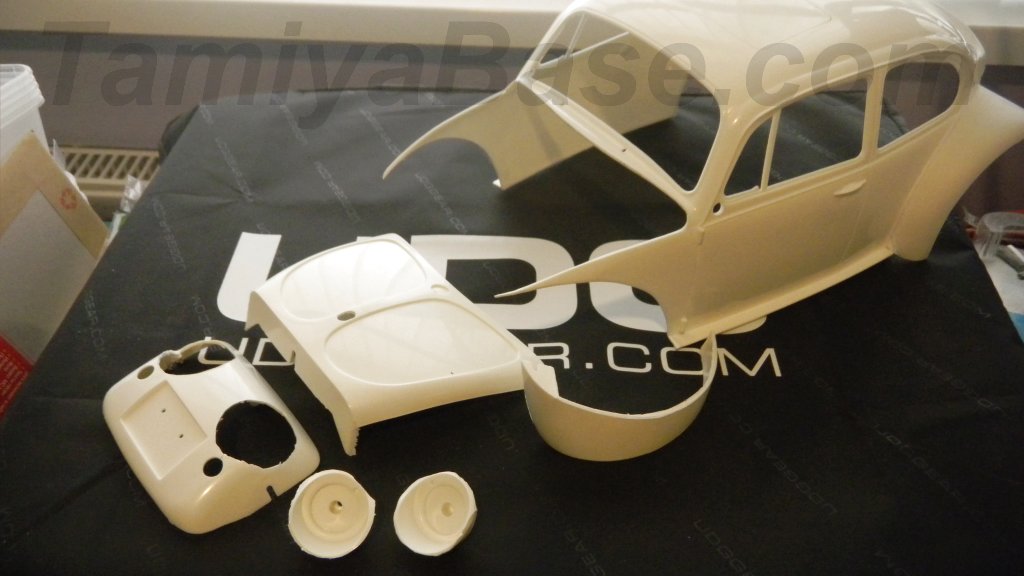
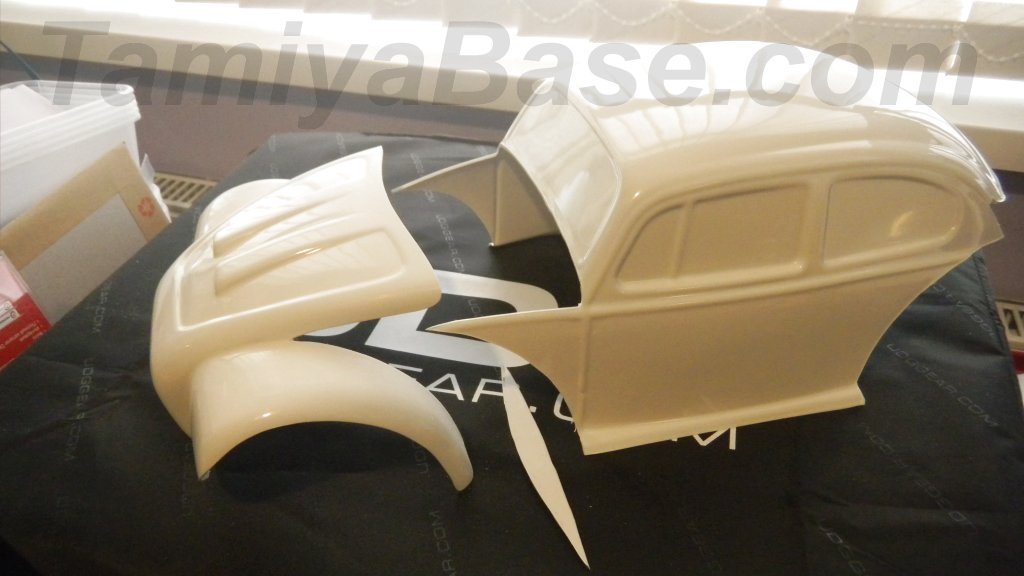
The most visible differences from a standard Sand Scorcher body were the JCR front and rear body sections, very much like the 1:1 EMPI “Wide Eye” kit. Fortunately there’s an aftermarket vacuum-formed “Baja” shell which has the correct bonnet pattern, wheel arch shapes & rear end form. Being available in ABS (or a close relative of, possibly HIPS) meant I could graft the front and rear end onto a Tamiya shell.
Phase 1: Body & External Details
Wheels & Tyres
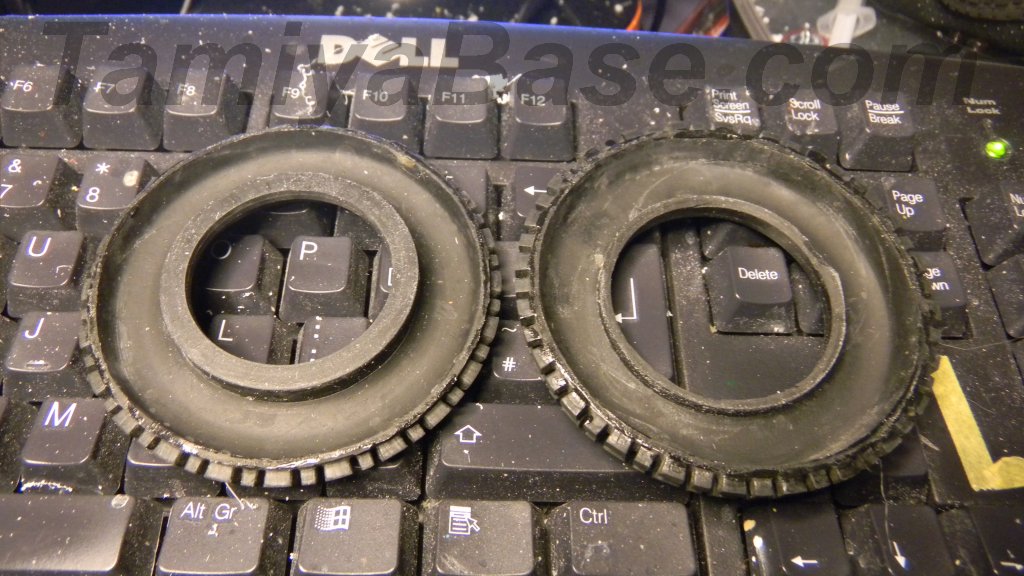
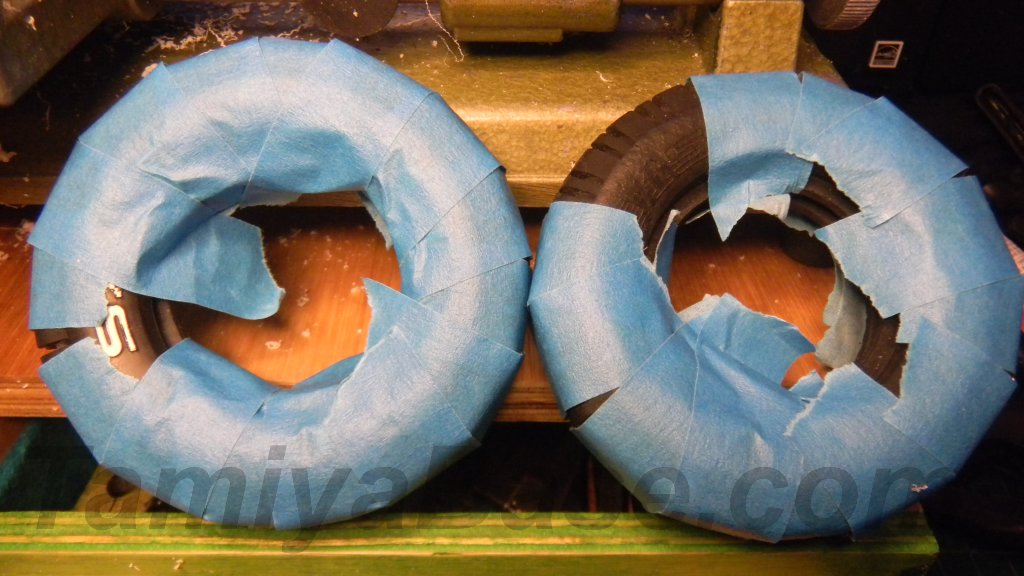
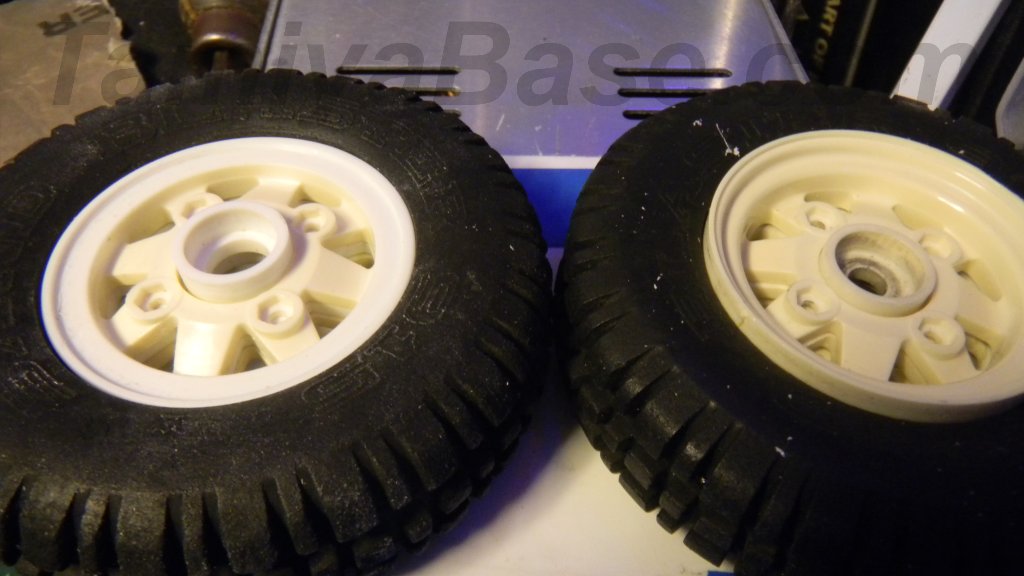
Having built a rolling chassis from new parts gleaned from a re-release Buggy Champ kit, work started with Ranger wheels and tyres. The rears were used as is, but the fronts needed narrowing. The tyres had a strip removed from the centre, the two halves then being glued a small section at a time with RT (“rubber toughened”) cyanoacrylate glue, the halves being held in position with masking tape until properly set.
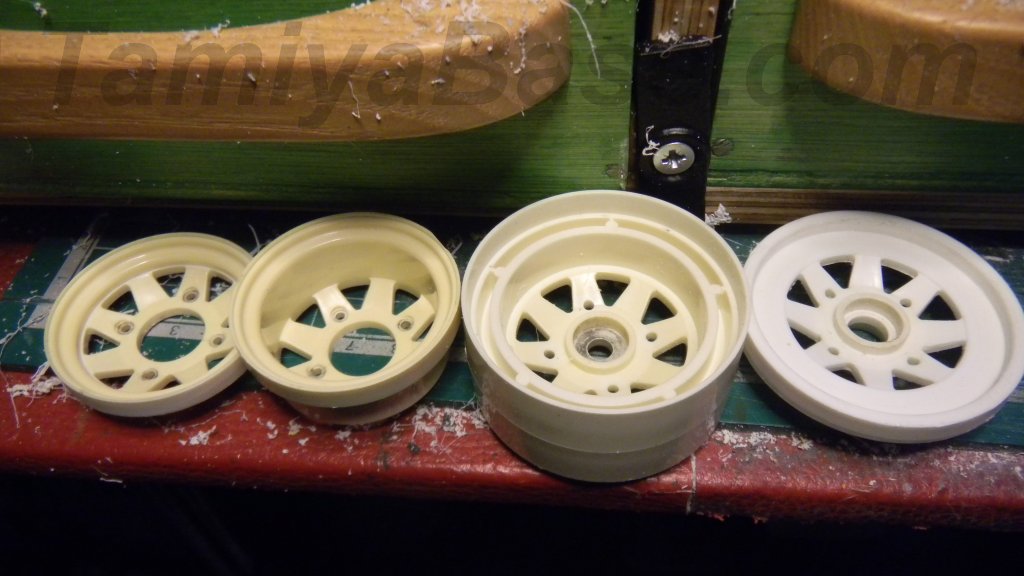
The wheels also needed narrowing. Potentially you could do the work using hand tools with careful marking out, cutting & sanding, but I turned the various sections on my Unimat (micro lathe). This worked very well after some initial failures due to inadequate workholding.
The left photo below shows before and after machining on the outer face and inner sections. If you look carefully you can see the join on the leftmost part where I machined a section out from the middle & bonded the parts together. The rightmost part shows just how much needed taking off the inner wheel part.
Right photo: the left part shows that a section of the third part of the wheel also needed reshaping.
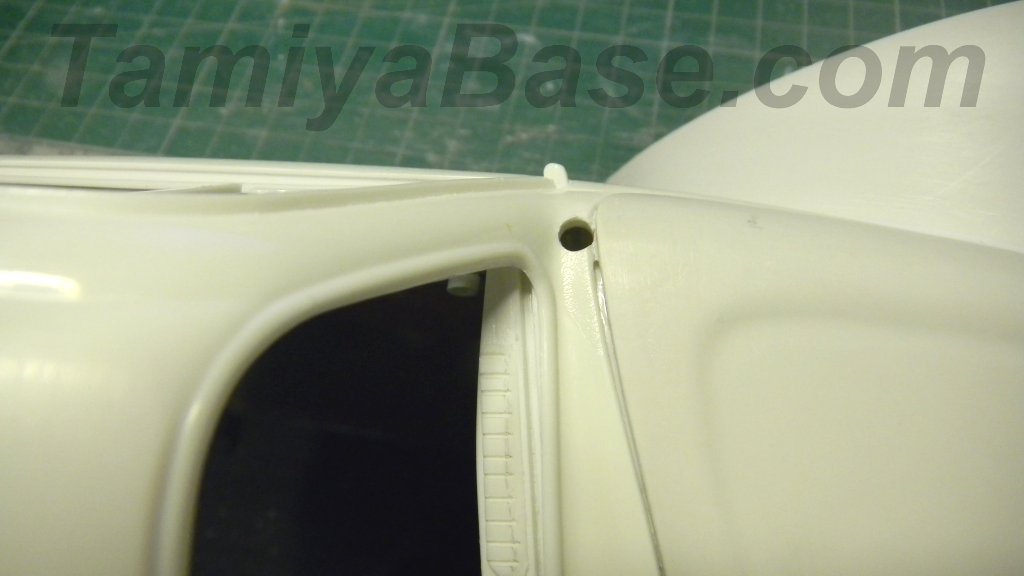
Front Body Post
Next was the front body post. I started with a slightly shorter one I’d turned up for a previous project, taking a bit more height off later as necessary.
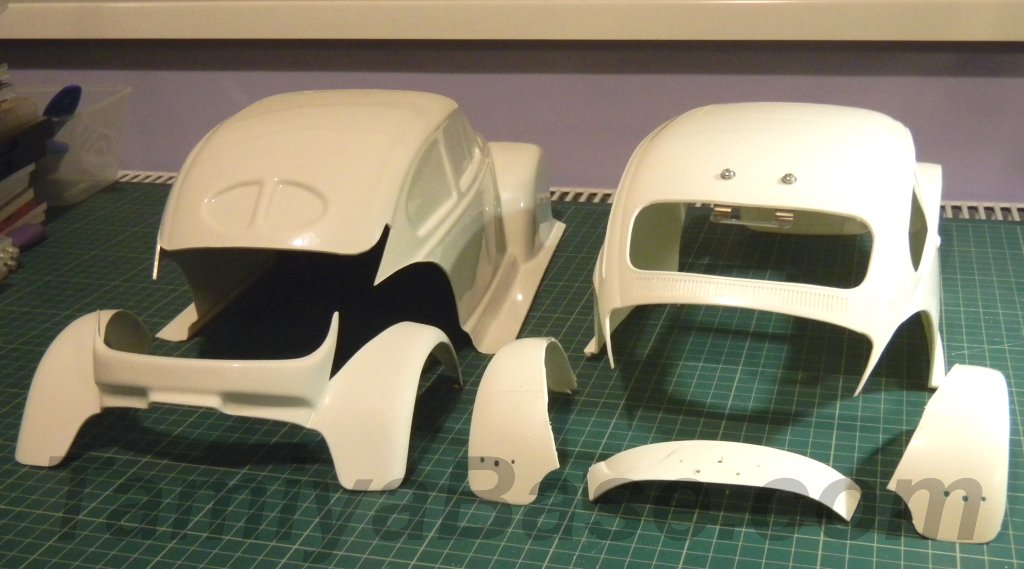
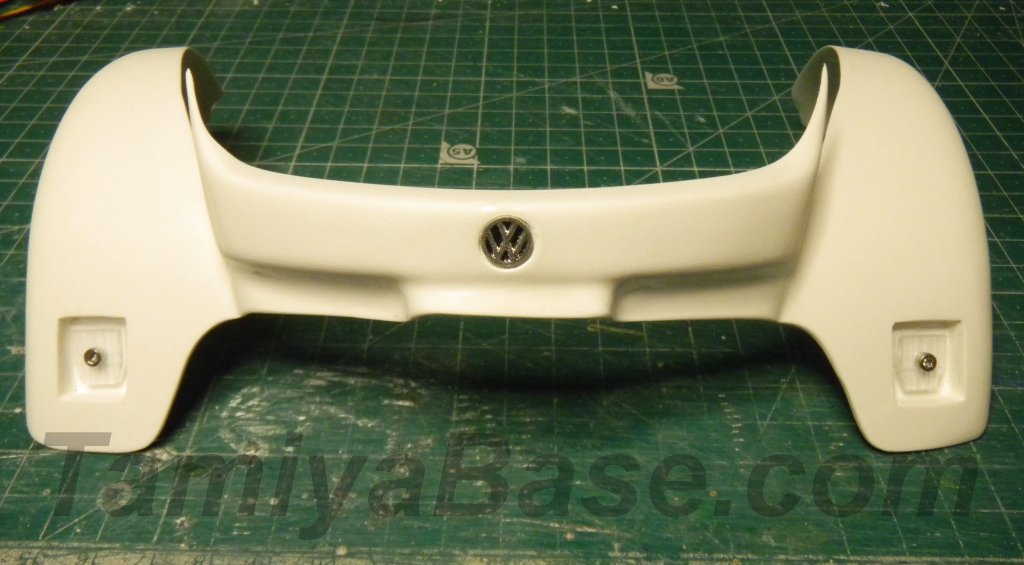
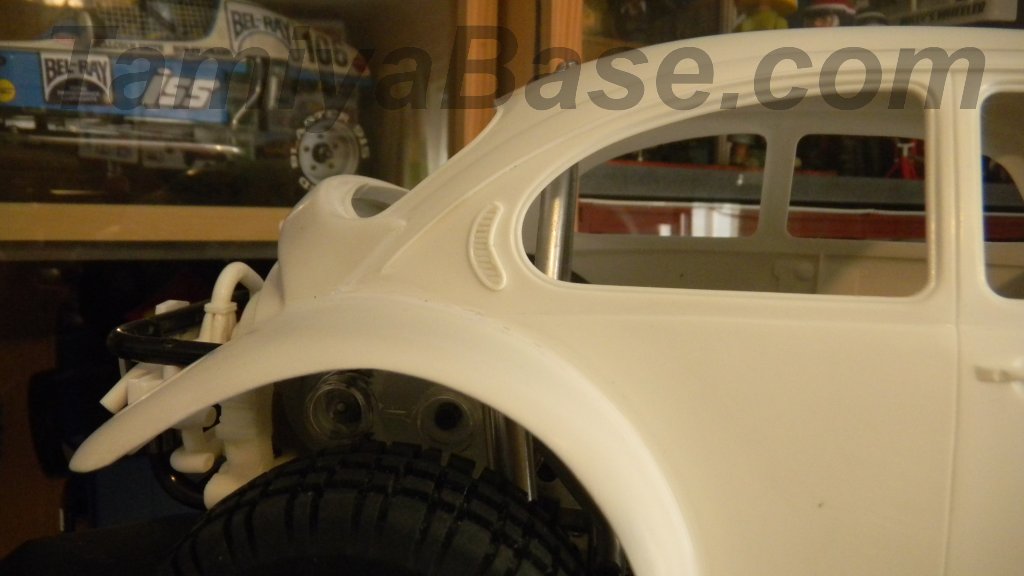
Body Rear End
If you look at the 3 photos below, they show:
1 the initial cutting of the donor shells;
2 the replacement rear end modified to take a VW badge and (CD case edge) rear lights in the manner of the original car;
3 the new rear end bonded on to the Scorcher shell – a process that needed a small section doing and clamping at a time, plus internal reinforcement from an Evergreen brand strip styrene form, and Milliput epoxy putty.
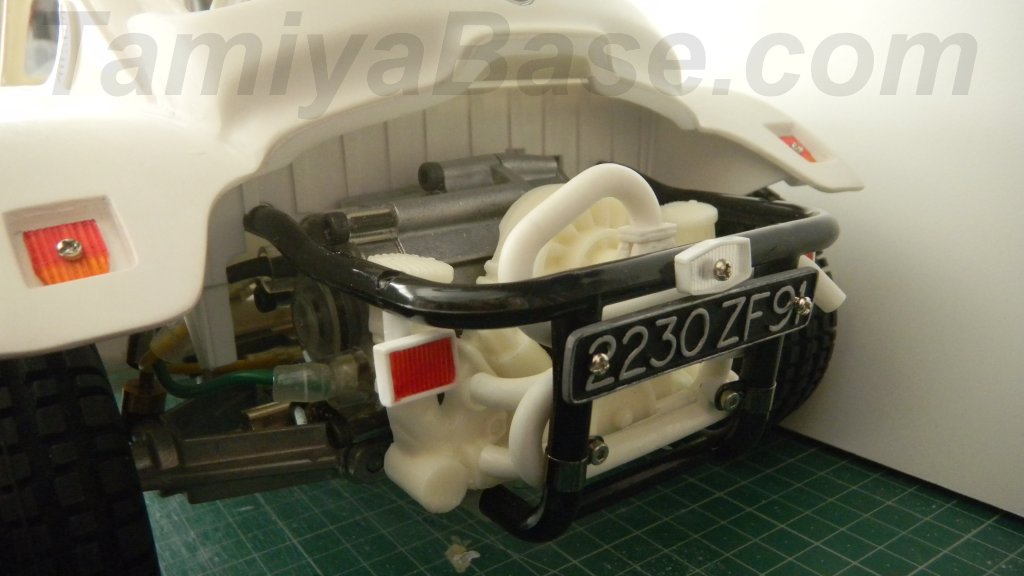
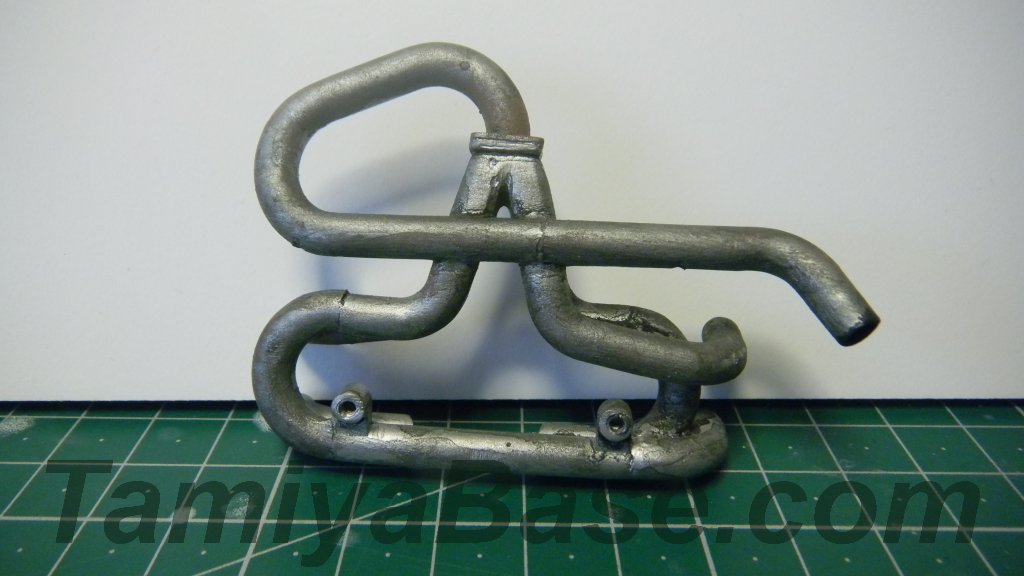
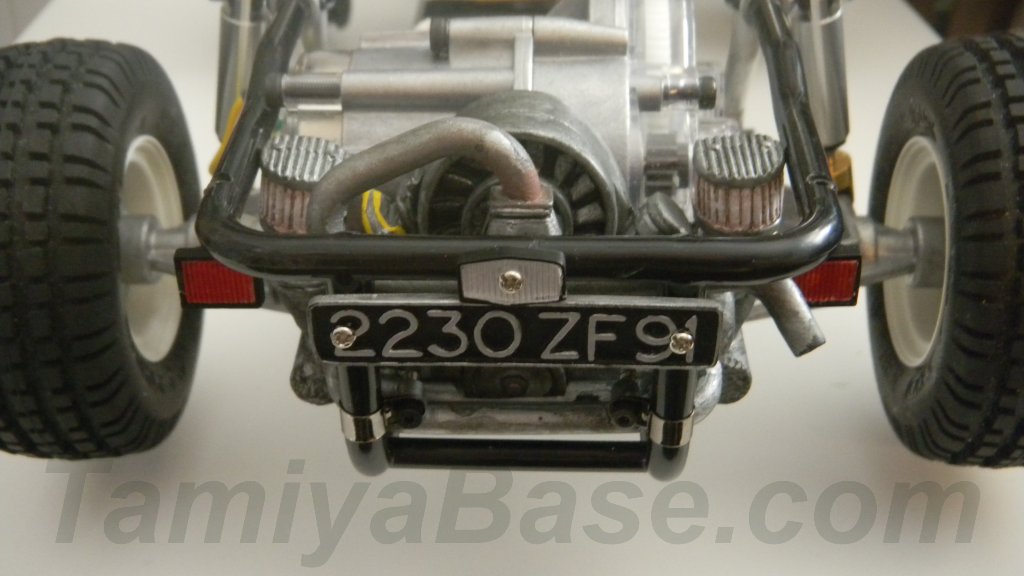
Engine & Exhaust
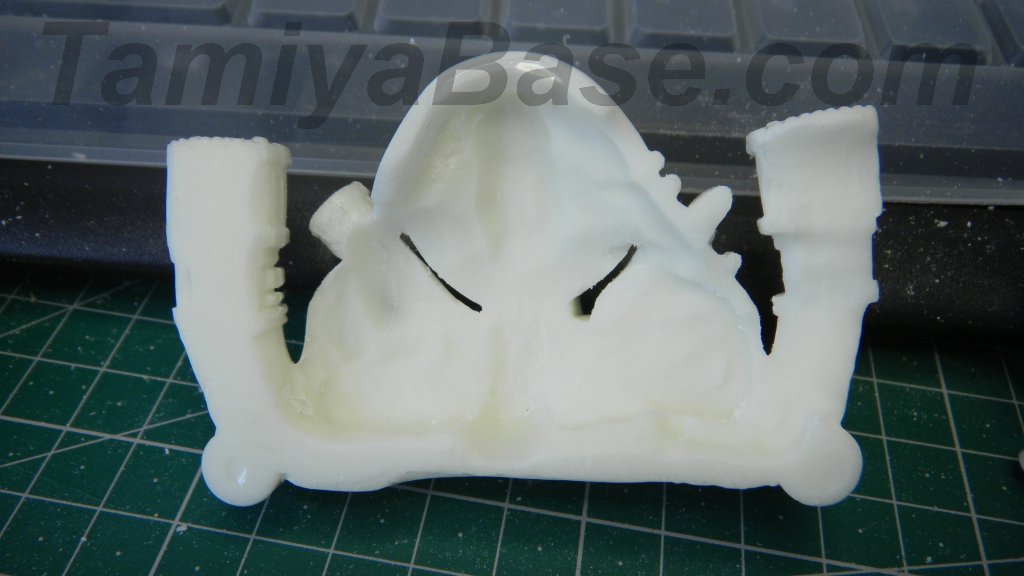
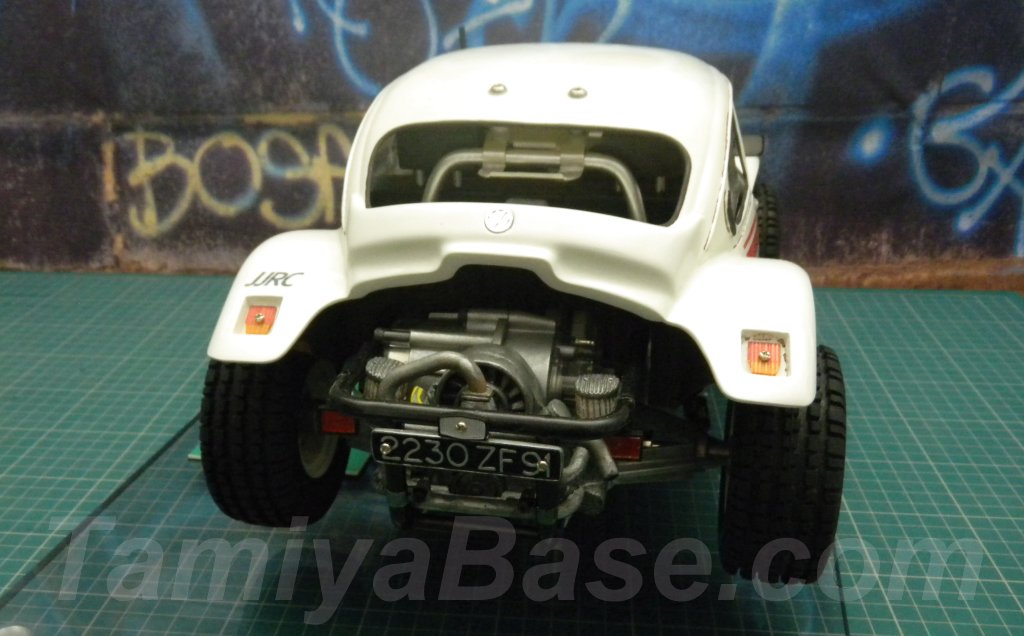
There are much more realistic engine units available than this casting from Greece, but not at a cost I could justify. The rear was heavily Dremelled to fit the Scorcher gearbox, and thread drilled & helicoiled to allow the engine to be secured to the Scorcher’s rear cage with P-clips.
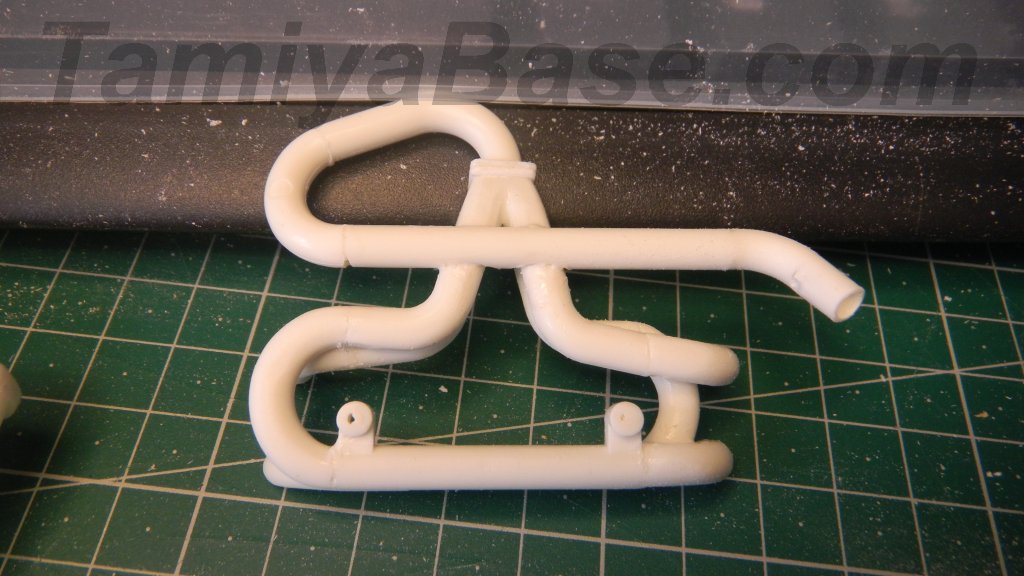
The exhaust was made by modifying stock Scorcher parts.
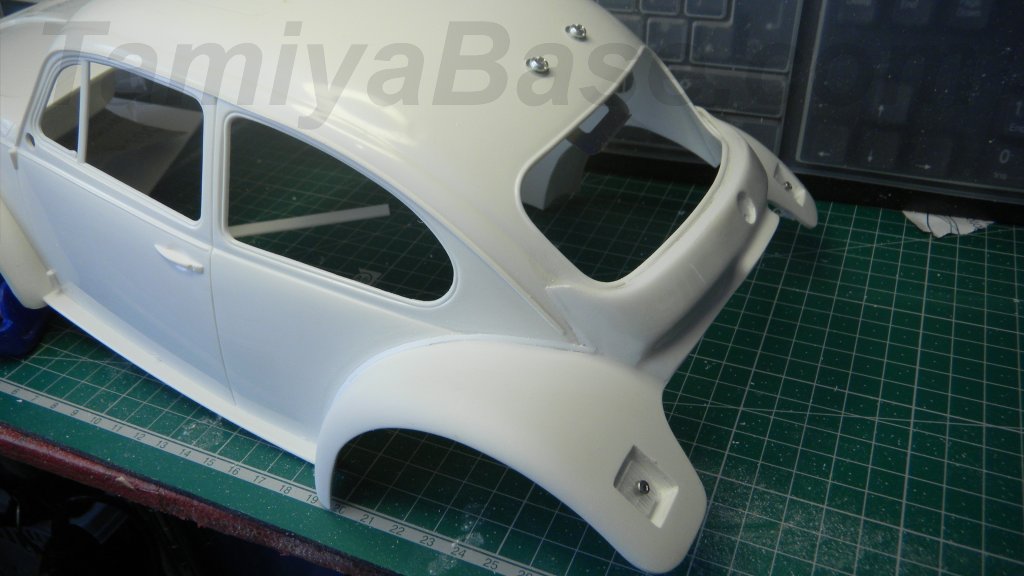
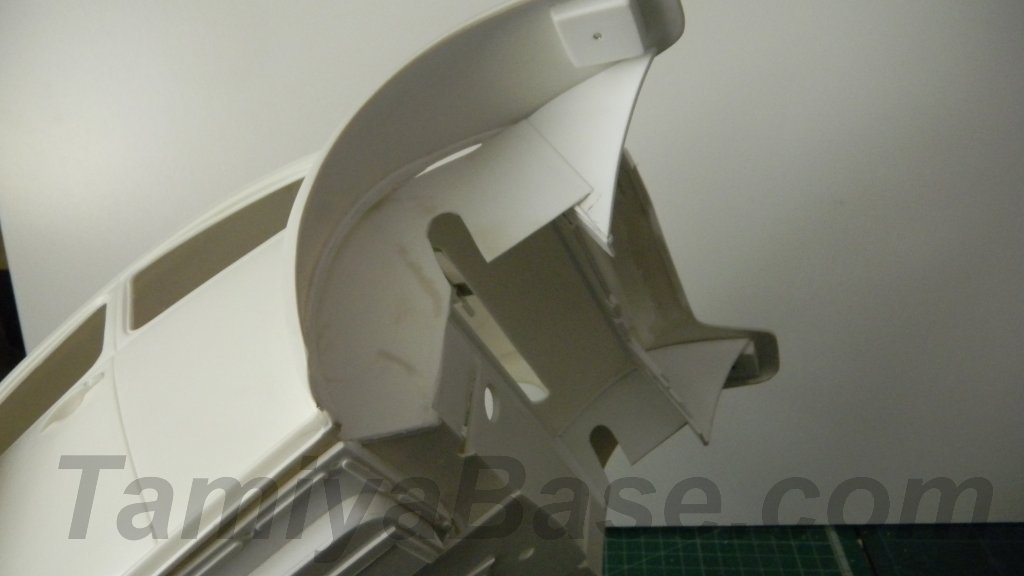
Body Front End
Most of the front end was cut off both donor shells. The headlight supports were Dremelled out from the Tamiya nose section, fettled, and bonded to the donor front end.
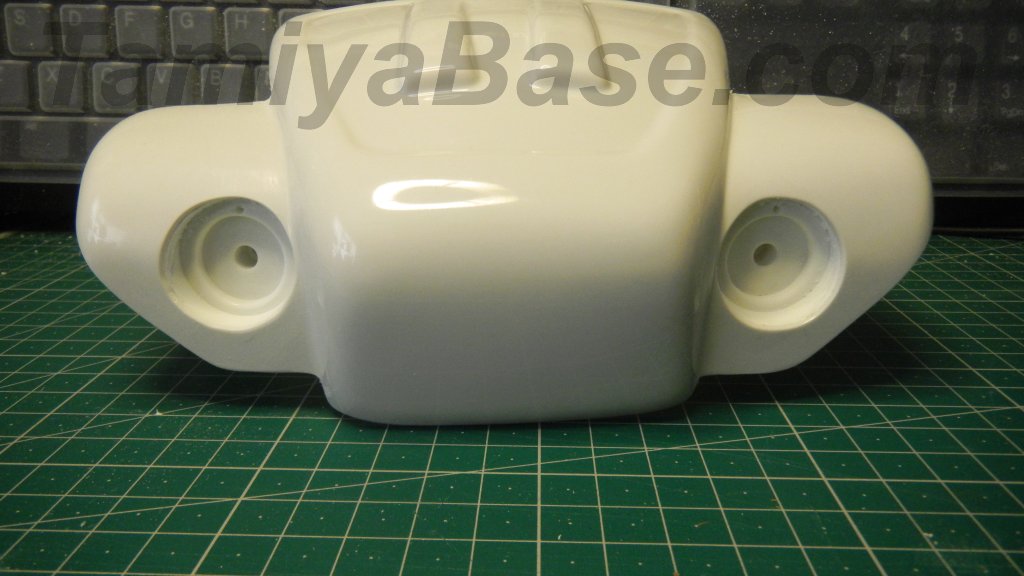
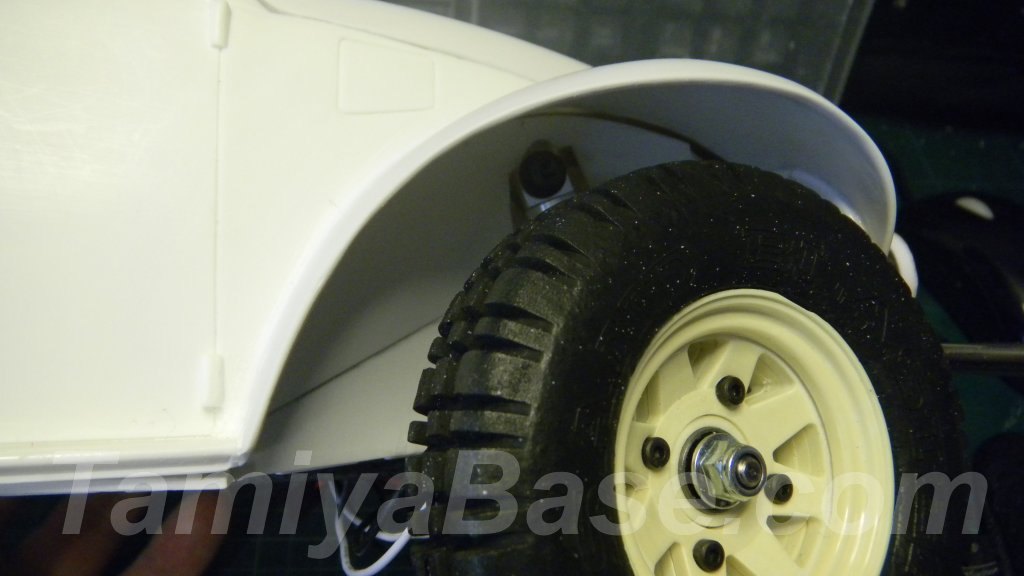
Nb The front wheel arch shapes went through several trimmings through the rest of the build.
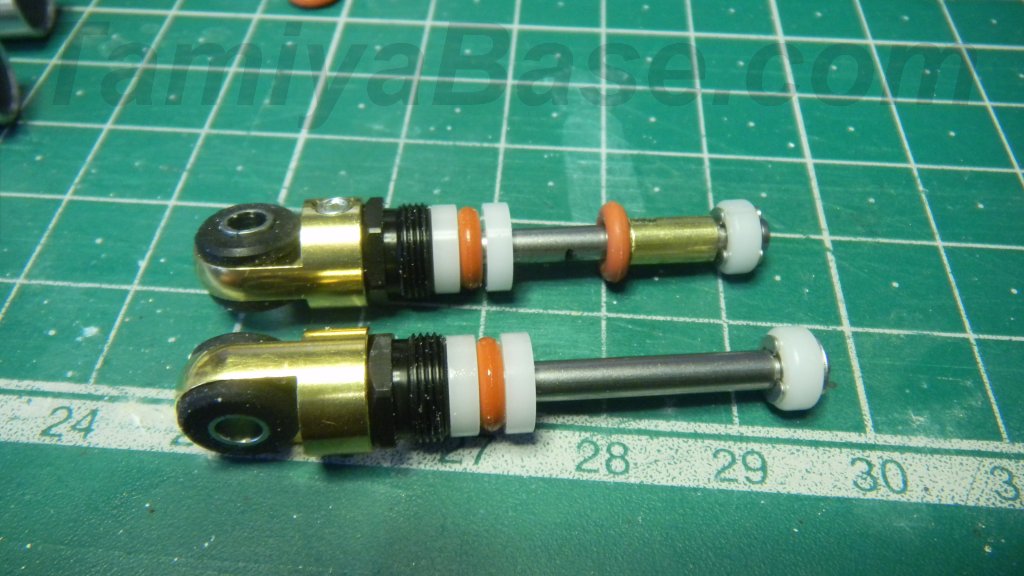
Damper Mods
I wanted the car to have a slightly more “street” look to get closer to the ride height of the prototype, this was partially achieved with a shorter front body post and tweaking the rear mount, but I also wanted the suspension to be lower.
Up to this point in the build I’d been using scraps of styrene wedged into the suspension at various points to bodge the ride height but got fed up of them falling out. I cut short sections of brass tube (8.5mm high for the front shocks, 7mm on the rear) & fitted them along with an extra O-ring in each shock body.
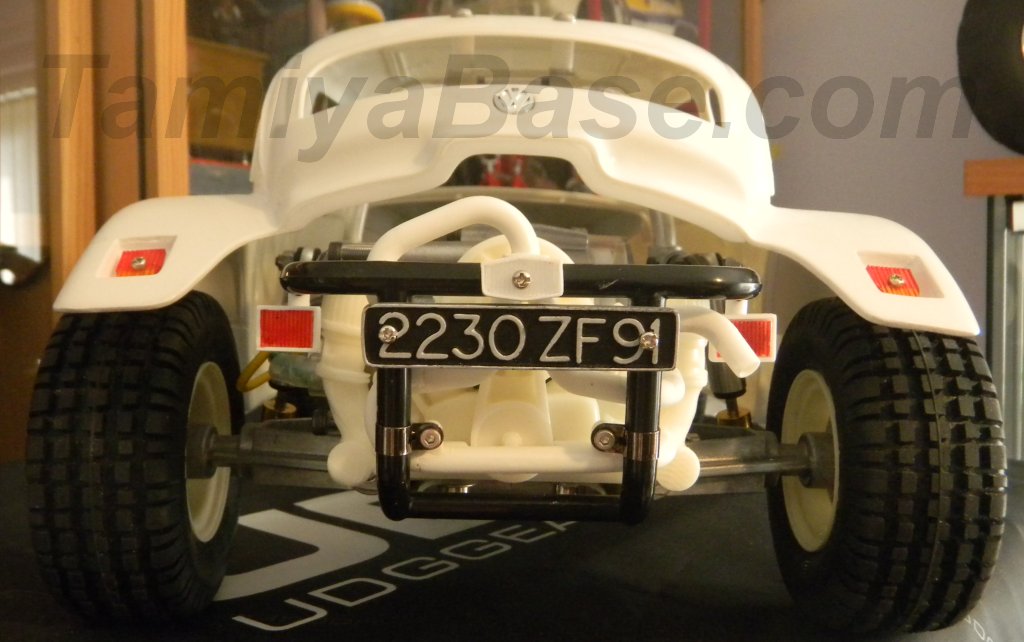
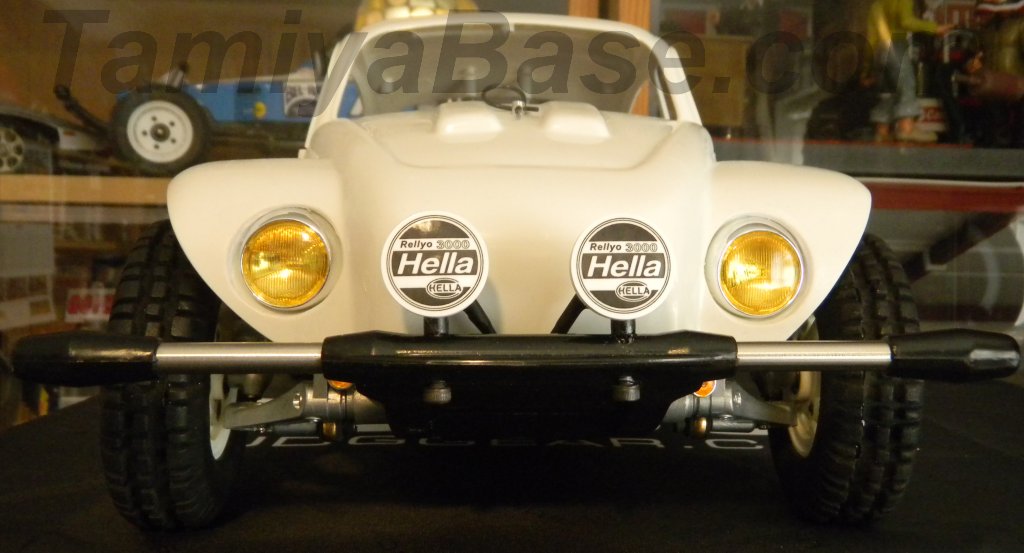
Other Details
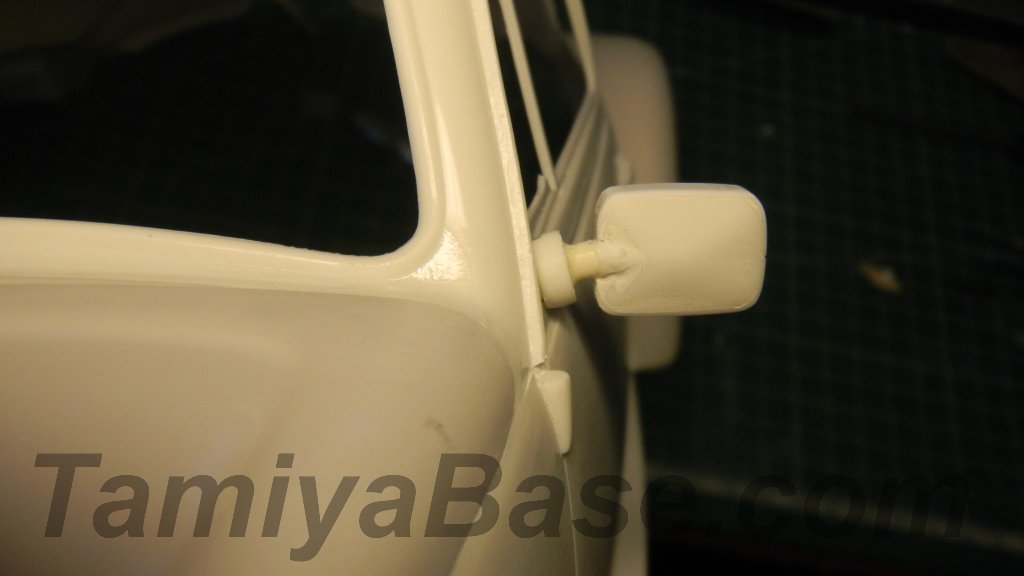
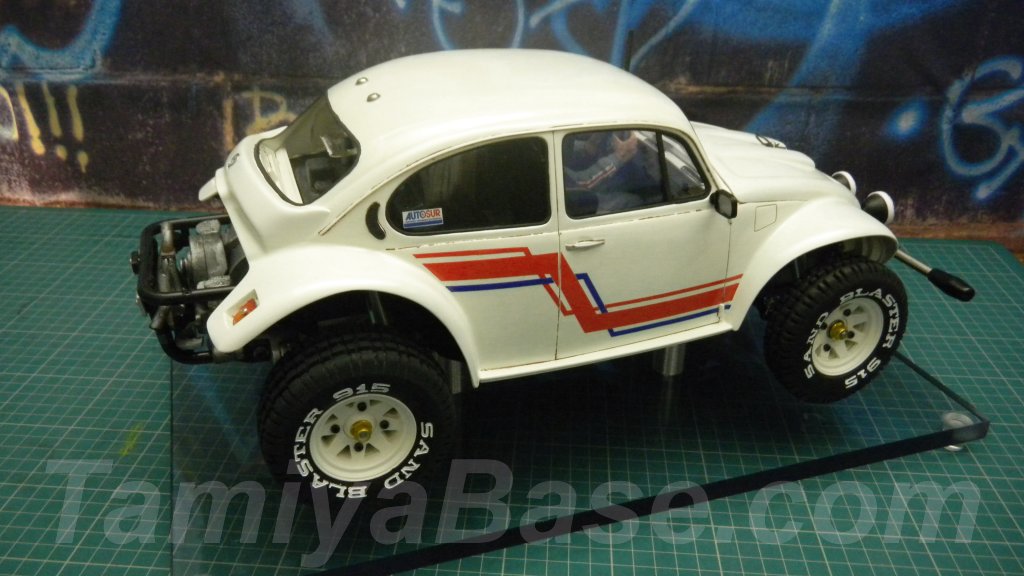
Final body details (I’d already filled around the sunroof gap) were “banana” rear vents, rear fog and reversing lights, number plate, front indicators & working driving lights. Mirrors are modified re-release parts.
Phase 2 – Underbody & Interior
I knew from my “Scrap Scorcher” and “Blue Max” projects that it’s perfectly possible to have a full interior in a functional RC Scorcher and a full underbody – I just hadn’t done them both together before in one vehicle.
It was obvious that some parts were going to have to stay attached to the chassis for access to the electrics and changing batteries, and some needed to be part of the bodyshell.


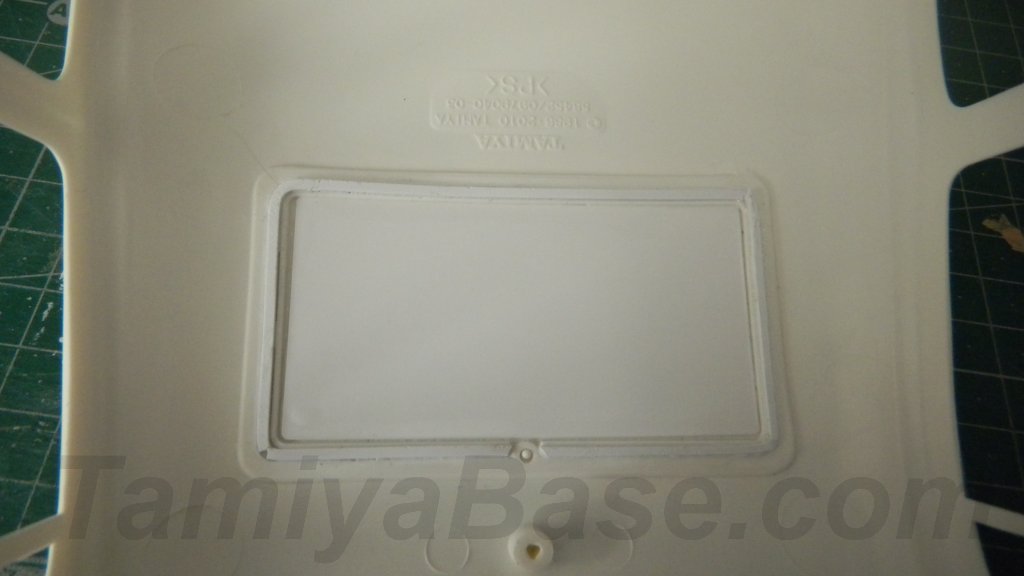
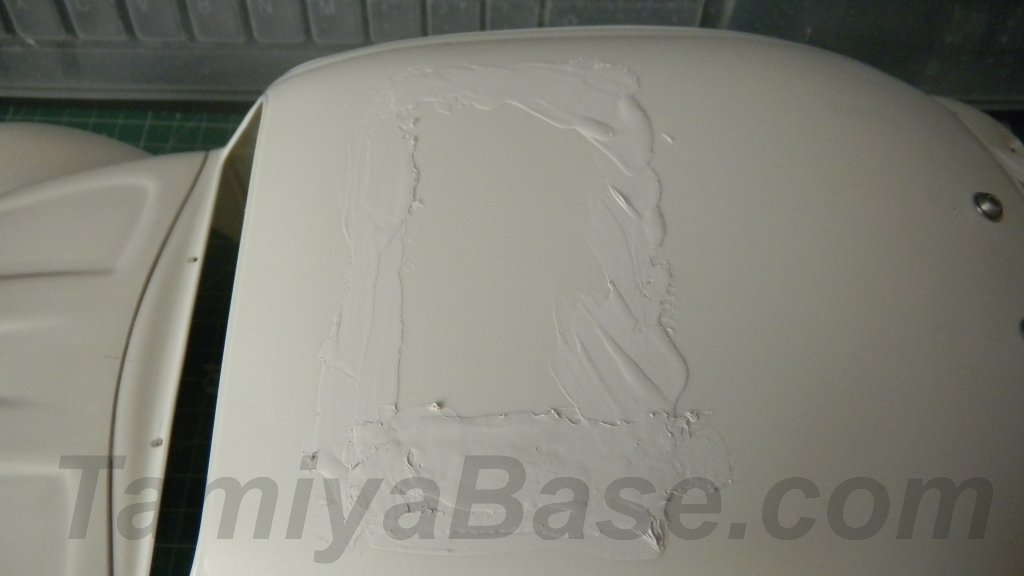
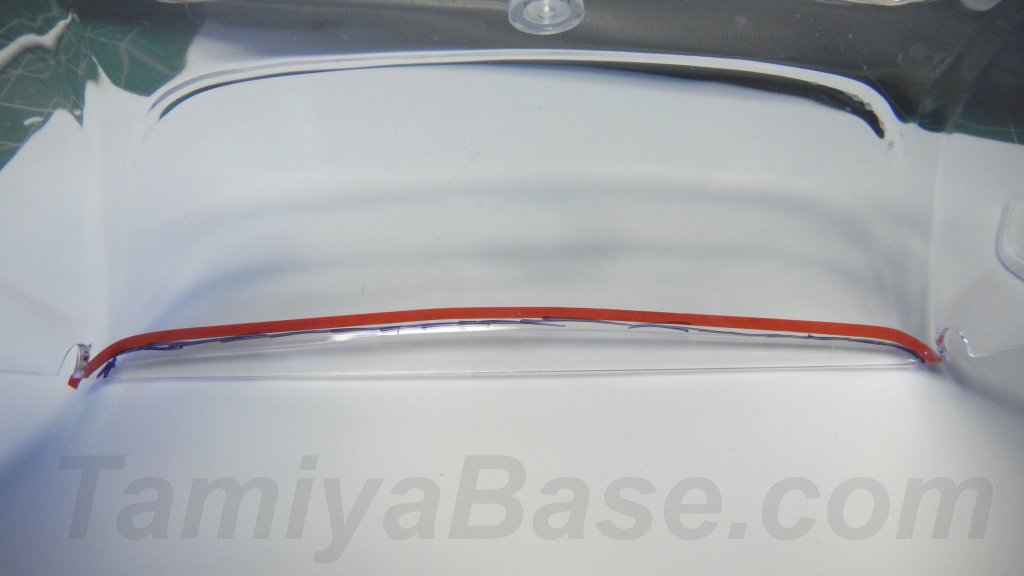
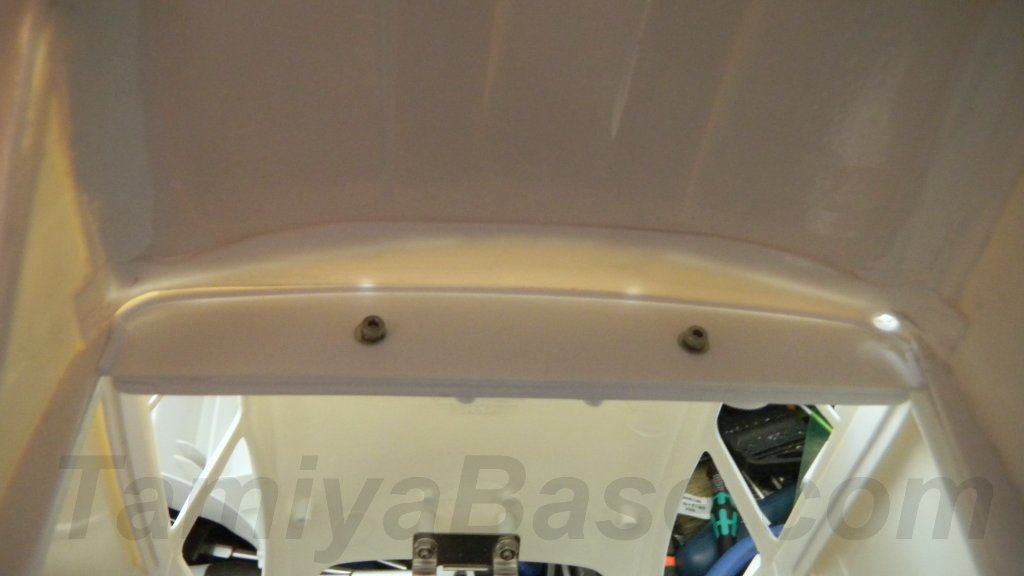
Sunroof
I made several attempts to fill and sand the join on the outside of the roof, even resorting to reinforcing the inside, but as you may see later, the join is still visible.
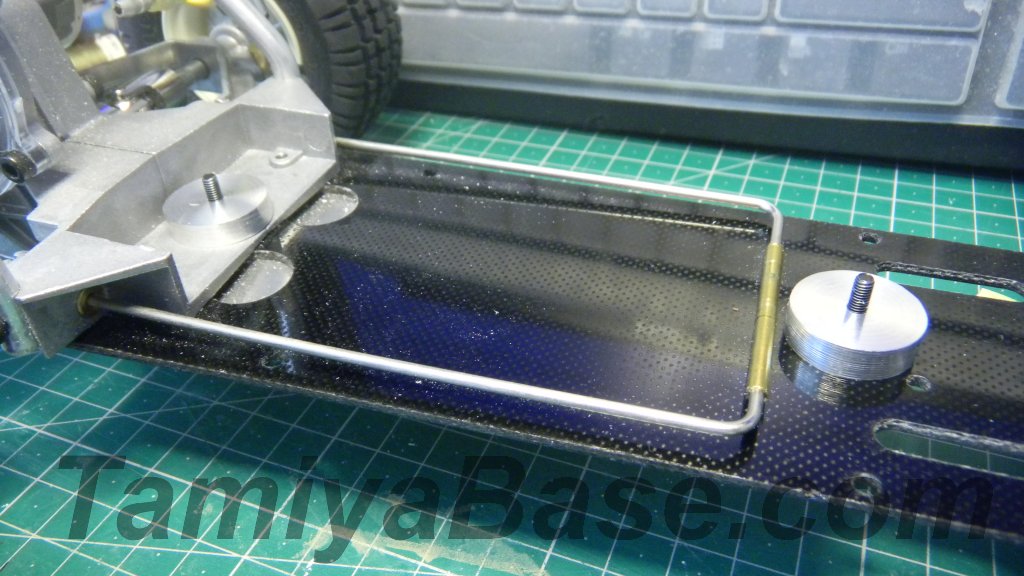
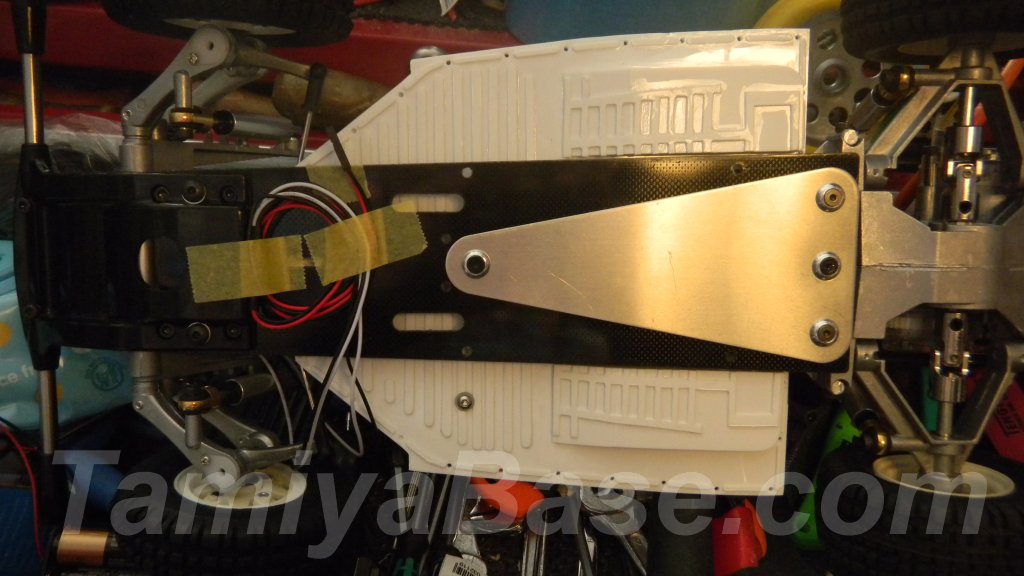
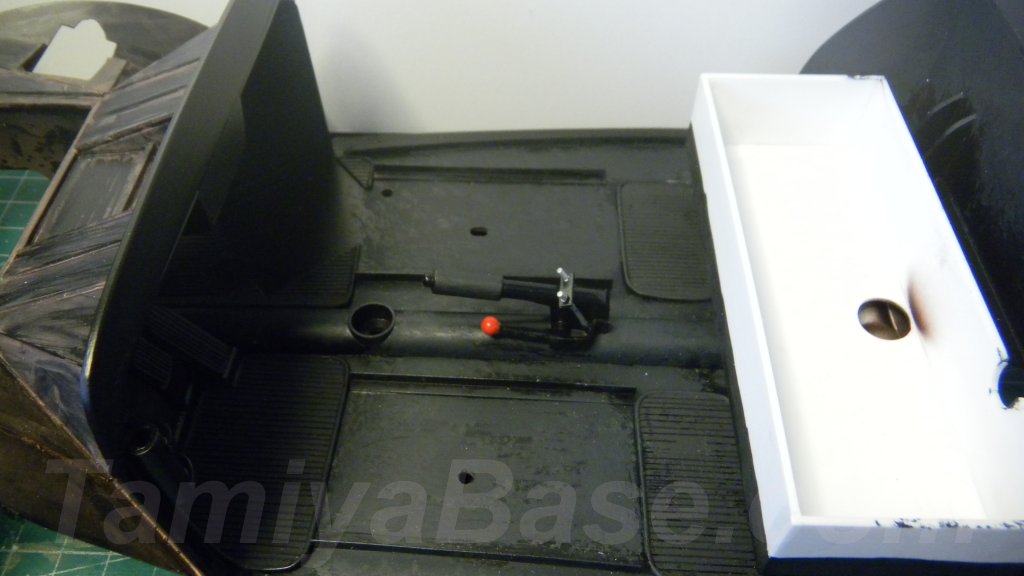
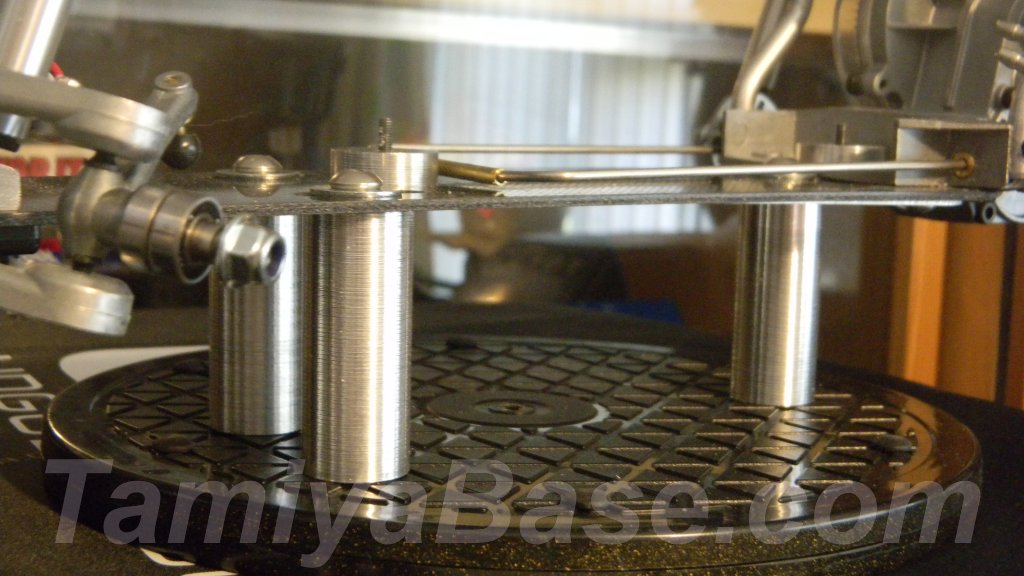
Floor
This started as a simple flat sheet of styrene, shaped to fit both the Scorcher chassis, and the body shell. Space to clear the rear torsion bars was created by adding turned aluminium standoffs to the FRP chassis plate. Details parts to simulate the ribbing and pressed rear footwells were added to the underside.
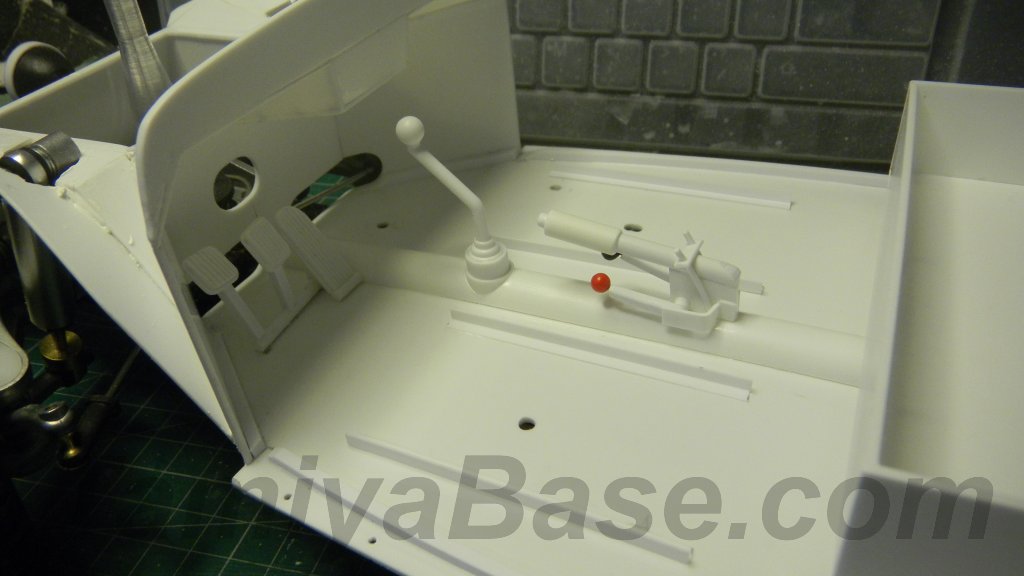
At a later point I went back and added reinforcement down the centre of the chassis (a 1/” styrene tube cut in half), a modified gear lever (which hides the forward mounting nut) and an exposed handbrake/heater control assembly, as well as pedals.
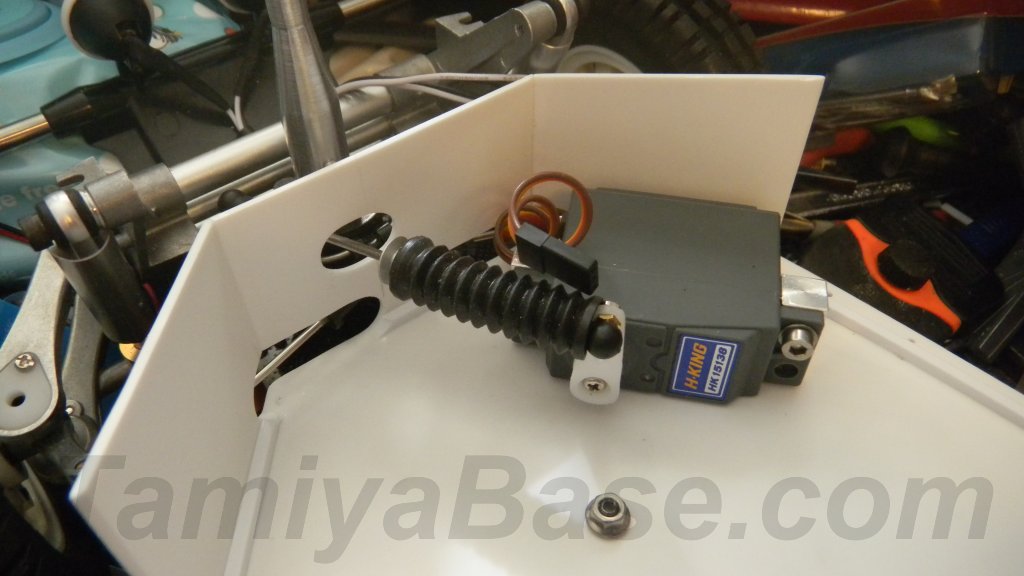
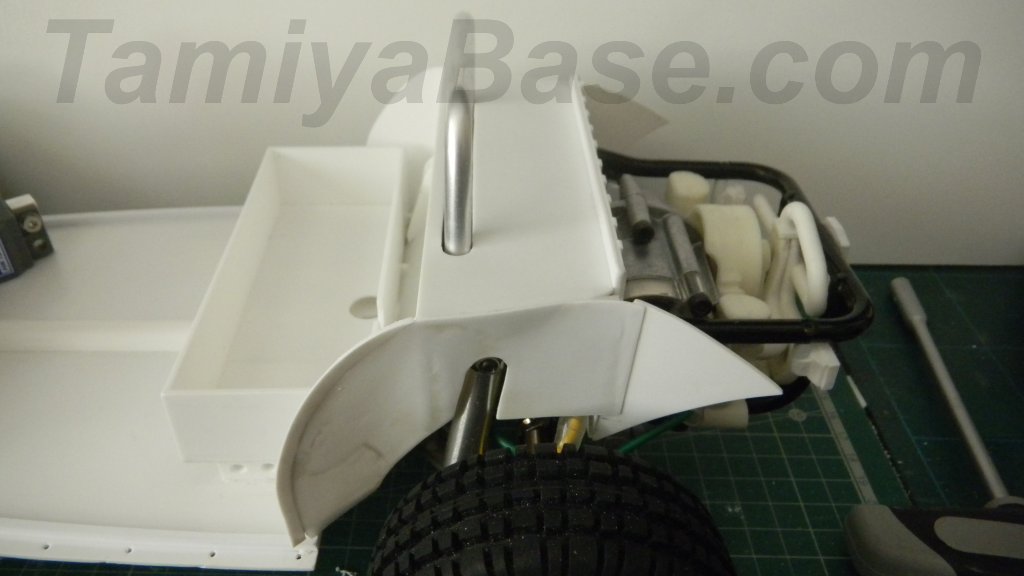
Front End
Once the firewall was added to the floor, the steering servo was fitted in the passenger footwell. It’s something of a compromise as it will make it visible, but the alternative was to not have a full pedal/drivers foot/leg area.
Note the slots required in the firewall for the steering rods.
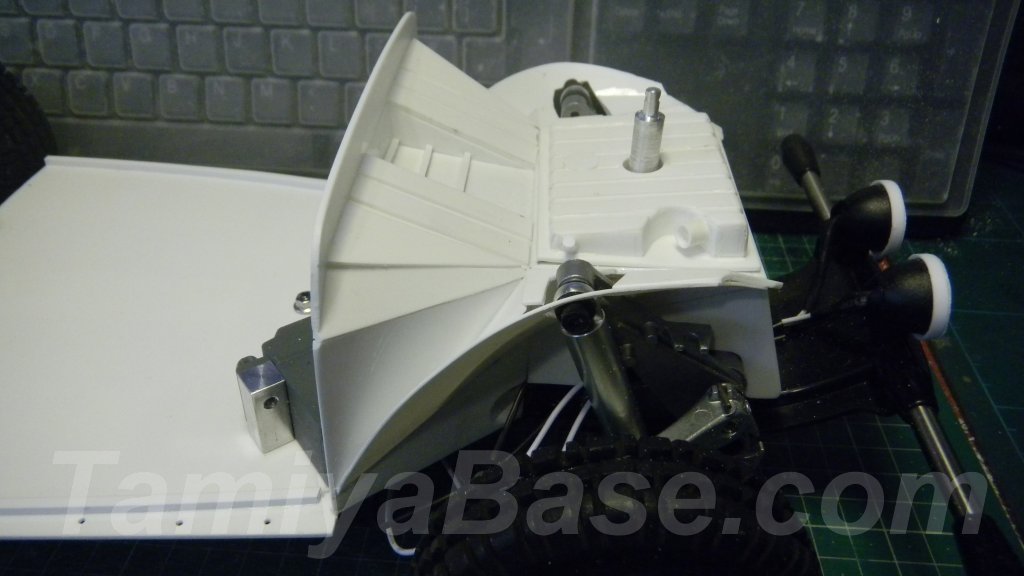
The full front-end underbody was then built up using many pieces of styrene sheet, constantly checking the fit against the body & SRB chassis. Many of the voids and joins were later filled and/or smoothed out with Milliput white epoxy putty.
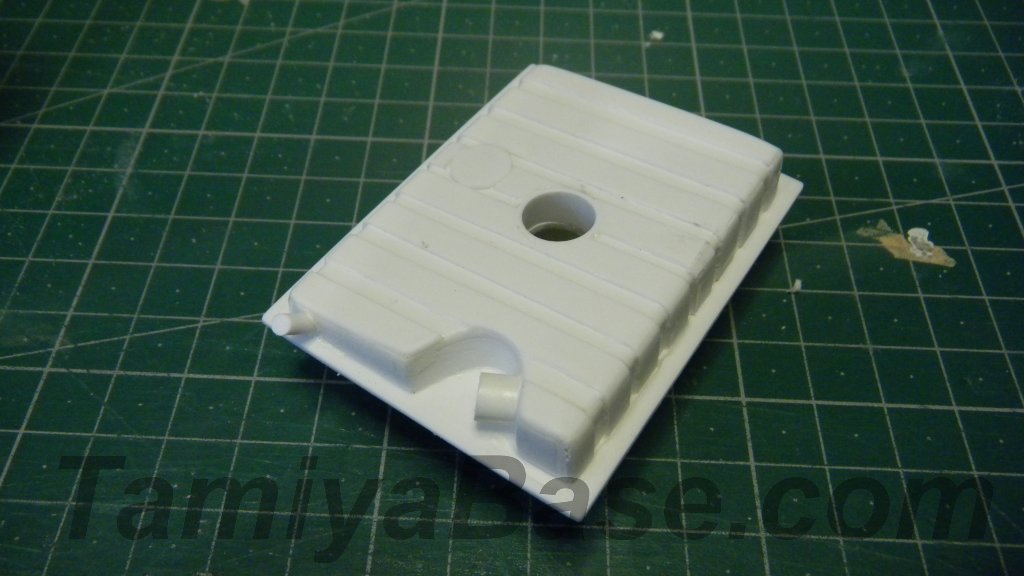
The fuel tank (complete with hole for the front body post) was made separately as I wanted to give it a cleaner paint finish later.
Door Frames & Cards
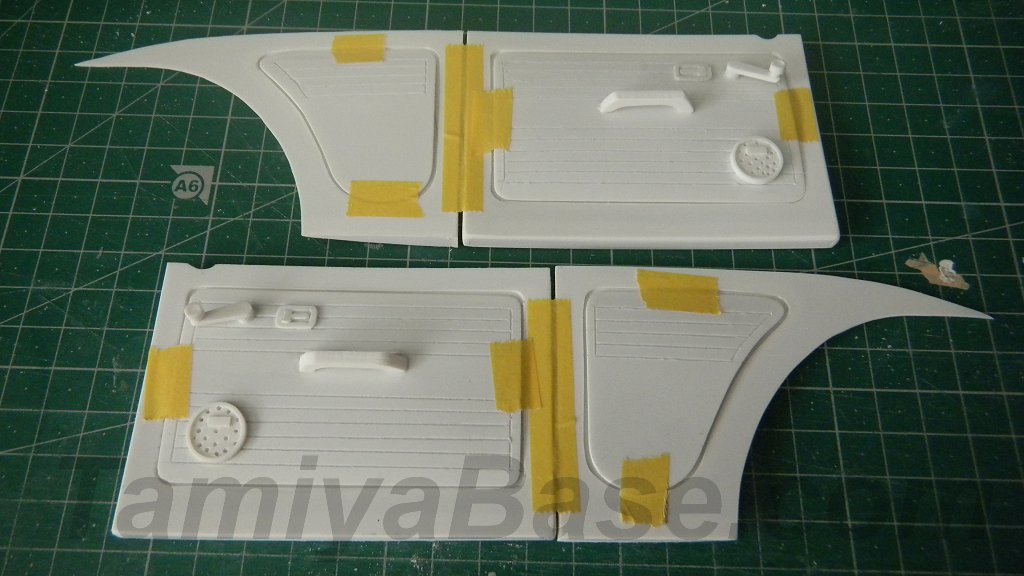
Using the “Scrap Scorcher” as a reference starting point, I made inner door/frame parts to fit the slightly different (especially at the rear) dimensions. Door cards were made separately & not glued at this point so they could be painted in difference colours while maintaining crisp edges.
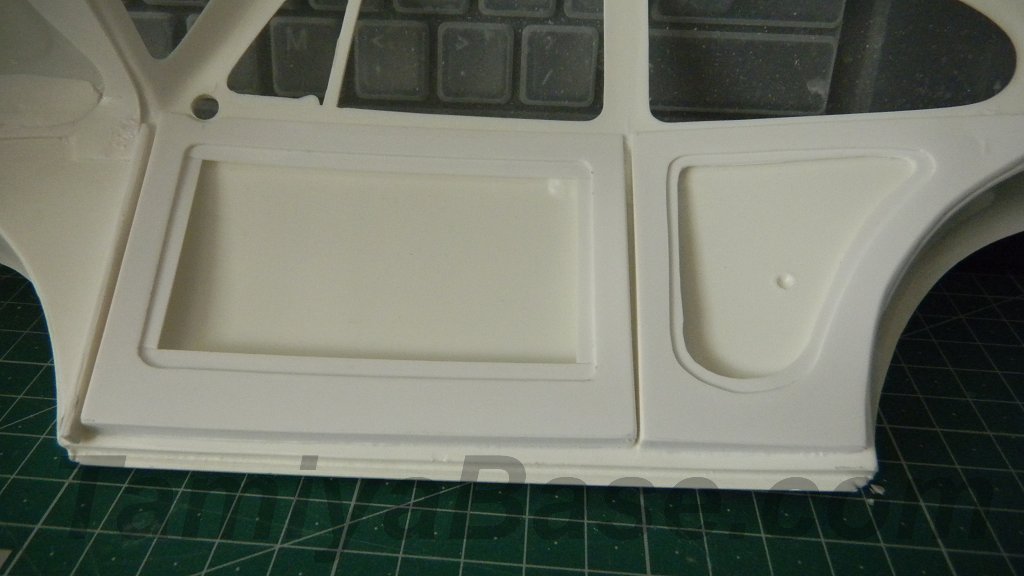
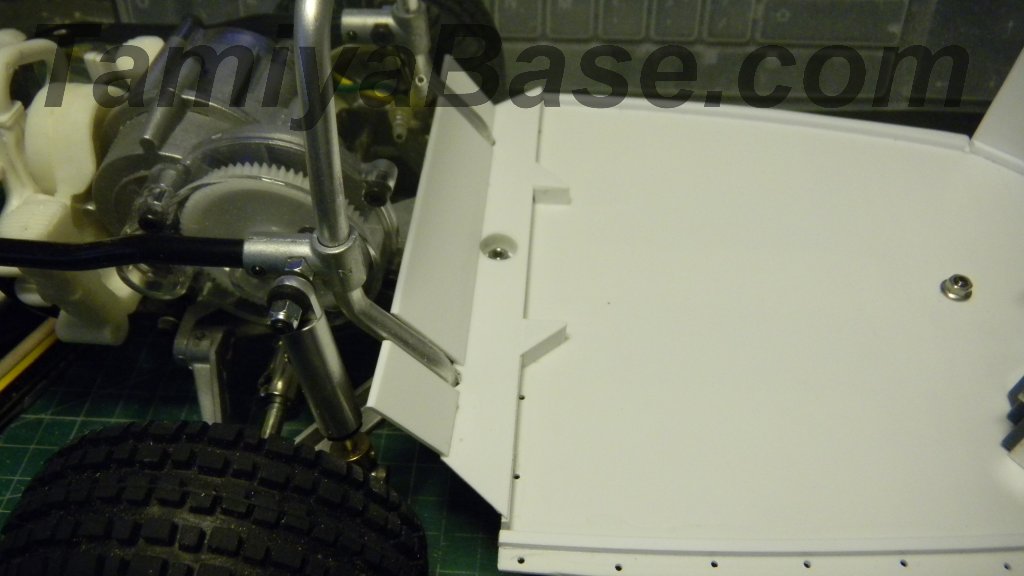
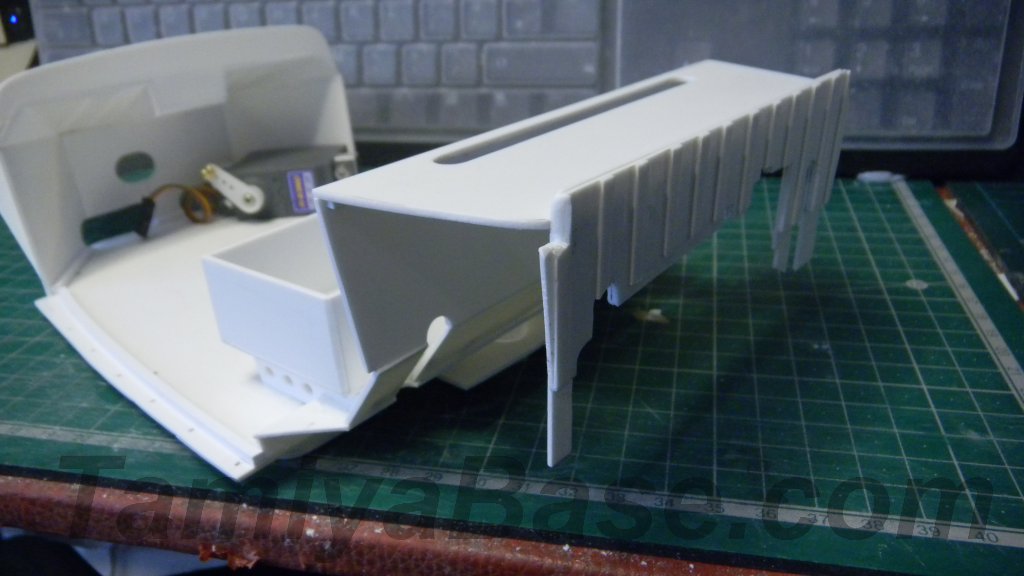
Rear End
The rear was more difficult because of the added complication of the non-scale motor/gearbox unit. From a quick bit of Cardboard Aided Design it was obvious that the rear bench seat would have to go much further forward than is “correct”, and there would have to be a (relatively) large flat parcel shelf where none exists on the 1:1 version.
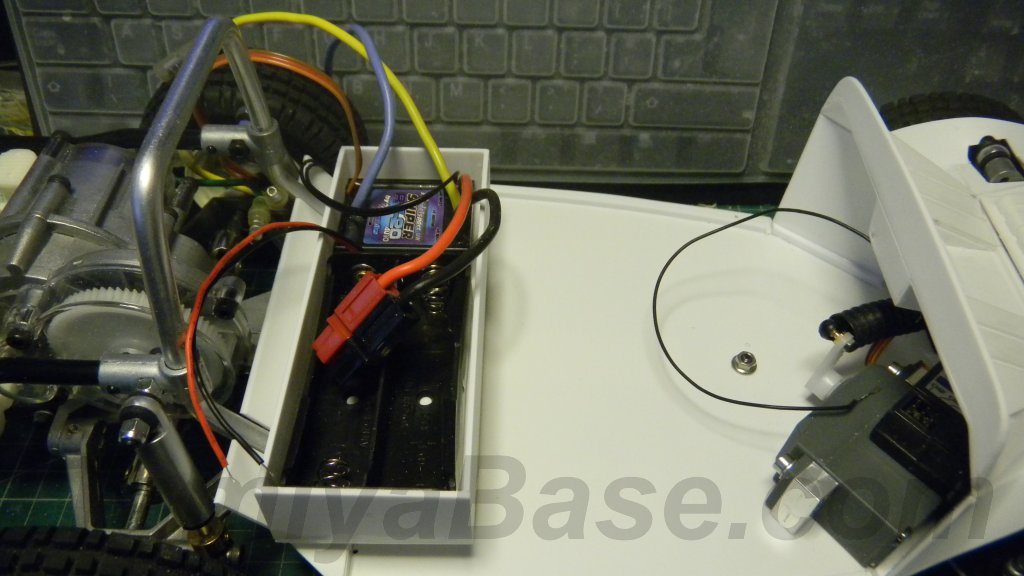
I started by adding the lowest parts of what “should” be there, then added an open topped box just big enough to contain a 2x 18650 cell holder & an ESC.
Further styrene sections were added to close the passenger compartment from the rear, the flat shelf mentioned earlier, and as much as possible of the what would be the rear firewall on a real Beetle.
More pieces were added to create the inner parts of the wheel wells, and the remaining gap between the firewall and the body was closed by adding yet more styrene pieces to the body, just under the rear window.
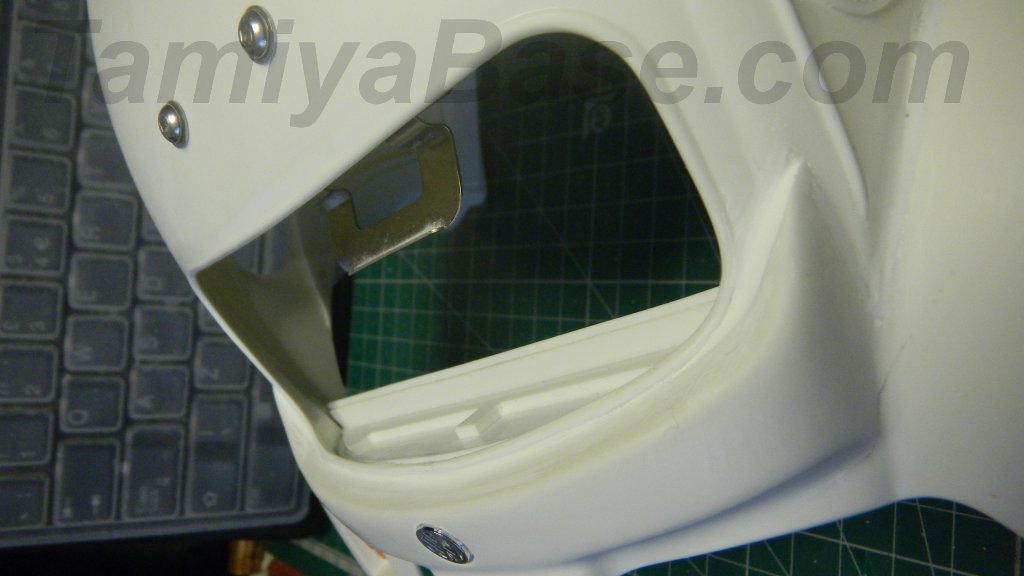
I later went back and added a recessed box for the SRB rubber switch boot and a screwed on blanking piece to hide most of the roll bar loop slot.
I also considered (and even started on) some fake speakers for the “shelf” but didn’t use them as I didn’t want to draw extra attention to an area that shouldn’t really be there.


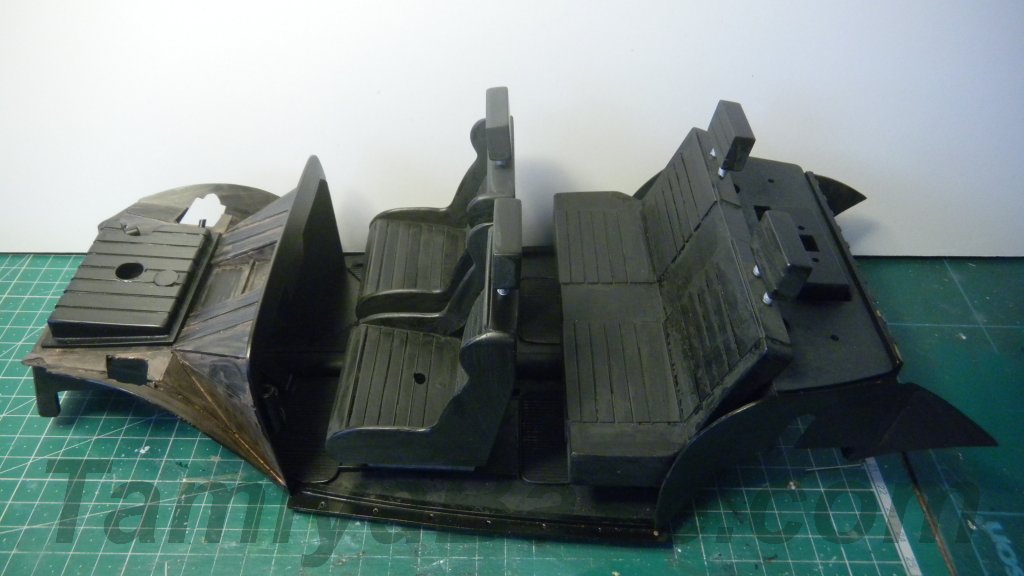
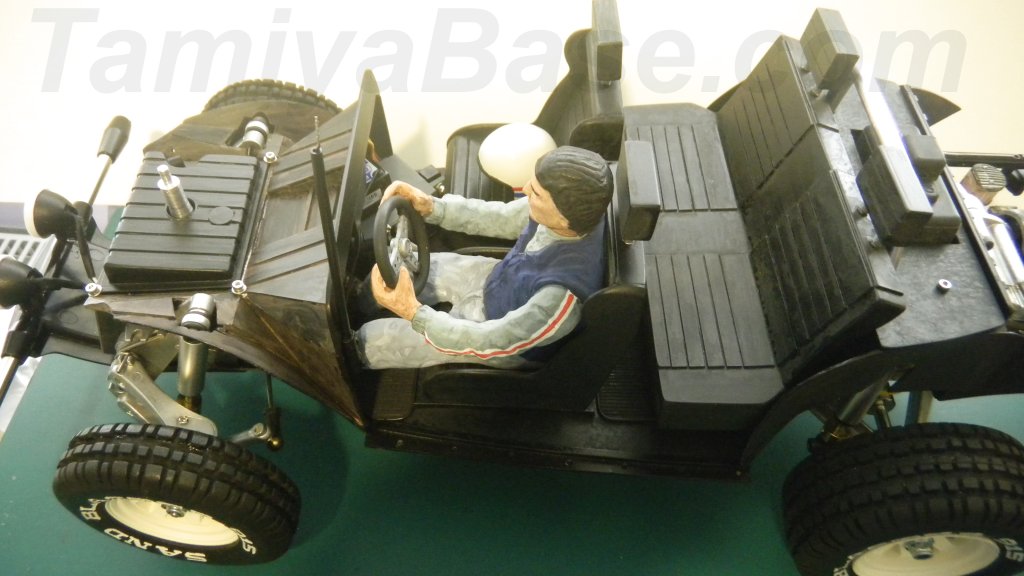
Seats
In some ways I would have liked to use a full figure Wild Willy, but although the body is not much bigger than other options, I think his feet would have been a problem in the limited space in the foot well. The size of his head would have meant having the driver seat pretty much on the floor and angling the seat right back to gain additional headroom. This really didn’t fit with the scale look I wanted.
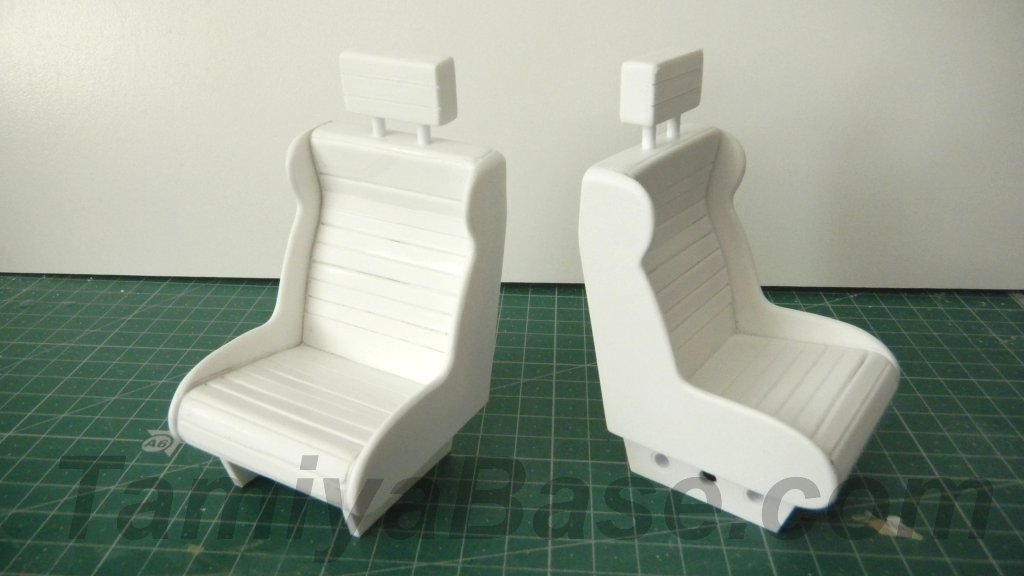
Having made the decision to use the 4x4 driver figure instead meant I could make a template for the form need to sit correctly, then make 4 sides, each joined in pairs by multiple strips of styrene. Having added backs and bases, I added secondary sides and head restraints to make them look a bit sportier, then added flat risers (with “speed” holes) to lift them from the floor.
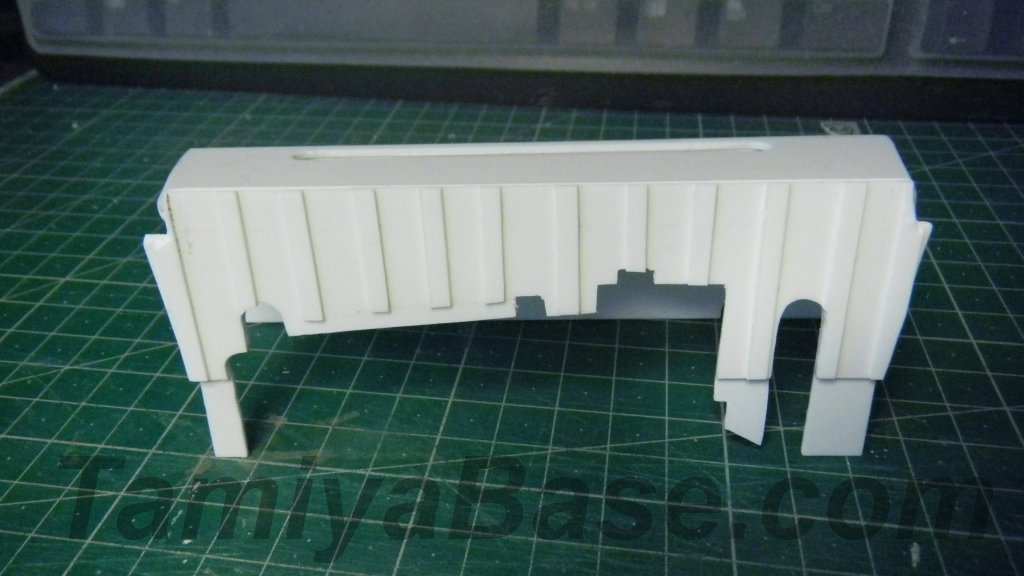
The rear bench seat started with a box section to fit over the battery/ESC holder with added sculpting on the sides, and a basic back section to fit the available space.
Detail strips and head restraints were added to match the front seats.

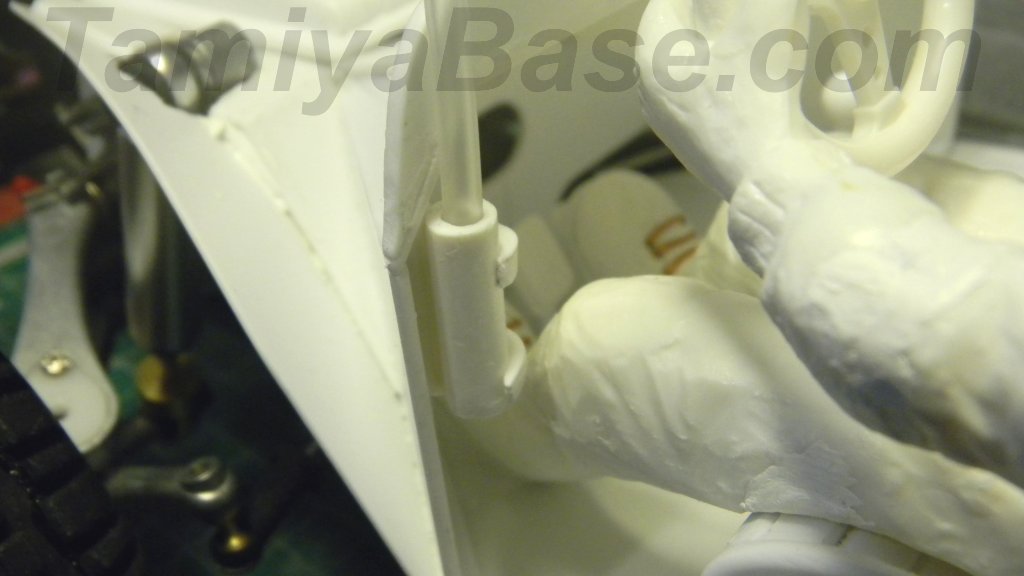
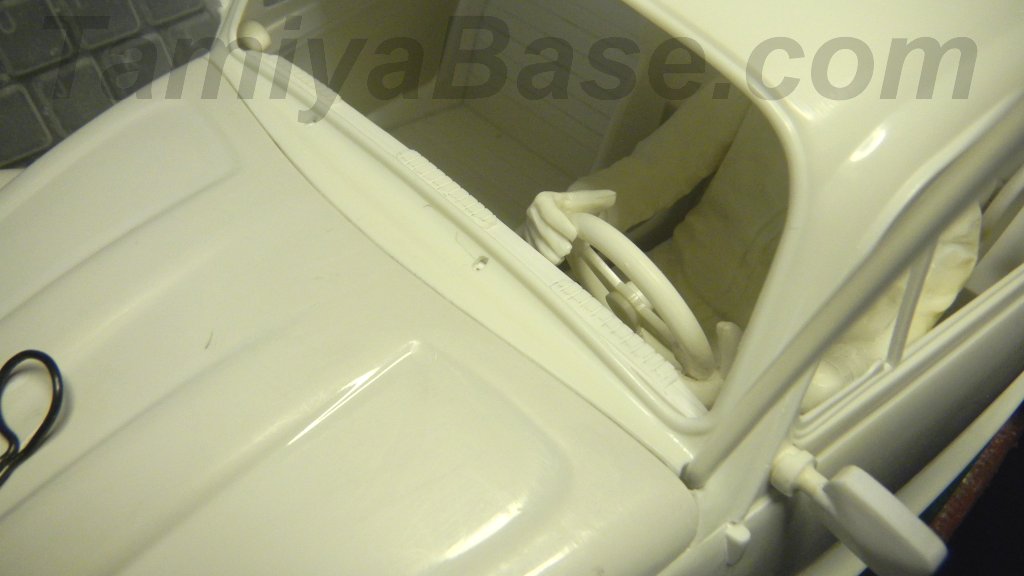
Driver
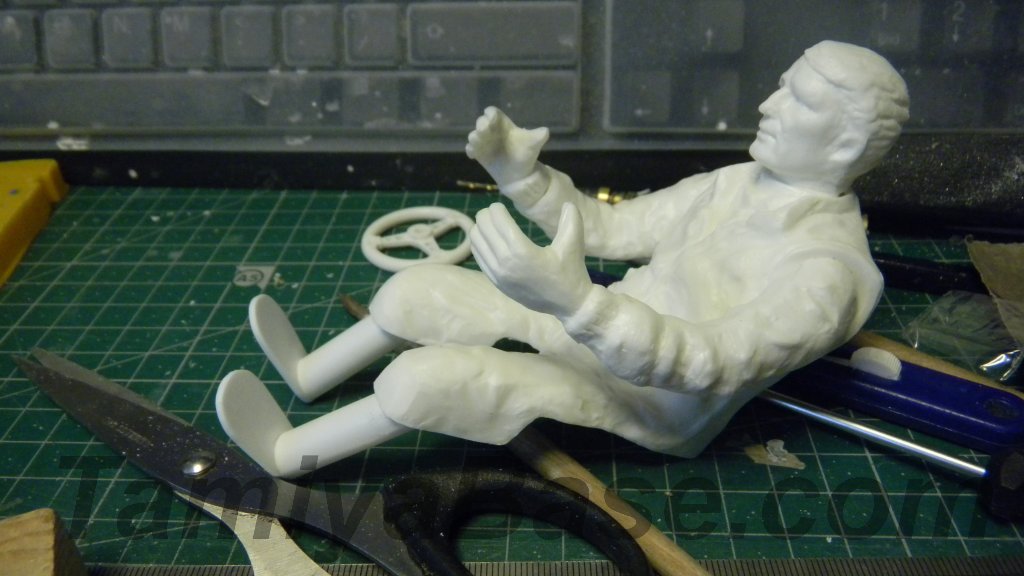
Using the 4x4 driver did cause some issues – for a start, the arms are positioned to suit a much larger steering wheel.
I wanted to use the smaller and sportier Willy’s Wheeler wheel, so cut out a section of the left arm to shorten it slightly and change the angle.
The more obvious problem was the lack of legs and feet. I made up for that by using sections of Evergreen tube and shoe sole shaped sheet styrene, then added more Milliput over the top. After final sanding added sole, heal and lace details. The result may be a bit bandy, short-legged and looking like he has his shoes on the wrong feet, but I’m no sculptor, and the pedal positions, footwell size, and seat position/height were all limiting factors. Once in position the modifications are passable.

Dashboard
This was worked from styrene sheet & forms & screws on from behind through a partial bulkhead bonded to the inside of the body.
A substantial section had to be removed from the bottom of the windscreen to make sure it could be non-destructively removed again if necessary.

Antenna
The Acoms 2.4GHz receiver has an antenna wire long enough that it makes sense to use an antenna tube to hold it upright.
The hole through the bodywork for the tube is in the “correct” place, but the fitting is anything but scale, having to be made strong enough to take more than the slightest touch.
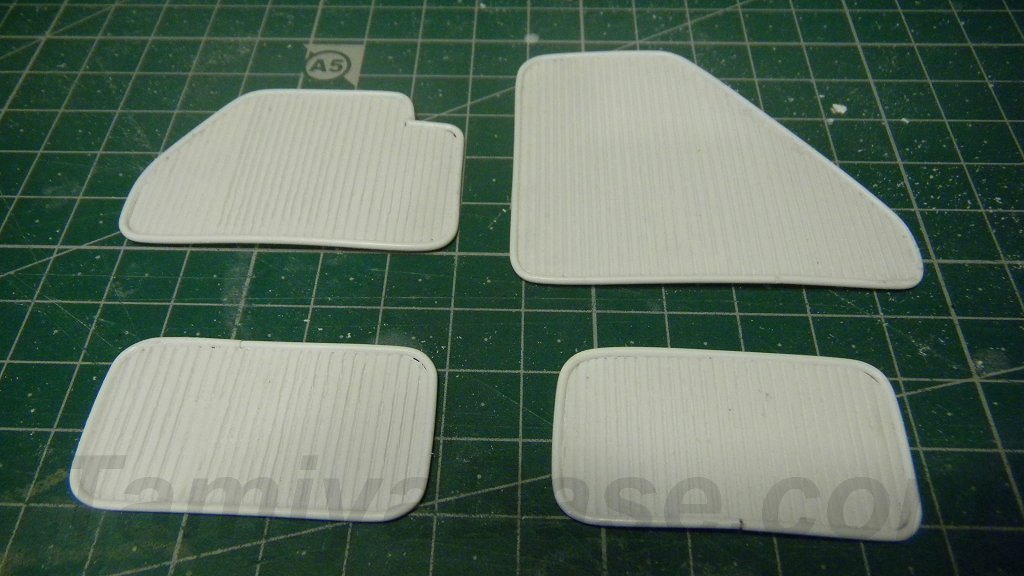
Floor Mats
These are thin pieces of styrene sheet scored with a Tamiya Scriber II and edged with thin round styrene rod. All except the passenger mat were bonded in place. The passenger mat was taped in to mark where material needed to be removed under the servo, cut to fit & then bonded in.
Phase 3 – Paint, Assembly, Electrics, Plinth
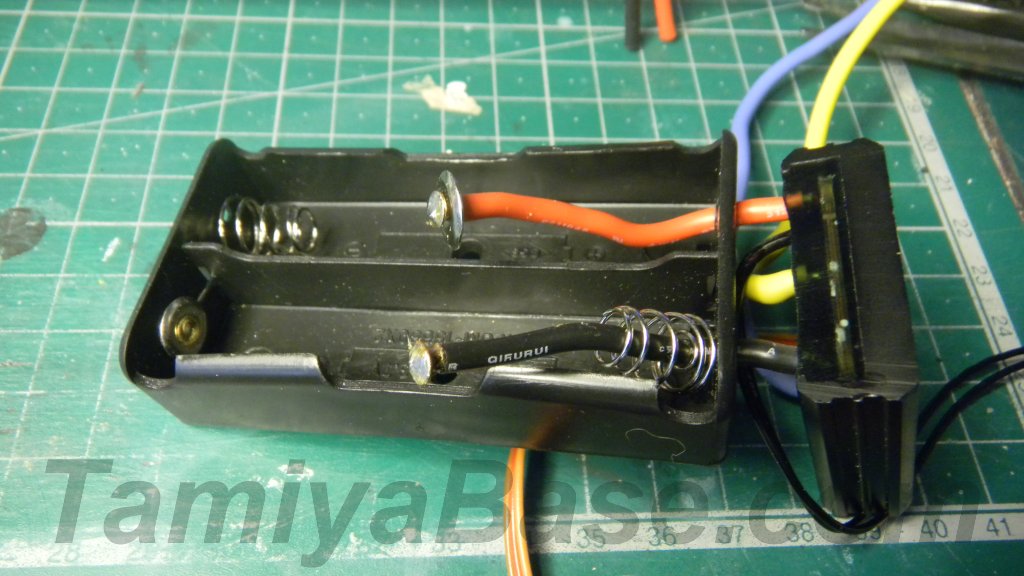
Electrics
A 2x 18650 size Li-ion (aka LiFe, or “Lithium Iron”) battery holder had the power leads removed & was directly coupled to an Mtroniks ESC to make enough room under the back seat. The ESC output & motor input wires were shortened, and new “Bullet” connectors soldered and crimped on.
Nb specifications vary for the 18650 battery (it’s a size/type rather than an absolute spec), two of them in series means a nominal 7.4v voltage (fully charged = 8.4v). The ones I used for testing were Samsung 25R units, which have a capacity of 2500mAH and a discharge rate of 20 Amps.
The RX sitting on the steering servo makes for a fairly tidy installation, the spotlight leads (which were shortened considerably) are mostly hidden, and the only visible lead from front to back is the ESC to RX lead (which needed a short plugin extension).
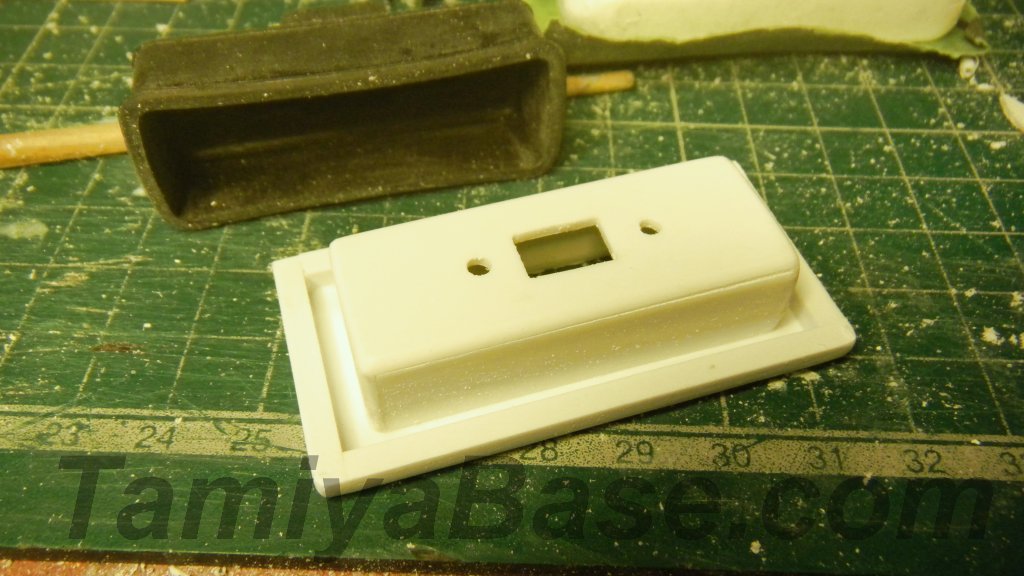
The ESC on/off switch was left unmodified and fits to the box fitted to the underside of the fictitious parcel shelf.
Paint
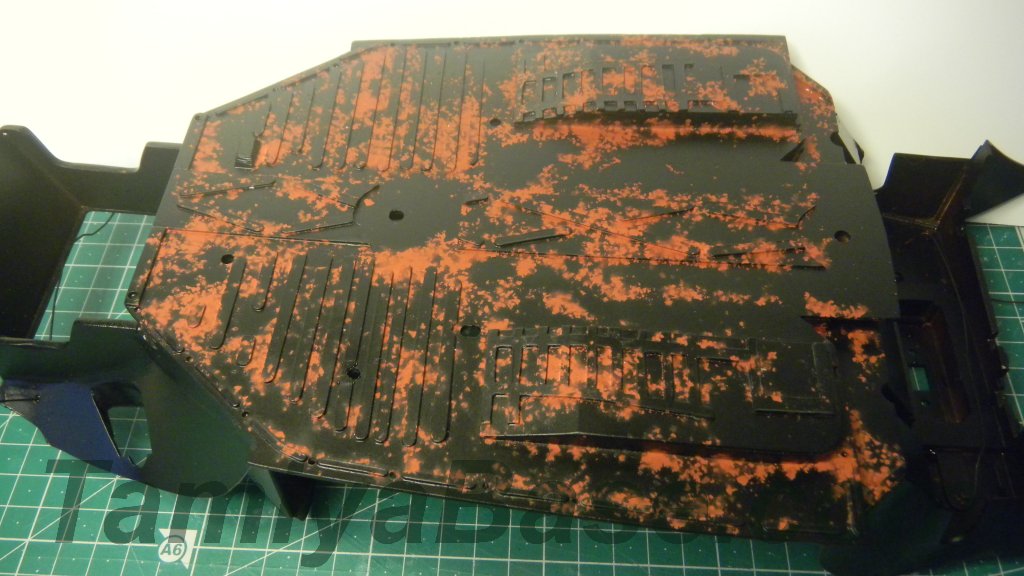
Underbody section
I hit this with red primer, then “salted” the underside before spraying it with black primer. Washing the salt off gave a start to a slightly rusted look, followed up with a light paint wash in Humbrol acrylic “Rust” brush paint.
The engine compartment and front storage are also got a wash in the same colour.
After painting the floor mats in “rubber black”, I attempted to stipple the rest of the floor in various colours to make it look more like carpet. I’m not really convinced it worked, and maybe I should have gone with my first thought – self-adhesive felt sheet – even though I couldn’t really get a “scale” look black.
The seats and door/trim panels were sprayed with satin black, then given a light wash in medium grey to highlight the details.
Engine & Exhaust
After grey primer this was sprayed with “aluminium coat” & given a light wash with black, as was the exhaust. Some engine details were brush painted, and the exhaust got a touch of dry brushing with the “rust” paint.

Exterior, Dash, Wheels, Helmet & Decals
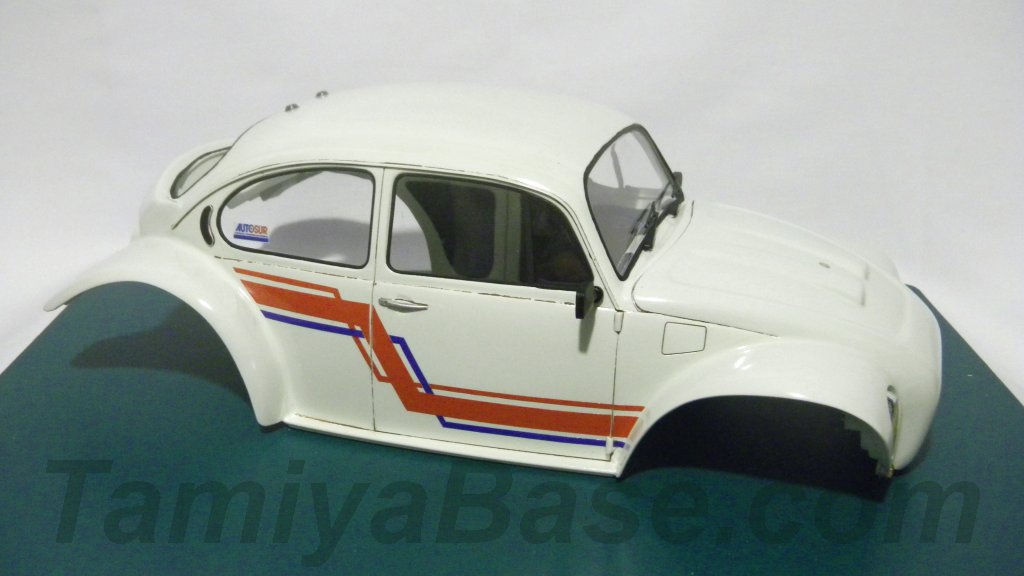
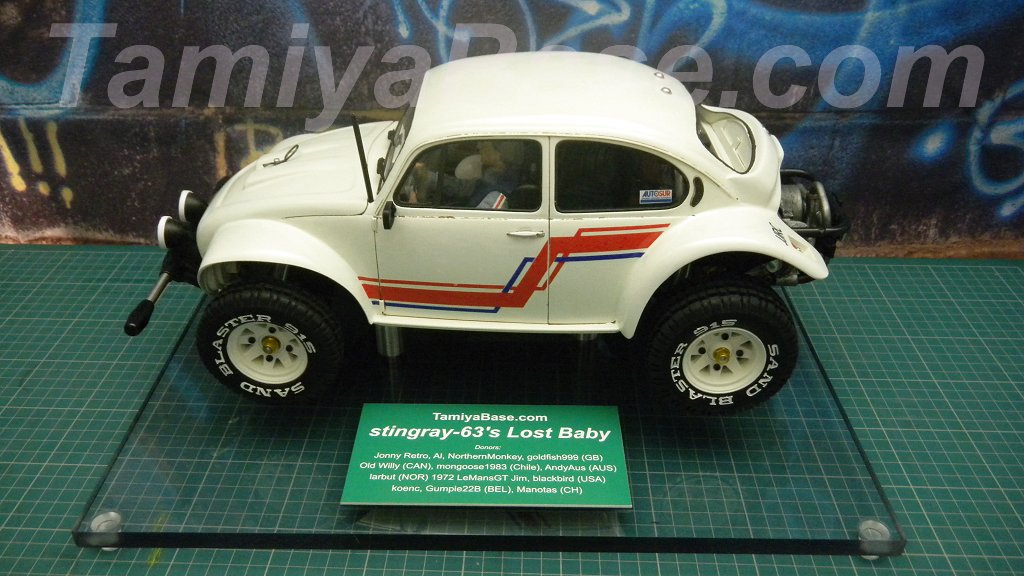
After priming in white, the body was rubbed down & any obvious flaws re-filled, and the process repeated. The paint is Hycote VW “Alpine White”, which I hope is close to the correct colour. It’s my default choice where “white” is called for on a hard body, as the slightly warmer, friendlier colour looks both more “scale” and “vintage” to me.
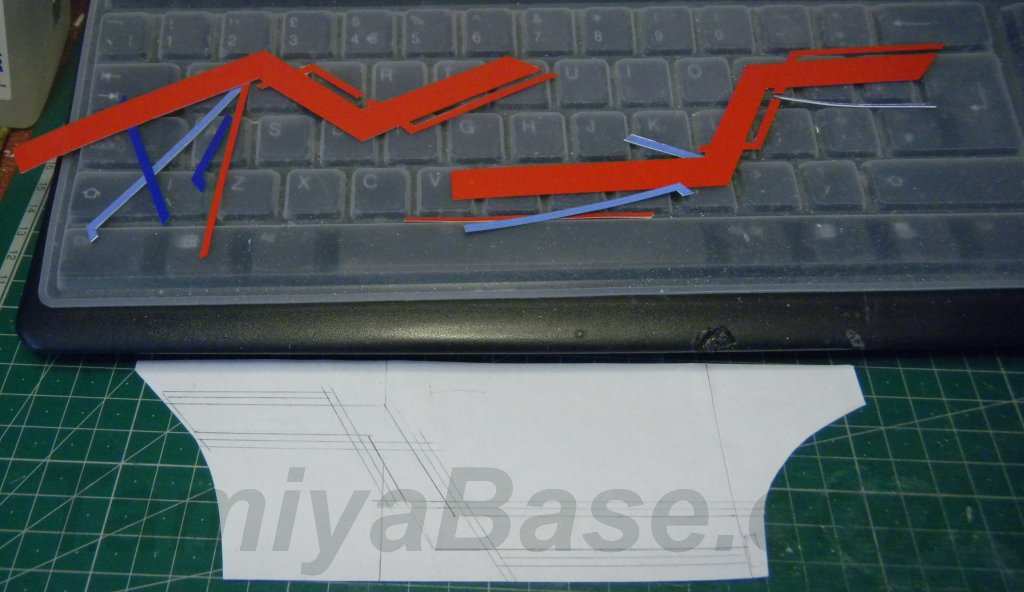
I made a thin card template of the side of the car & sketched out what I thought the graphics should look like. After scanning, I separated out the red & blue parts, made a mirror image for the other side, then printed the templates out so I could cut them out of self-adhesive vinyl sheets.
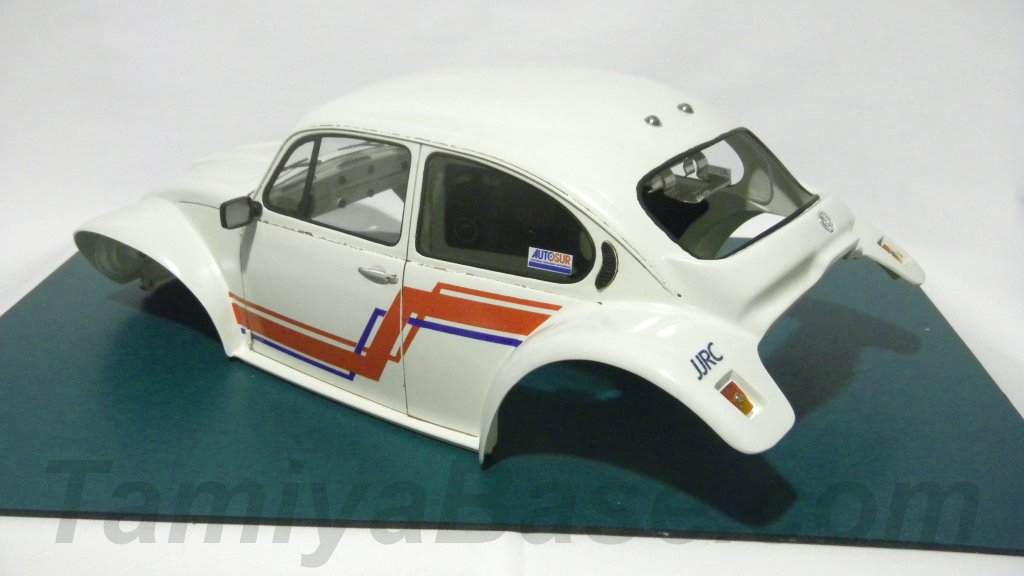
Initially I left out anything forward of the doors, but quickly realised the graphics really needed to continue over the whole side. I’d also planned to leave the paint as it came out of the can, but instead cleared over the paint and the vinyl.
This did bring out some surface scratches from sanding, and filler shrinkage that hadn’t been apparent before. My only excuse is it’s quite hard to see faults when the body is white, the filler is white, the primer is white, and so is the paint…
The window rubbers & other details were brushed on, and I used Tamiya Hull Red brush paint (thinned with water) to add some strategic dirt and highlight some of the details.
The dashboard got treated very much the same way, as did the helmet (made from the standard Scorcher driver item with the face Dremelled out & interior thickened with Milliput) and wheels. The tyre lettering was filled in with Tamiya PC-1 white polycarbonate brush paint with the aid of a fine cross point screwdriver.
There are also waterslide transfers on the car – these were drawn up in an elderly version of Paint Shop Pro, printed out on suitable white and clear transfer paper as appropriate, and cleared over. The “JJRC” at the rear was open to some interpretation: AndyAus had some compelling evidence that what’s on there is correct, but I still think the first “J” should have been a cobra. The “Autosur” cling (French vehicle roadworthiness test centres) should have been on the back window, but as the Scorcher doesn’t have one, I put one on each rear window.
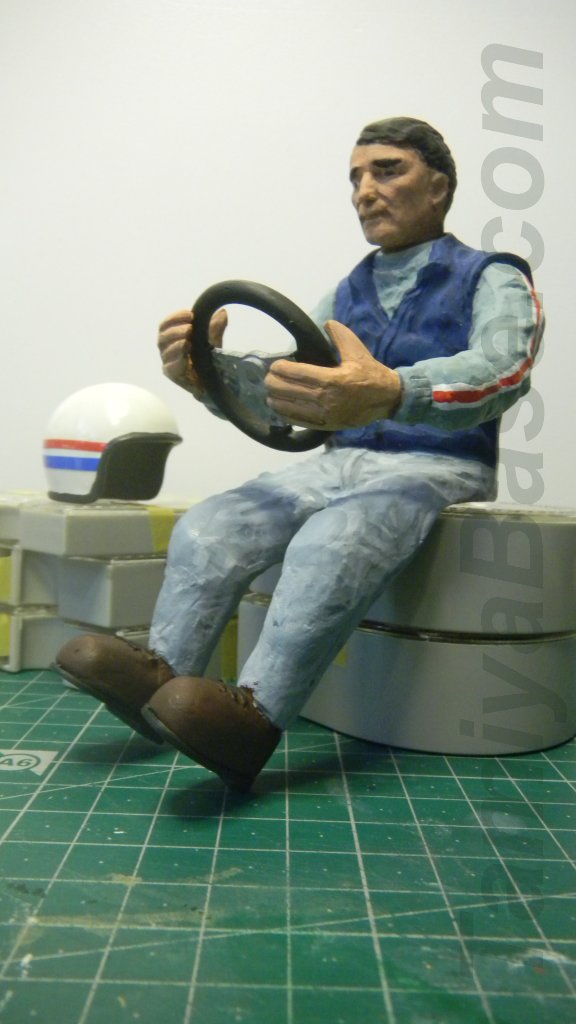
Driver
After primer, the driver got a blue gilet, faded blue jeans, brown boots and a light blue top. The red line on that was painted on, but the white lines are just the absence of paint. Everything (almost) got high- and low-lights, plus a wash of an appropriate colour to dial it back a little.
Plinth & Plaque
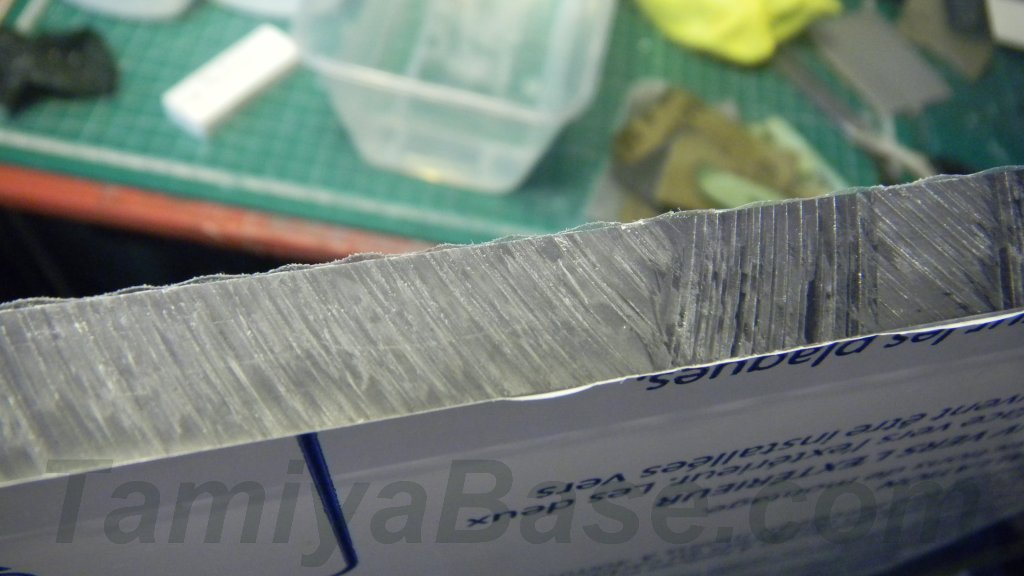
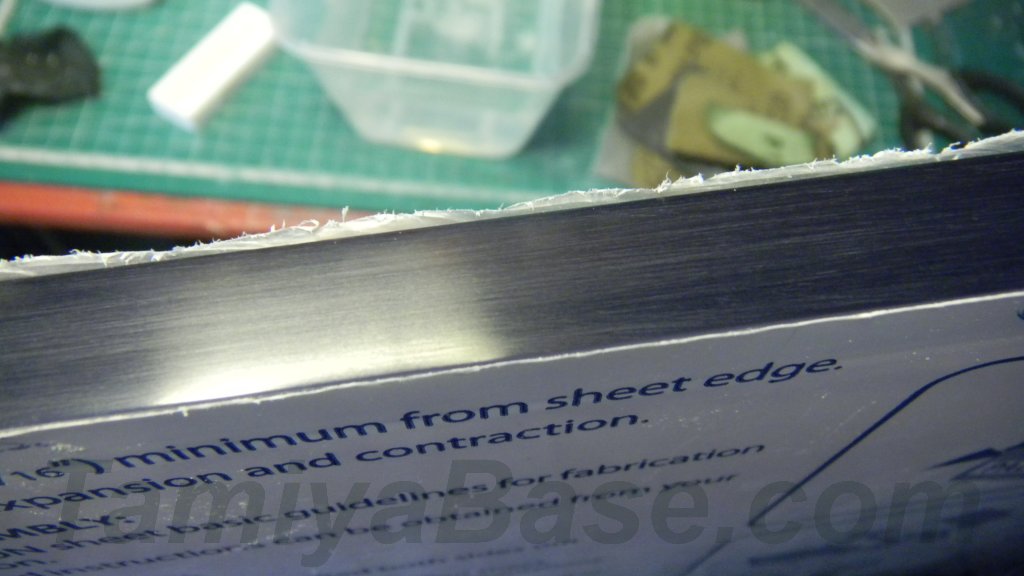
The plinth is an A3, 12mm thick sheet of clear polycarbonate. It arrived with very visible saw marks along all the edges, and damage on the corners. Extensive sanding & polishing was required, and to be honest it really could have done with a bit more work. Perhaps I should have gone with the wood plinth I originally thought of rather than trying to be clever?
Clear, self-adhesive rubber feet hold the plinth up, while turned aluminium standoffs have been tapped M5 both ends and hold the car to the plinth together via button head stainless screws and washers. The car was always intended as more or a presentation piece than a runner – just because it’s capable of running, doesn’t mean I want to encourage it. ;)
A plaque is theoretically a cheap and easy thing to buy, but I really wanted to specify exactly how it should look.
Even with those suppliers supposedly offering an online configurator you’re very much just entering text and hoping they use a suitable font, size and arrangement. The exception was Signomatic.co.uk, and a nicely engraved plaque arrived from them in less than a week. Complete with my two typos, unfortunately.
Assembly
This was quite straightforward, it just needed to be done in a specific order. The bare chassis had the aluminium risers fixed on & was fixed to the plinth. The steering servo was screwed in, then the driver was fixed to the driver seat, and the front seats were fixed to the underbody section.
This was then fixed down to the chassis via two M3 nuts, which were then hidden by the addition of the gearstick and the rear seat.
The “glass” was fitted to the body, then the mirrors. The dashboard was screwed down, and the door cards and rear trim panels were carefully superglued in.
Before painting, the fit of the body to the underbody/chassis was to very close tolerances, and there was a positive “clunk” as it seated correctly, and without any force.
With the addition of paint though, things are a little tighter than I’d really like, especially on the rear clip. I haven’t wanted to investigate at I think it’s ok for the shelf or careful running.
Final Thoughts
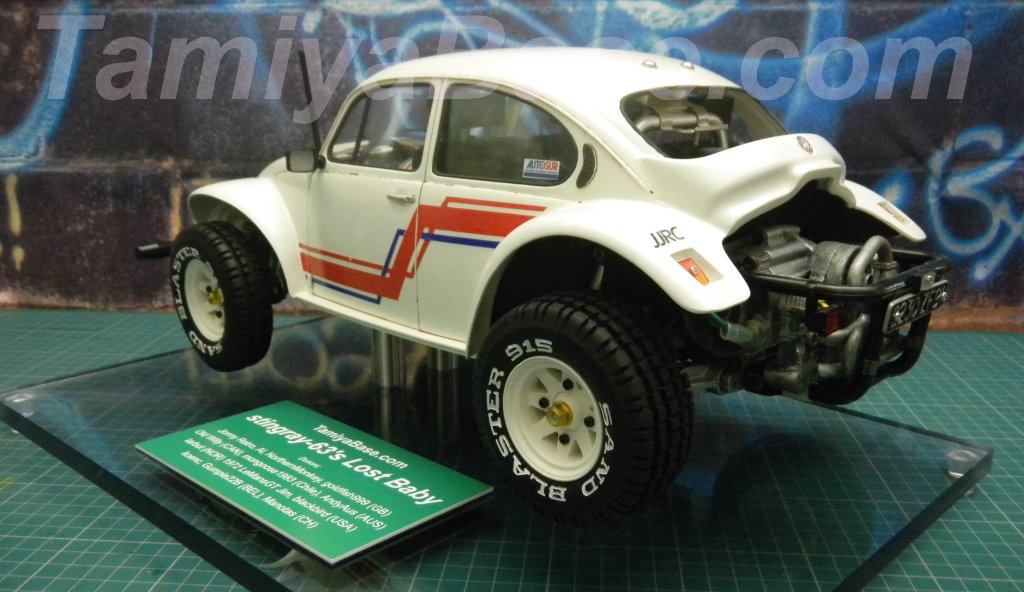
This the most involved Scorcher build I’ve been involved with, having both an underbody structure and a full interior – and with the constraint of being a (potential) runner. Build time (based on listening to my entire Hip Hop CD collection, followed by the full perm of Harry Potter audiobooks) was over 200 hours.
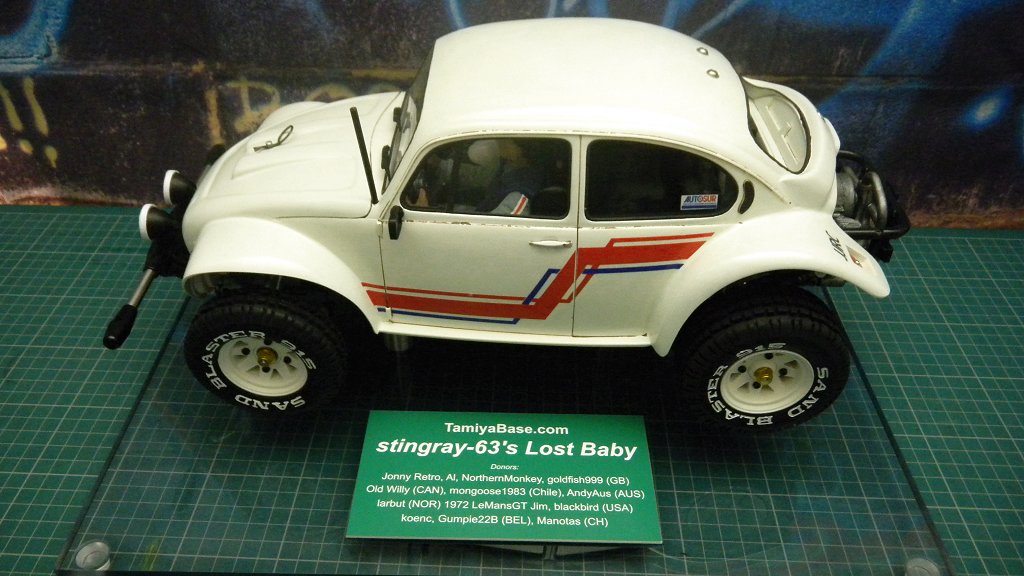
It’s not a perfect replica of the 1:1 prototype, but I think it hits the mark or being a reasonable 1:10 RC version.
A big thanks to Al, NorthernMonkey, goldfish999, 1972 LeMansGT Jim, blakbird, koenc, Gumpie22B, Manotas, Old Willy, mongoose1983, AndyAus, yogi-bear, and especially larbut for their donations, encouragement & support along the way.
________________________
Written by TB member Jonny Retro