Last time, I covered Overspray, Bloom/Matt looking finishes, Orange Peel, and Runs. Unfortunately, that’s not all that can go wrong.
Mottling (in metallic paints)
Caused by putting on too much paint it one hit and/or spraying too close – instead of laying flat, the metal particles have enough room to “float” & tend to move edge on, giving the affected area a different look. If this happens, allow adequate curing time & spray lighter coats from a greater distance – don’t aim to get a shiny look from metallic paints by themselves – just get a good even coverage, so any matt look can be covered & made shiny by clearcoating.
Foreign Bodies
Paint seems to have magnetic attraction for dust, hairs, pollen, insects & so on. Pollen collecting insects are _really_ interested in yellow, less in other brighter colours (white, orange, etc), but still seem to be interested in any paint – especially when it’s getting to the point of being shiny.
The only way to avoid this is to spray in a hermetically sealed environment with filtered air coming in, but unless that’s an option, all you can really do is minimise the problem – if you’re spraying indoors, keep the area well hovered, if doing it outdoors then avoid times of greatest particulates – early spring and late autumn often have high enough temperatures & lower enough humidity to paint, if you paint in the summer then early morning & evening are best.
If you’ve got something adhered to wet paint, the best thing to do is leave it alone until the paint it hardened off, when hopefully it can be rubbed or plucked off, any ridges very gently sanded off, and the area repainted.
Sanding Marks
Even if you do a “guide coat” (see later) after filling/sanding, these marks often don’t appear until you’ve got the colour coat on. Yet again, prevention is better than cure – so make sure you do go down through decreasingly fine grades of paper, even if it “looks fine” after 400 grit. If they do appear, the best thing to do is (after waiting for the paint to harden of course) some very gentle sanding to reduce the difference between the peaks & troughs, and respray.
Remelt
is where a subsequent coat of primer, colour or clearcoat melts preceding layers, adding to the risk of runs, or melting it enough that the two mix together – colour coat mixing with primer underneath to create a whiter/greyer/less glossy finish than expected, for example – although this can be hard to distinguish from bloom.
To a certain extent this is bound to happen – although there is an aspect of chemical curing going on, with each coat you are basically putting on more of the solvent that made the paint liquid in the first place. Inadequate drying time and/or putting on too heavy a coat of paint are the usual causes though.
Yet again the “fix” is going to be to leave it until any paint has properly hardened, give it a light sanding if appropriate, and repaint.
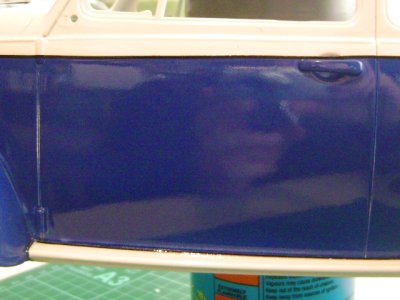
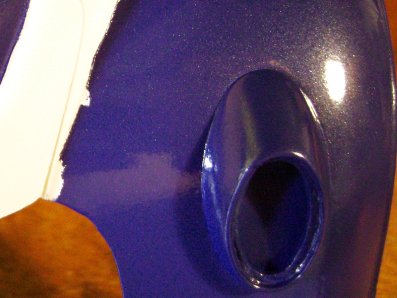
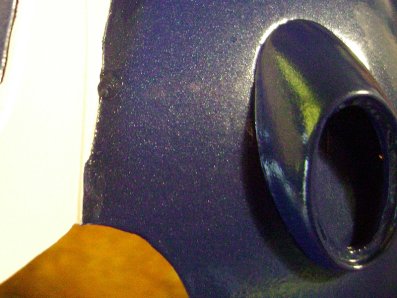
Having said all that, faulty or incorrect paint formulation can be a cause too. If you look at the start of the article you’ll see a couple of examples of remelt, in the first (blue) example, clearcoat has remelted & badly thinned the paint at the bottom of the door on my mk.1 Scorcher – in this case you could argue that two days wasn’t enough drying time before applying the clearcoat ...
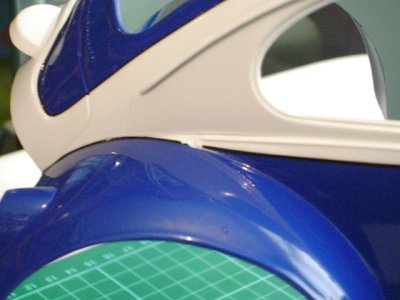
In the second (white) example though, the clearcoat was being sprayed over white paint that had gone on four weeks previously. In this case I have to blame the clearcoat – any formulation that won’t let you apply a “wet” final coat without melting the paint underneath has got to be wrong, so I won’t probably won’t be using that brand again – or will at least be a lot more cautious.
Wipe marks
should be something you don’t get – or only get once – these are caused by seeing an insect or other crud land on your wet paint, or seeing a run – and attempting to fix it by wiping it off with a rag or a finger – which of course only makes it worse.
Chances are you would have wiped off a much bigger area than you needed to, probably smearing lightly melted primer with it, and maybe even the plastic underneath.
Paint reactions
are a nasty business – sometimes it happens right in front of your eyes, other times you’ll think you’ve done a fine paintjob only to see it later in a disastrous state ... Bubbling, peeling & cracking are typical symptoms.
Incompatible paints are the usual cause – even ones that should theoretically be ok can sometimes do this (e.g. acrylic paints from different manufactures, especially if not enough drying time has been allowed for at some point).
The only real fix is to strip back to bare plastic so you can be 100% sure that everything has gone, and start again – preferably with a set of more compatible paints.
Note that such reactions should not be confused with issues arising from contamination. For example:
Pin holes can be caused by a tiny hole/porosity in your filler, but more usually it’s chemical contamination of the surface – often by silicone, or mould release agent stopping the paint from adhering. The best “fix” is to not get pin holes in the first place to do a better job of filling, clean the shell properly in the first place, and/or not let the shell get contaminated. Once it has happened _don’t_ try to rectify it by spraying on more paint – leave it to harden fully, clean the affected area very thoroughly with something that won’t damage the paint, give it a light tickle with wet & dry, and fill before repainting.
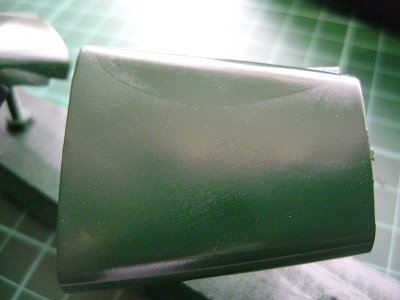
Take a look at the crazing, crystallising and inexplicable “border” on the 1/24 Caterham bonnet – I put this down to surface contamination caused by not washing the part prior to spraying – so 100% my fault. Stripping & starting again are required – due to remelt, merely spraying over it will _not_ fix it.
Bleed
A little colour getting under the tape & marring the paint underneath seems to be any inevitable adjunct of masking – but there are things you can do to reduce it. Using good quality tape is the biggest, but also making sure it’s stuck down firmly & using light coats of paint also help.
Theoretically, spraying the same colour paint as you’ve just masked over will give better results than putting on the second colour straight away – the idea is that if the paint is going to bleed anyway, it’s better to use the same colour first, so the bleeding is the same colour as the paint it’s on – this will then seal any gaps, so when you put on the second colour, there won’t be any bleed.
For example, if you’re spraying a Sand Scorcher in box art blue & white, you’d spray the white, mask, spray white again, then move on to the blue before unmasking.
I have tried this & it really didn’t work for me, perhaps I just need to persevere.
Chips, or tape lift
– i.e. a tiny area of damage limited to the colour coat only, caused by impact, or by masking tape damaging an edge when you remove it. Respraying a large area (probably up to the nearest panel line) is an option – but you have to weigh up the benefit against the possibility of it happening again – or something worse happening.
I’d always rather try the minimum approach first – so in this case I’d suggest cleaning your finest brush & a suitable receptacle (like the cap off the rattle can), spraying in a bit of paint, then dabbing it on to the affected area.
For an example, look at the Scorcher rear fender (above) - that is tape lift – before & after applying the paint.
It still doesn’t look that great, but the remaining wobbliness of the line will get covered up with line tape later on, and by the time the body has been clearcoated, that “repair” should be pretty much invisible.
________________________
Written by TB member Jonny Retro


