Keyword

TOPIC:

Carbon fibre racer in minature, scratch build! 11 years 2 months ago #18291

you should make a youtube video of the car in action!

Please Log in to join the conversation.

Carbon fibre racer in minature, scratch build! 11 years 2 months ago #18332

I would, but have no clue how to!

Please Log in to join the conversation.

Carbon fibre racer in minature, scratch build! 11 years 2 months ago #18351

film it, log in to youtube and click upload then follow the steps
please try, or email me a vid and ill upload it :lol: :y:

Please Log in to join the conversation.

Carbon fibre racer in minature, scratch build! 11 years 2 months ago #18397

Plan is to take it to work tomorrow & give it a proper run, so I'll have an ask about to see if anyone's got a half-decent cam there - I don't possess anything worthy of making good enough vids

Please Log in to join the conversation.

Carbon fibre racer in minature, scratch build! 11 years 2 months ago #18400

A bit ahead of myself there...
Ok, more pics (Historical now!)
Body with 2x coats of paint, awaiting laquer


Missed out some steps with the excitement, put it all together tonight & TADA!


& a pic of it sat next to my TL01, to give a better feel for it's size

Attachments:

Please Log in to join the conversation.

Carbon fibre racer in minature, scratch build! 11 years 2 months ago #18488

If you have a iphone or any decent smart phone. they all have 720p or 1080p hd video recording nowadays. I think iphone even have feature to send directly to youtube. Or u can just upload the video on this site

Please Log in to join the conversation.

Carbon fibre racer in minature, scratch build! 11 years 2 months ago #18490

If you have a iphone or any decent smart phone. they all have 720p or 1080p hd video recording nowadays. I think iphone even have feature to send directly to youtube. Or u can just upload the video on this site


Not much chance of that ;)


Attachments:

Please Log in to join the conversation.

Carbon fibre racer in minature, scratch build! 11 years 2 months ago #18505

That's posh Jonny, I might have to upgrade...

Discovered there's a video cam on my iPod, no idea what it's like though, & knowing Apple I'll need some special software (That will fry my PC) to play the vids, & probably have to pay through the nose for it! i-(don't work)-phone...

Played toy car in the office at lunchtime today. I'm really going to have to do something about the motor, it's waaay too fast. Even with no more than 1/4 beans the office was too small & you've already crashed before you think it might be time to throttle back! ESC brakes are hopeless too. It's no fun at all!

I've had a hunt around tonight for a FK-180SH-14180, which should tame it a bit if I can just find one to buy. Seems they're used in rotary tattoo guns, but around here they just use rusty nails & broken glass for doing skin-pictures, so I'm unlikely to find one nearby

Please Log in to join the conversation.

Carbon fibre racer in minature, scratch build! 11 years 2 months ago #18506

The 3240 version is what's in it at the mo. As you might be able to see, the numbers don't really add up - it looks like it's designed for running huge current at low volts to get the torque, eg turning heli blades using a Lipo, which is exactly where it came from.
I had it apart & the windings are 0.6dia wire, with only 1ohm resistance for the whole stack.

I'm planning on fitting the 14180 version, it appears a lot more calm


Attachments:

Please Log in to join the conversation.

Carbon fibre racer in minature, scratch build! 11 years 1 month ago #19277

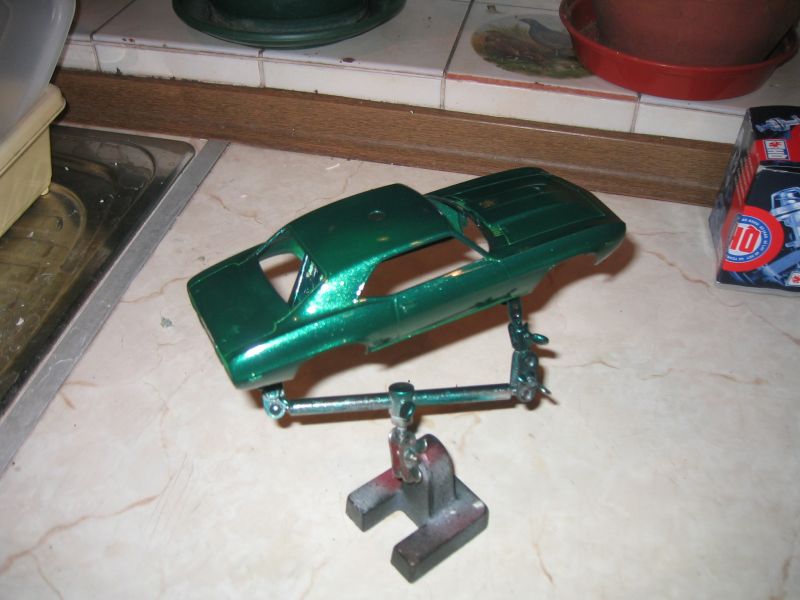
A quick recap then on to some modding to sort this out to make it more useable...

After finishing it, I'd given it a test run in the office at work - in summary it was totally bonkers & uncontrollable! Too fast to be fun, any more than 1/4 throttle on the carpet just produced manic wheelspin & spin-outs.
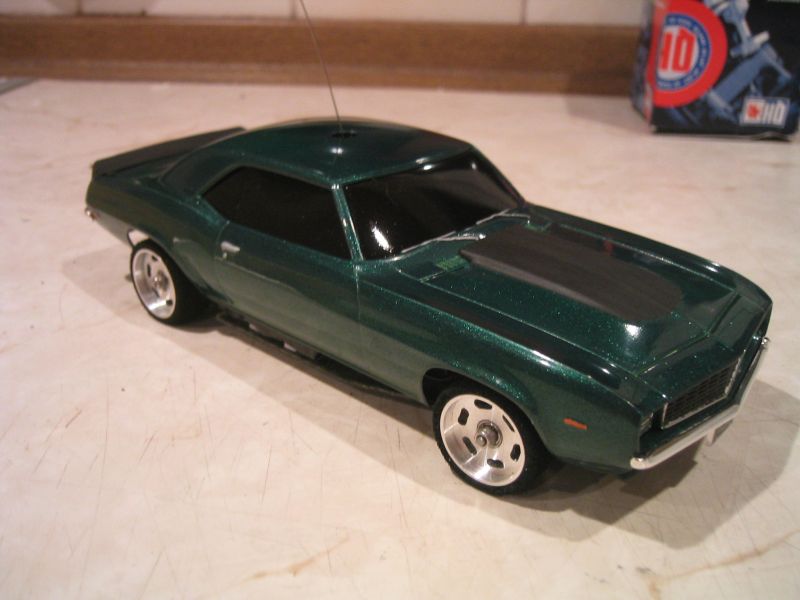
Couldn't get a decent video of it, no-one was quick enough to be able to track it, & to be honest, you didn't really know which way it was going to head once it went tearing off!

Timing it from a standing start, it was doing 10m in roughly 3 seconds, if you could keep it in a straight line... The beast needs taming!

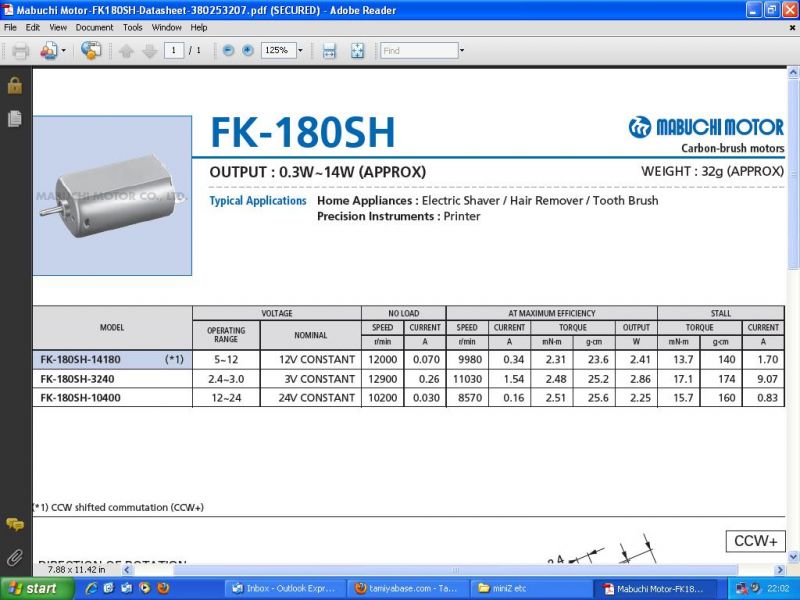
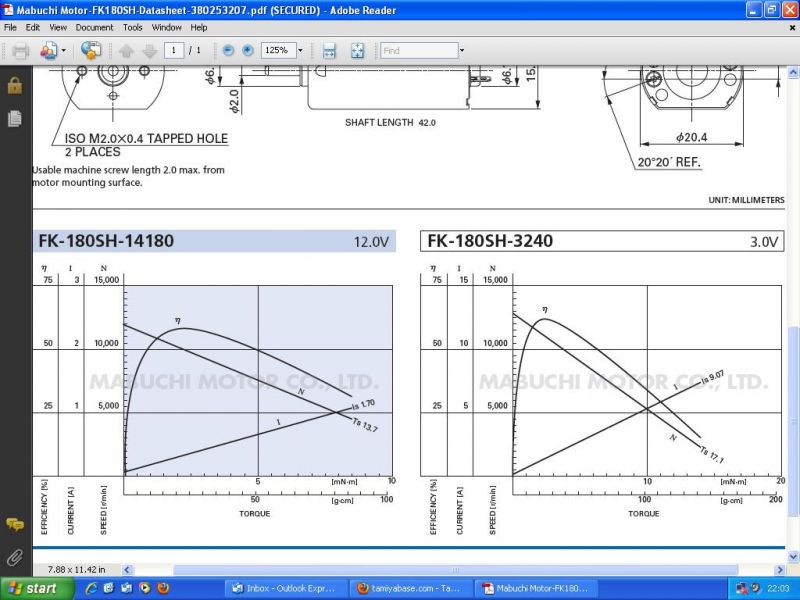
So, I went looking for the 14180 (12V) version of the motor. Couldn't get one for love nor money. Started looking at slot car motors, but further investigation revealed that they are in fact physically smaller (Mounting holes would never line up) & the brush gear too weedy for the higher current a rechargeable battery can supply.

Only other option - get an identical (Cheap) motor to the one that's in it, & rewind it.
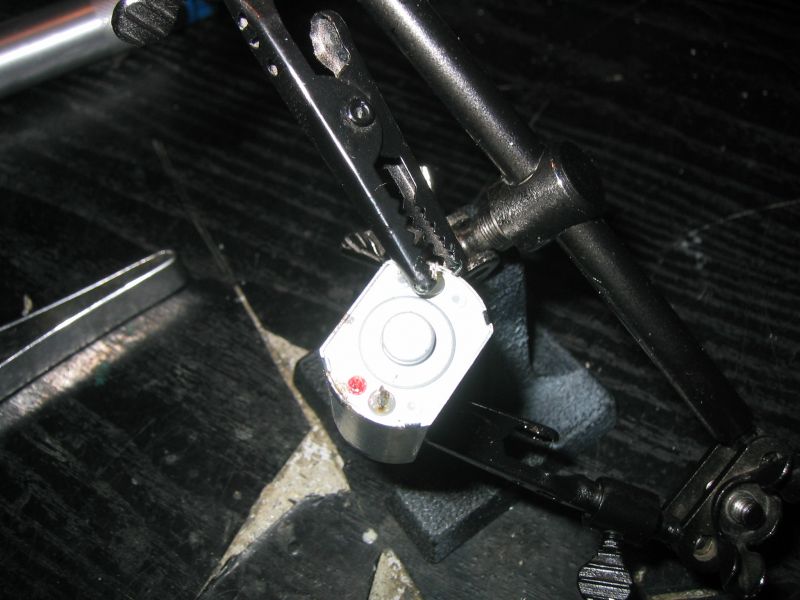
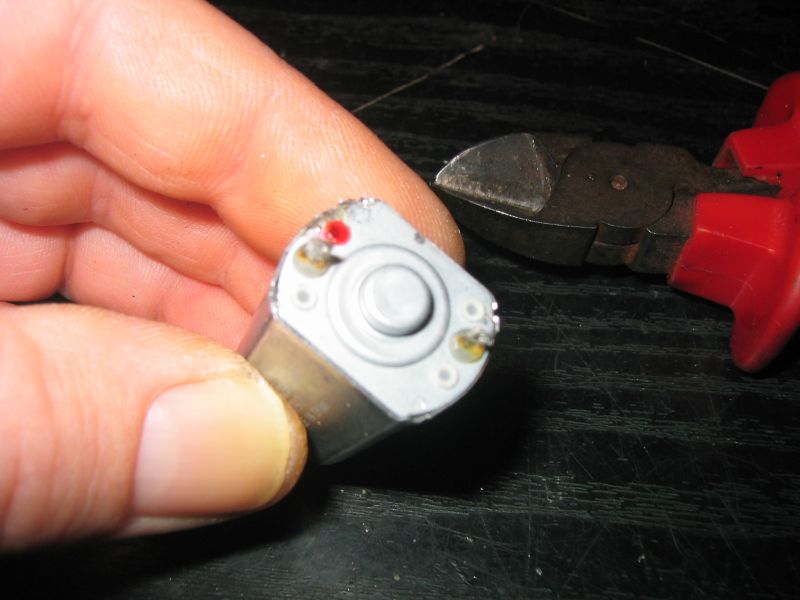
So that's what I did. 1st pic is the new donor 3240 heli motor pre-vandalism


1st job then (After getting it out of the packet), remove all the wire & doins to get it out of the way


Next, pinion has to come off or I won't be able to get the rest of it apart.
This was done with a mini blowtorch & a knife to lever it off. Trick is lots of heat & do the job quickly, so the heat doesn't get a chance to track down the spindle & melt any plastic spacers etc inside.


Next, the crimps holding the endbell on have to be uncrimped. On this type I use sidecutter to lever the crimps clear, on plastic endbells I use a suitably sized screwdriver to lever the tabs back


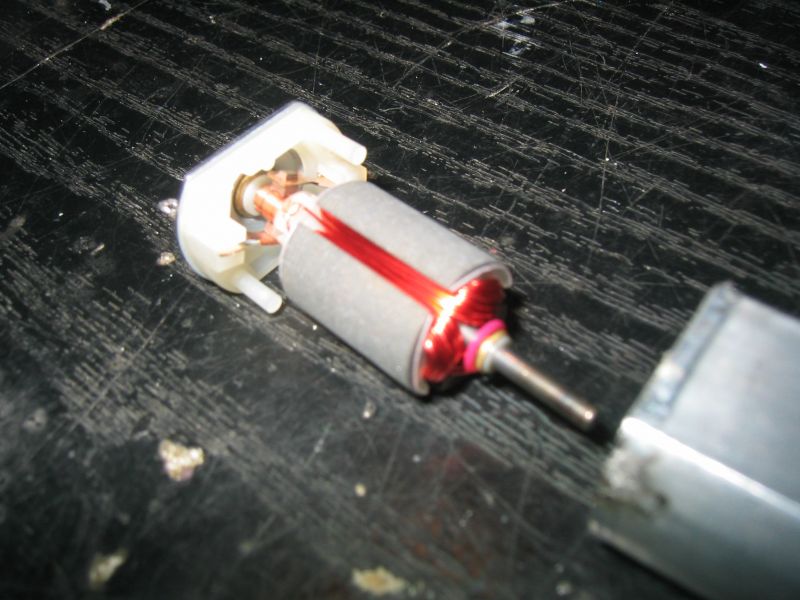
A quick check to make sure nothing else is holding the endbell in, then rest the spindle on the bench & pull the can down - this should pop the back off with the brushes still on the comm, so they don't get bent/damaged


Note the hefty wire & oversize brush gear for such a tiddly motor. Interestingly, this motor has finer windings & smaller brushes than its identical brother in the car.

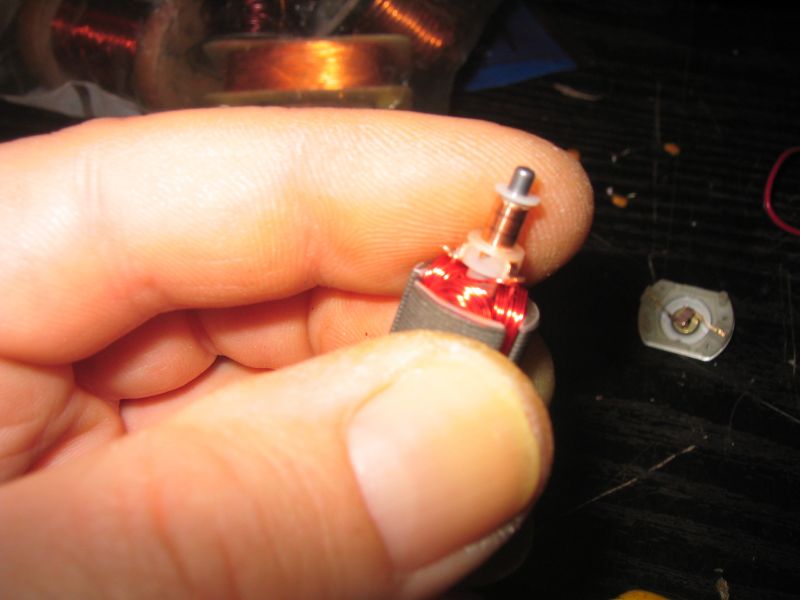
Next, the windings have to be released/disconnected from the comm. Normally these connections are just crimped tabs, requiring only some gentle leverage with a Stanley knife blade to open them up, but sometimes they're also soldered, which can be a bit more tricky


Important bit next - BEFORE pulling the windings apart, make a sketch of exactly which way the coils are wound, & to which segments of the comm they are attached (I've also noted endbell orientation, for ease of reassembly).
It's often easier to cut the winding at the comm-tab & remove the bits afterwards, rather than trying to release the winding from the tab, especially if the motor's a tiny one like this.
Count the number of turns of wire & note for reference (So you know if you're putting more or less on than what came off).
This motor had 40 turns per pole of 0.3mm diameter wire.
Plan is to use 0.2mm wire & put as many turns on as I can - to slow it down I'm aiming for more turns & more resistance, so revs will be less & it will require less current to run.

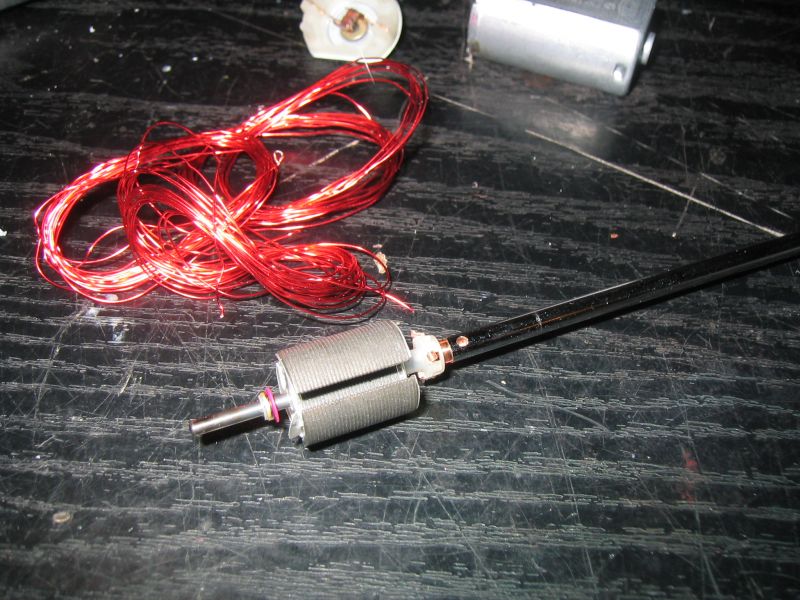
So, one bare rotor & a bird's nest. A quick check to make sure there's no sharp edges that could damage the new windings & we're ready for some new wire

Please Log in to join the conversation.

Moderators: caprinutstingray-63AndyAus
Time to create page: 0.296 seconds
Cookies are required to make this site work. If you continue to use this site you permit us to use cookies.