Keyword

TOPIC:

TLT based old school crawler/scaler build - Icelandic Pajero. 3 years 6 months ago #61976

I'm not feeling to well today so I only lasted a short while in the hobby room.

But I did started to collect rod ends from my links pile, and I got plenty of links!
As links is my next step I wanted to see if I had enough ball ends before I buy any.


Handy tip if you need to assembly ball ends.
Hold the pliers like this over the pivot ball and the plastic bit, and then just press the plastic bit downwards, the pivot ball should snap into place.


Sorted the ball ends into piles


Then removed the bad ones and kept the useable ones and fitted some spare pivot balls.
From left:
Traxxas #1942 ball ends which is my favorite when it comes to ball ends for 3mm links. The round handle ones is usually fitted to shock ends.
Row 4 and 5 is Traxxas #5347 for Revo. These is for 4mm links, but still 3mm hole for the bolt.
These are my favorite ones when they need to stay strong.
Row 6 is Axial bent rod ends which is used for links that needs to fitted to an angle, from chassis side and inwards or outwards.
Row 7 is Axial bent rod ends for steering linkage, these moves the links out from the axle if needed due space.
Row 8 I belive is RC4WD angled ones, don't tend to use these as these is a bit hard and brittle and the pivot ball has not great fitment.


Plan is to use the 4mm Revo ones for my lower links, most likely the will be made in brass to get some weight low down.
The TLT akxles has no means of fitting added weight, so need other solutions, I will rather not have weights in my wheels as that wear out the drivetrain over time.
The 3mm #1942 will be used for upper links.
For 3mm you can use a 3mm allthread rod and sleeve it to furter strength it, will come back to that.

Sometimes it is easyer to lay the chassis into the body and then place the axles into the wheel wells to make a start of making the suspension links.
I will start on the rear links next time....
The following user(s) Liked this: stingray-63

Please Log in to join the conversation.

TLT based old school crawler/scaler build - Icelandic Pajero. 3 years 6 months ago #61980

Terrible. Skeletin chassis pure empty I love it.
The following user(s) Liked this: caprinut

Please Log in to join the conversation.

TLT based old school crawler/scaler build - Icelandic Pajero. 3 years 6 months ago #62011

Today I started on the rear links to see what works or not.
Chassis can just go forward so much before it hit the mounting tabs for the led holdes.
Since the suspension links will be very short due the short wheelbase, and shock travel can just be of certain amount, the chassis location in related to the body is almost given.

Since this is a mockup only for now, length of bolts does not matter and I like to use flanged nuts to hold the bolts in place.
How it looks now.


A close look..
Lower links is ok, but the upper is no good.
As it sits now, the axle will roll forward as the suspension travels upwards.
Due the upper link placement, the axle tube will also swing forward as the offended side damper compresses.
The forward movment was about 3cm at 5cm travel, which is far too much.


Better view what's going on from the top.
The upper links needs to be more of a straigh angle related to the chassis rails.
Ideal the lower links should be longer as well, could easly be fixed with mounting the link mount triangle on the underside of the axle, minus will be less cround clearance.


One solution is to fit the upper links as marked with red line.
I then need to remove the axle truss link mount, or fit it to the backside of the axle, it will then become a strengthner as it no longer will serve as link mount.
When the links a figured out, I can then begin to test fit dampers.


The links above is 3mm allthread cut to length and then the ball ends are screwed on.
For short links I try to have about 6-7mm of allthreads sticking into each ball end.
And for the longer sleeved ball ends, about 8mm or so.
For making a matching pair of links, I'm using calipers and beasure the length between the ball ends.
When I make the final links, I will make a jig. I will show how I do it.
That should make the axle square to the body.
The following user(s) Liked this: Jonny Retro, stingray-63, AndyAus

Please Log in to join the conversation.

TLT based old school crawler/scaler build - Icelandic Pajero. 3 years 6 months ago #62037

Earlier today I asked my friend if he could 3d print some more of those straight axle adapters, which cleans up the look no end.
Here is the ones I got earlier for my 6x6 BullHead build, and that is an Hi-Lift axle.


The straight axle adapters is one of the items that is about impossible to find nowdays.
JunFac and RC4WD among other used to do them.

Nothing done today as I'm having a rest day.
But I keep building/plan in my head :silly:

Please Log in to join the conversation.

Last edit: by caprinut.

TLT based old school crawler/scaler build - Icelandic Pajero. 3 years 6 months ago #62065

I see a Lego Technic beam connecting your leaf springs.

Please Log in to join the conversation.

TLT based old school crawler/scaler build - Icelandic Pajero. 3 years 6 months ago #62074

I see a Lego Technic beam connecting your leaf springs.


That's correct sir :y:
I used it to mock up my chassis to see where I needed things to be before drilling :)

The two pairs of 3d printed axle straight adapters is now printed, I just need to collect them.

Please Log in to join the conversation.

TLT based old school crawler/scaler build - Icelandic Pajero. 3 years 6 months ago #62082

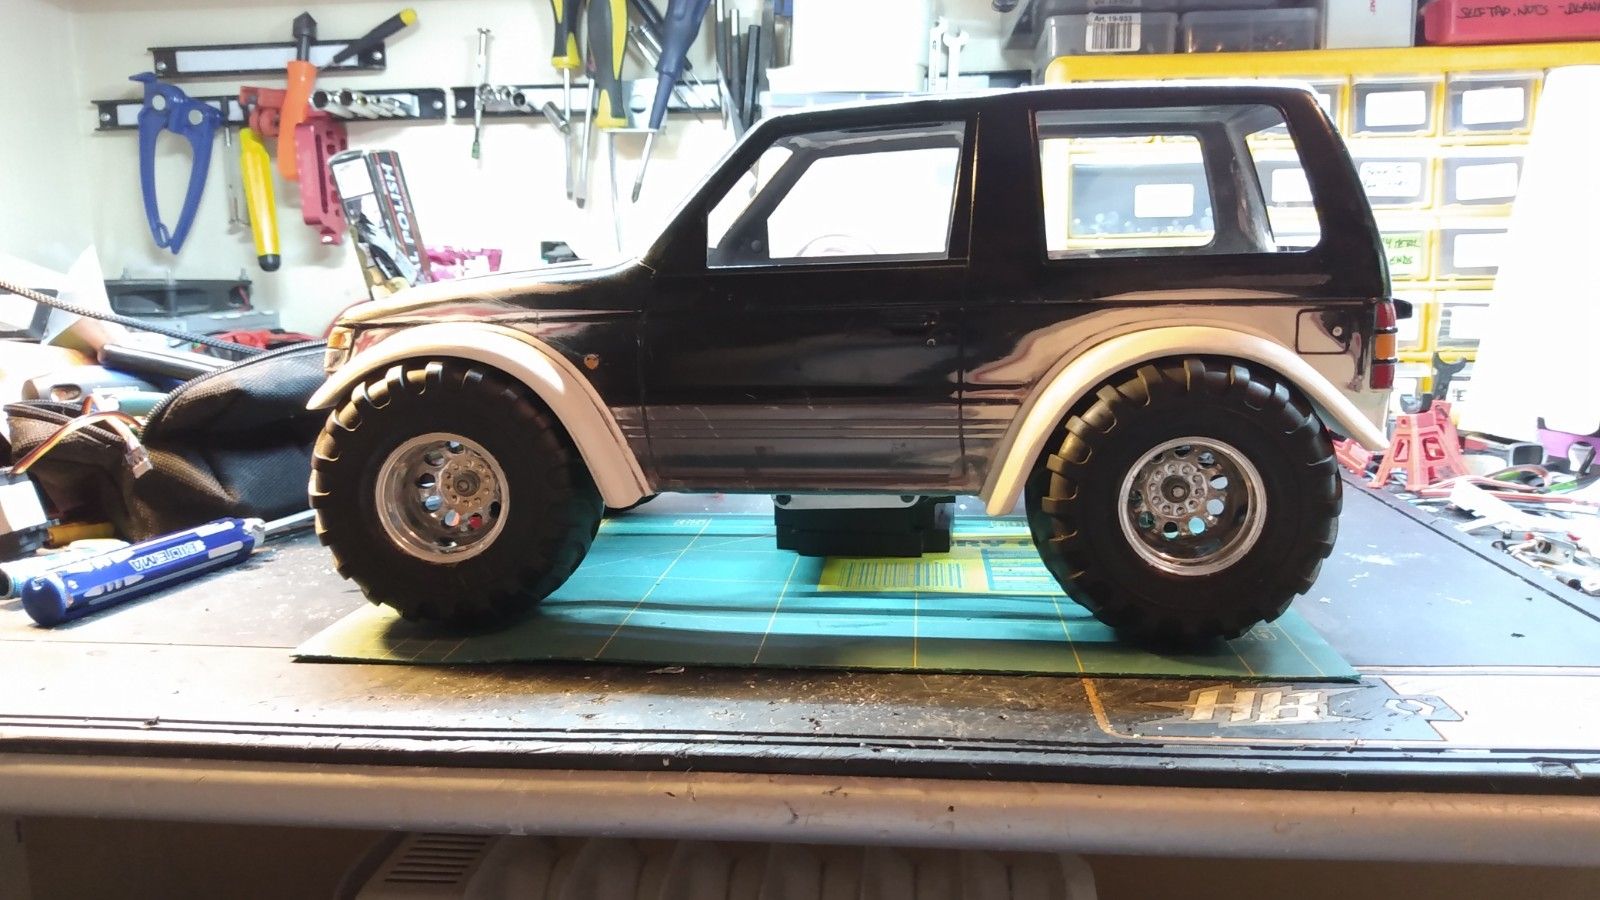
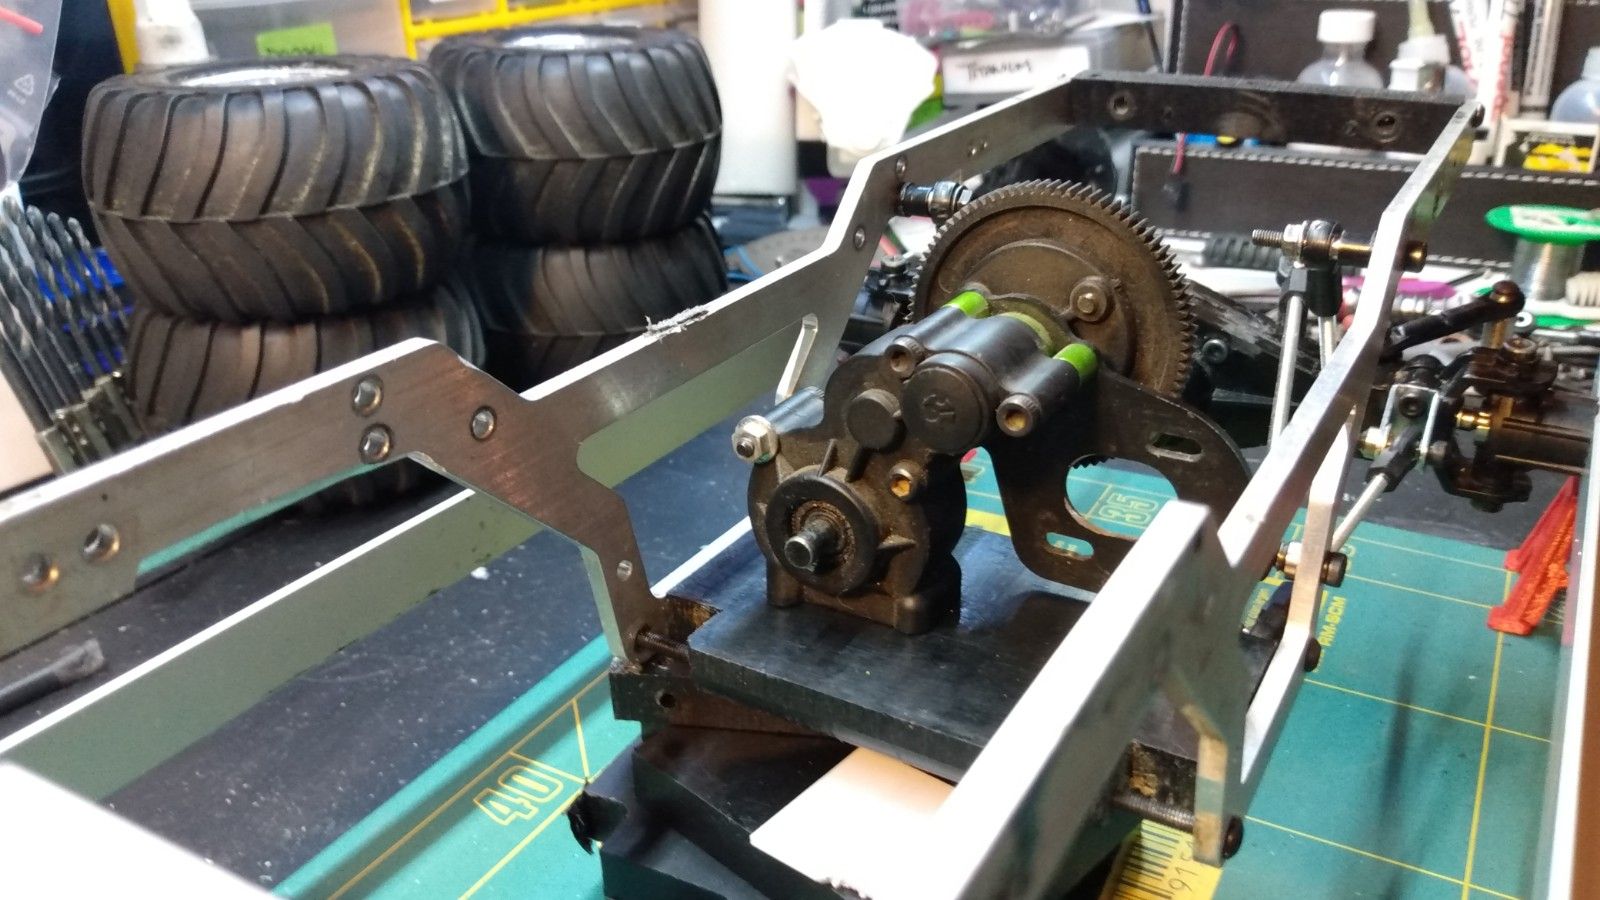
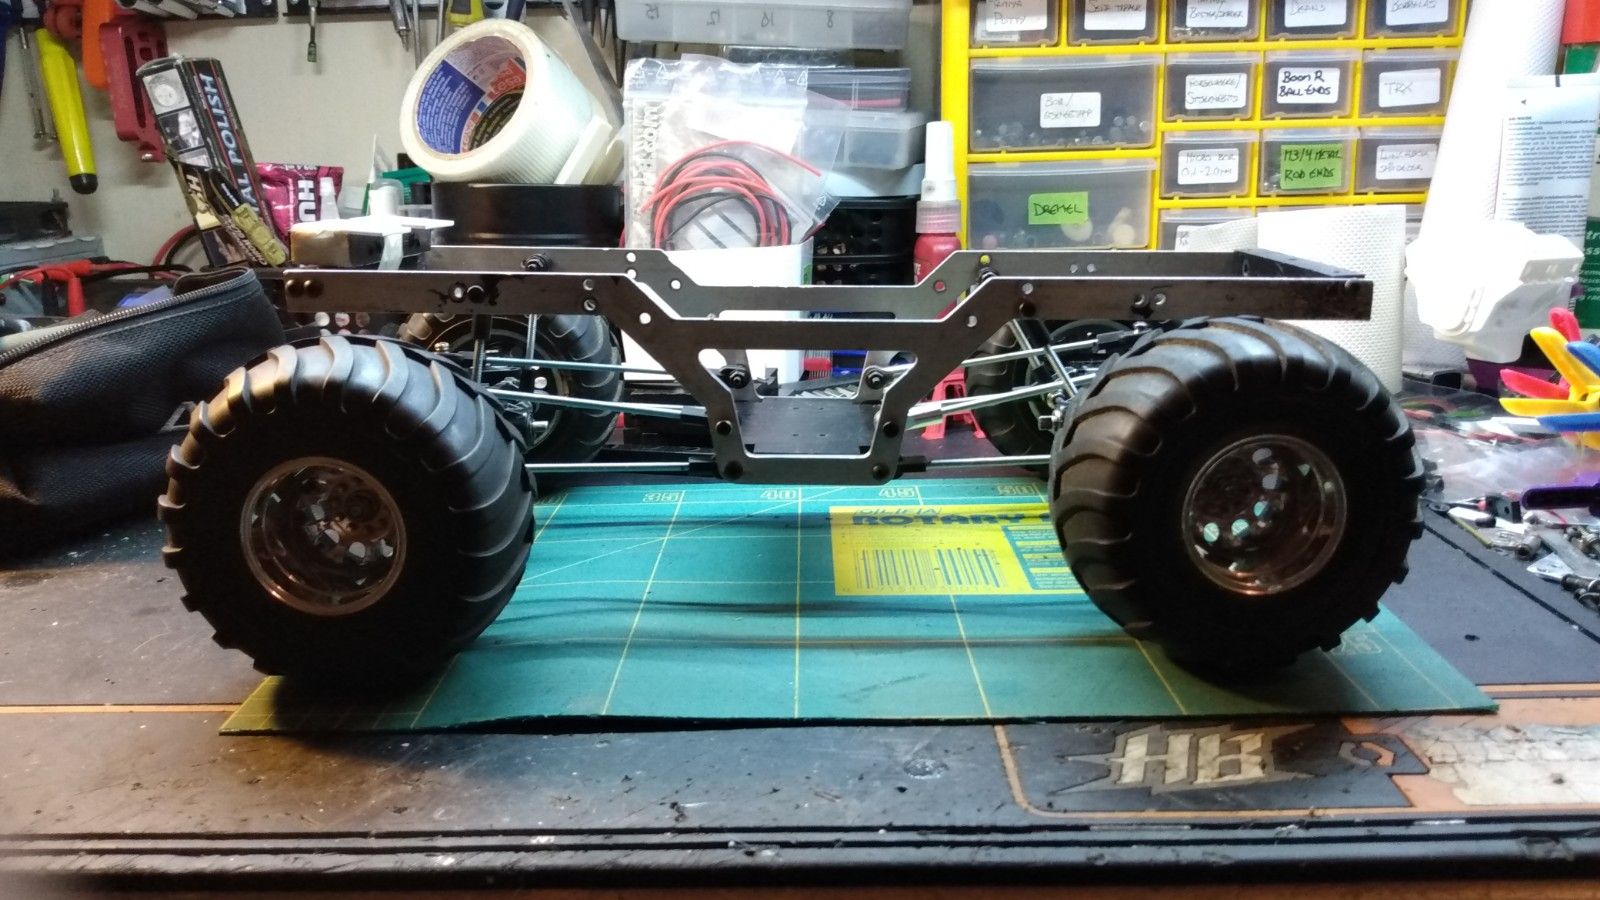
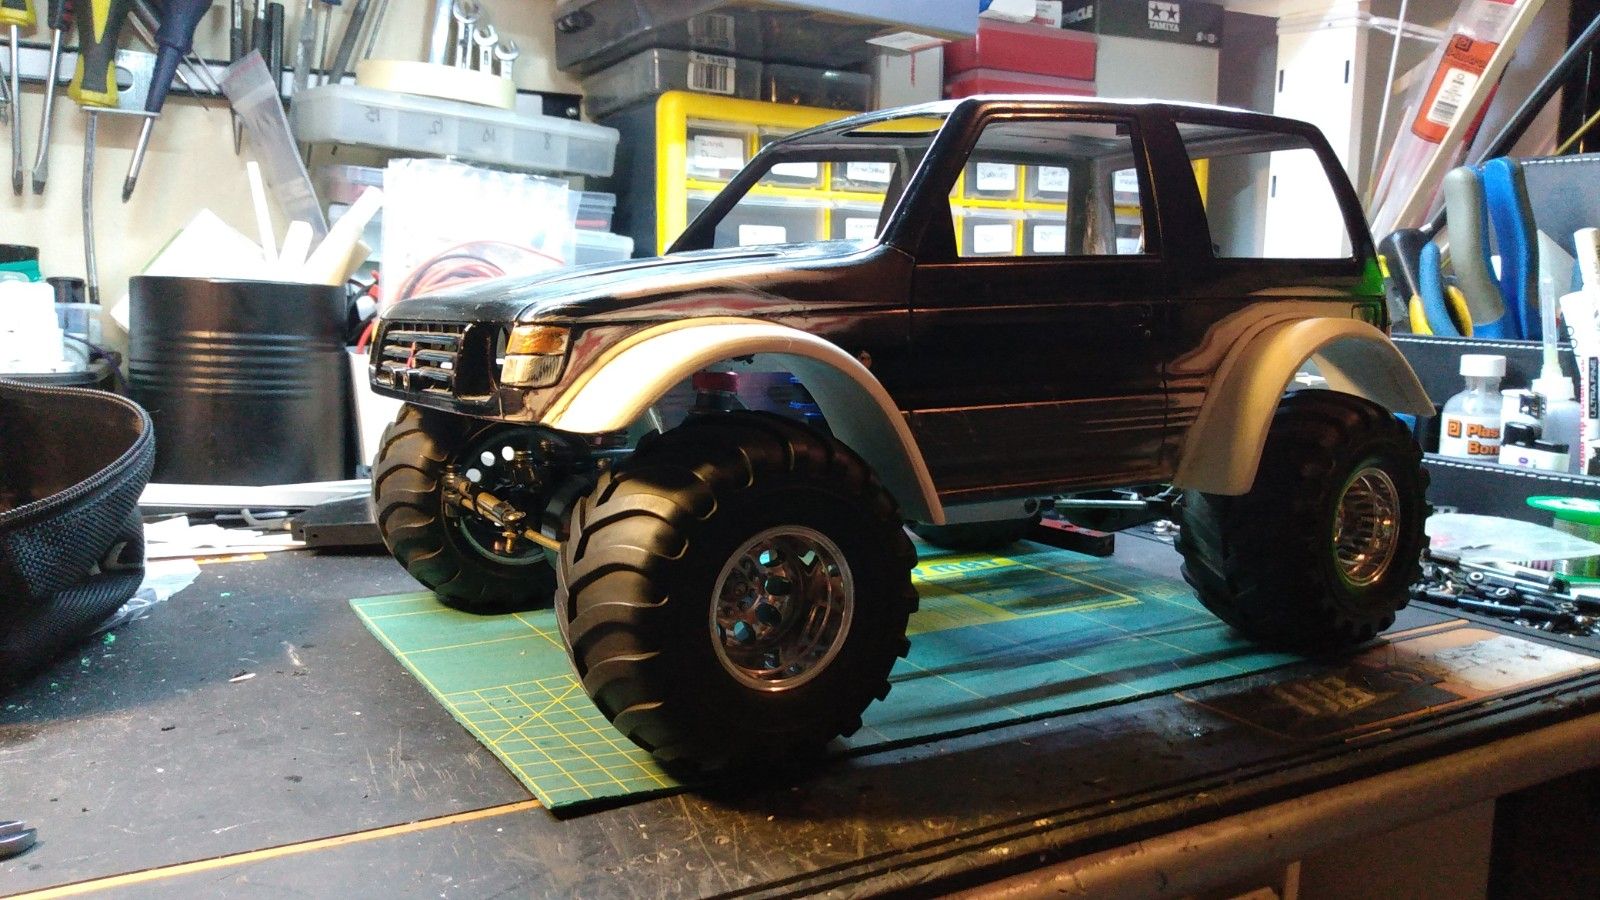
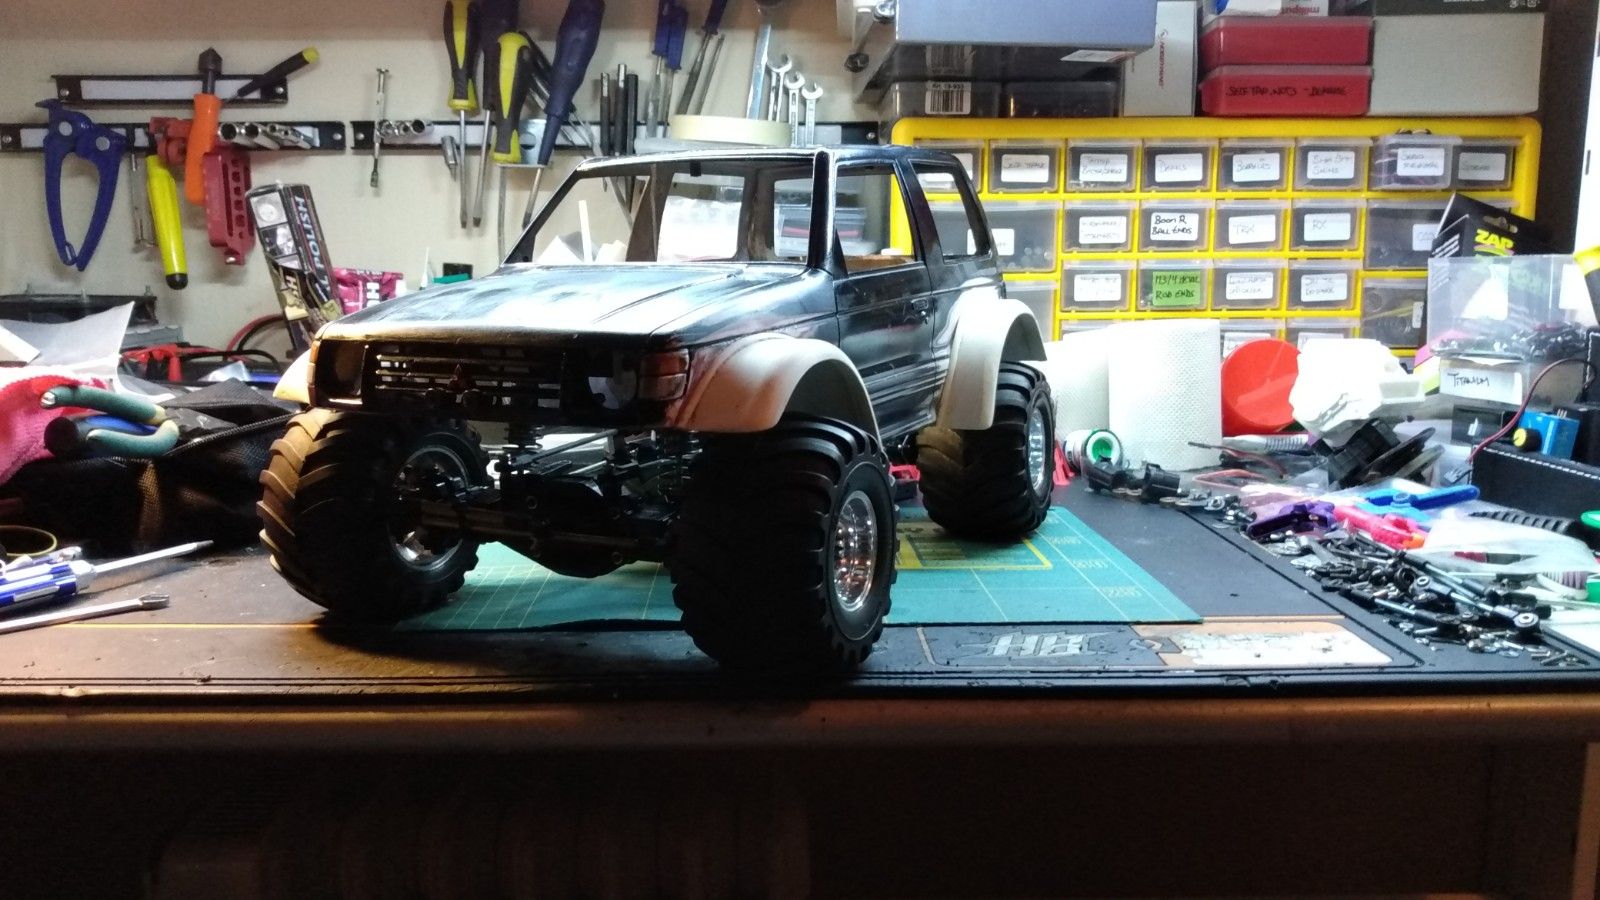
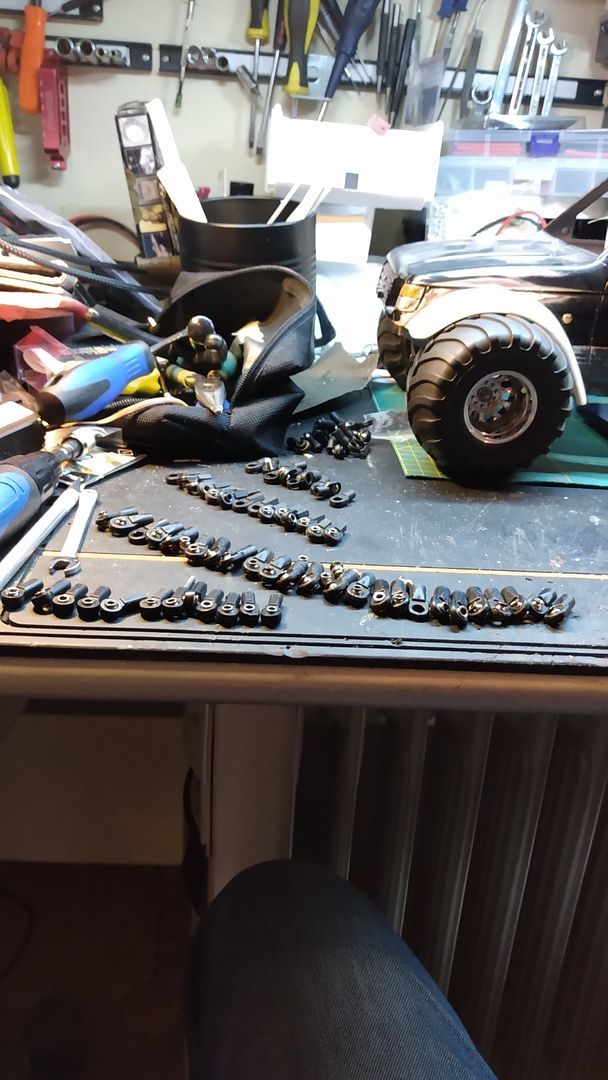
Made a bit more progress.

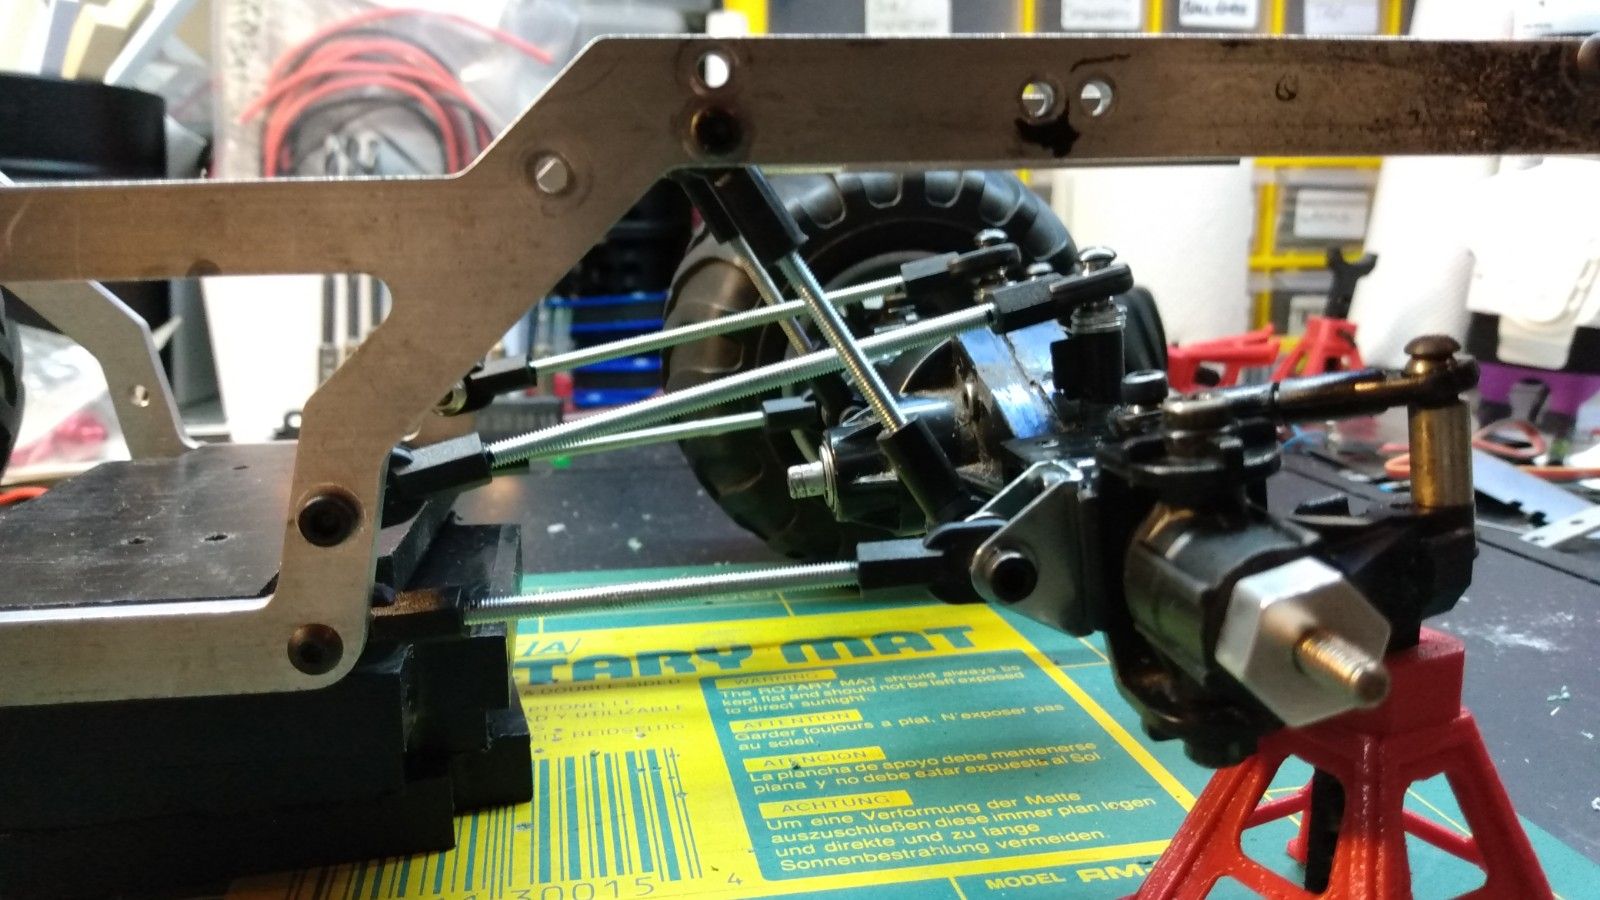
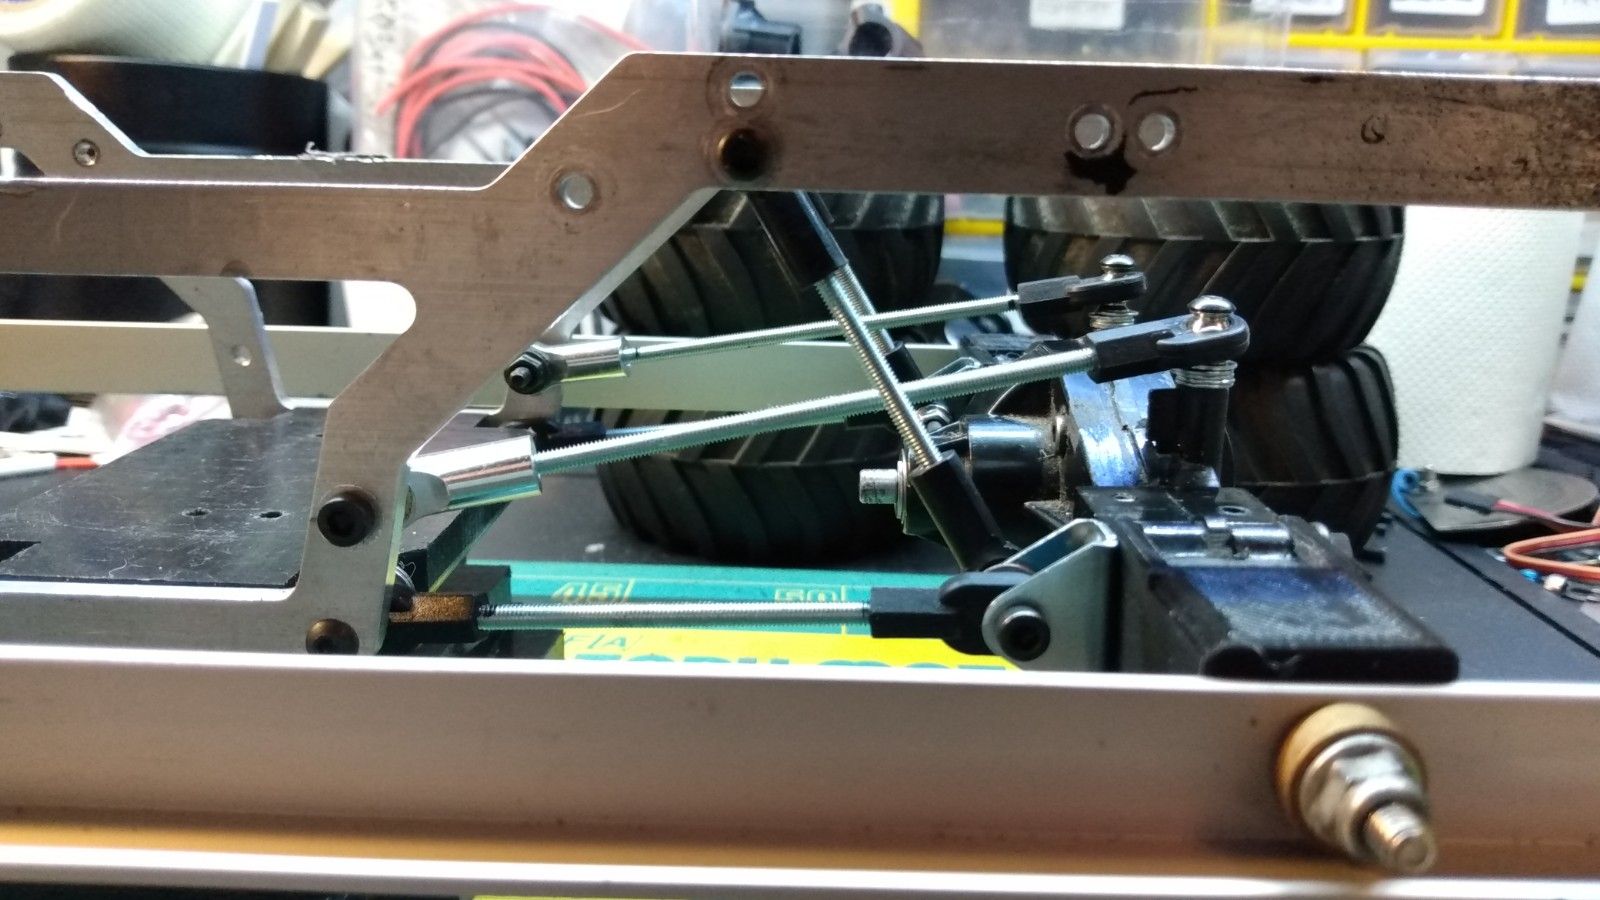
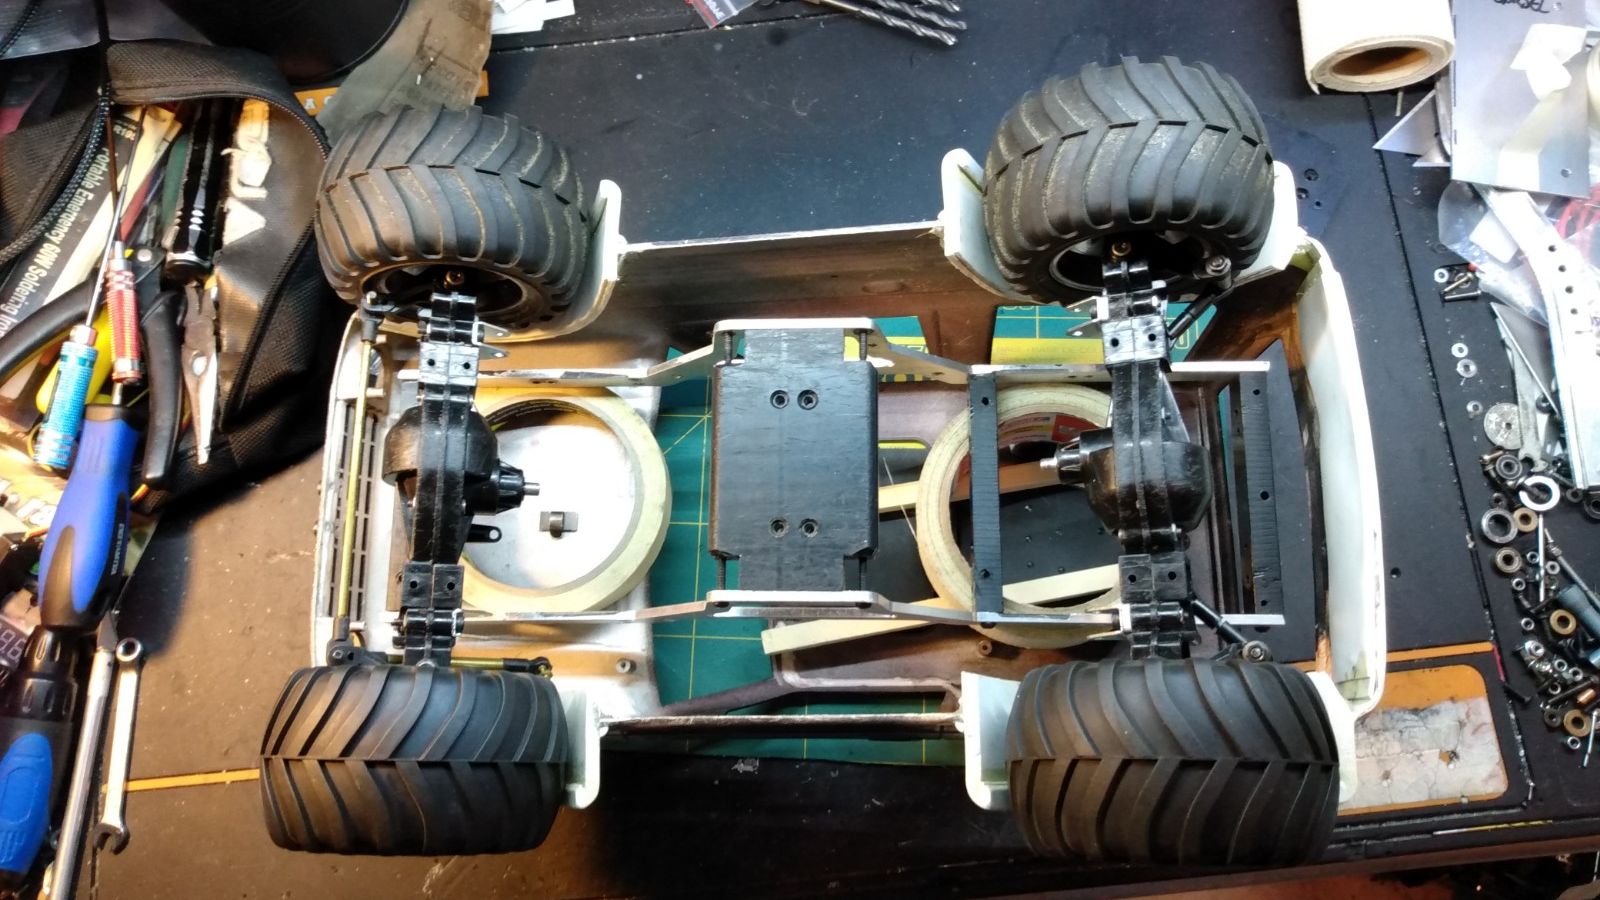
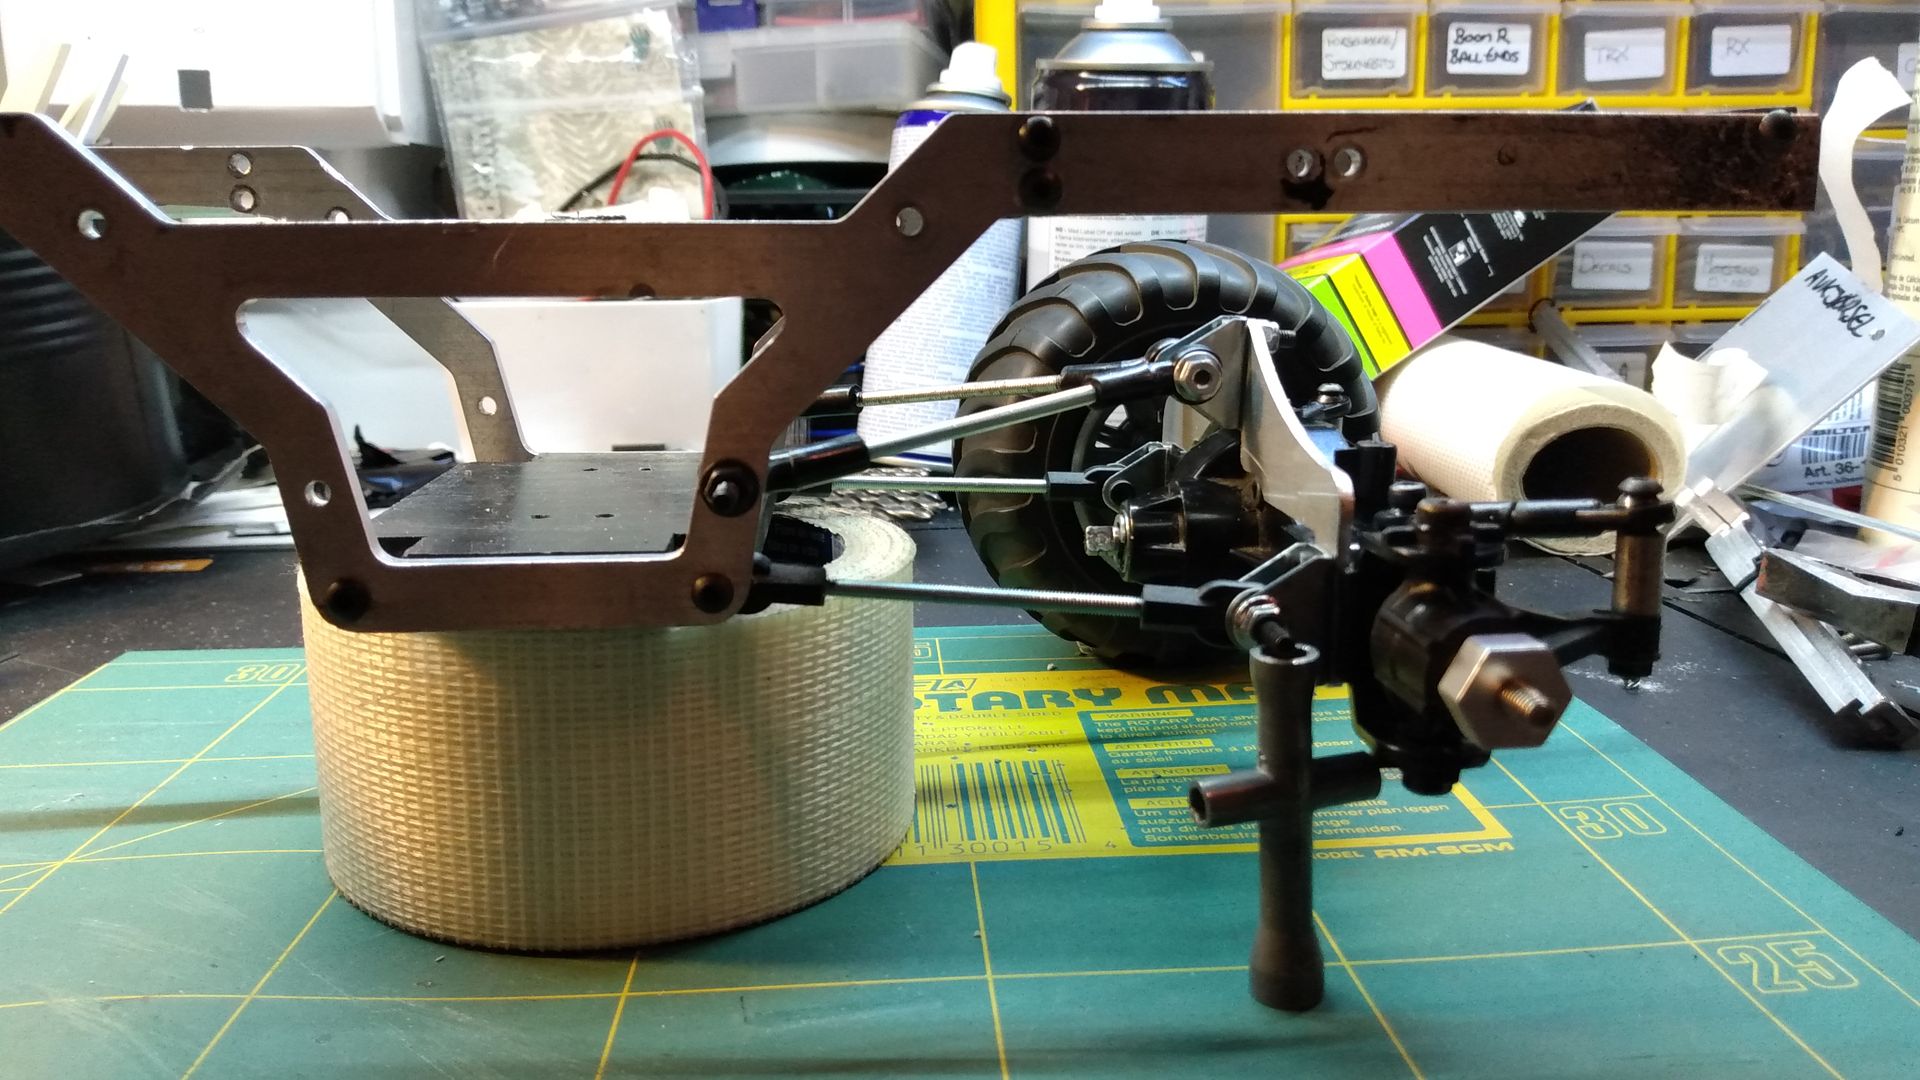
Removed the axle truss and made new upper links.
Much better when the suspension moves.


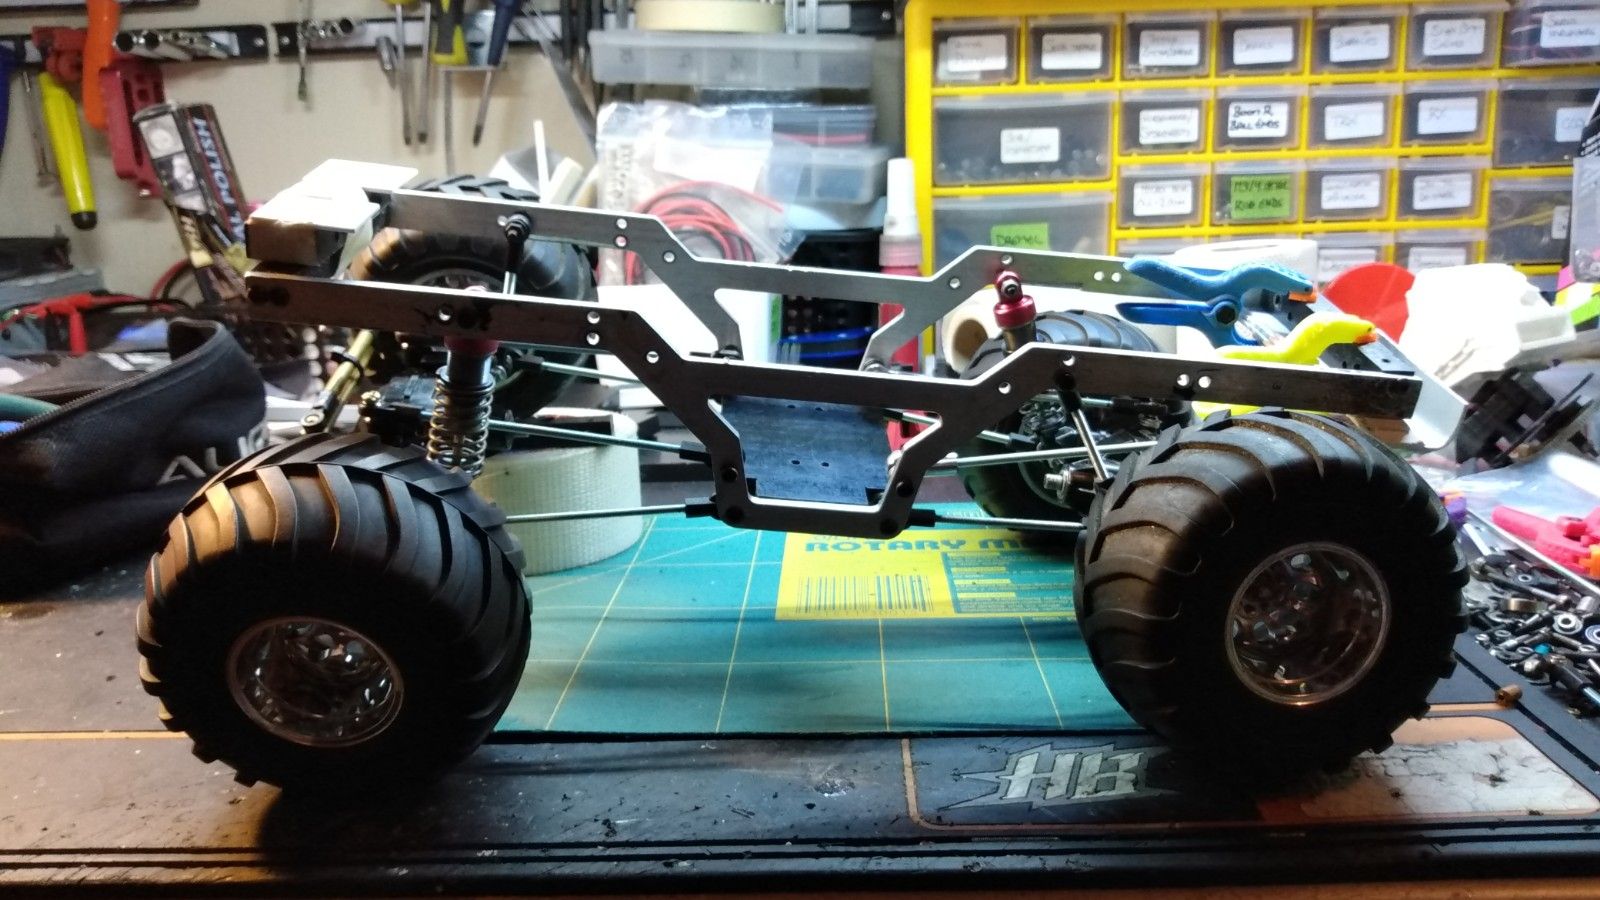
You may notice the link that goes from top of chassis rails to the axle.
This mimics the shocks I'm going to use at compressed length, which in my case is 55mm.
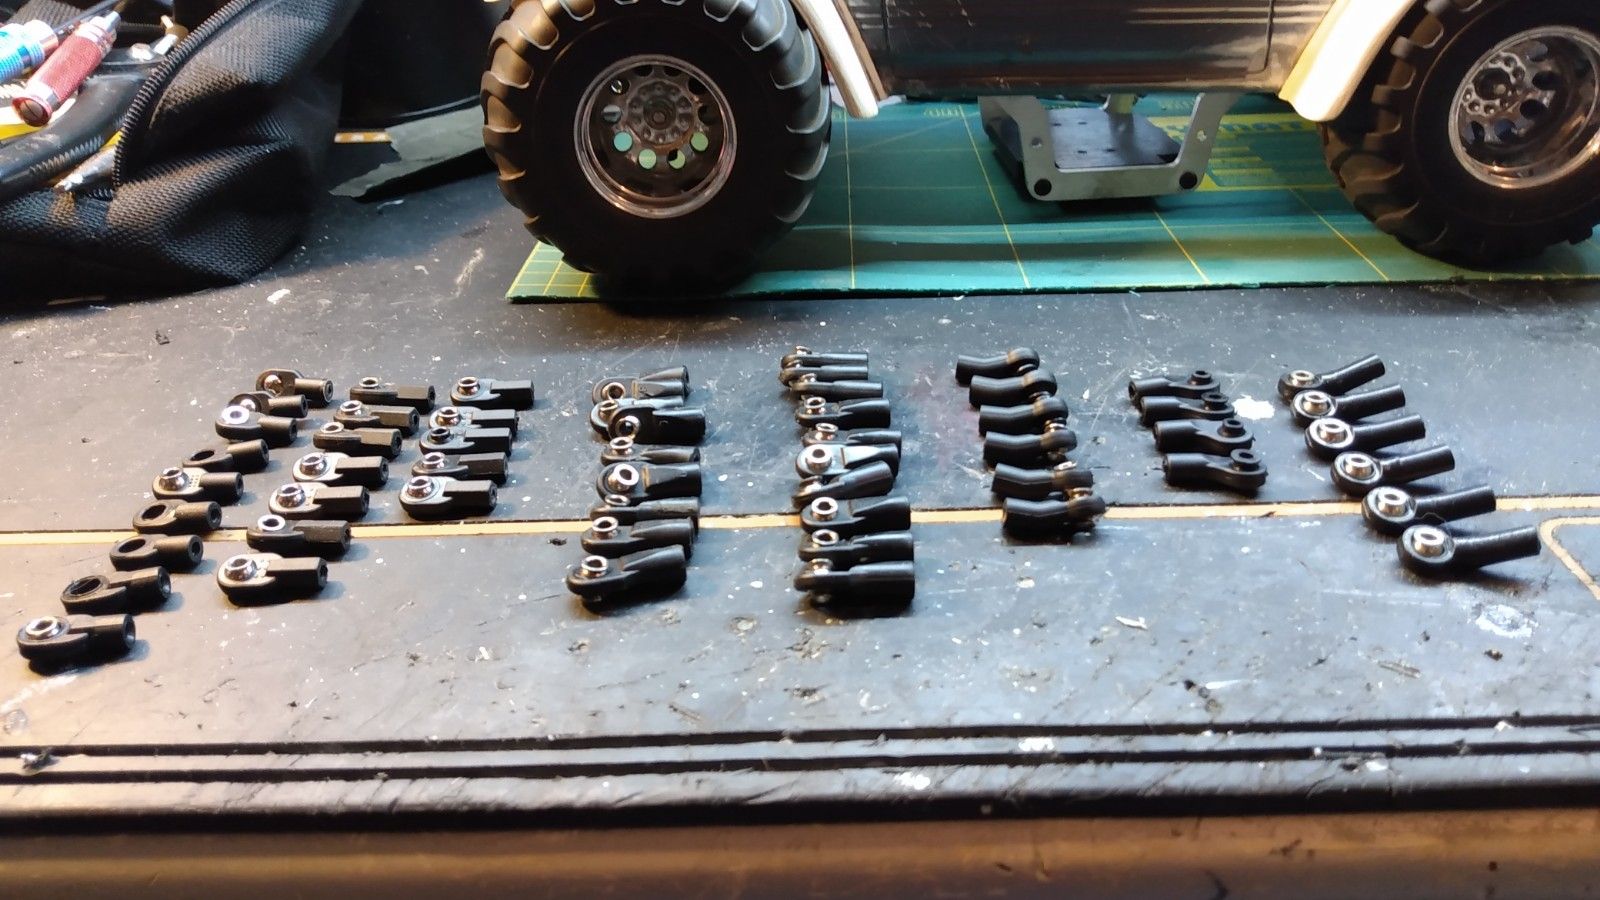
Again I used 3mm allthread, and Tamiya ball ends, as Tamiya ones has less pivot angle than the Traxxas ones and are perfect for this.


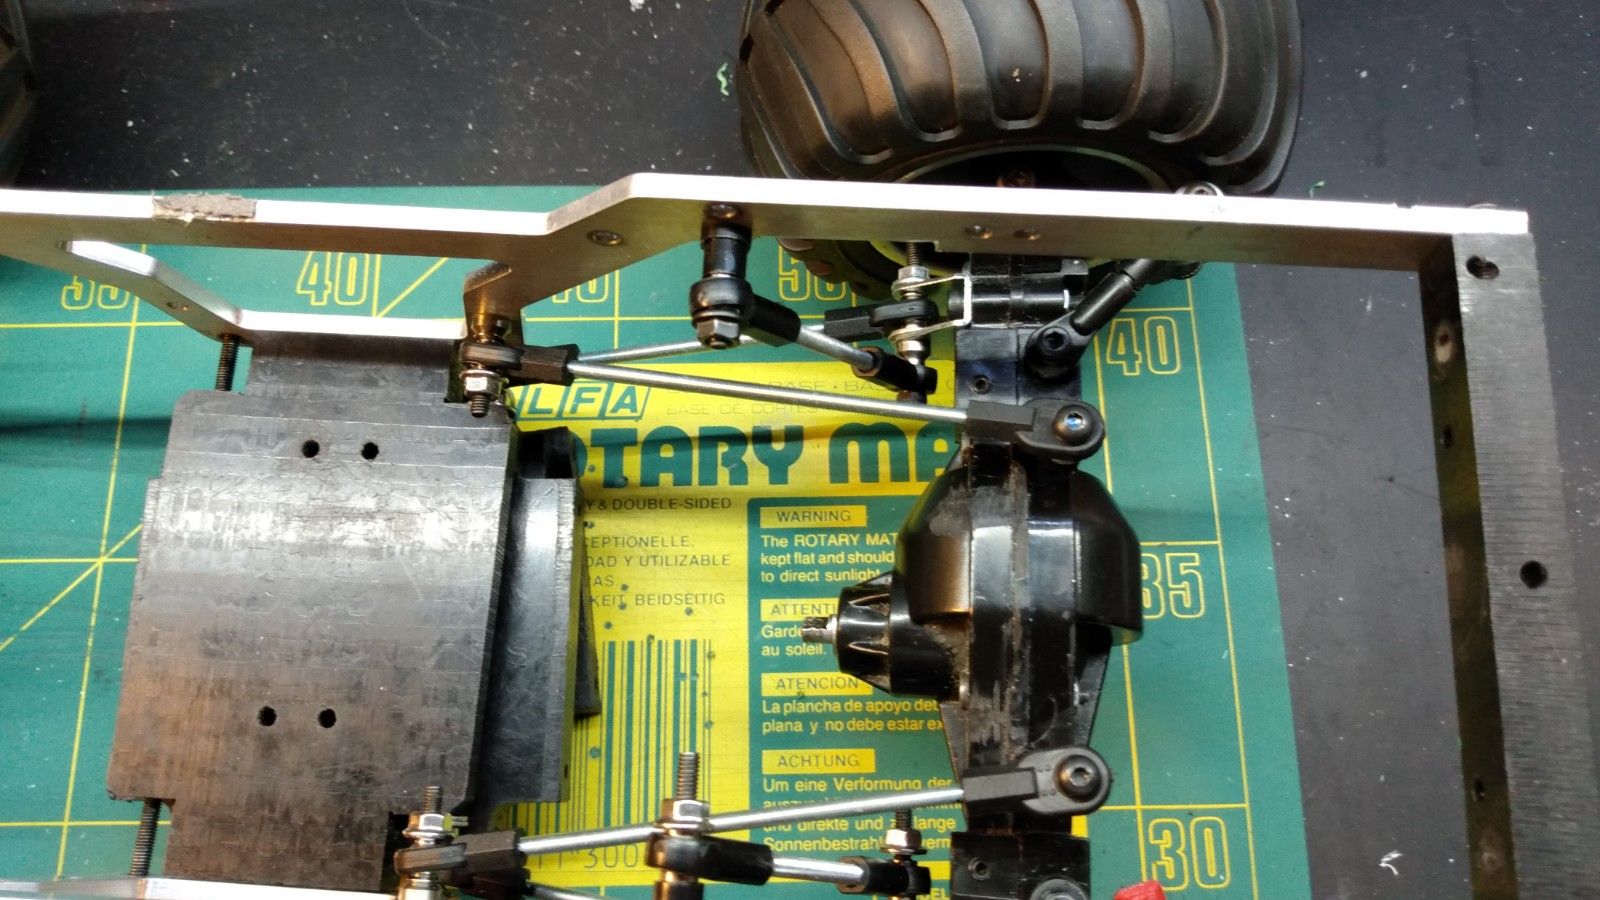
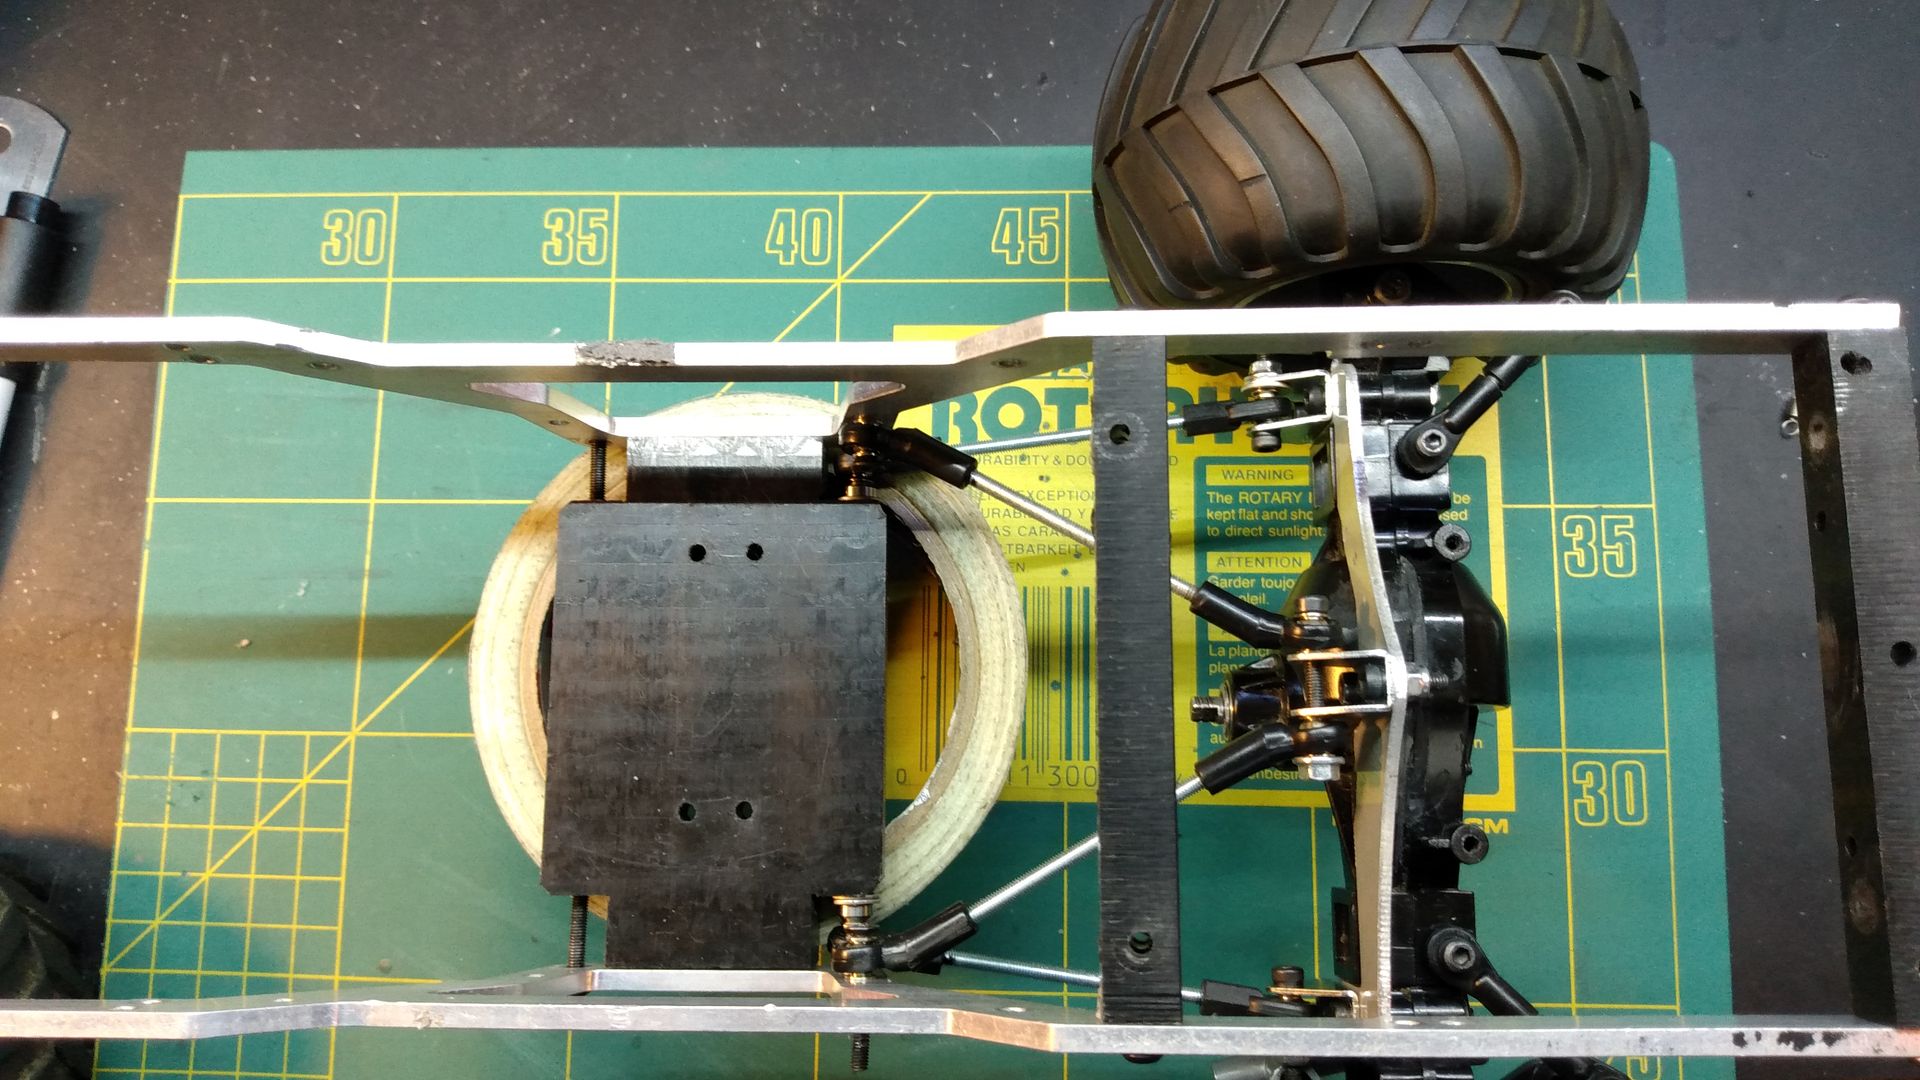
The new upper links viewed from top
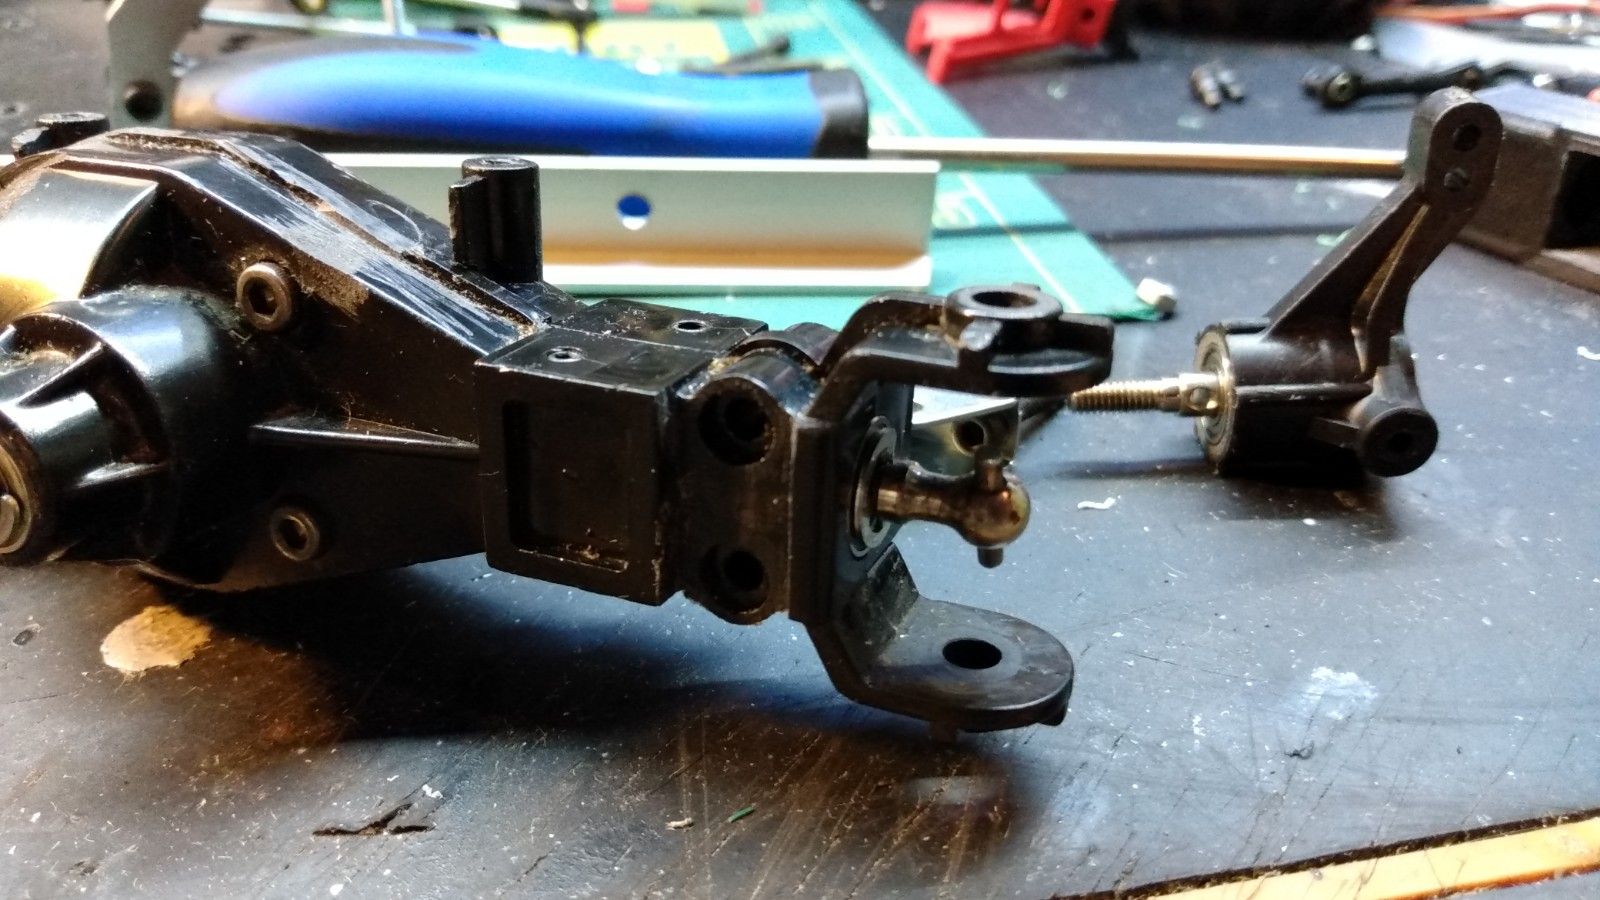
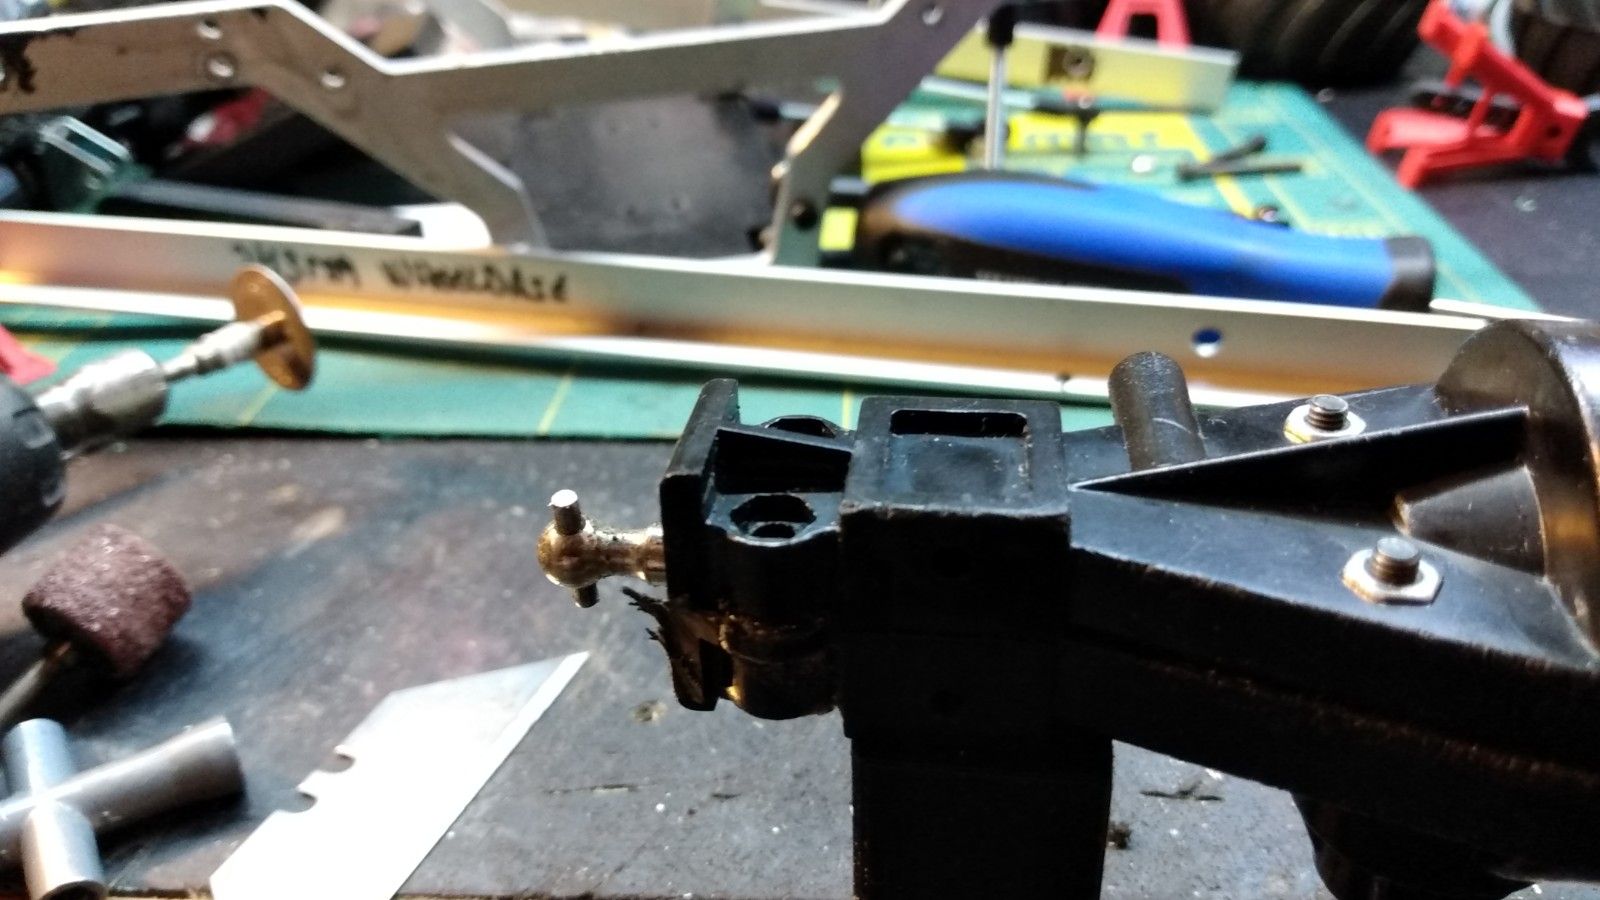
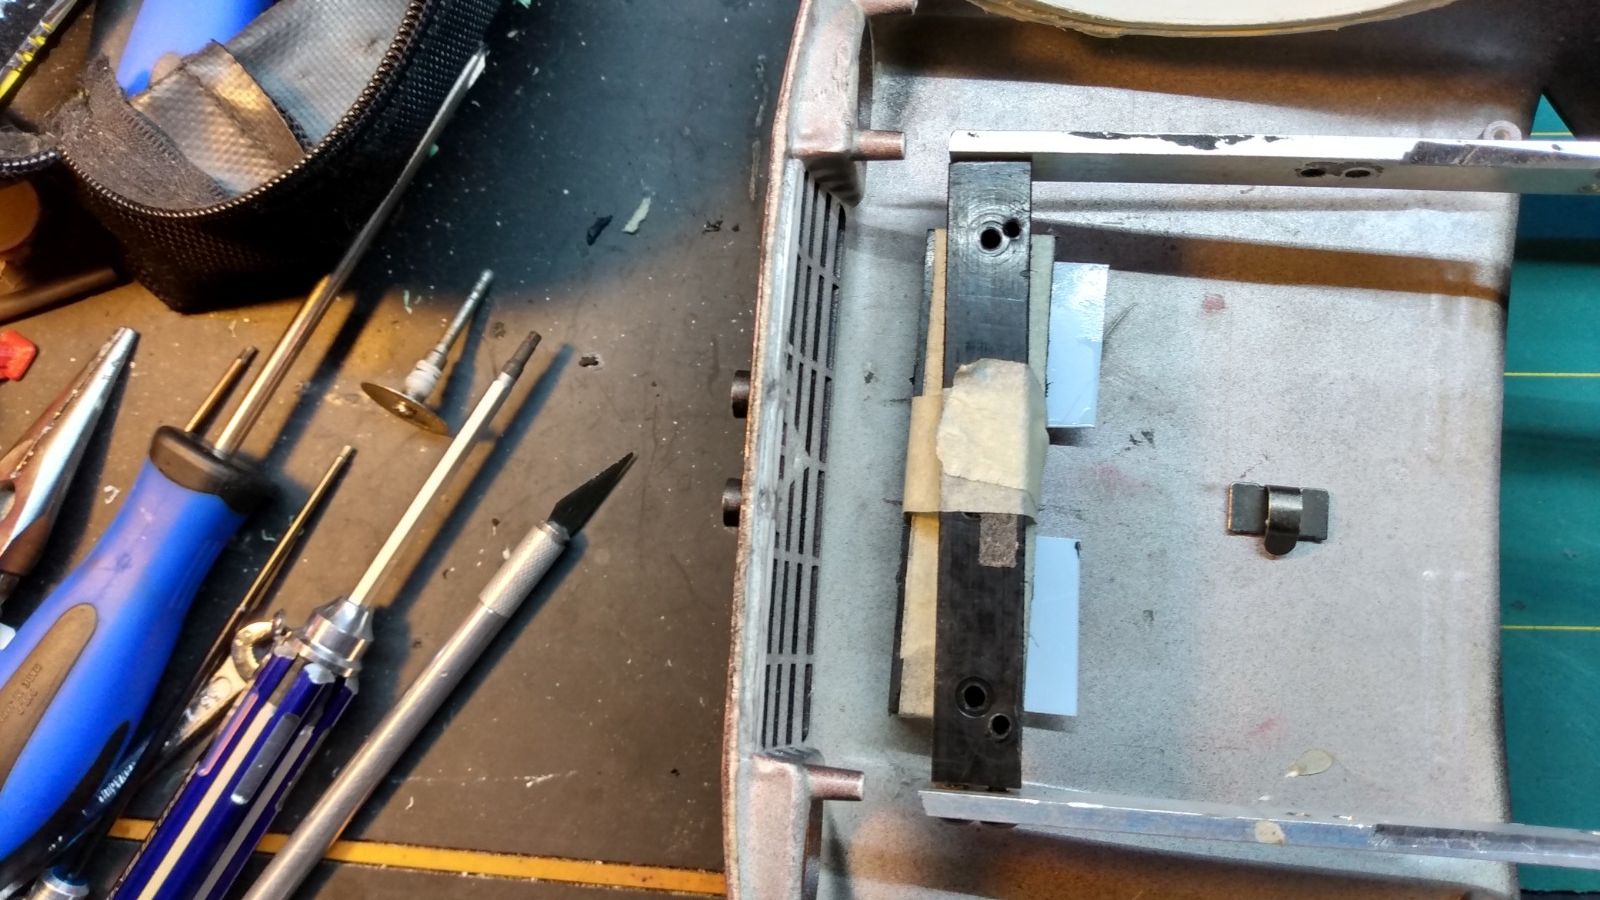
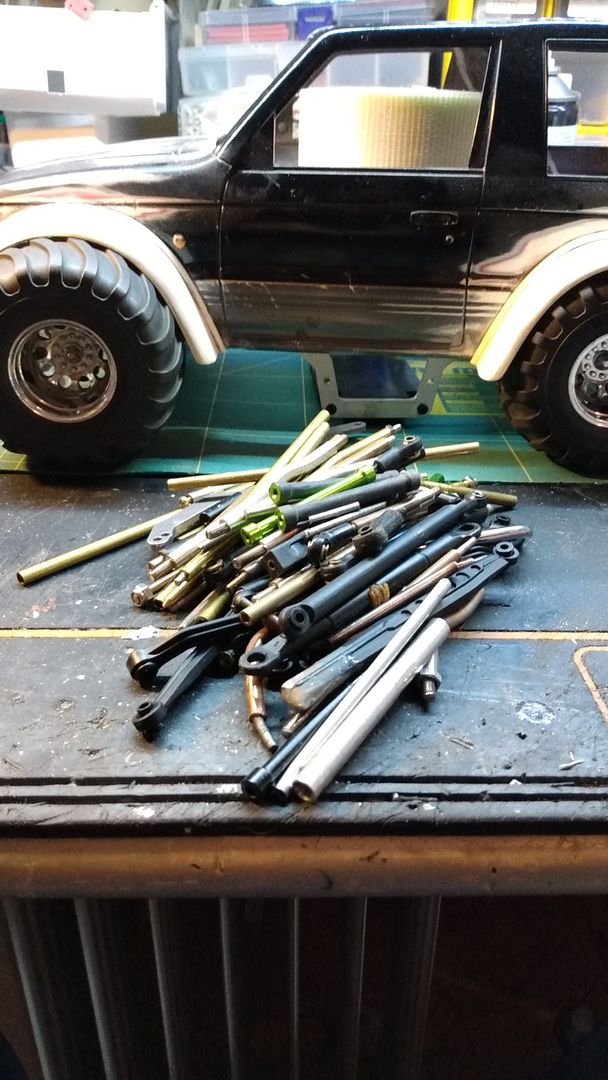
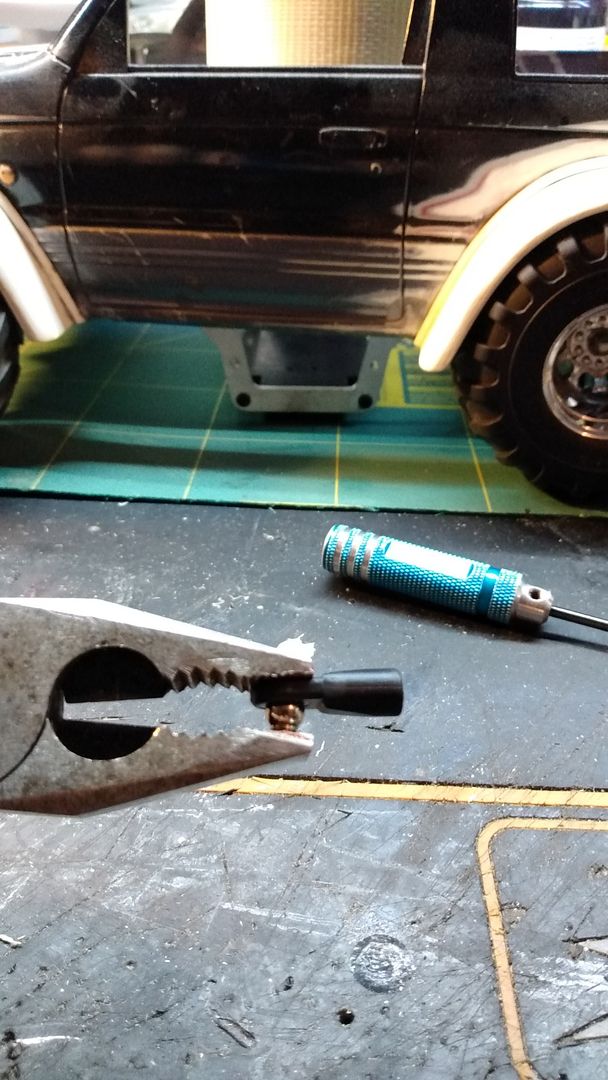
Was planing on using bent rod ends at the axle end, so the links clear the shocks.
But they was 4mm threaded so I have to wait till I make the final links.


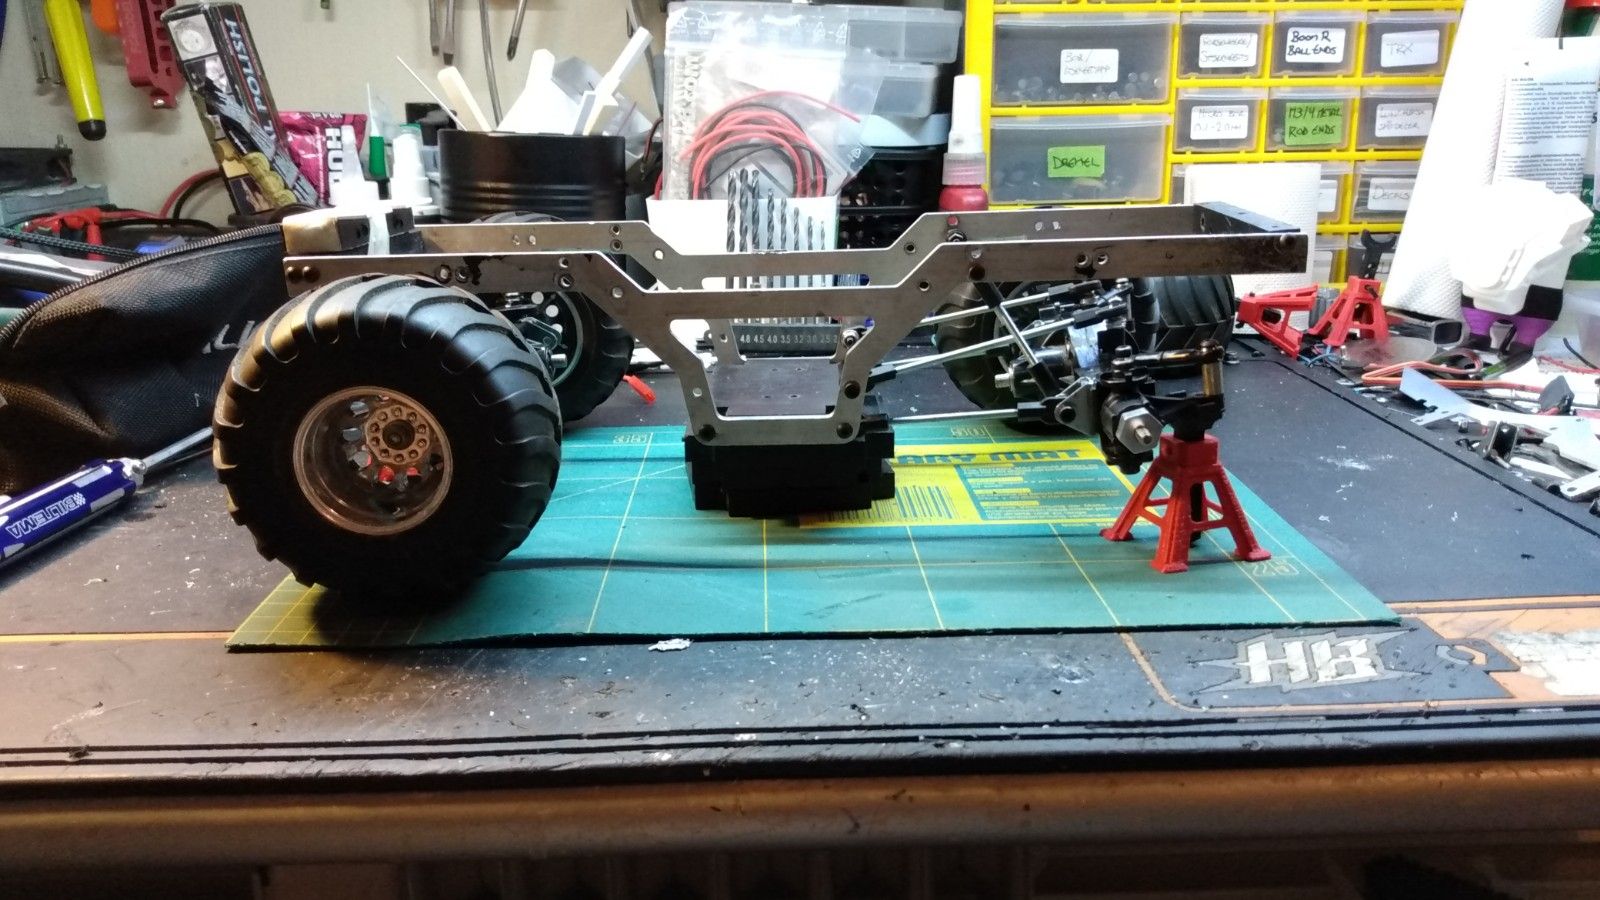
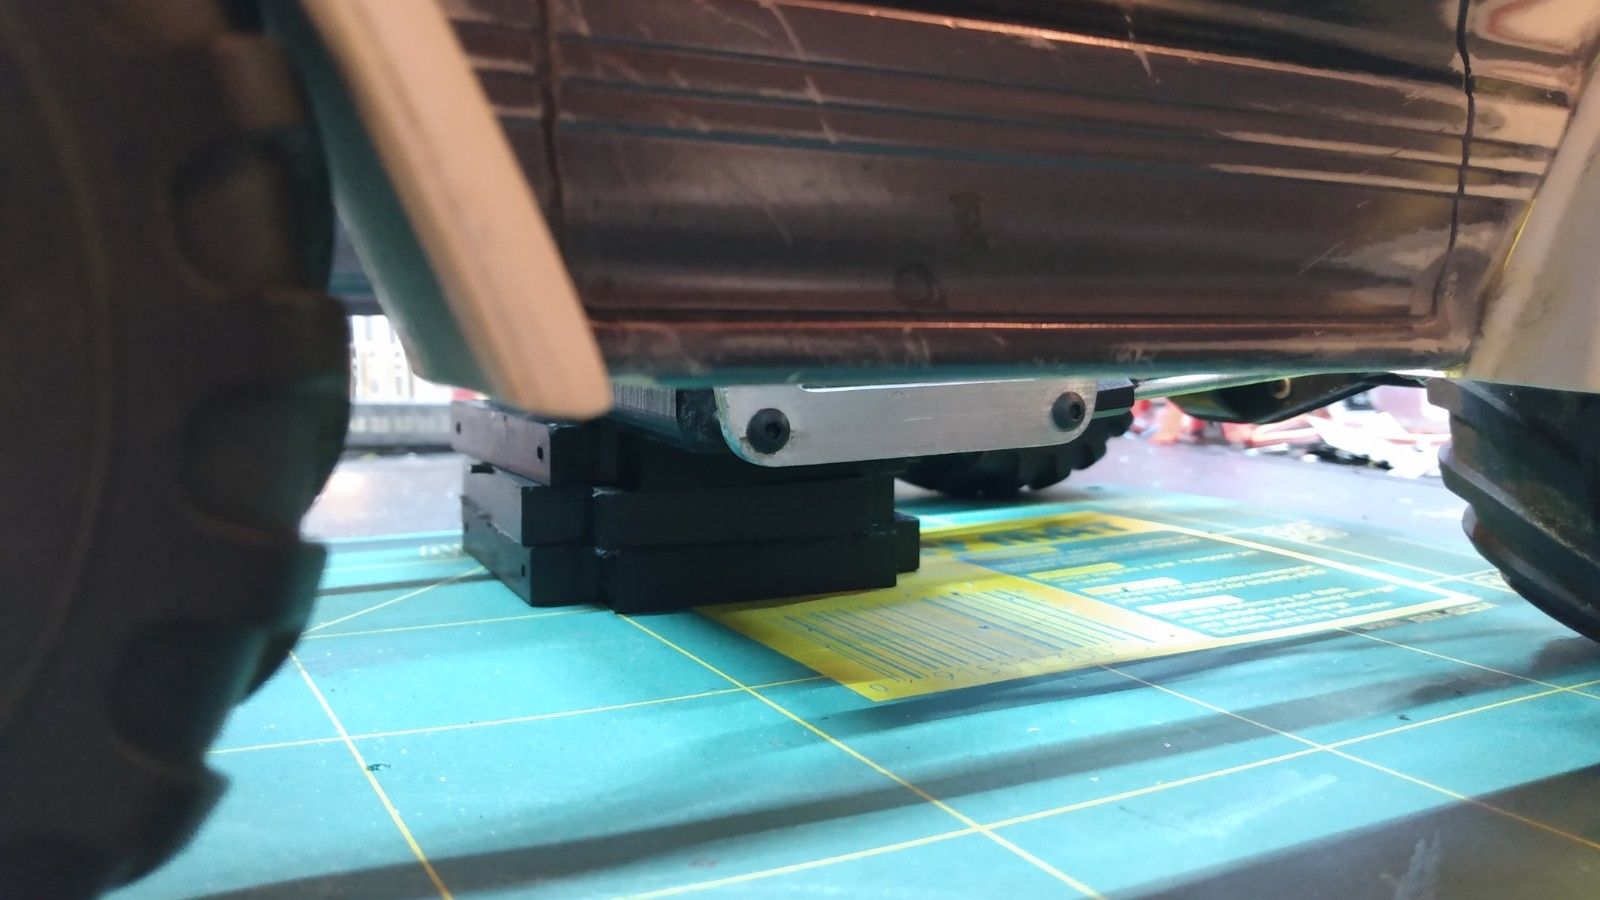
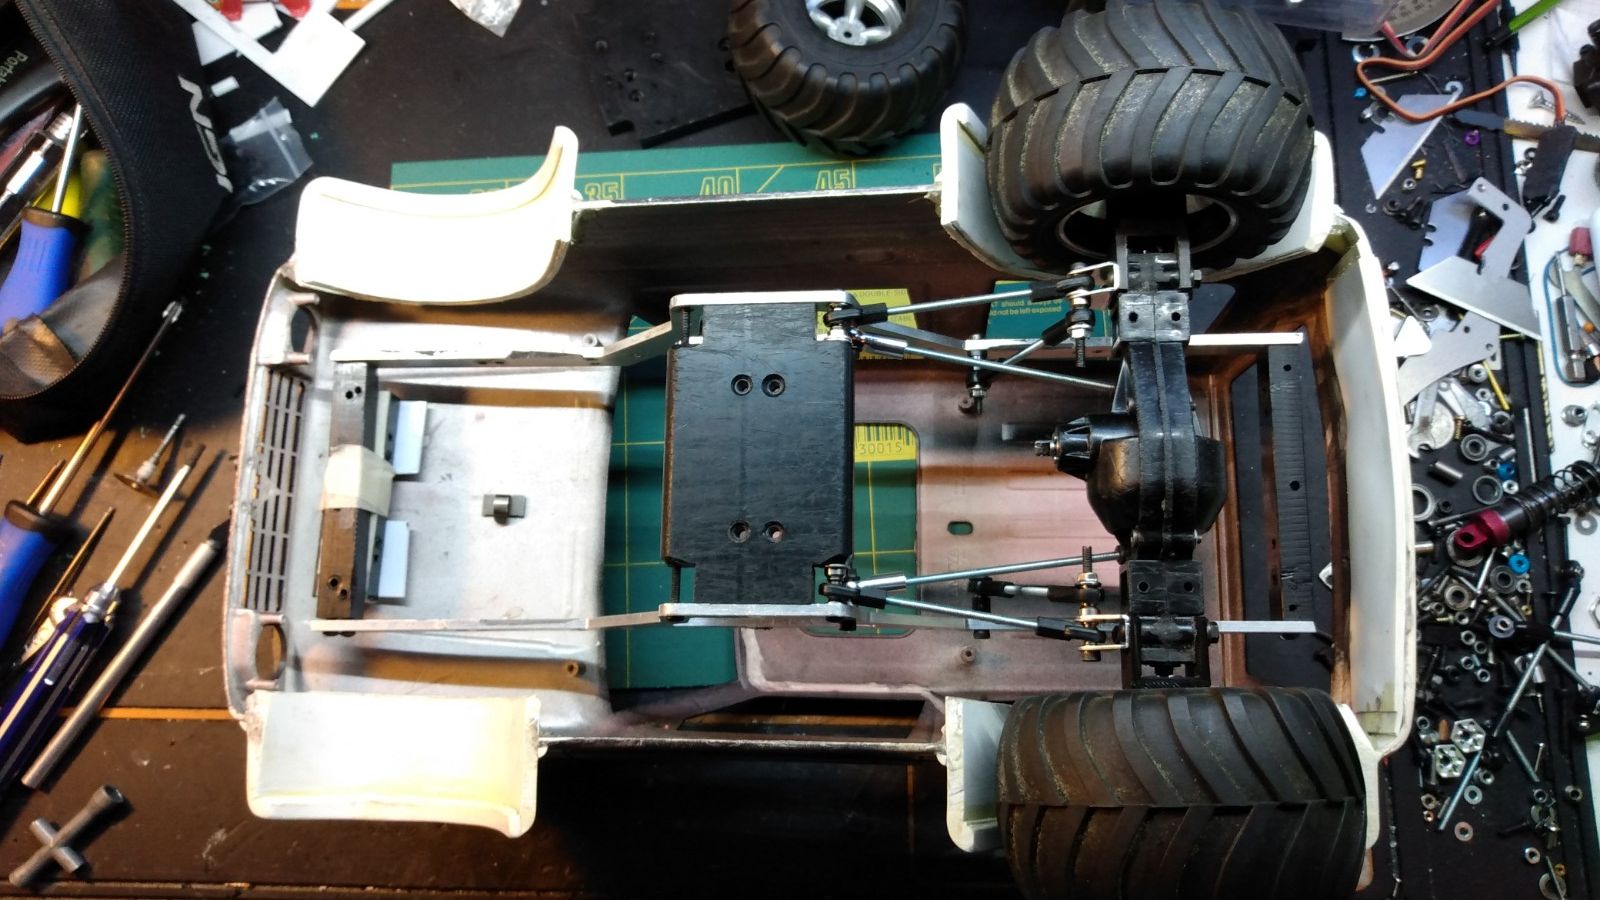
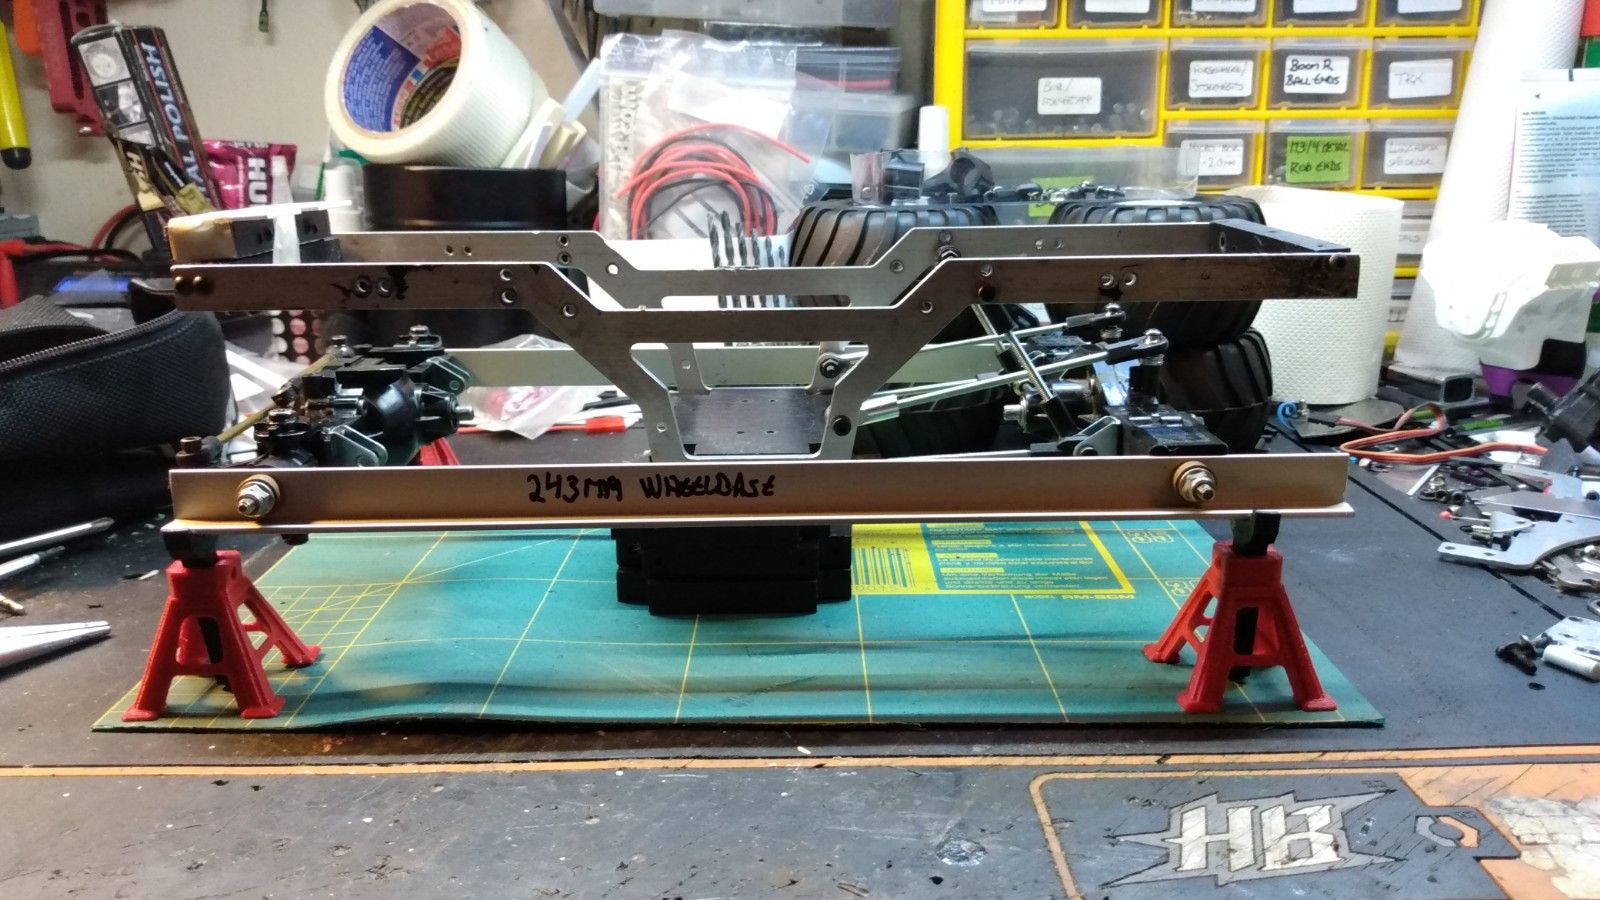
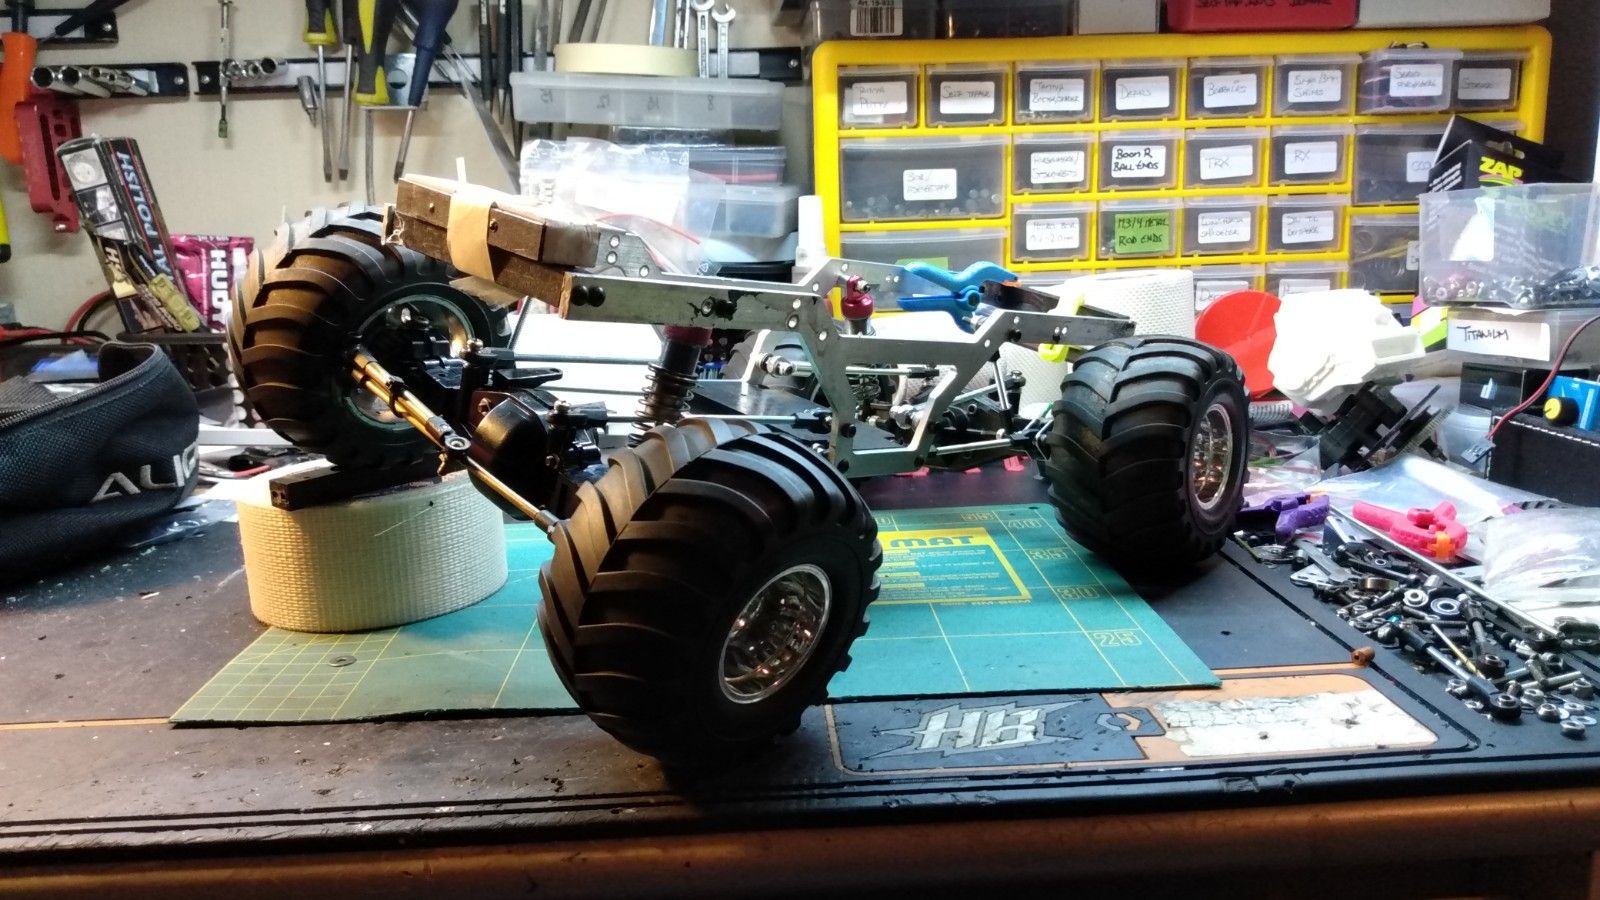
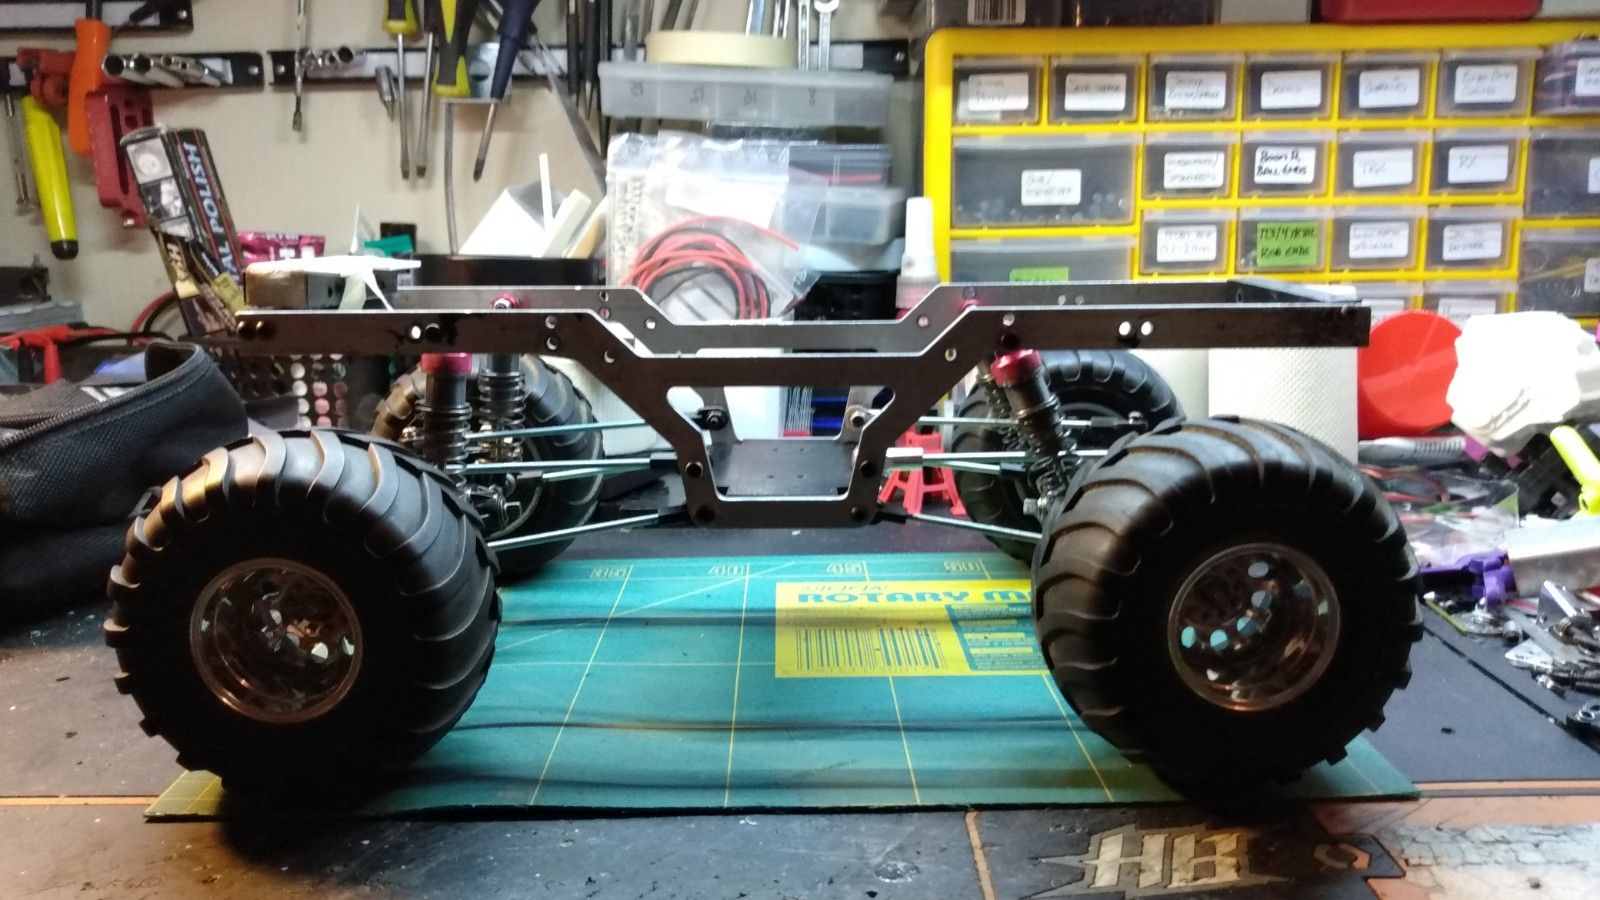
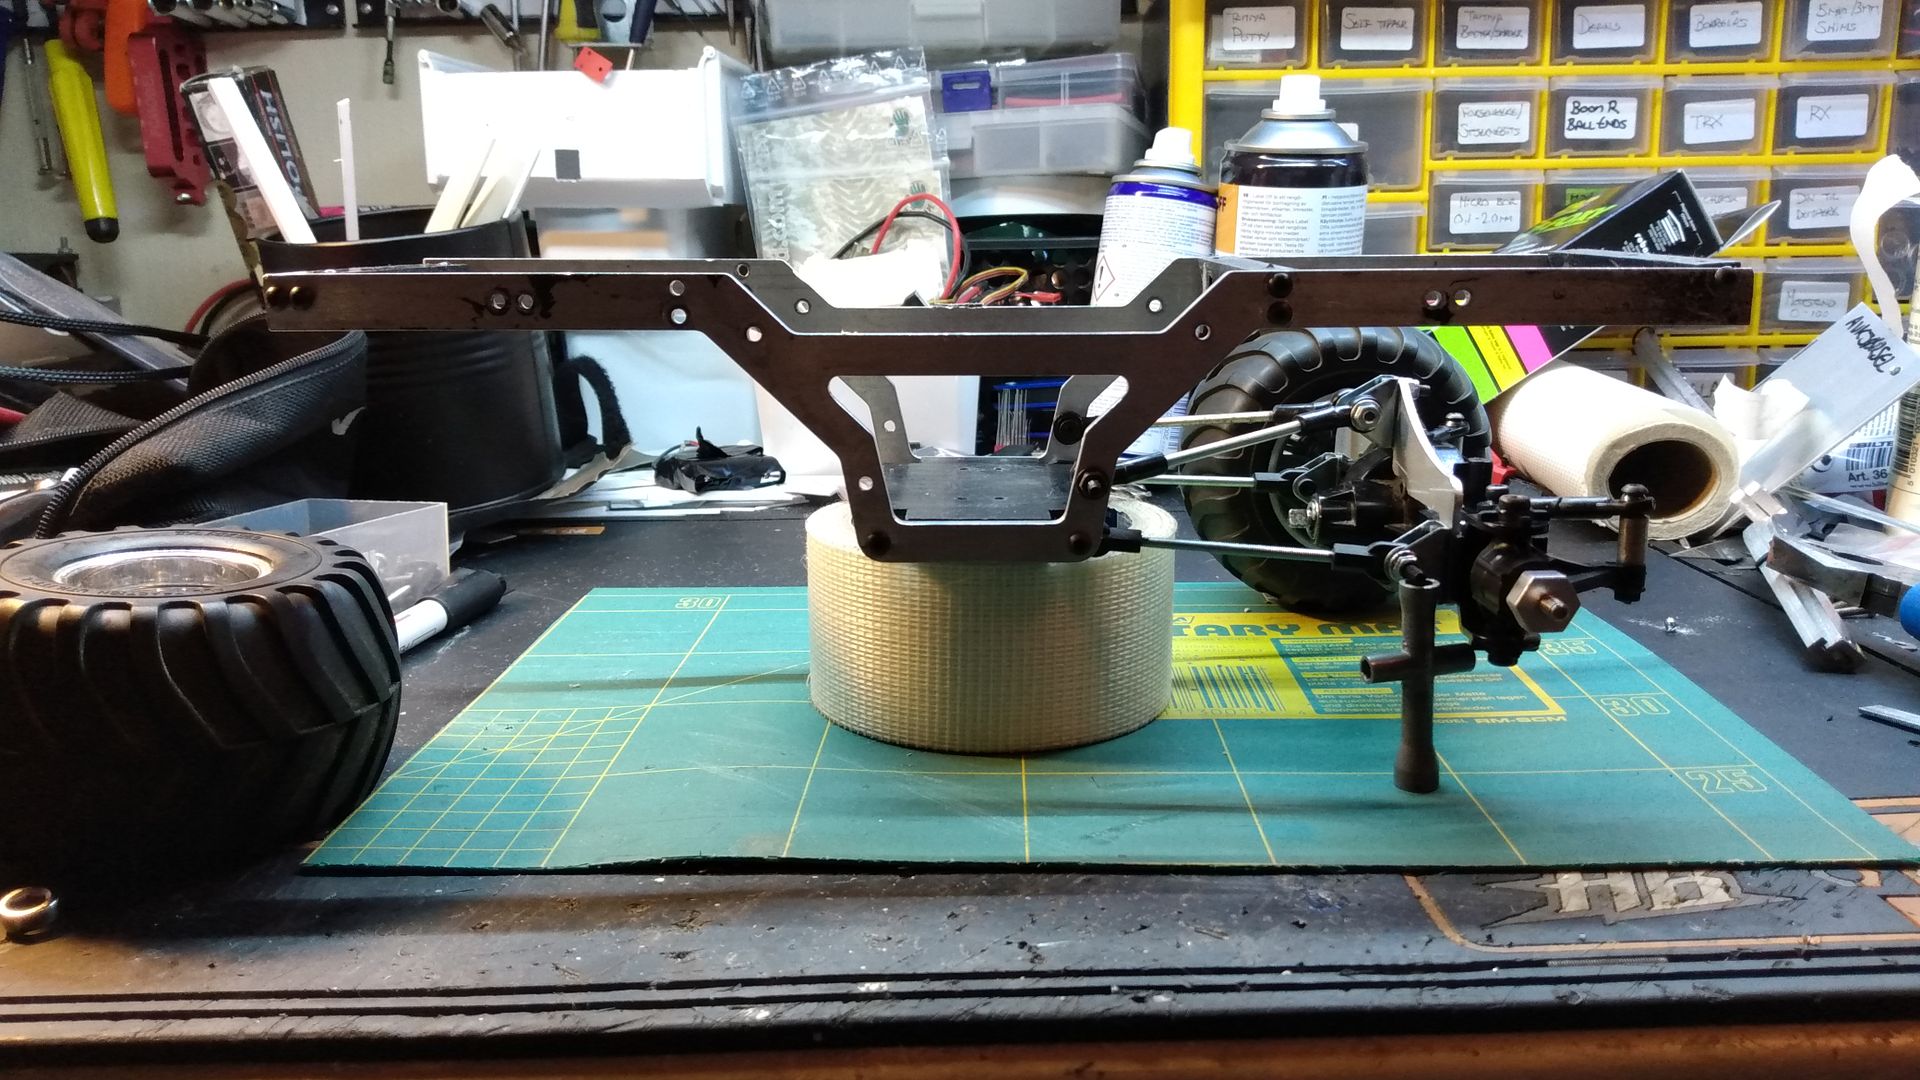
Now I know where chassis hight is at full compressed shocks aka minimum length eye to eye, I can finally see where the chassis will be sitting.


Chassis will sit like this, give or take a few millimeters.


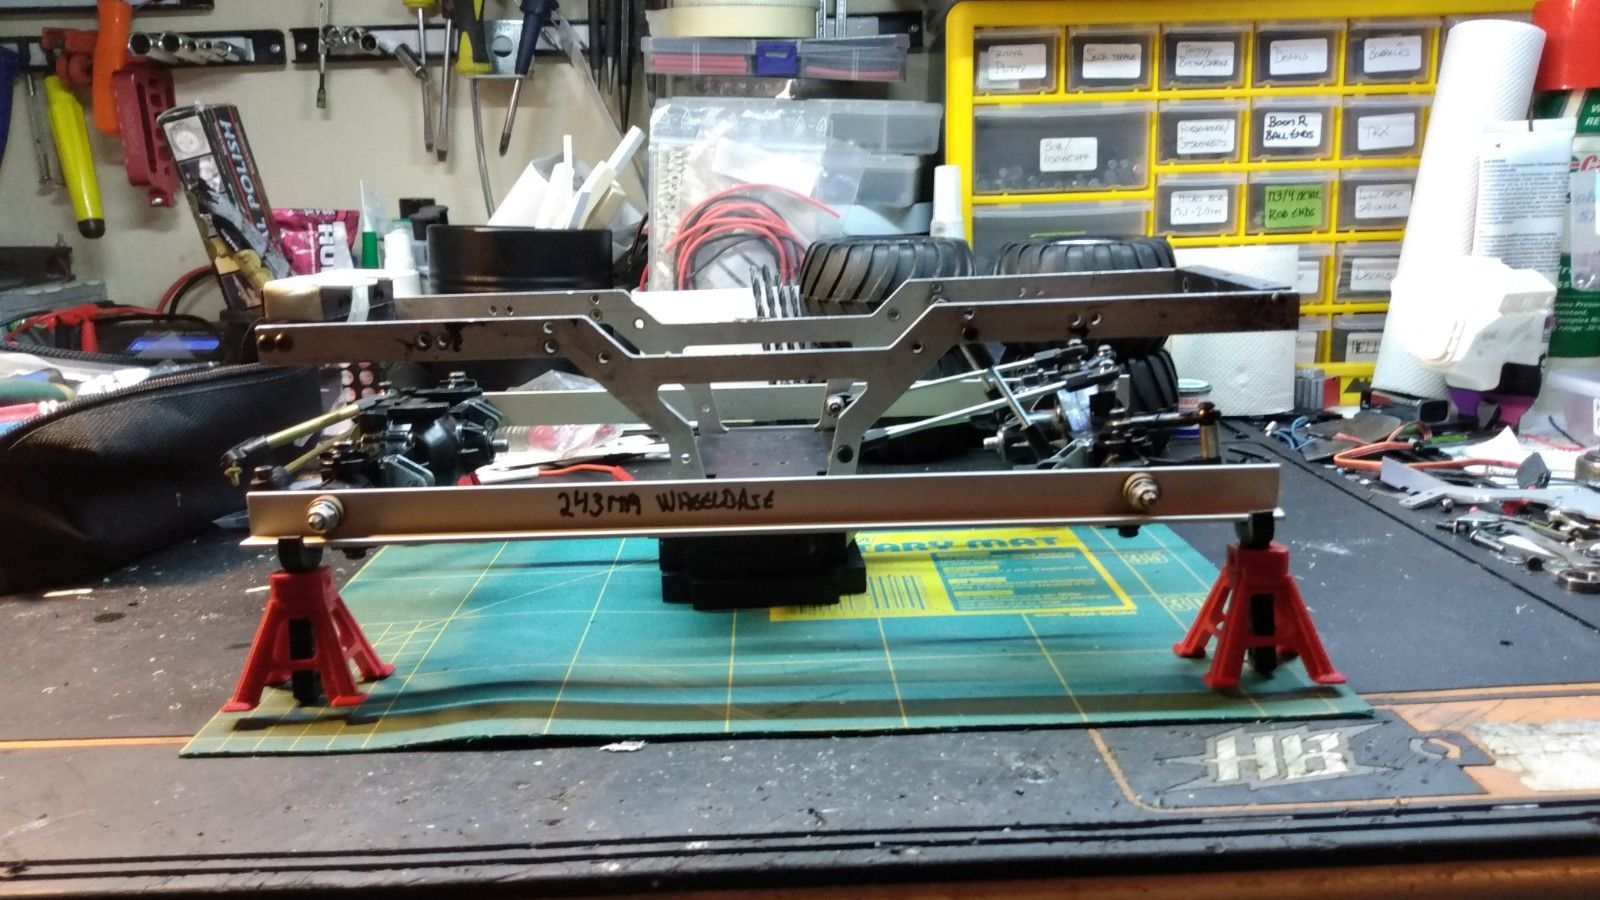
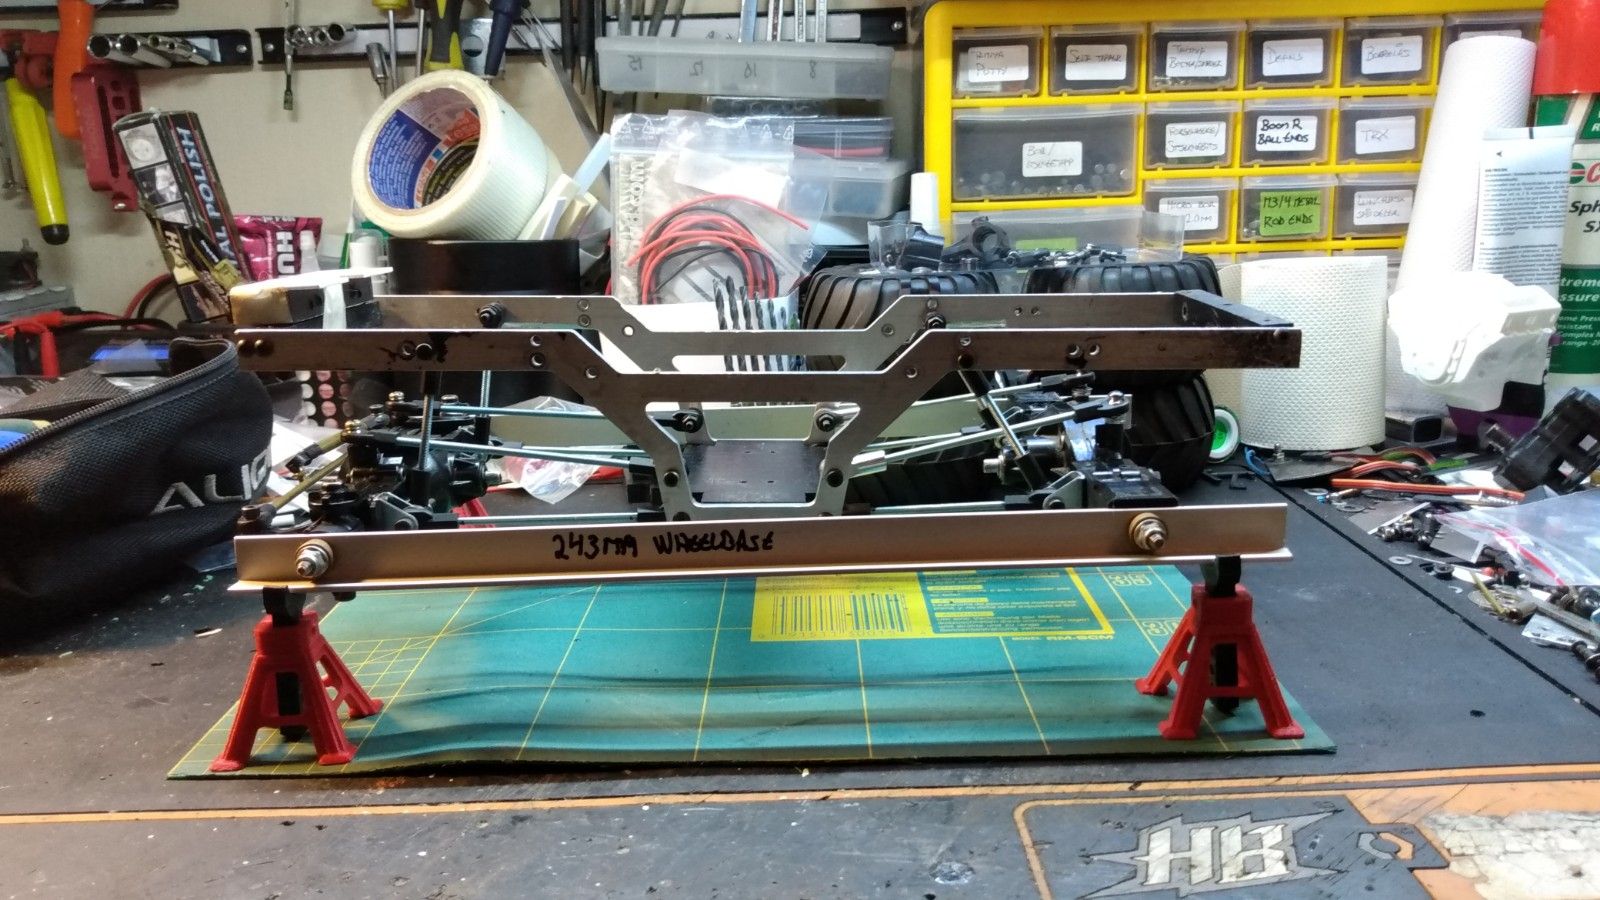
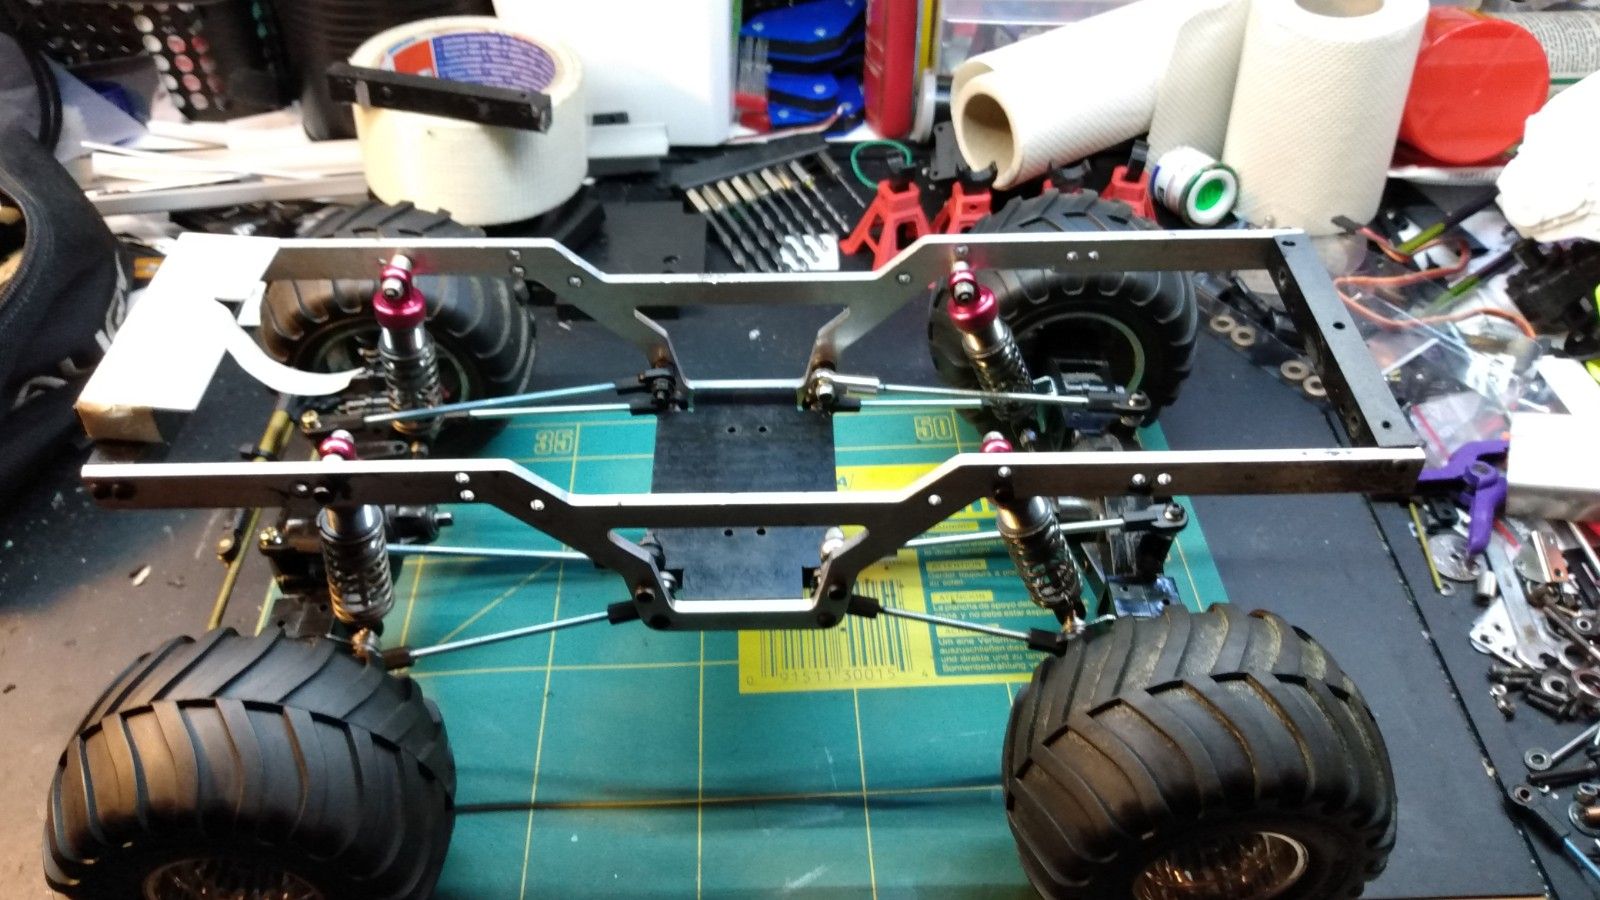
Now as the rear link lengths are set, I could measure the wheelbase, which in my case is 243mm and make a JIG from some L shaped aluminium.
Drilled it with 1.5, 2.5, 3.2, 4, 4.5 and 5mm as I go since that makes nicer and more accurate cuts. I don't own a bench drillmachine.
Wheel, wheelhex and cross pin is removed and the 5mm holes in the JIG slides onto the wheelaxles.
Those bronce bushes as spacers and regular M4 wheelnuts to secure the axles to the JIG.


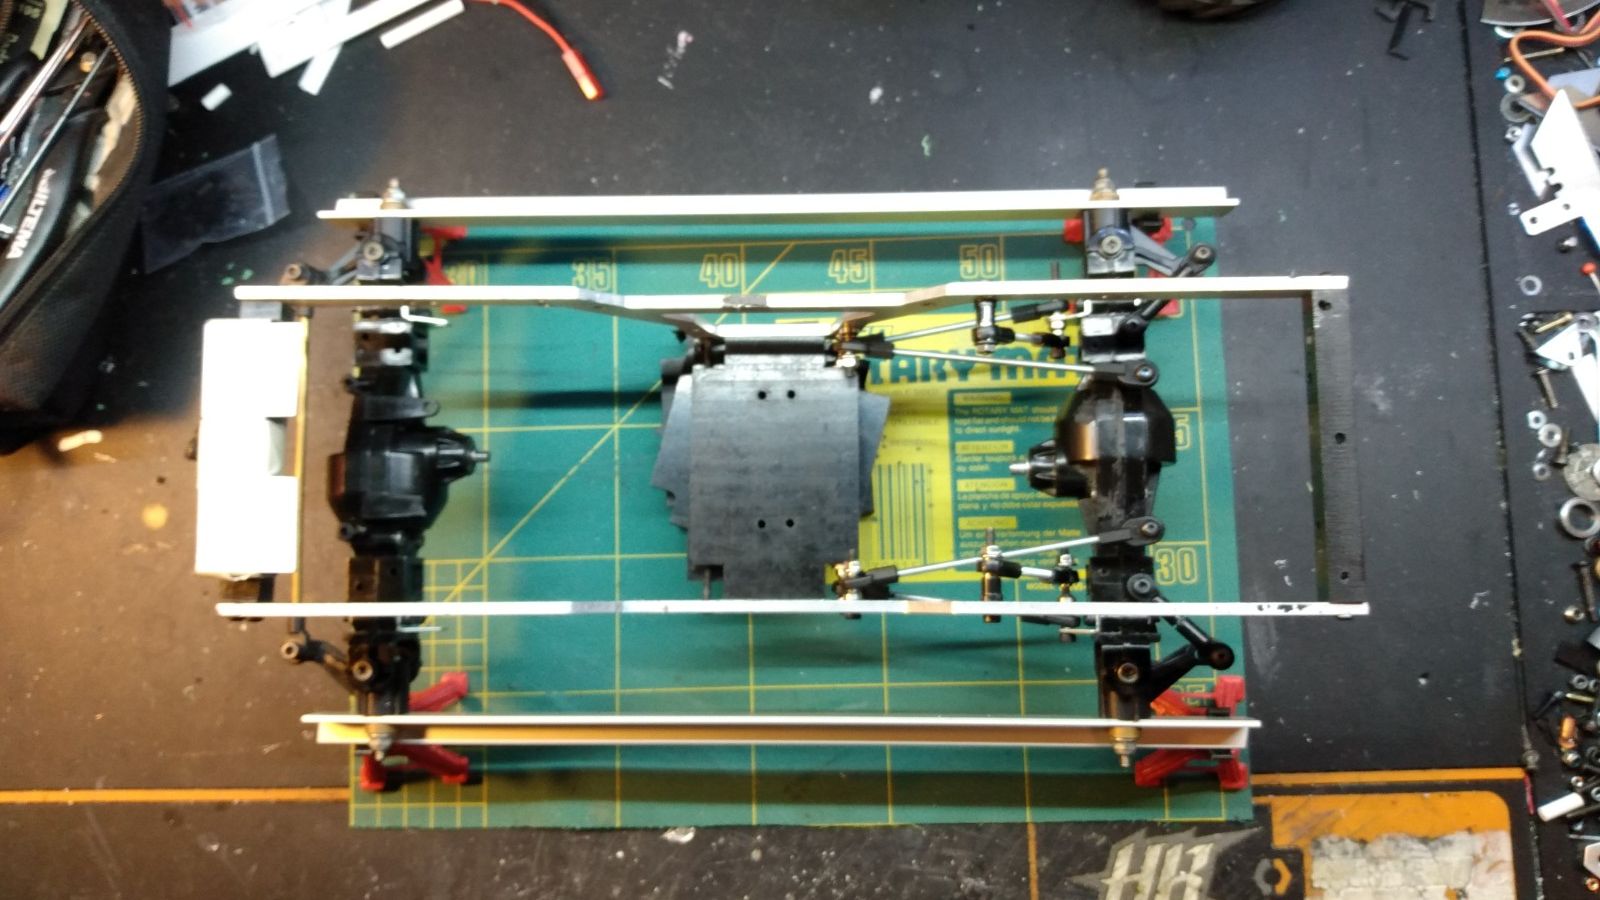
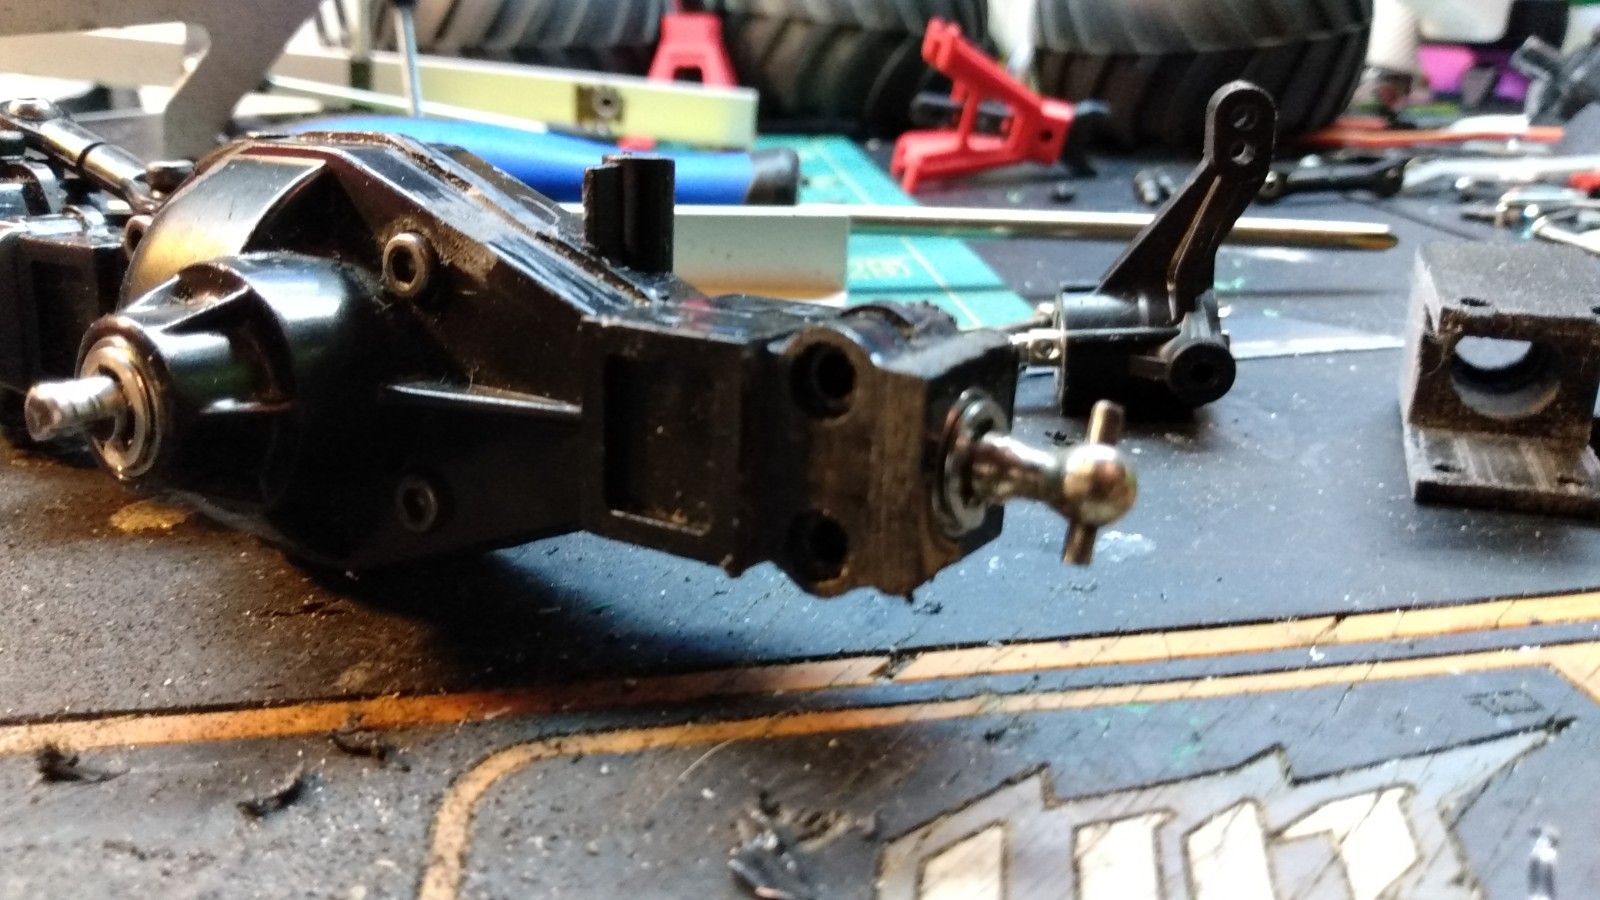
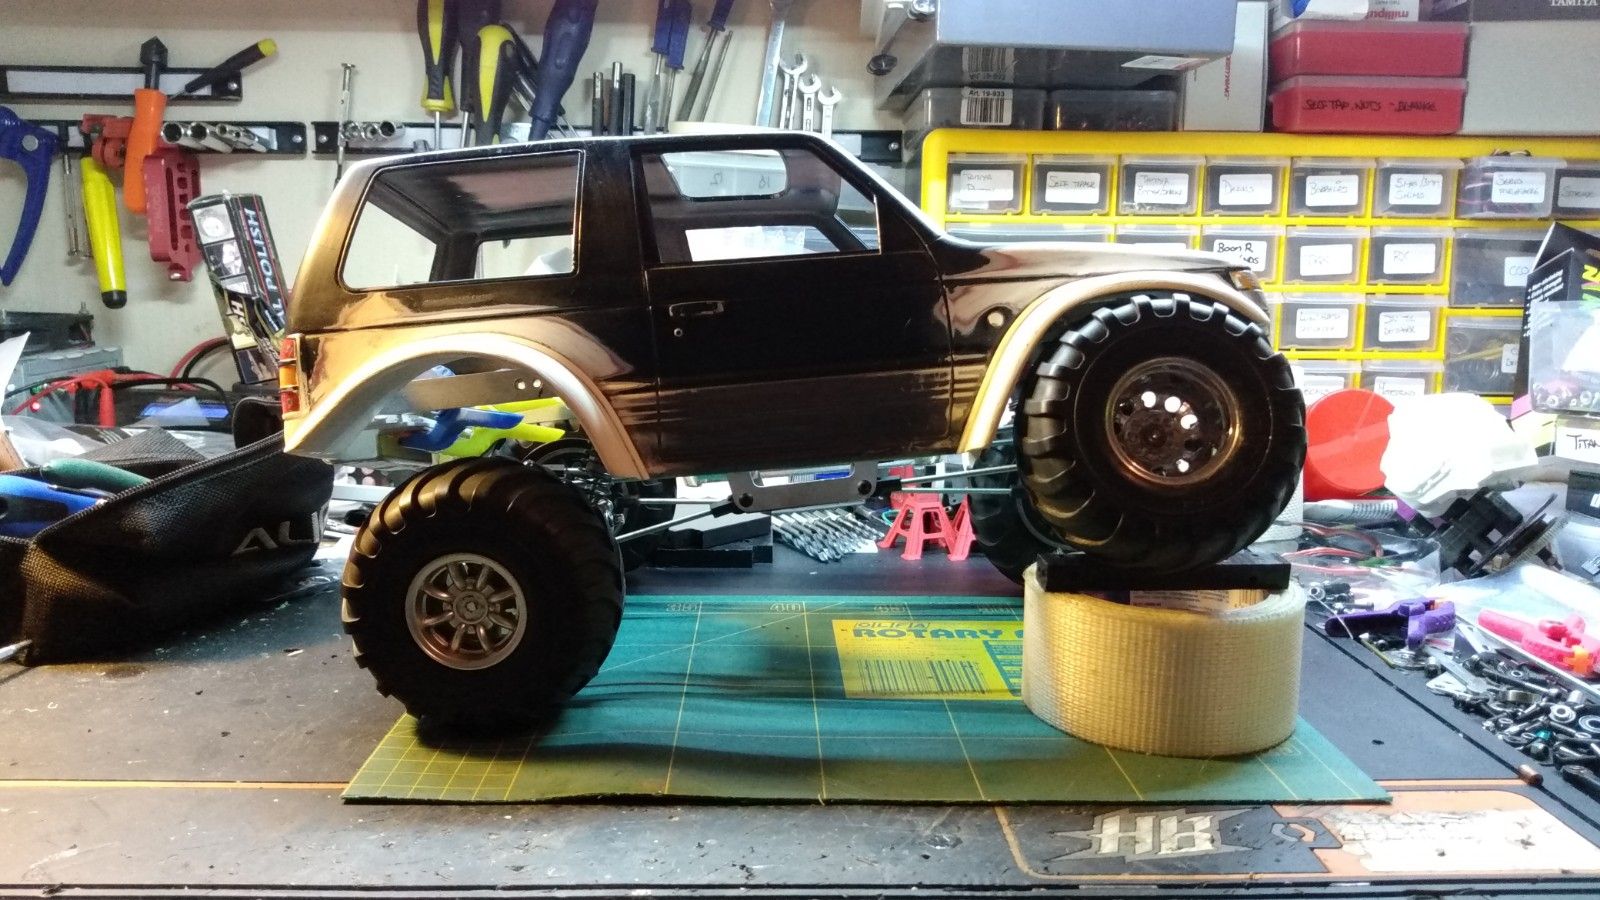
Now I only need to connect the dots up front, making the front links.
I'm thinking of doing 3 link suspension and Panhard like modern trail rigs like the Axial SCX iii.


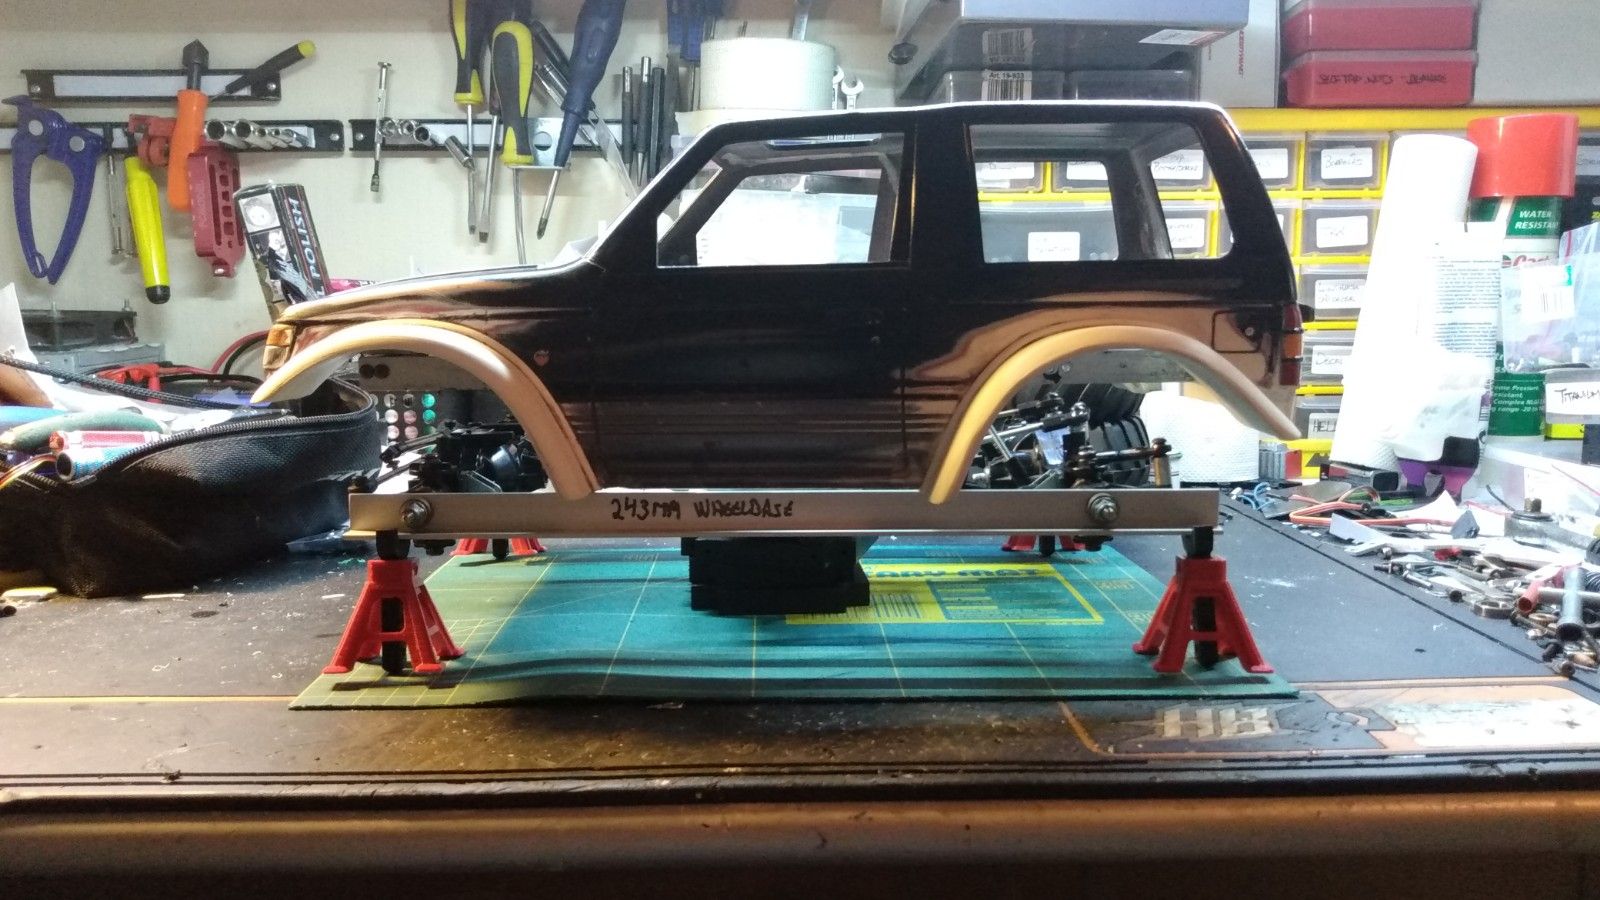
When the suspension is done, the axles will swing in a little arch due the short links, so wheelbase will be a tad longer when it is resting on the wheels, or when axles drop fully, like when you lift the rig of the ground.
That is a pluss as longer wheelbase is better when crawling around.
And due the small arches that match the wheel diameter is important to set the vehicle up at fully bottomed out shocks, so you know there tire do have space in the wheelarch, or a slight bodylift is needed.


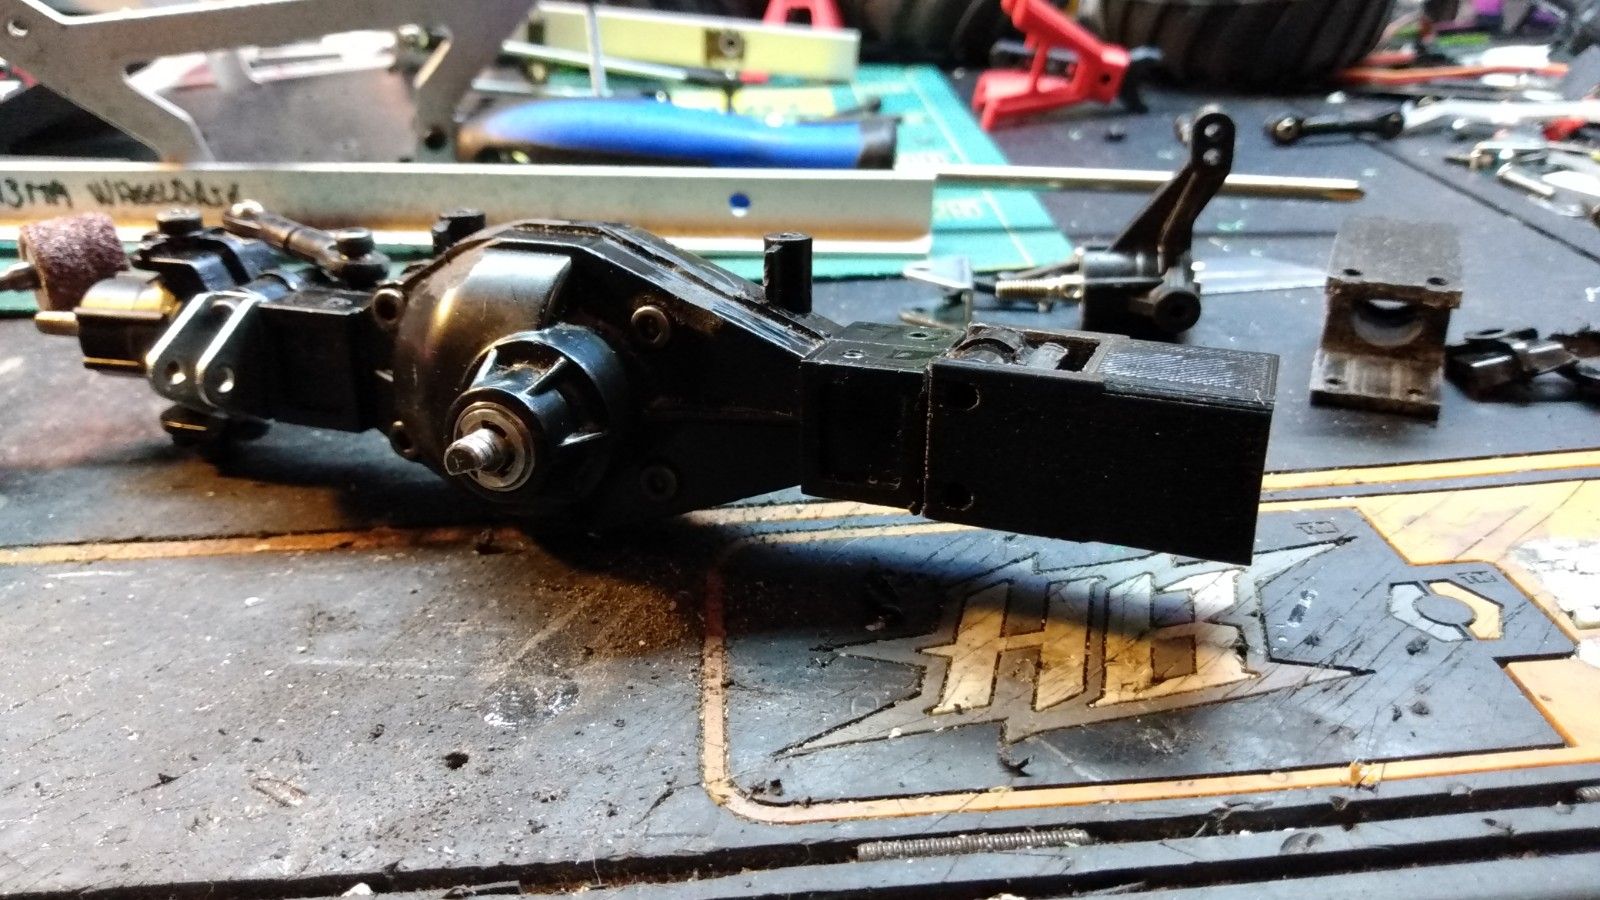
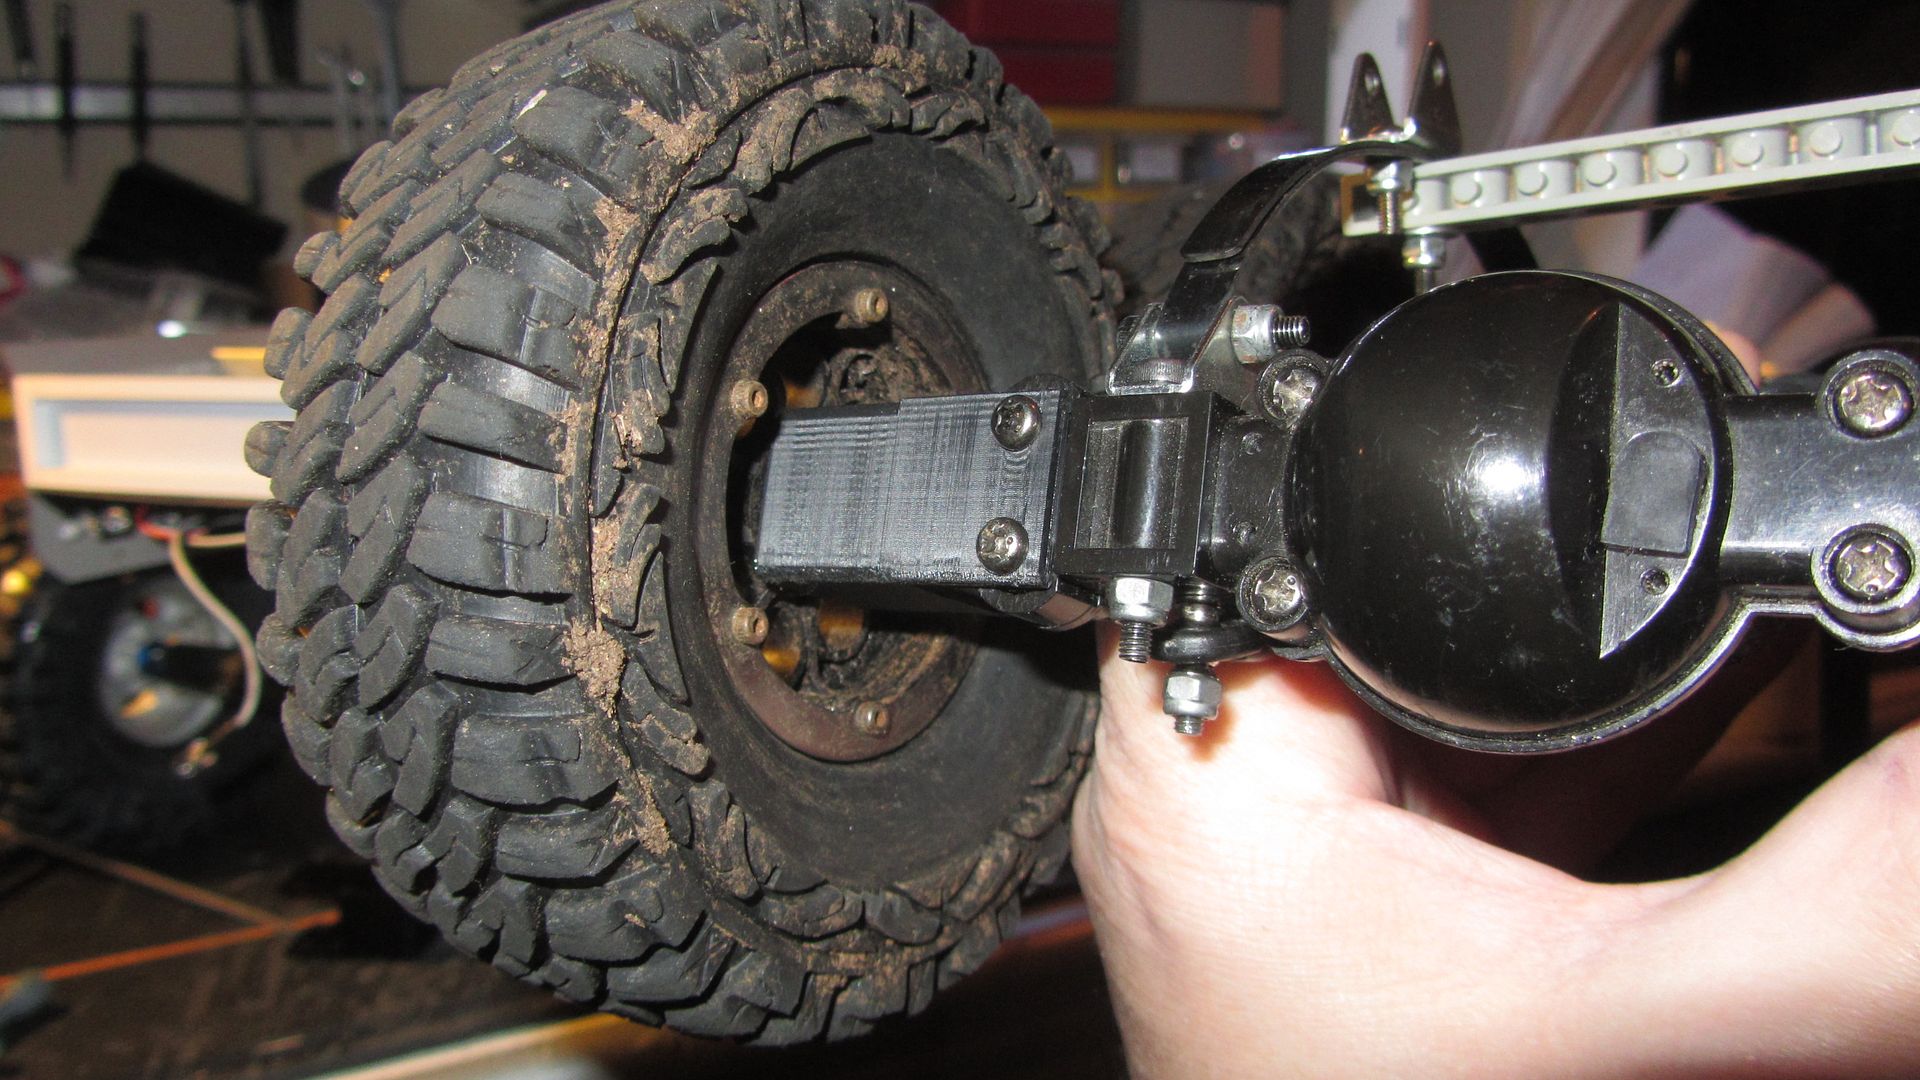
In my partsbin I have a Axial SCX10 gearbox which is perfect for this build, matches the age of the chassis as well.


Will mount it so the motor points forward, weight up front is good.
Usually a crawler/scaler have 60/40 weight bias to be able to climb steep incline.


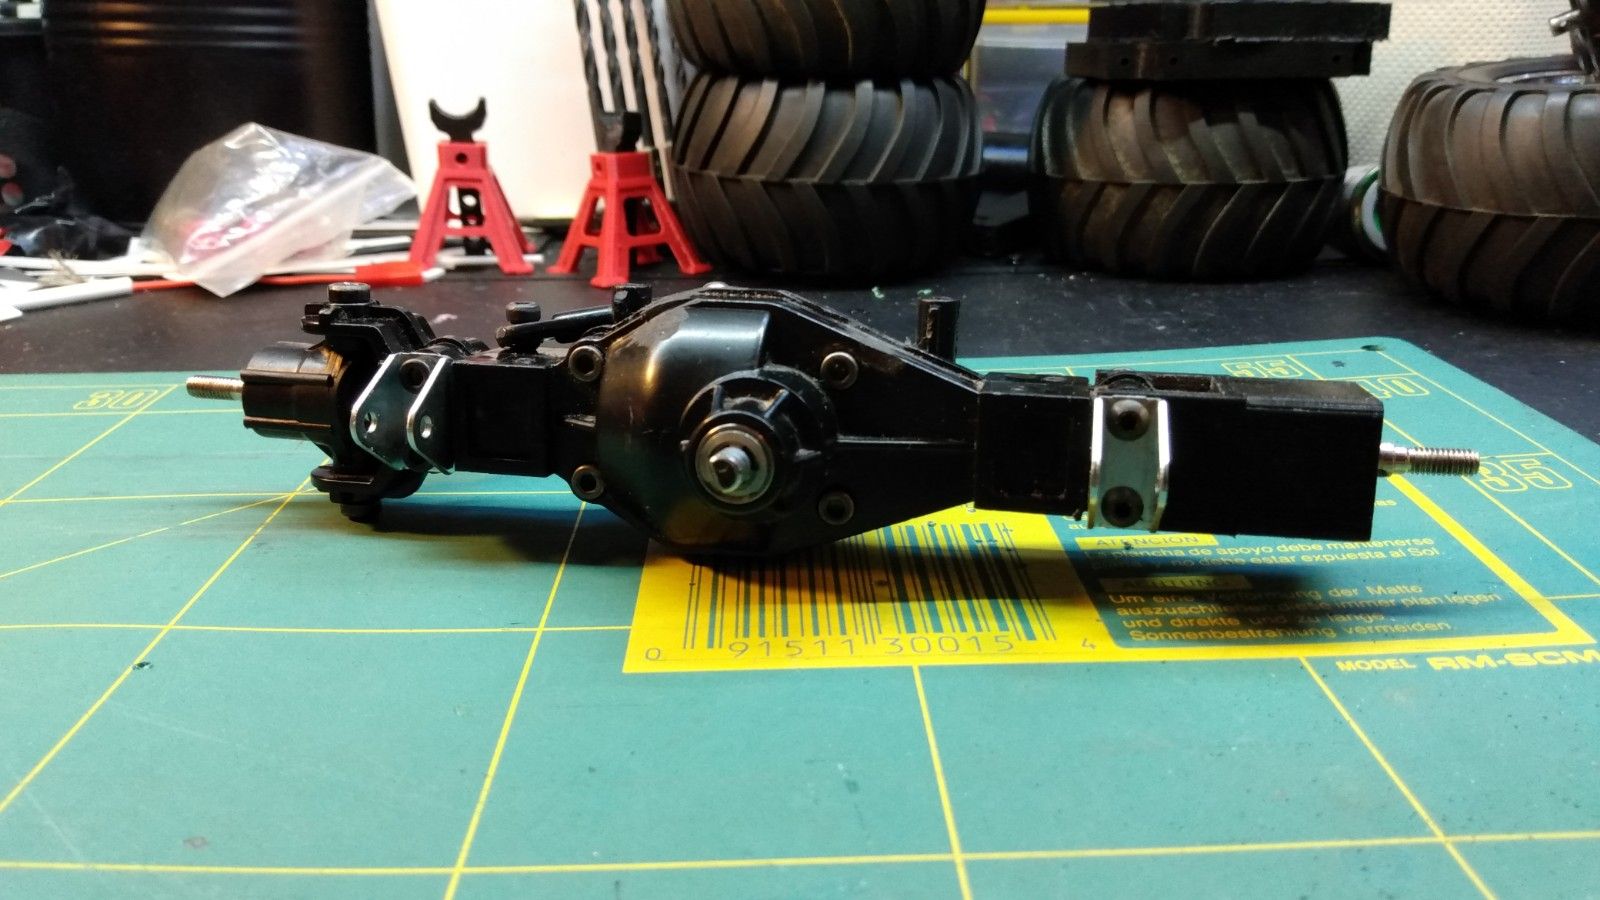
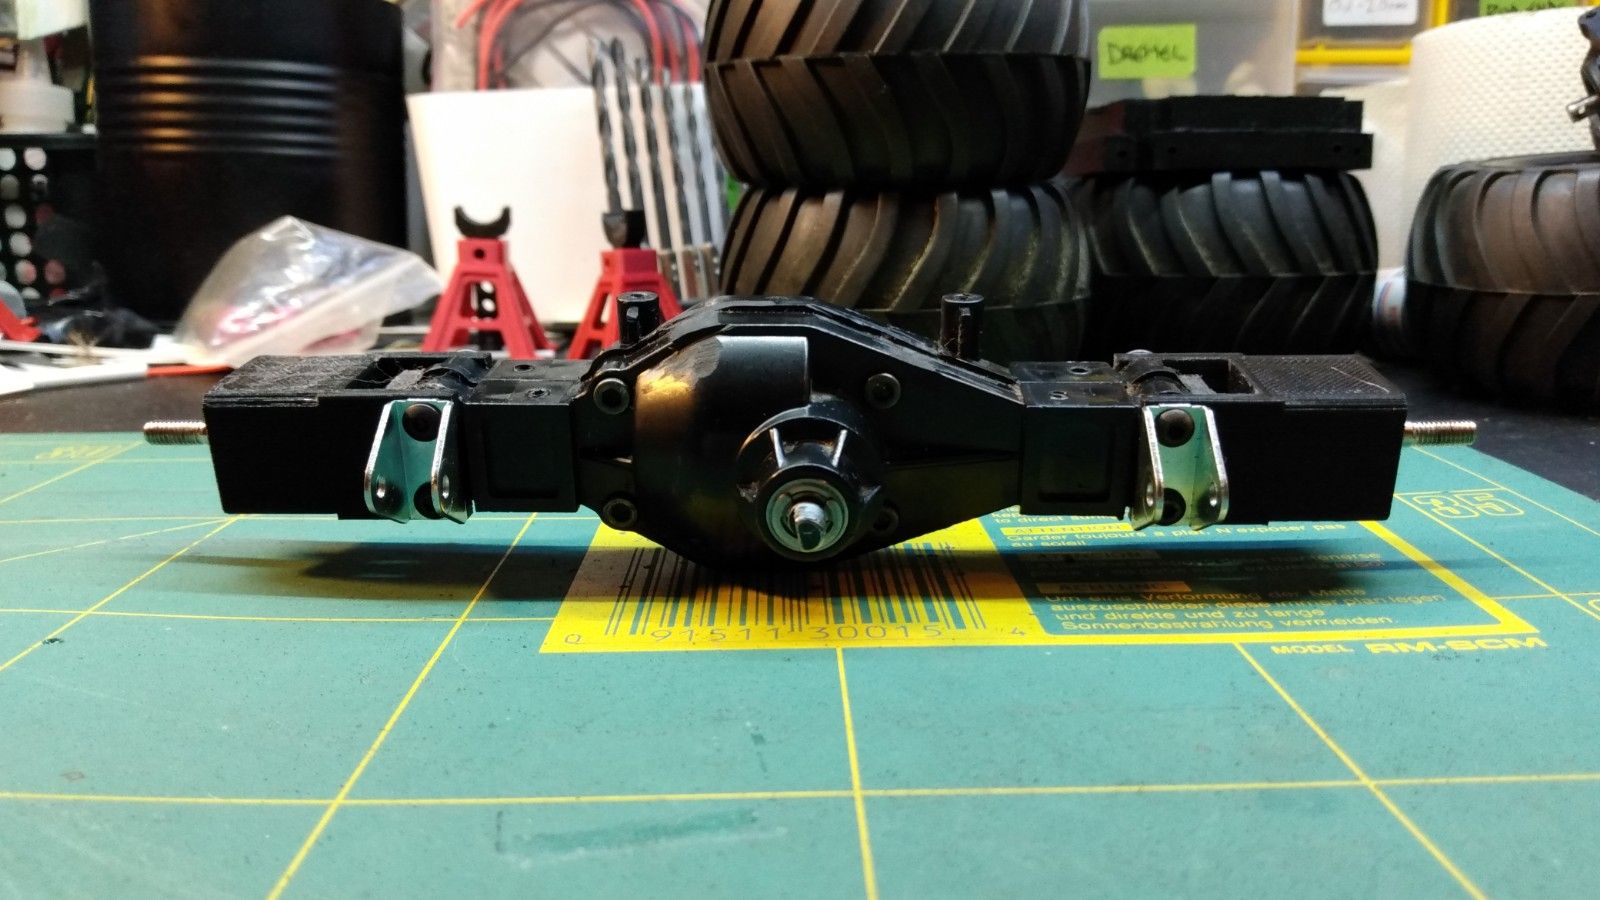
And I just collected the 3d printed straight axle adapters.
One pair for this and one pair for a future project.


First time building a rig with a JIG rails, seen lot of others have done it this way.
But due the limited space inside the wheelarches and suspension travel, it is the best way to do it to ensure things will fit.
On a lexan body there is room to play a little with wheelbase and link setups.
The following user(s) Liked this: Edou, stingray-63, 1972 LeMansGT Jim

Please Log in to join the conversation.

TLT based old school crawler/scaler build - Icelandic Pajero. 3 years 6 months ago #62087

Excellent work and very detailed :)
If you can't fix it with a hammer, you've got an electrical problem mate :)
The following user(s) Liked this: caprinut

Please Log in to join the conversation.

TLT based old school crawler/scaler build - Icelandic Pajero. 3 years 6 months ago #62102

Excellent work and very detailed :)


Thank you very much :y:


Before I go further I need to install those straight axle adapters as the change to suspension a few millimeters.
As the axle was basicly free, I can hack these without any regrets, I do have several others as spare.
First the C hub part where the uprights are fitted to need to be cut off.


When thats done, the strengthning webs needs to be removed as this is where the straight axle adapters bolts to.


And when those parts are removed, the axle should look like this.


And the straight axle adapters fits like so...


As you can see this cleans up the look of the axle, left side is stock.


Both sides modified


Upper links had to be adjusted and I have only one rod of allthread left, so instead of making new uppers, I simply put on a longer rod end at the chassis.
Also had to make sure the chassis still fits within the body, which it does.


Still clearance to the bulb holder plate screws.


Back on the chassis jig.


And chassis links geometry is loads better now, but ideally the upper links should up at chassis end or lower on the axle end.
But there is a limited ways of mounting links on this combo.
I'm toying of the idea of making a steel axle truss with link mounts.


To remember what the links does, the lower ones dictates the wheelbase and the upper links center the axle, they also act as a pivot point of the center of the axle.
And upper and lower links needs to cross eachother so the axle can't swing sideways.
Others option is running parallel 4 link and panhard that locates the axle sideways, 3 links is also very much used, both lower and one upper.
The following user(s) Liked this: Jonny Retro, stingray-63

Please Log in to join the conversation.

TLT based old school crawler/scaler build - Icelandic Pajero. 3 years 6 months ago #62112

4 hours work today, takes time to make stuff and adjust and swap parts around.

Front links are now complete, for now at least.


And for the first time chassis can stand on its own wheels.
Still with the links that mimic the compressed shocks.


Wanted to see how much flex the suspension had in it, so I mounted 2 of the shocks.
About 6.5cm of flex is very good with that short wheelbase (243mm)


With body


Then fitted all 4 shocks, hight is too high, but will sag a little when all the bits is fitted.


Had to move and add washers as there is really to little space for the rear shocks.
Btw washers makes great spacers if you need to move things a little.


Unloaded it sits a bit to high, but the tires will clear the flares at least at rear, front may need a bit massage.


With weight added, body sits about where it will end up fully loaded.


Now I need to figure out how I want my bodymounts to be, think I'm going for magnets for this one.
And 3 TLT wheels is on the way in the post as I'm missing one, you may spot the M chassis wheel in one of the pictures.
TLT wheels have 1.6" ish outher bead and 1.9" inner, so for now I have used on touring wheel on the inside and M chassis for the outer instad of that wheel that is missing.
The FarmKing and TumblingBull actually use TLT wheels and tires up front, just with white ones instead of chrome or red chrome on the TLT-1 variants.
But every online shop is out of those wheels atm, not only these but there is a massive shortage on Tamiya parts in general due the virus.
If you happen to own 4-6 FarmKing front wheels #9335677 I want to purchase those, think white wheels will float better with the Icelandic look than chrome ones.

Hope this progress continues, will be my fastest build in a long time... :)
The following user(s) Liked this: Jonny Retro, Edou, stingray-63, 1972 LeMansGT Jim

Please Log in to join the conversation.

Moderators: caprinutstingray-63AndyAus
Time to create page: 0.263 seconds
Cookies are required to make this site work. If you continue to use this site you permit us to use cookies.