Keyword

TOPIC:

Richard's 4x4 Lunchbox with DF01 drivetrain. 3 years 2 days ago #65795

Great work, I don't know how you work it all out. I'm struggling with a basic ladder chassis lol.  

Lee

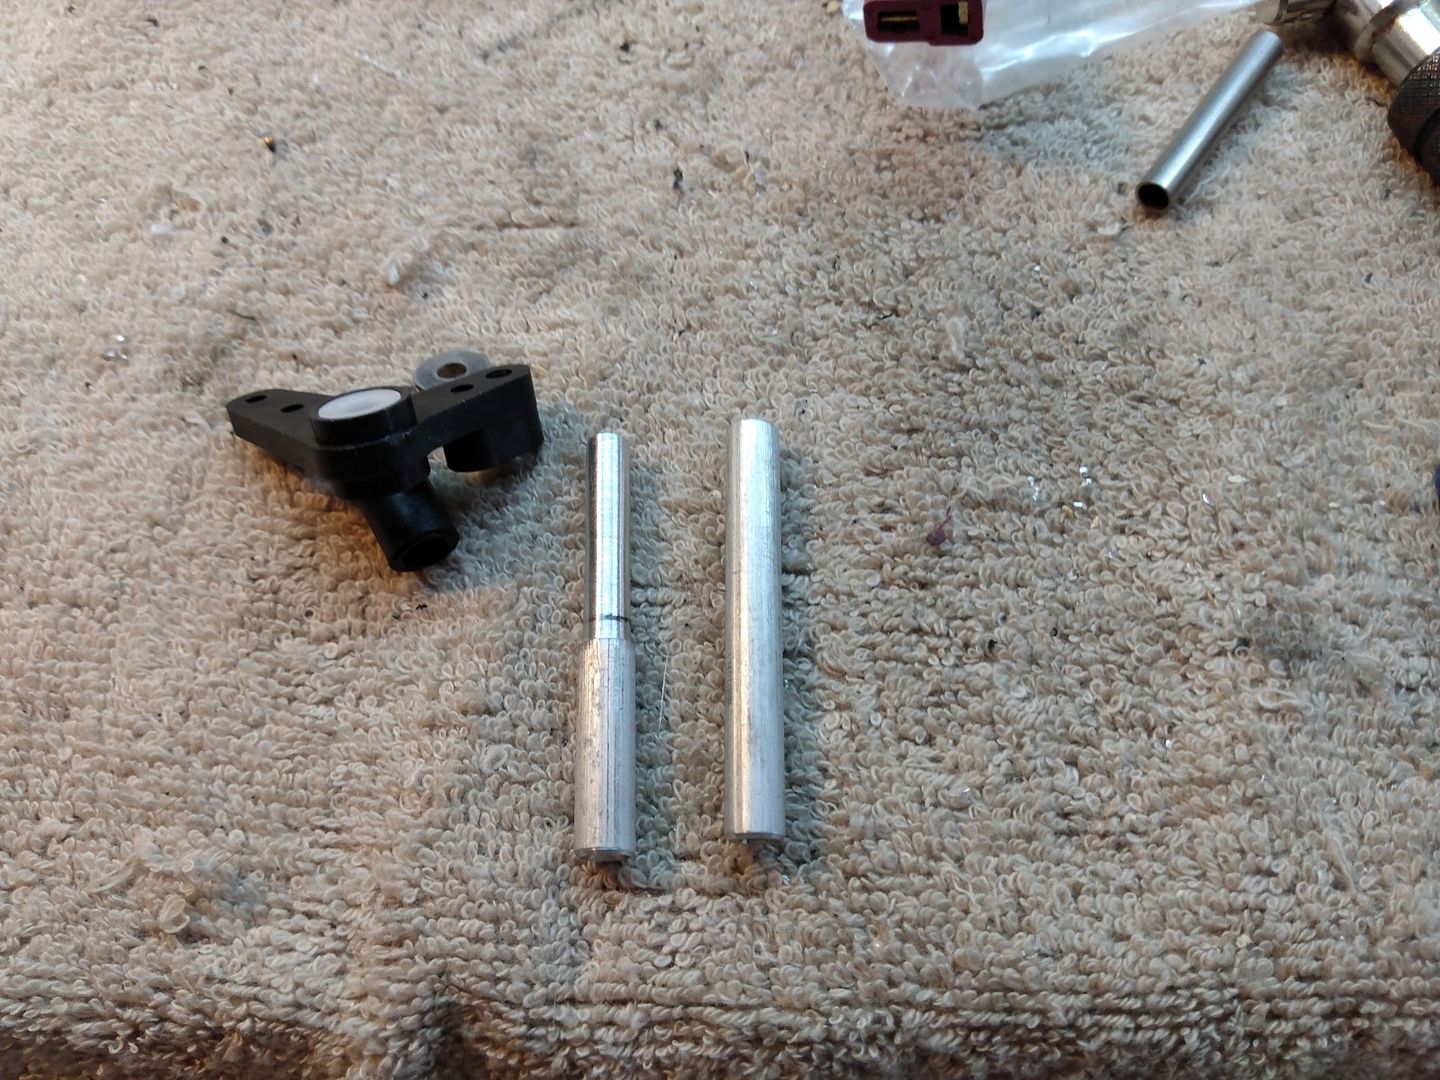
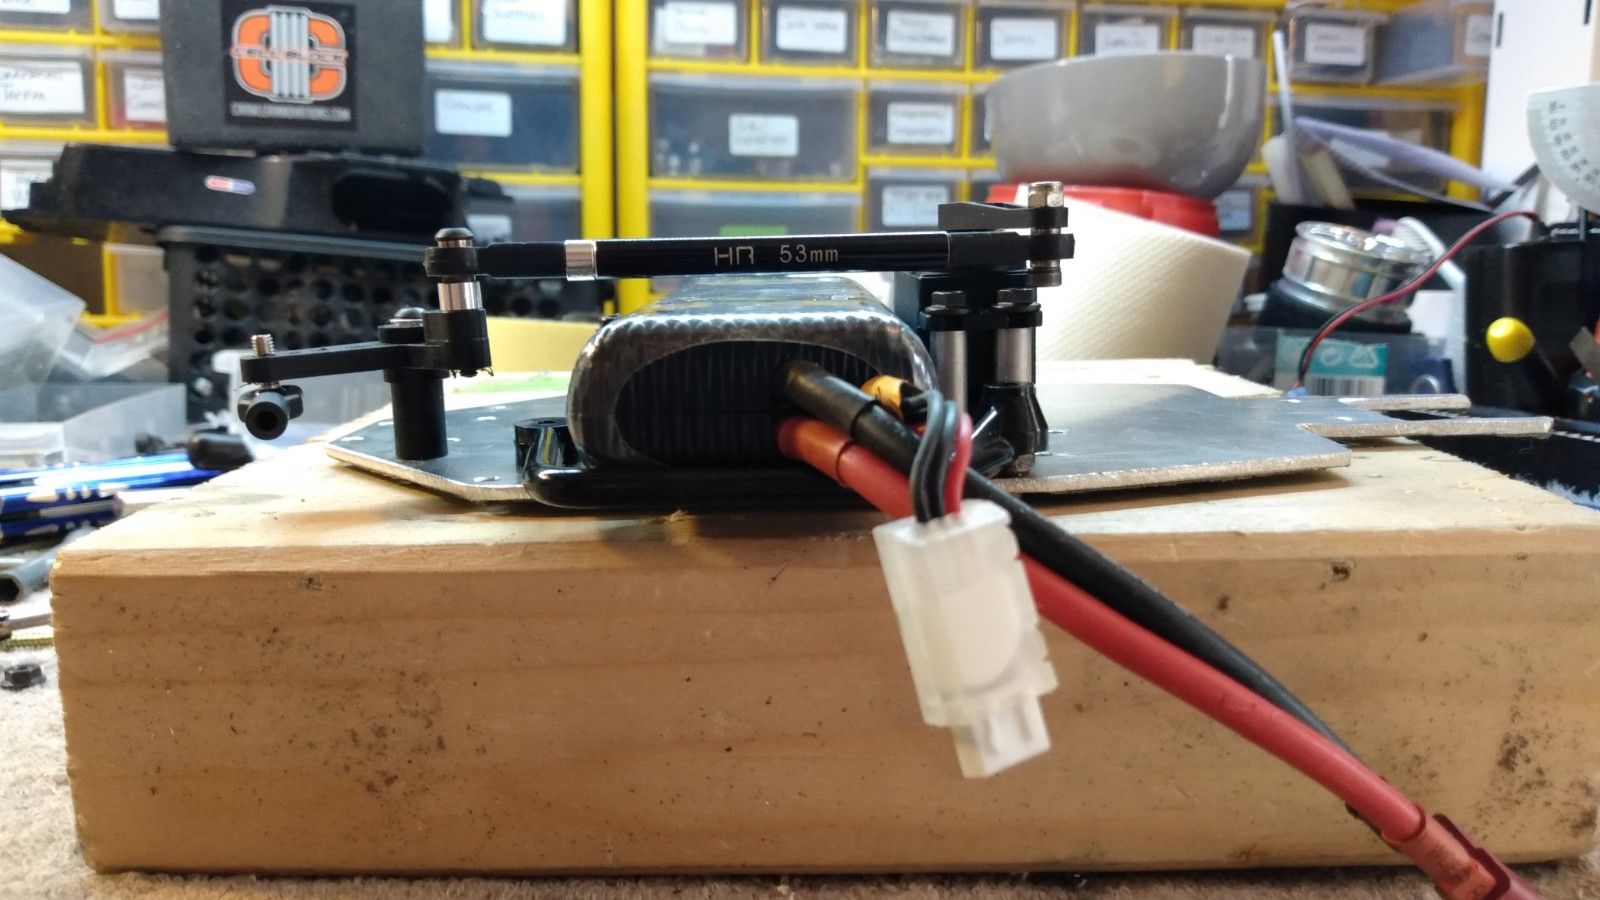
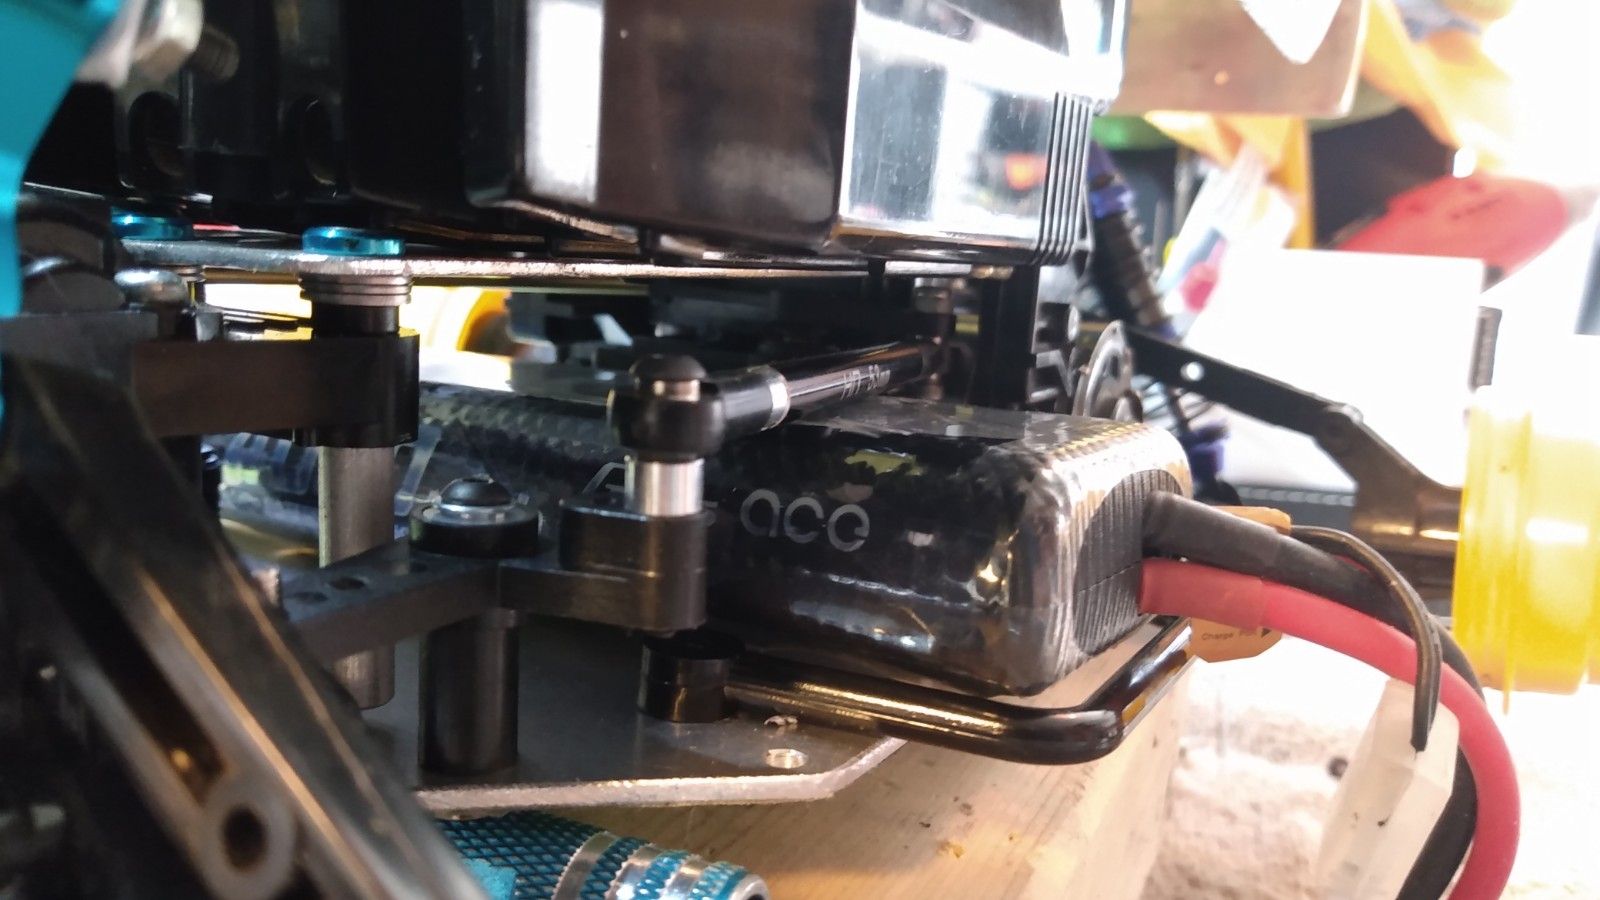
That's why I use those threaded tubes. I fit long setscrews in them and measure the length between them.
Between my measurements and the DF01 FRP template I got link to a few days ago, I'm able to work out where things needs to be.
Just connecting the dots really.
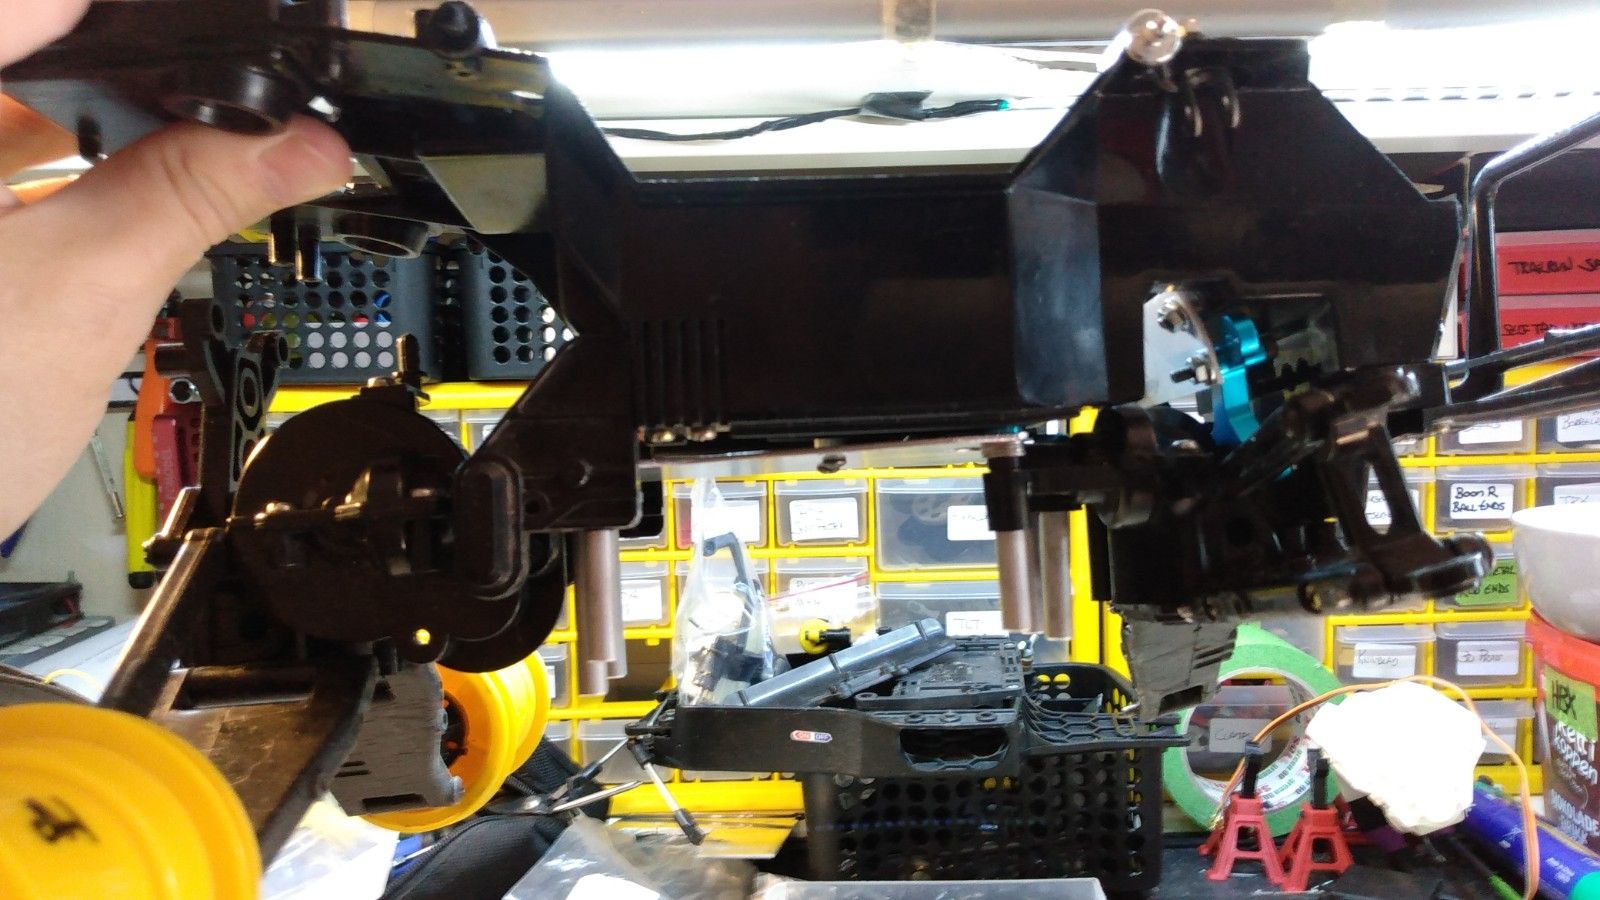
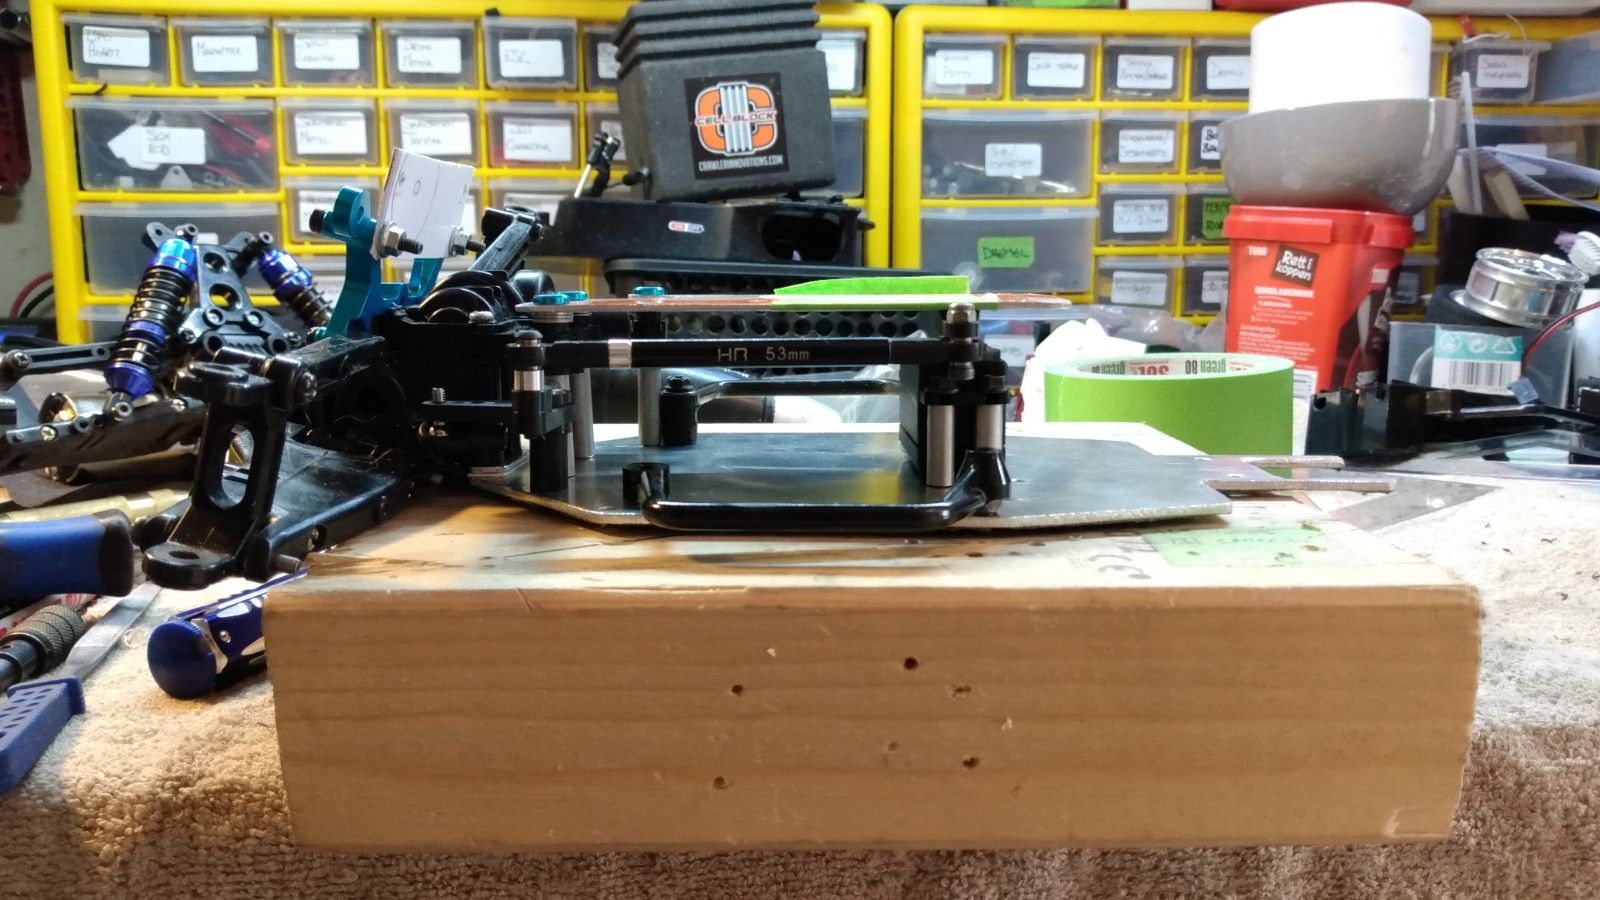
Hardest is where to begin. I had to start at the front gearbox as it needed to be fitted as tight to the Lunchbox chassis and tires need to be about center of wheelarch on the body when fully compressed.
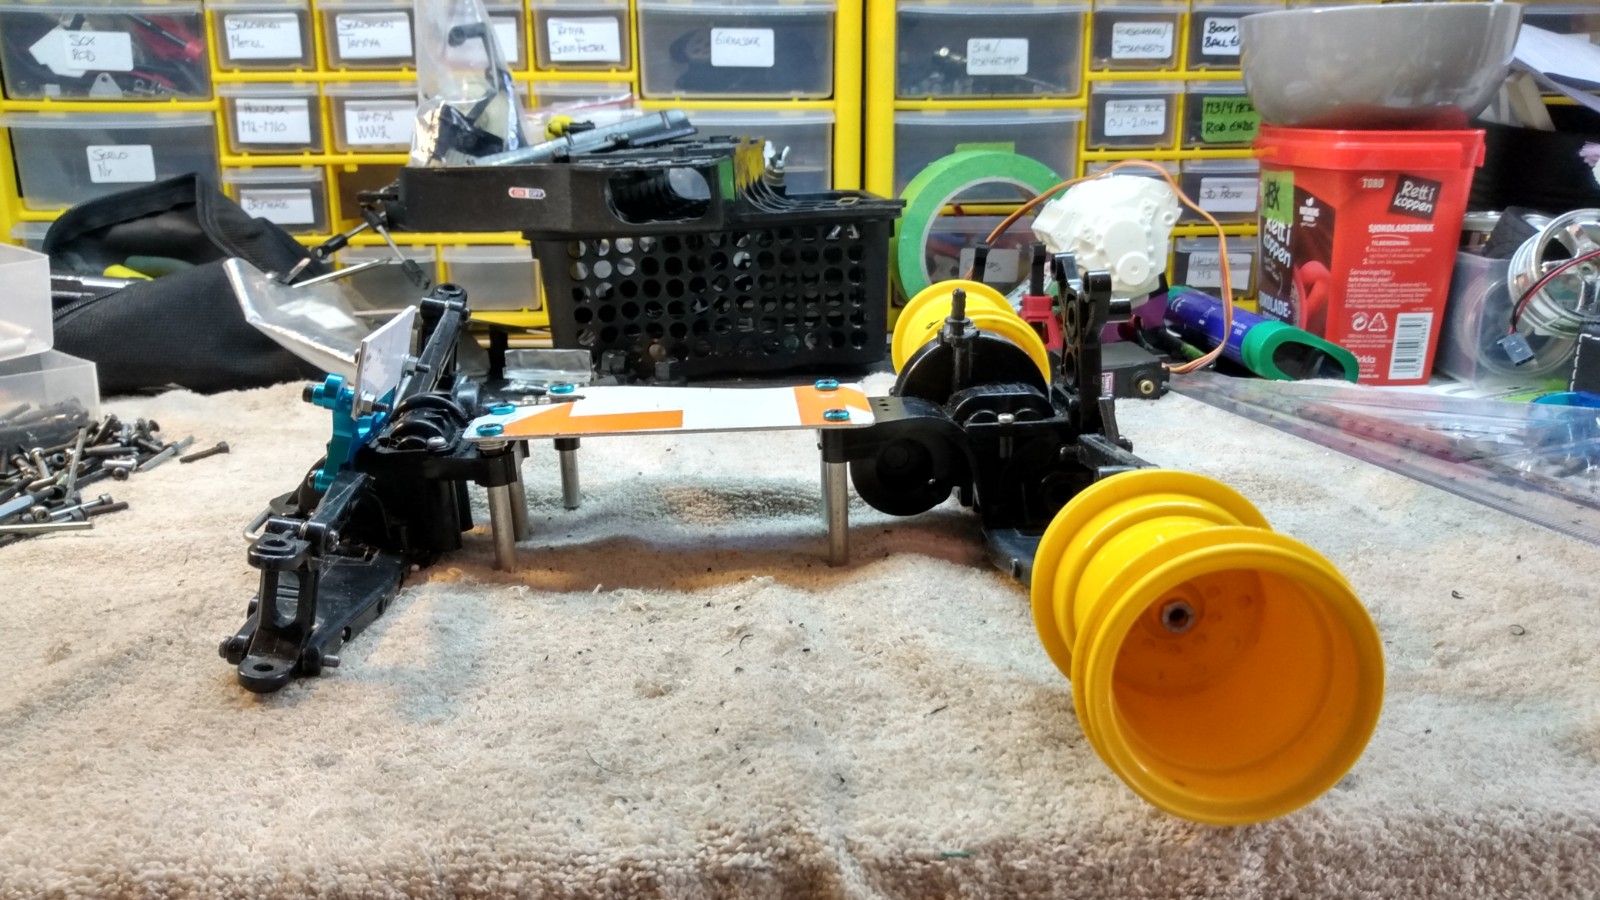
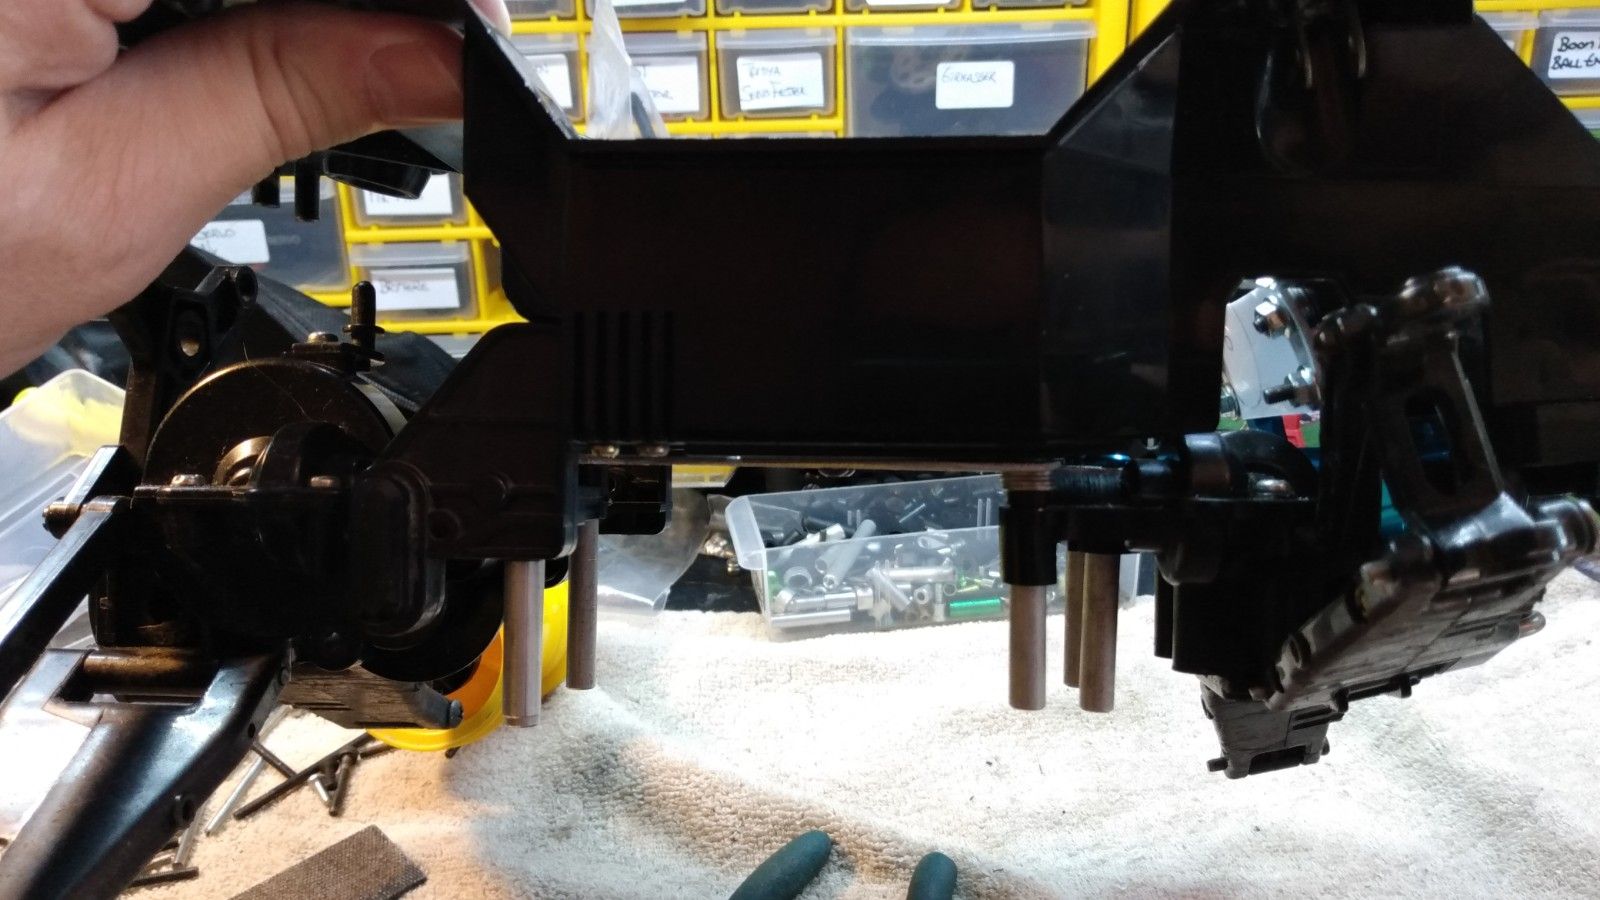
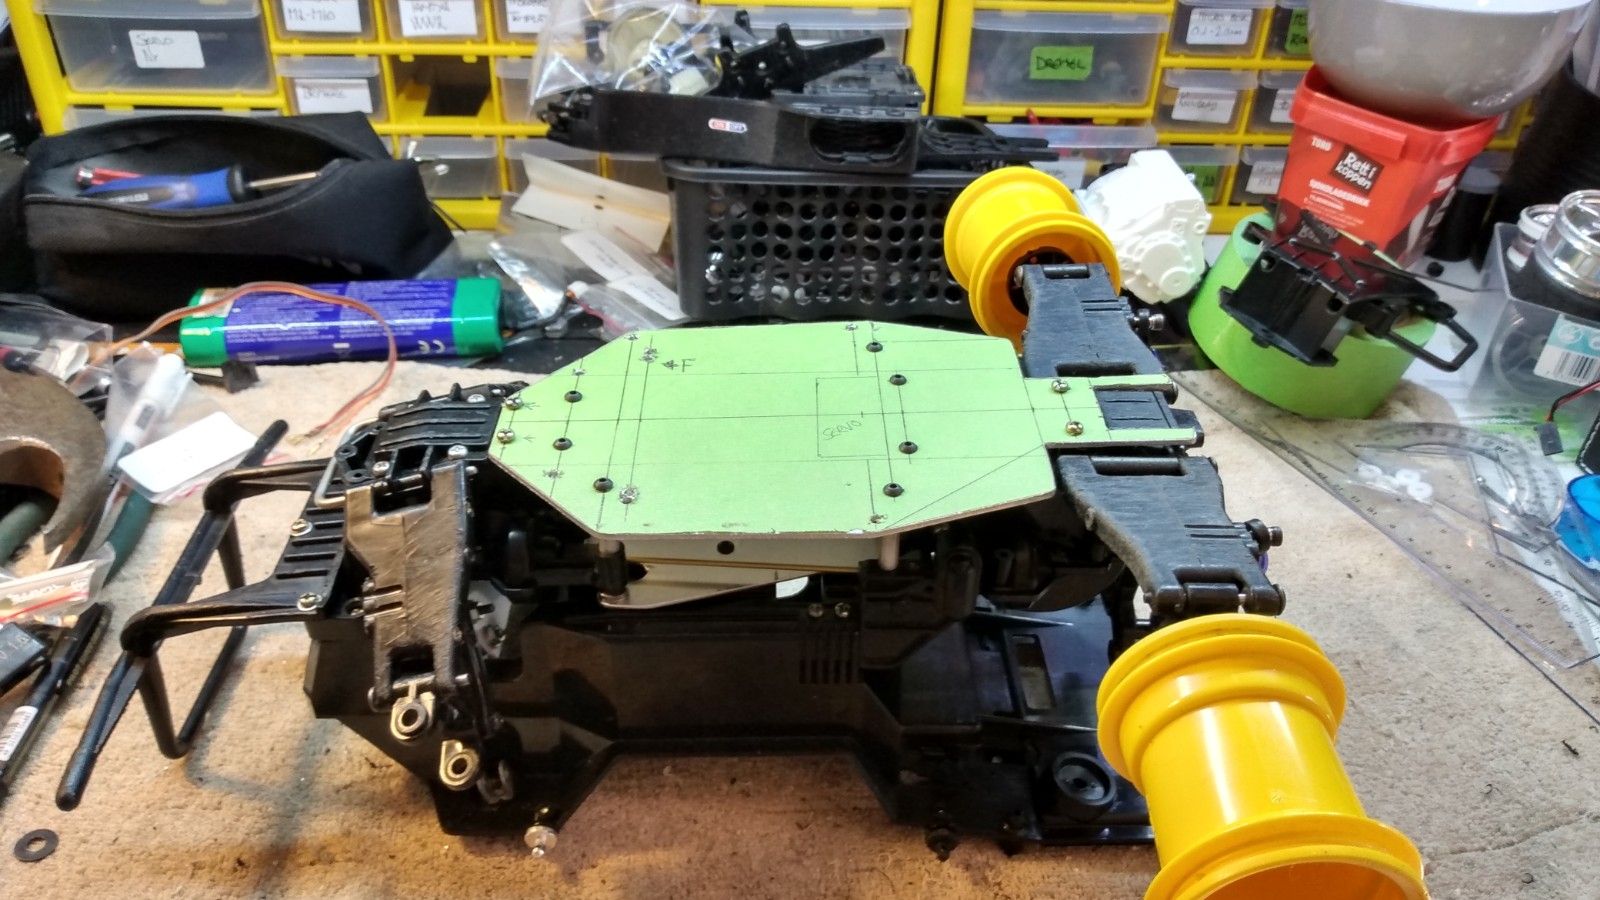
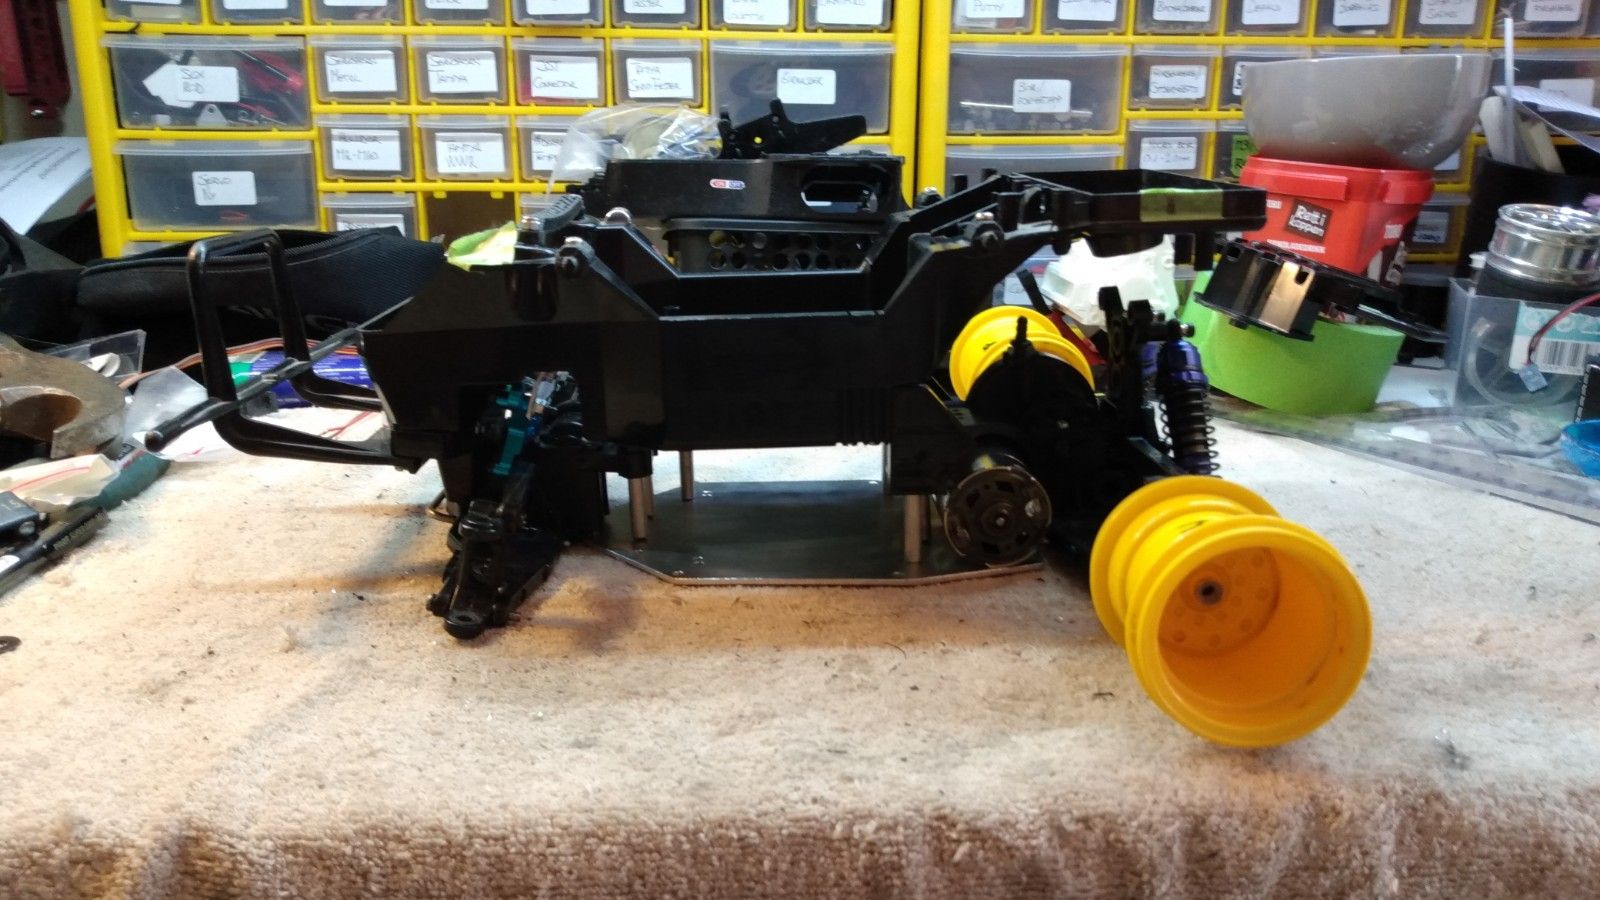
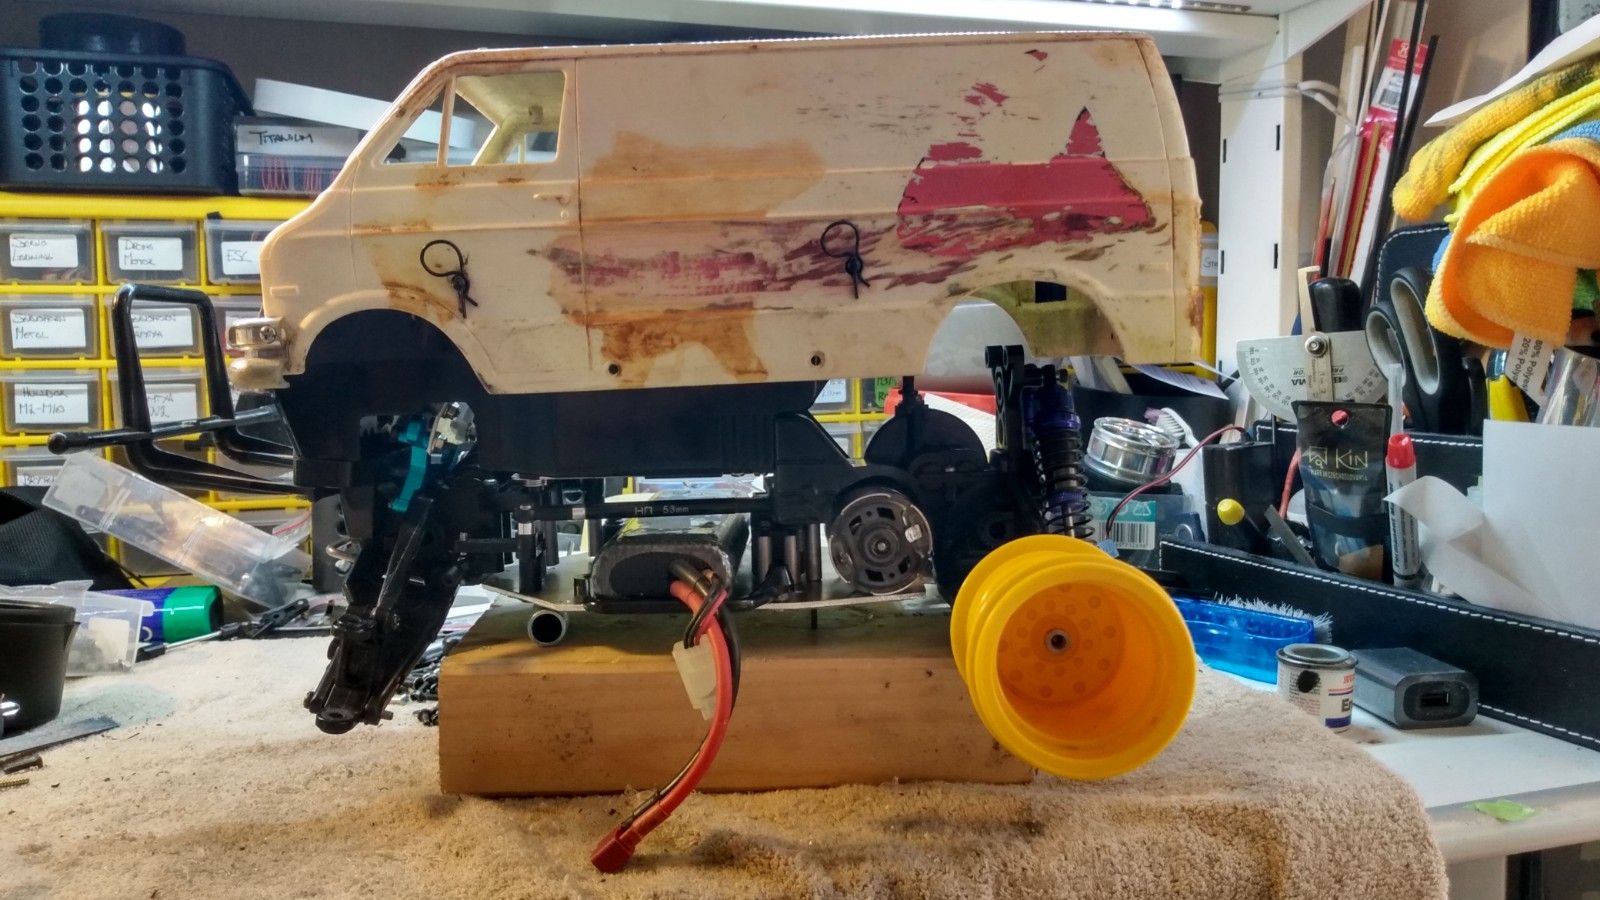


Day 3 of the build.

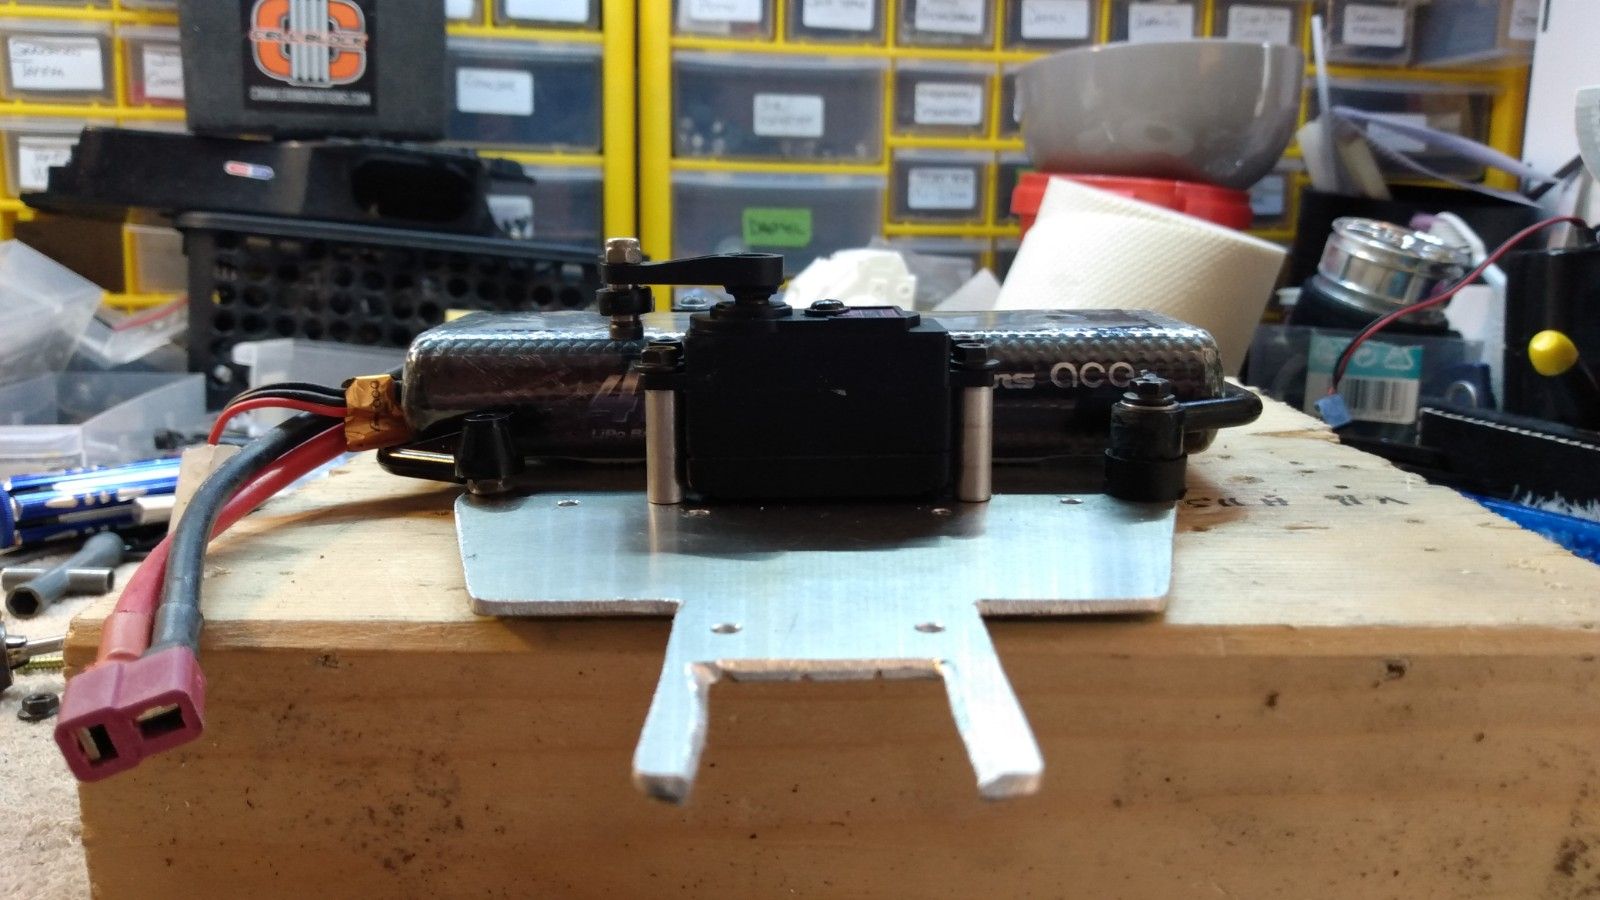
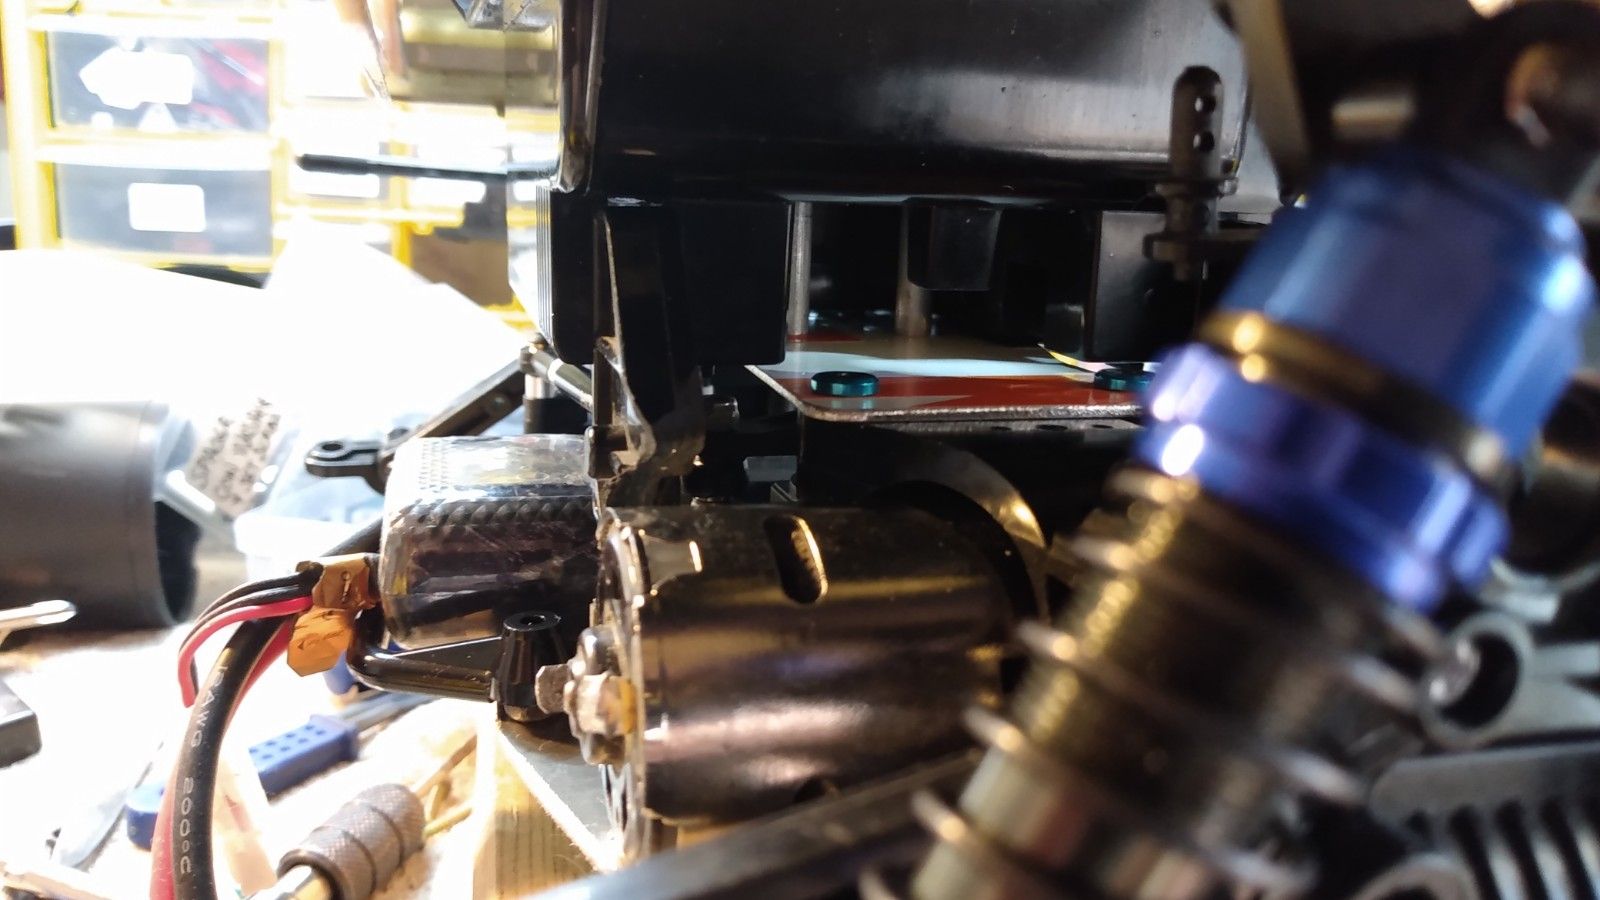
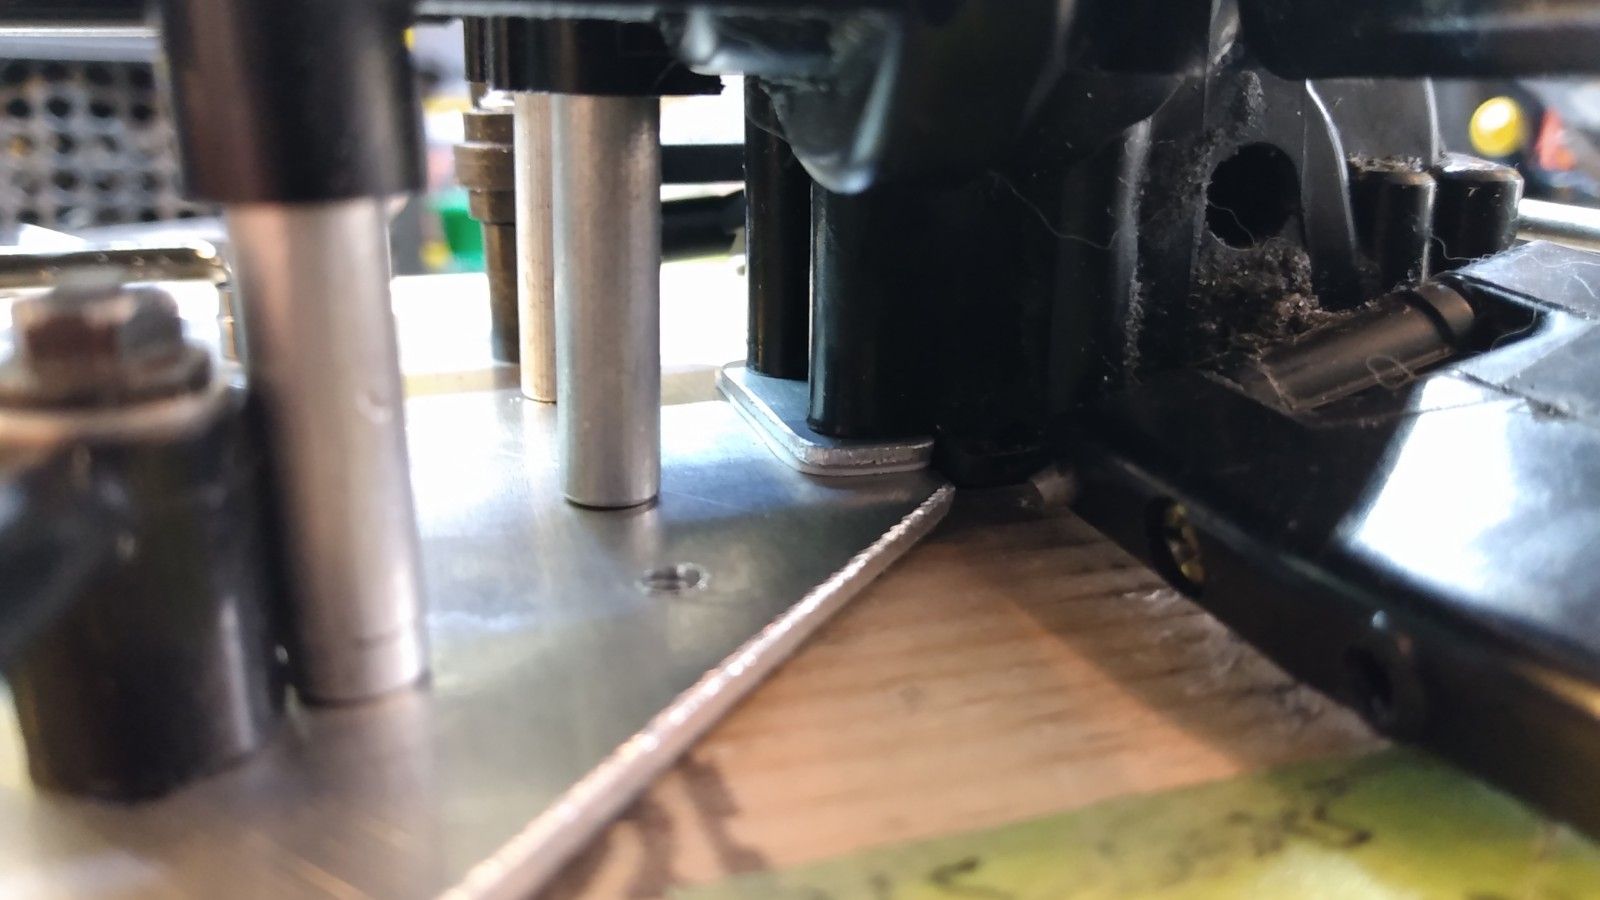
Here is how the upper chassis and gearboxes looks like atm.


Today I wanted to bolt the DF01 upper chassis to the Lunchbox tub.
I used the bolt holes where the MSC used to sit.


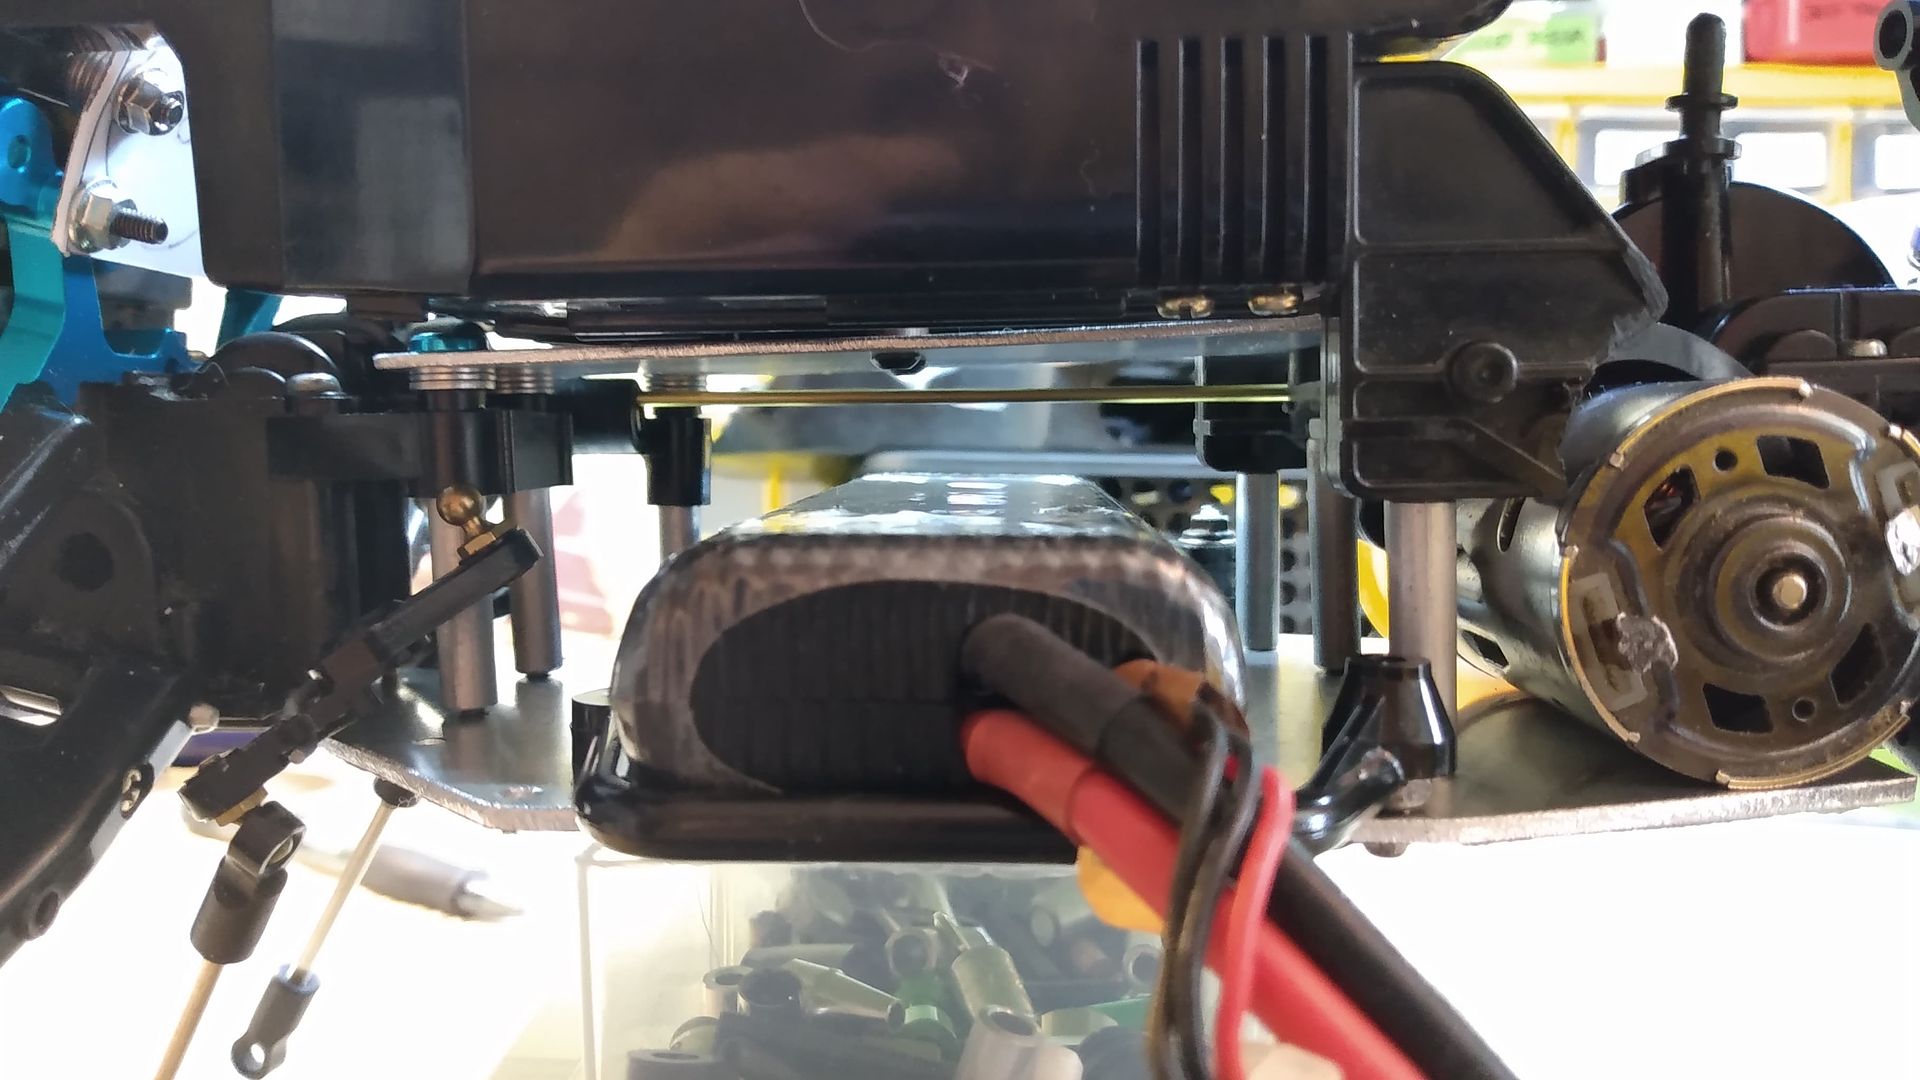
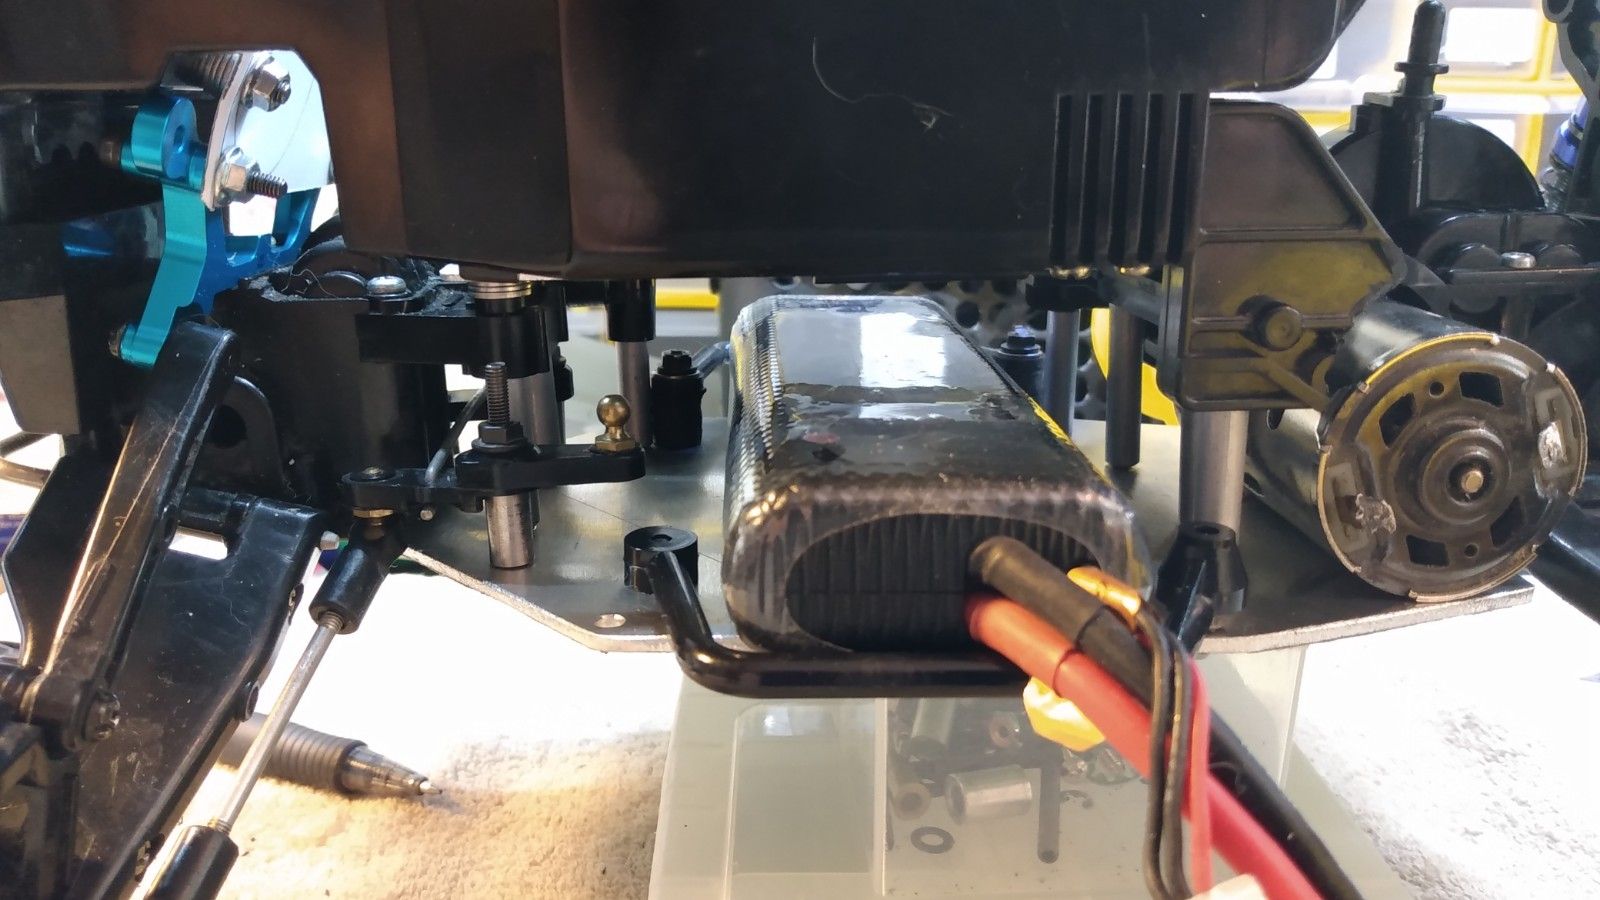
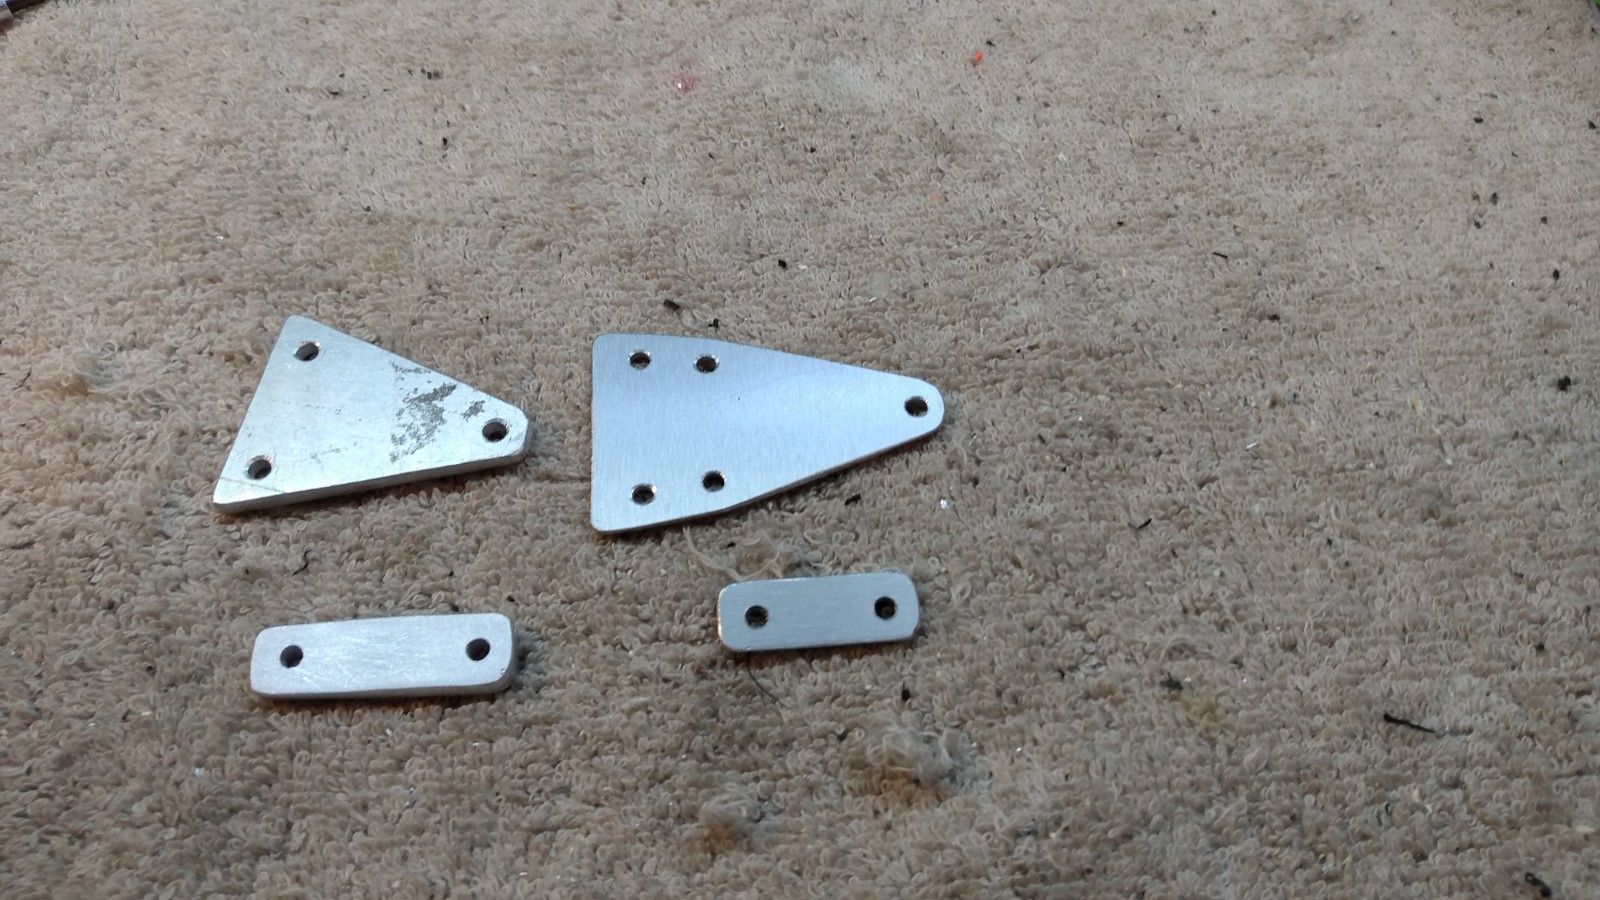
I'm using 3mm threaded links, or tubes if you want. Rapidly down of the amount left in my parts bin.
Got these from a mate that used to have a 4x4 scale/crawler store about 10 years ago.
These was used to make your own links on crawlers,
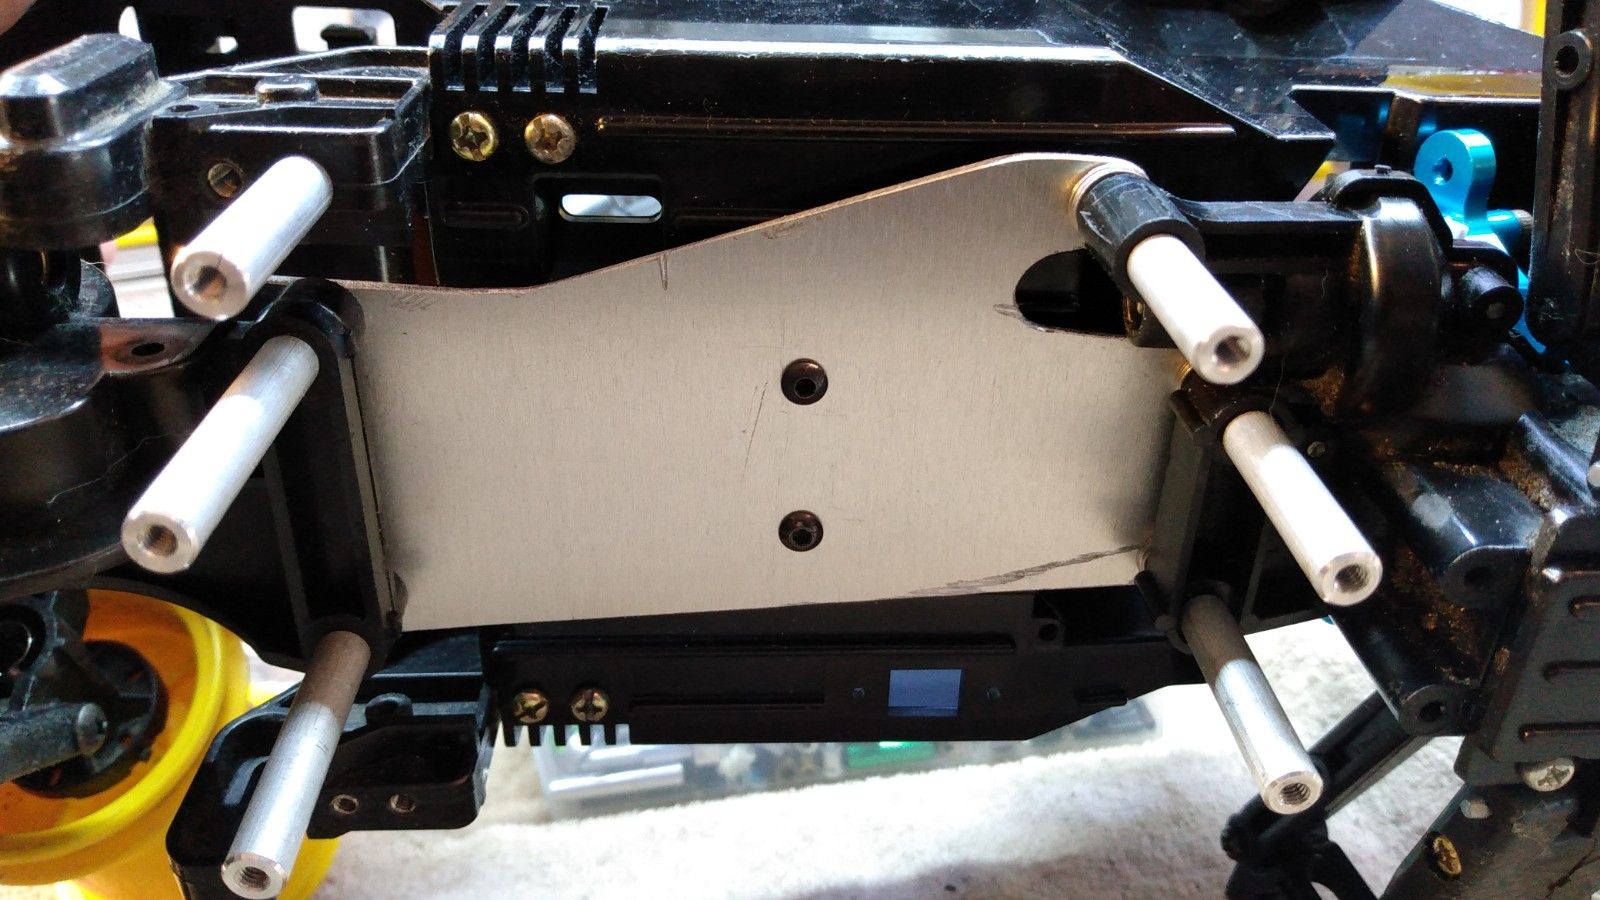
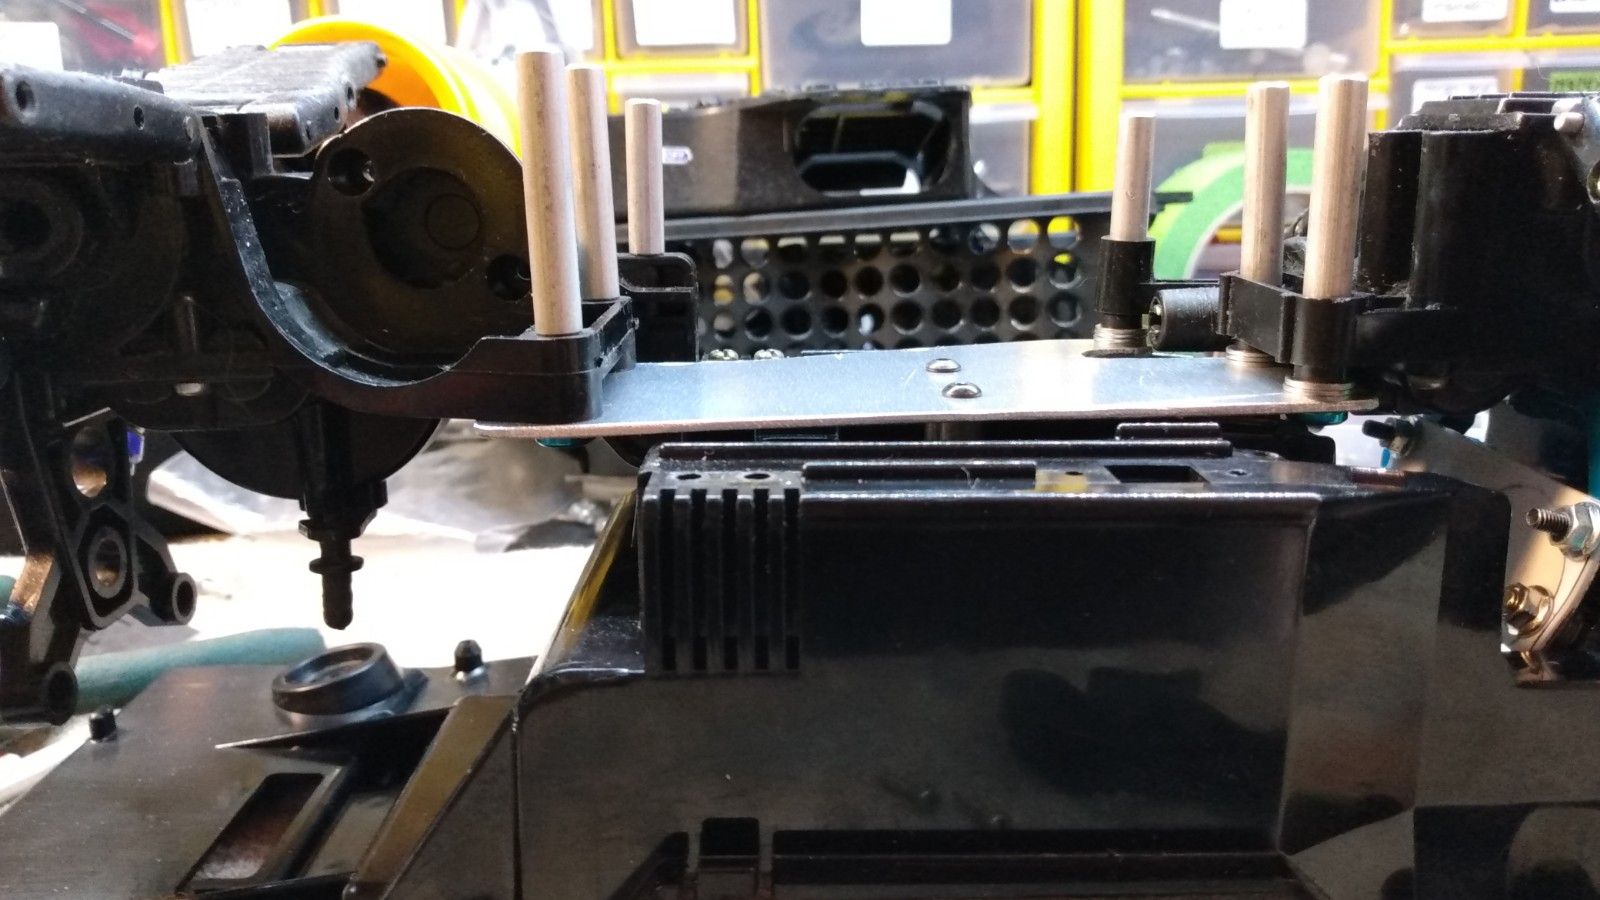
If you look carefully, I have fitted small 3mm grub screws to mark where the holes need to be on the chassis.
A light tap with a hammer was all it needed.


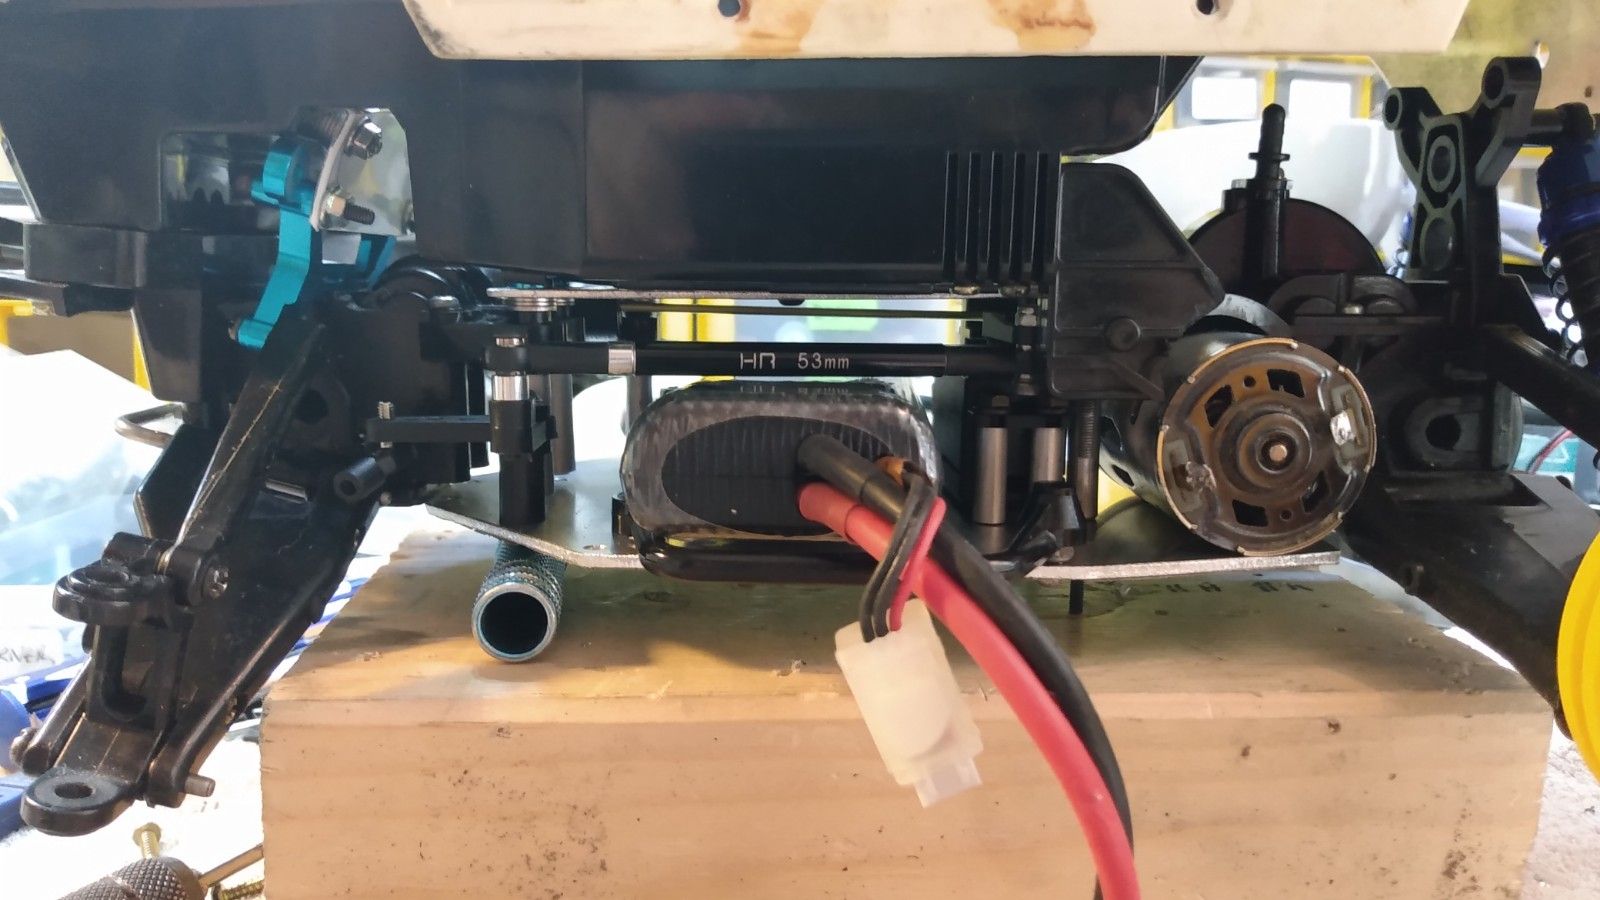
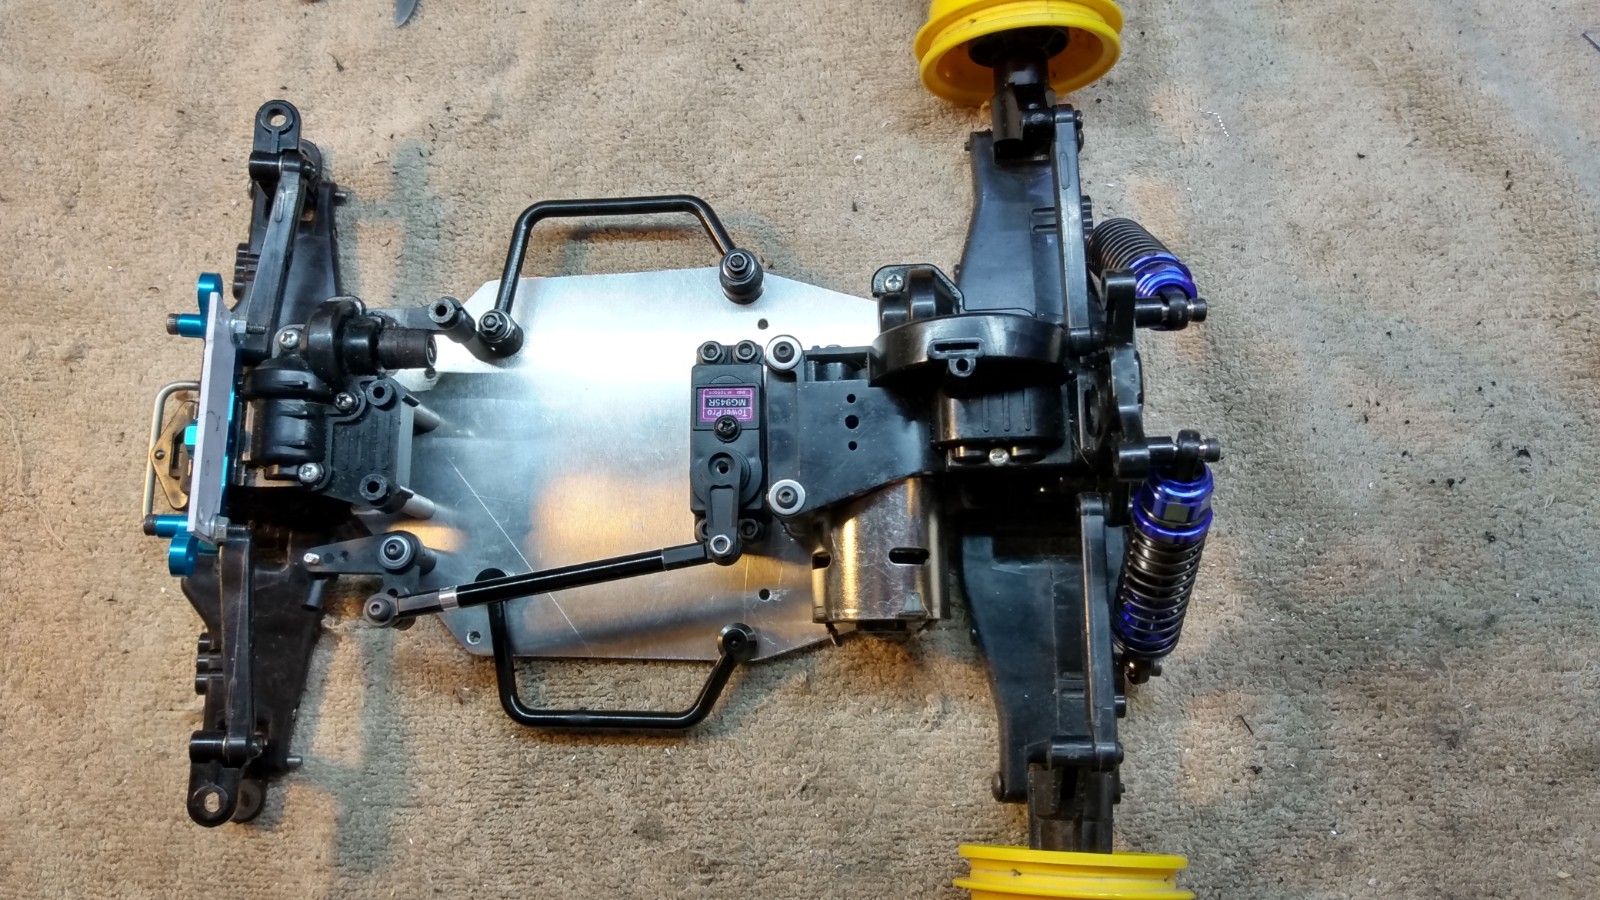
Looks like so when bolted together


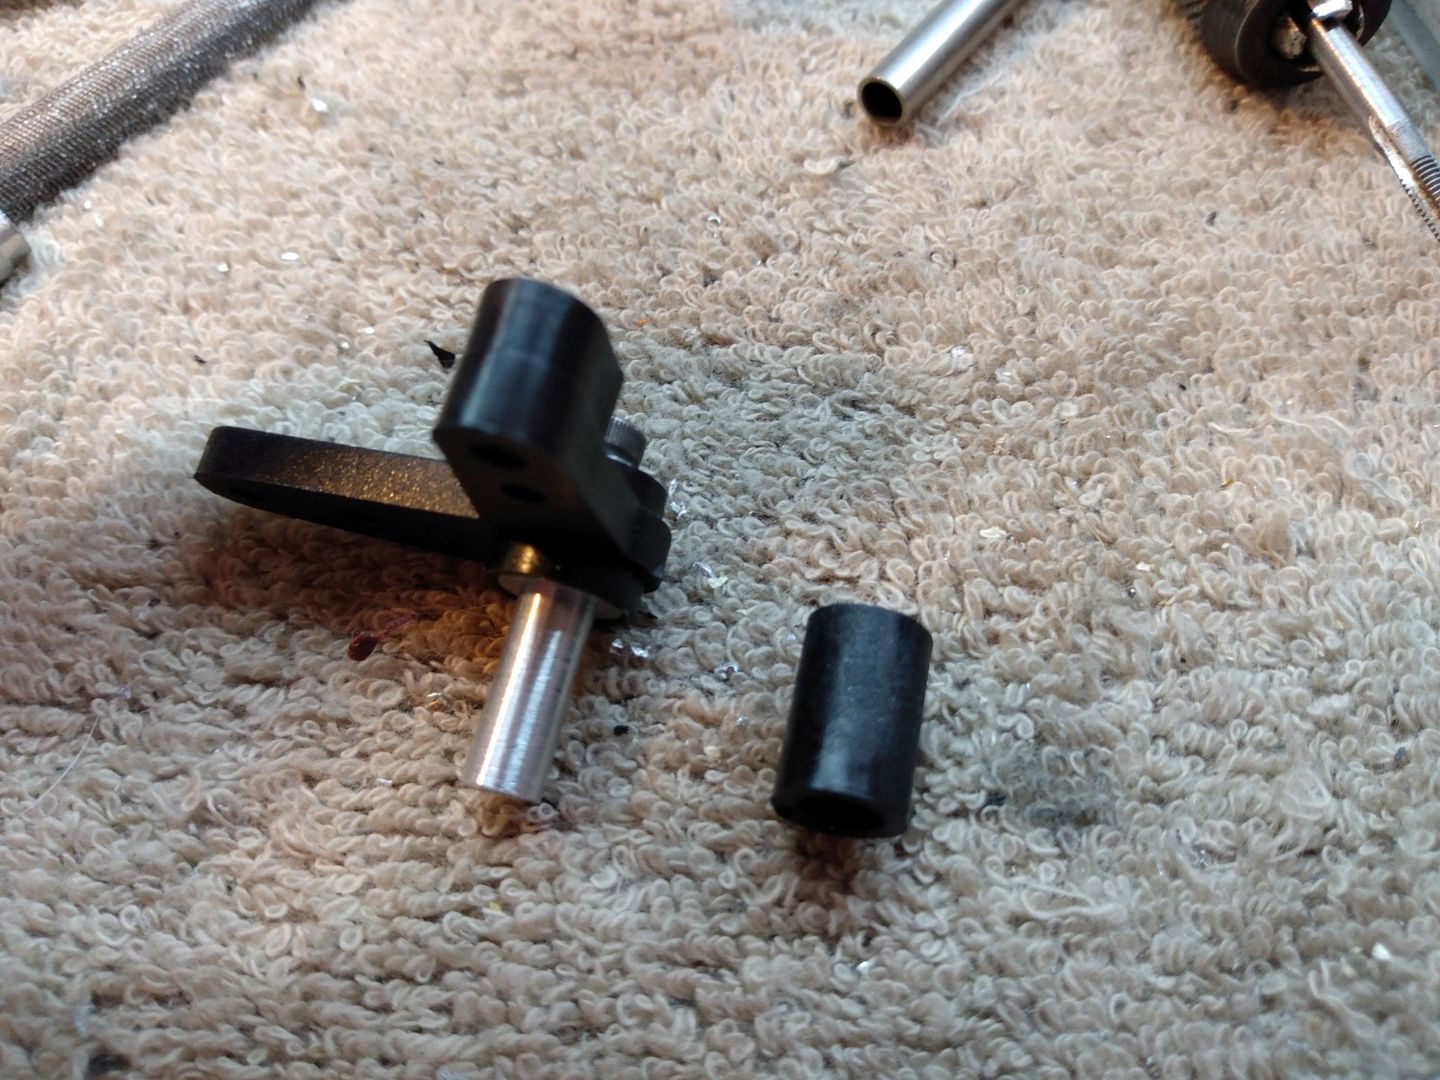
But there was a problem.
Those links was a tad too long, making the chassis plate to sit on a angle.


Shaved off 1.5mm of those links and all was good.
I'm not good at sanding level, so I used a drill and a file to I had taken off the amount needed.


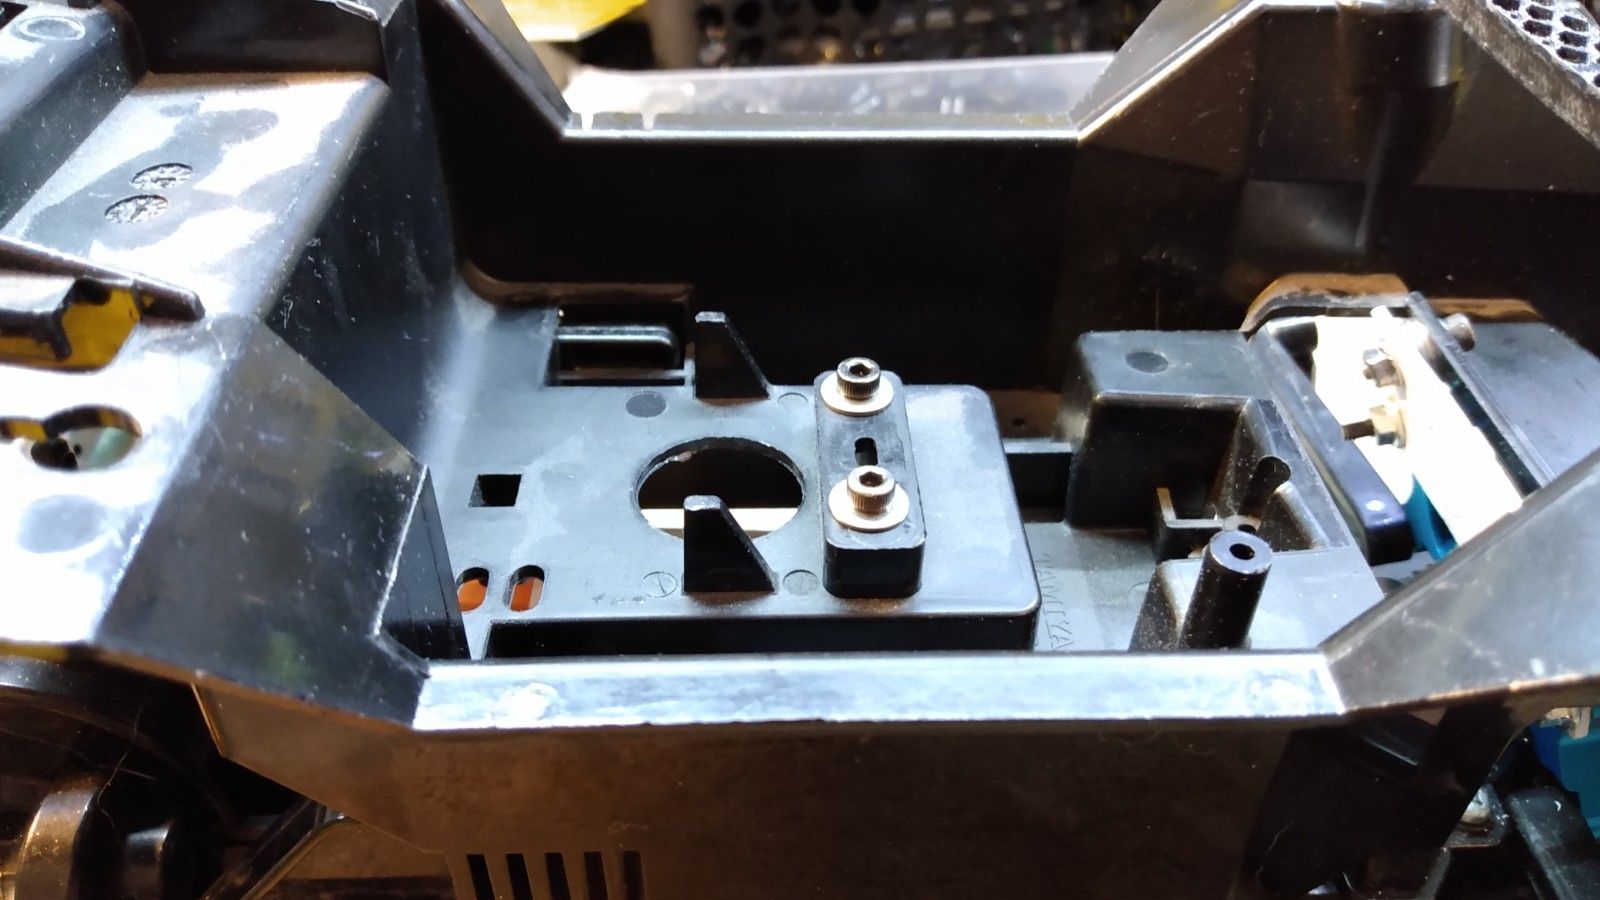
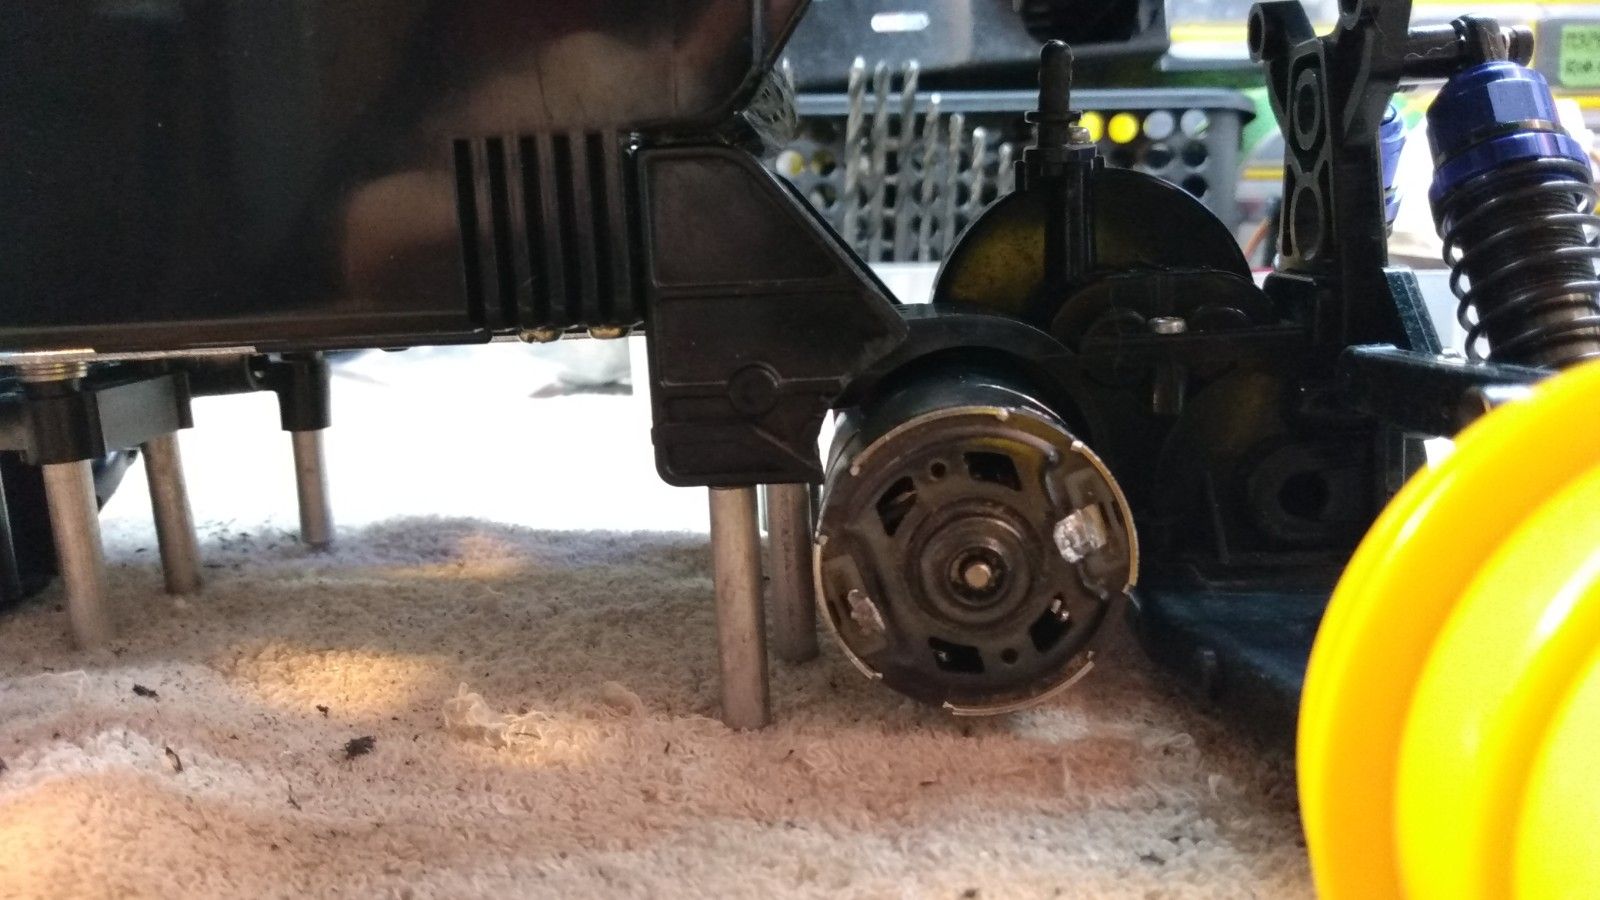
When the orginal Lunchbox gearbox holder is removed, it looks like this.
Real simple setup really.


By shaving off the slider guide part on the gearbox holder, the motor now fits on the transmission.


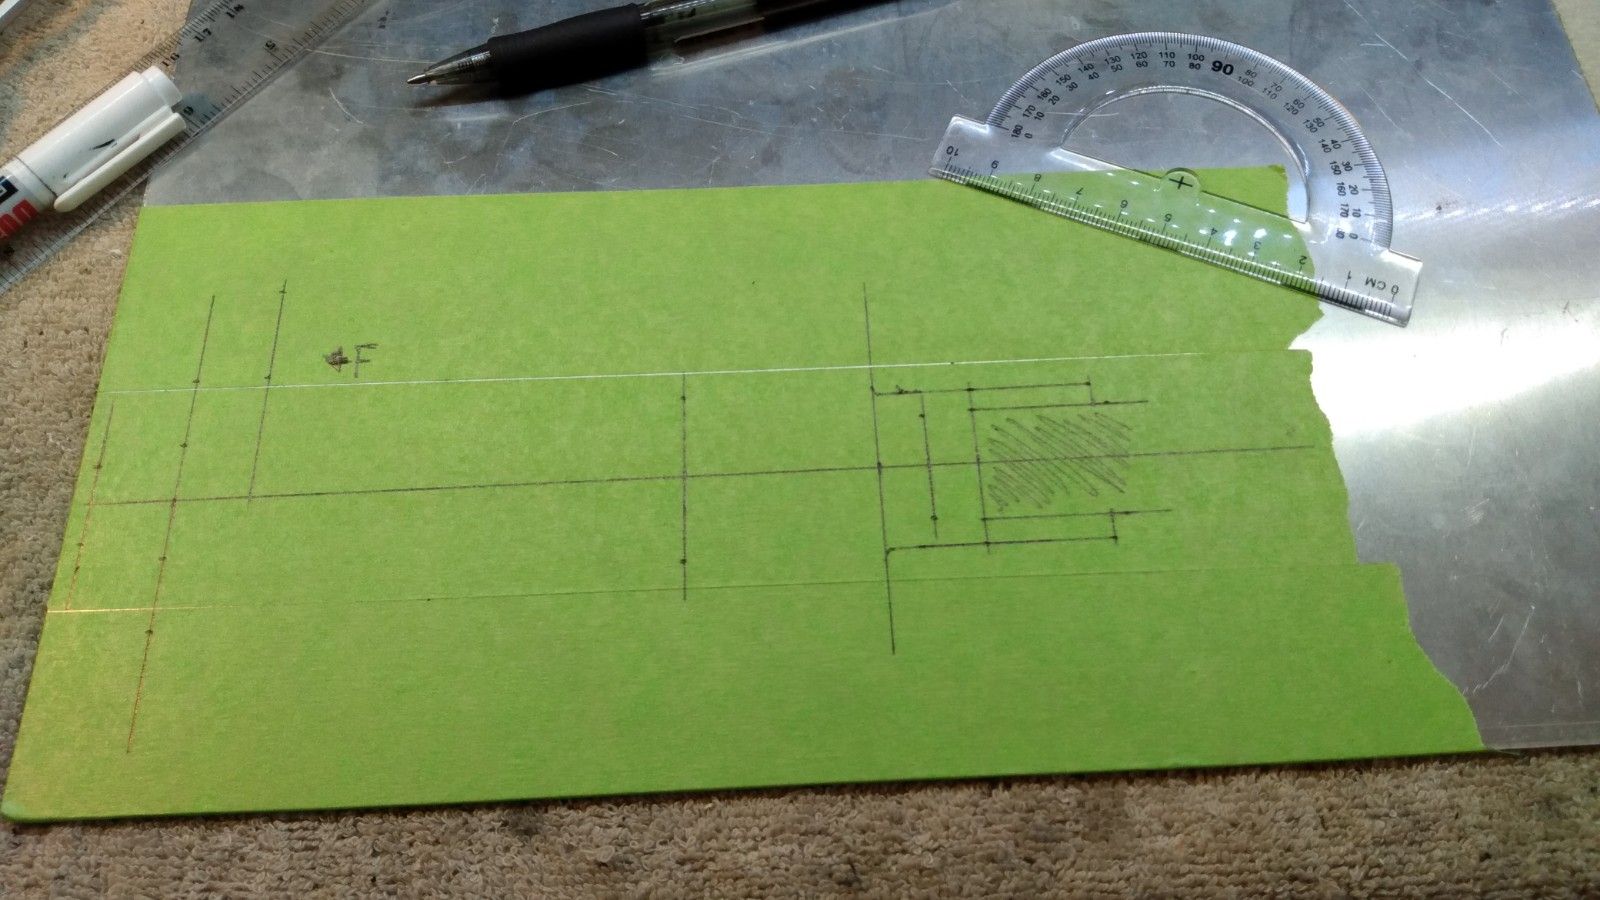
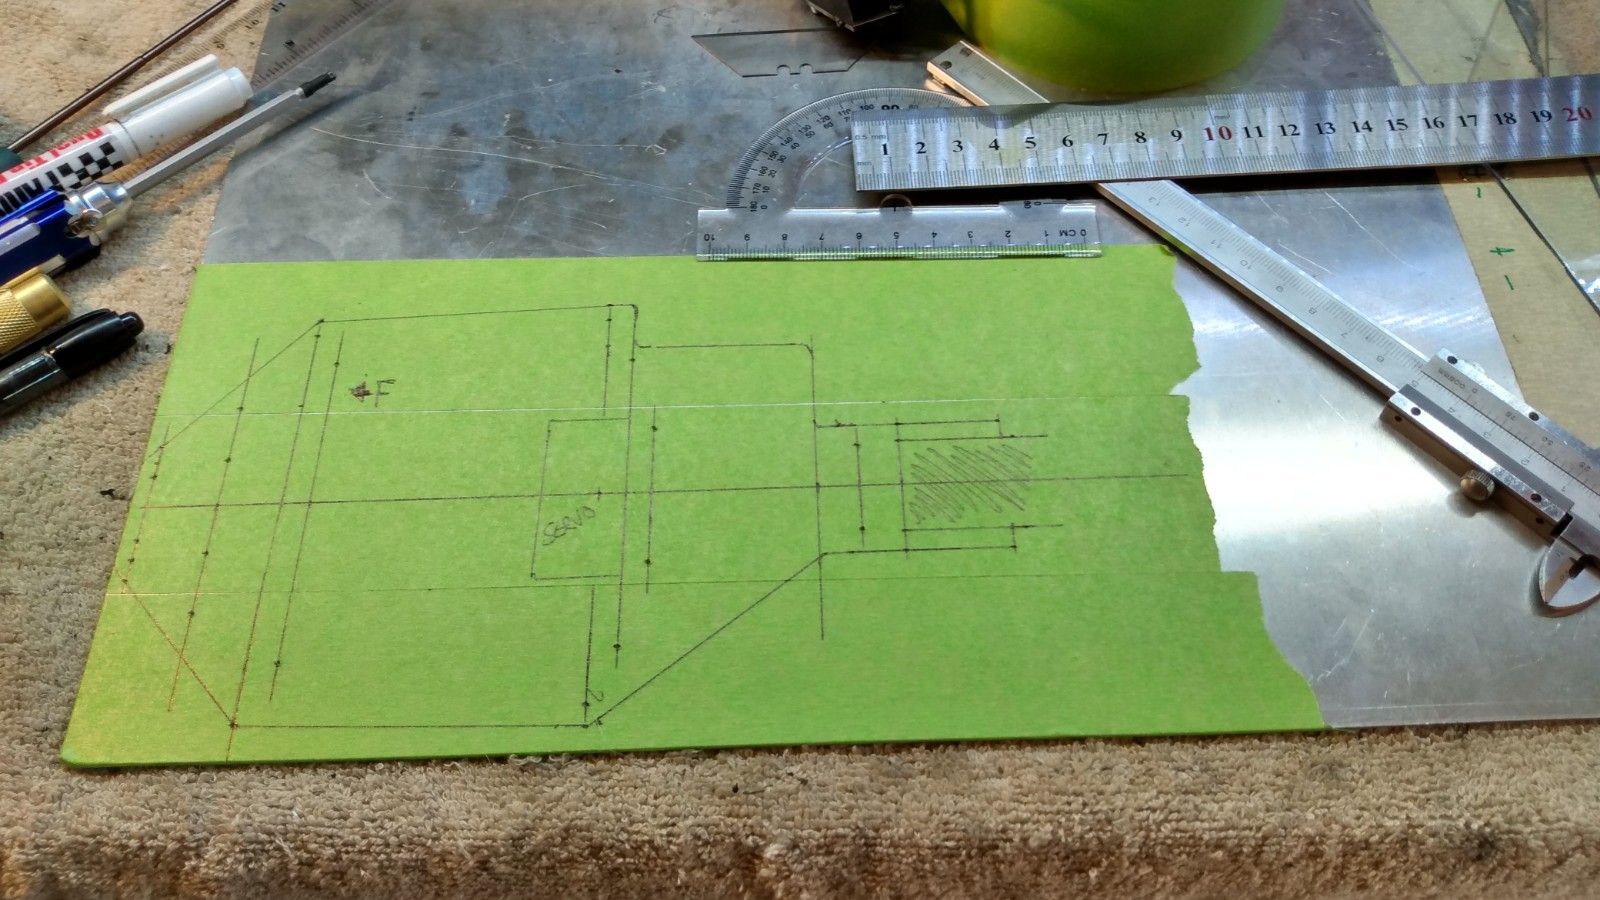
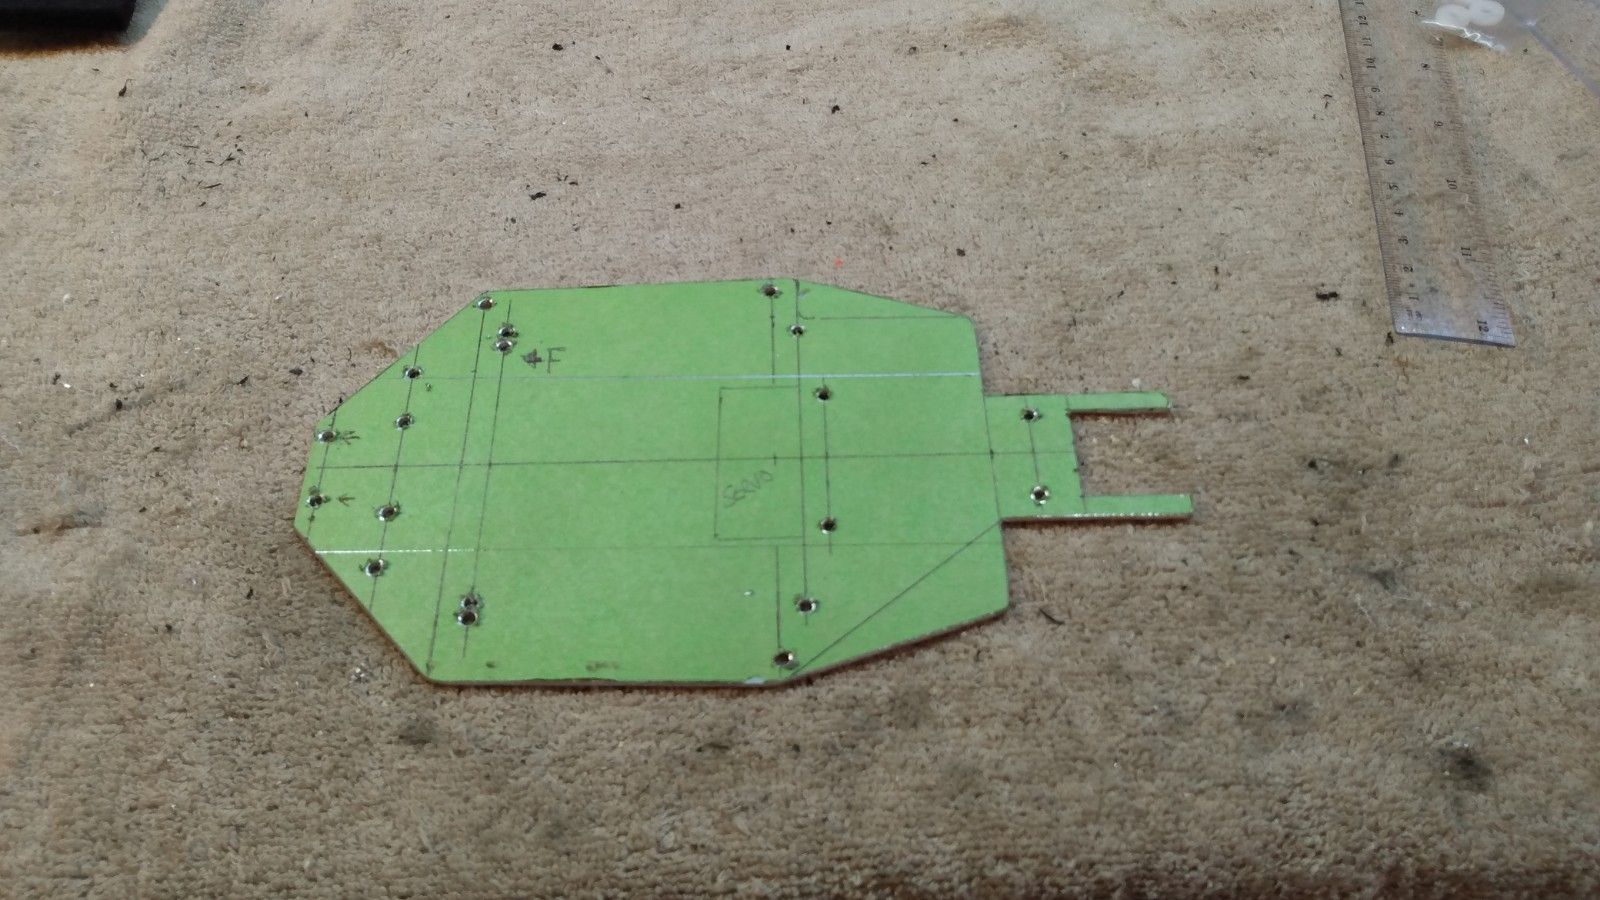
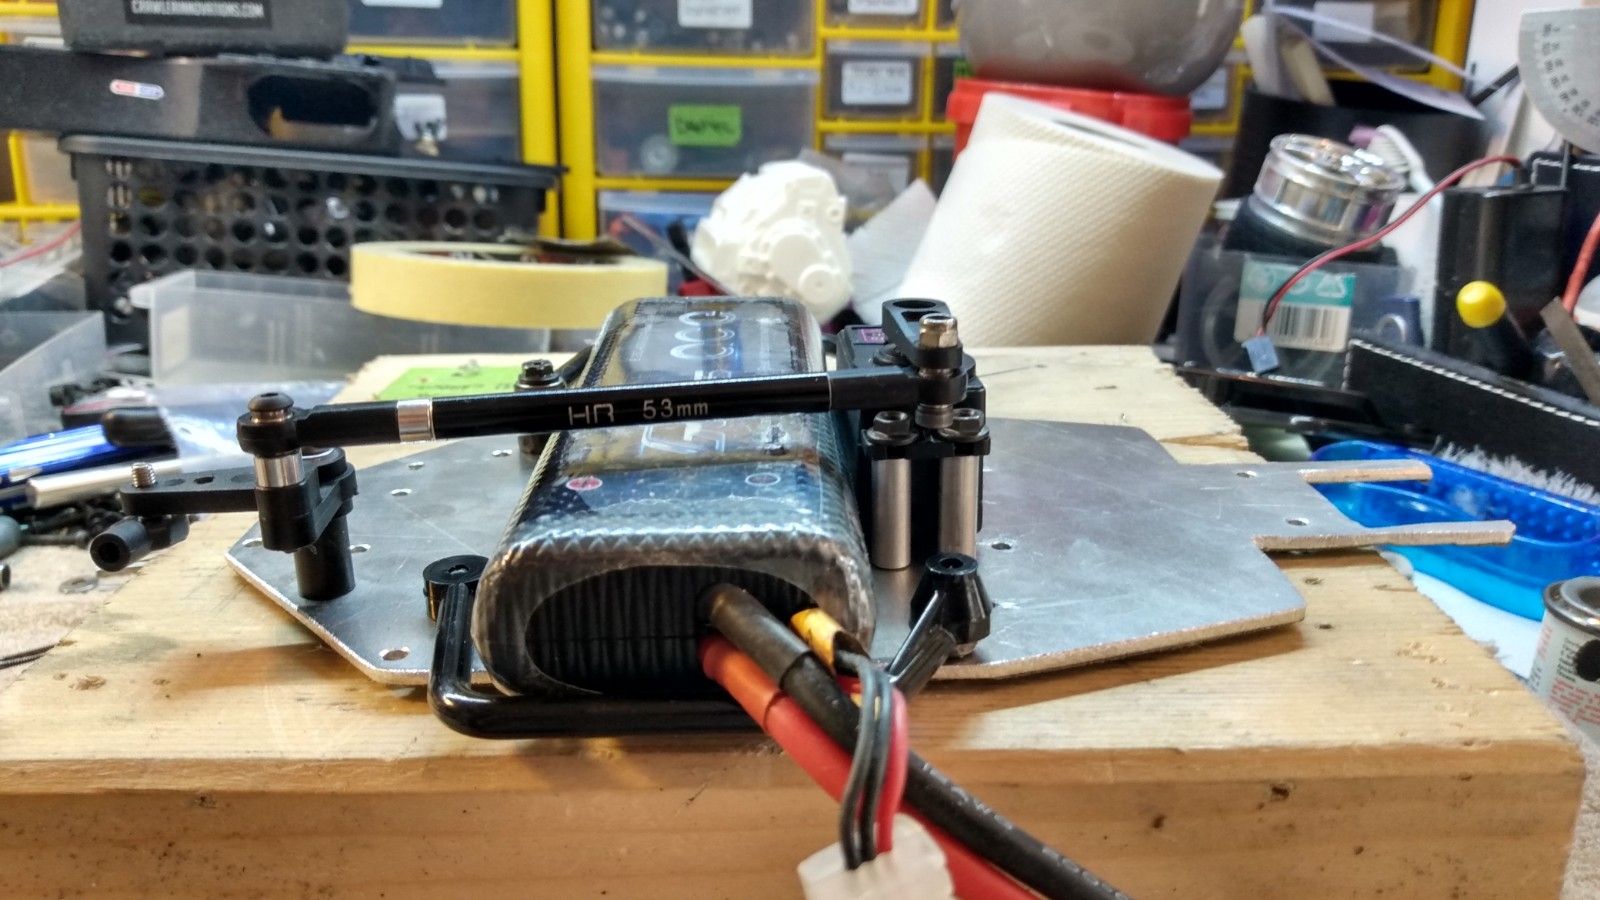
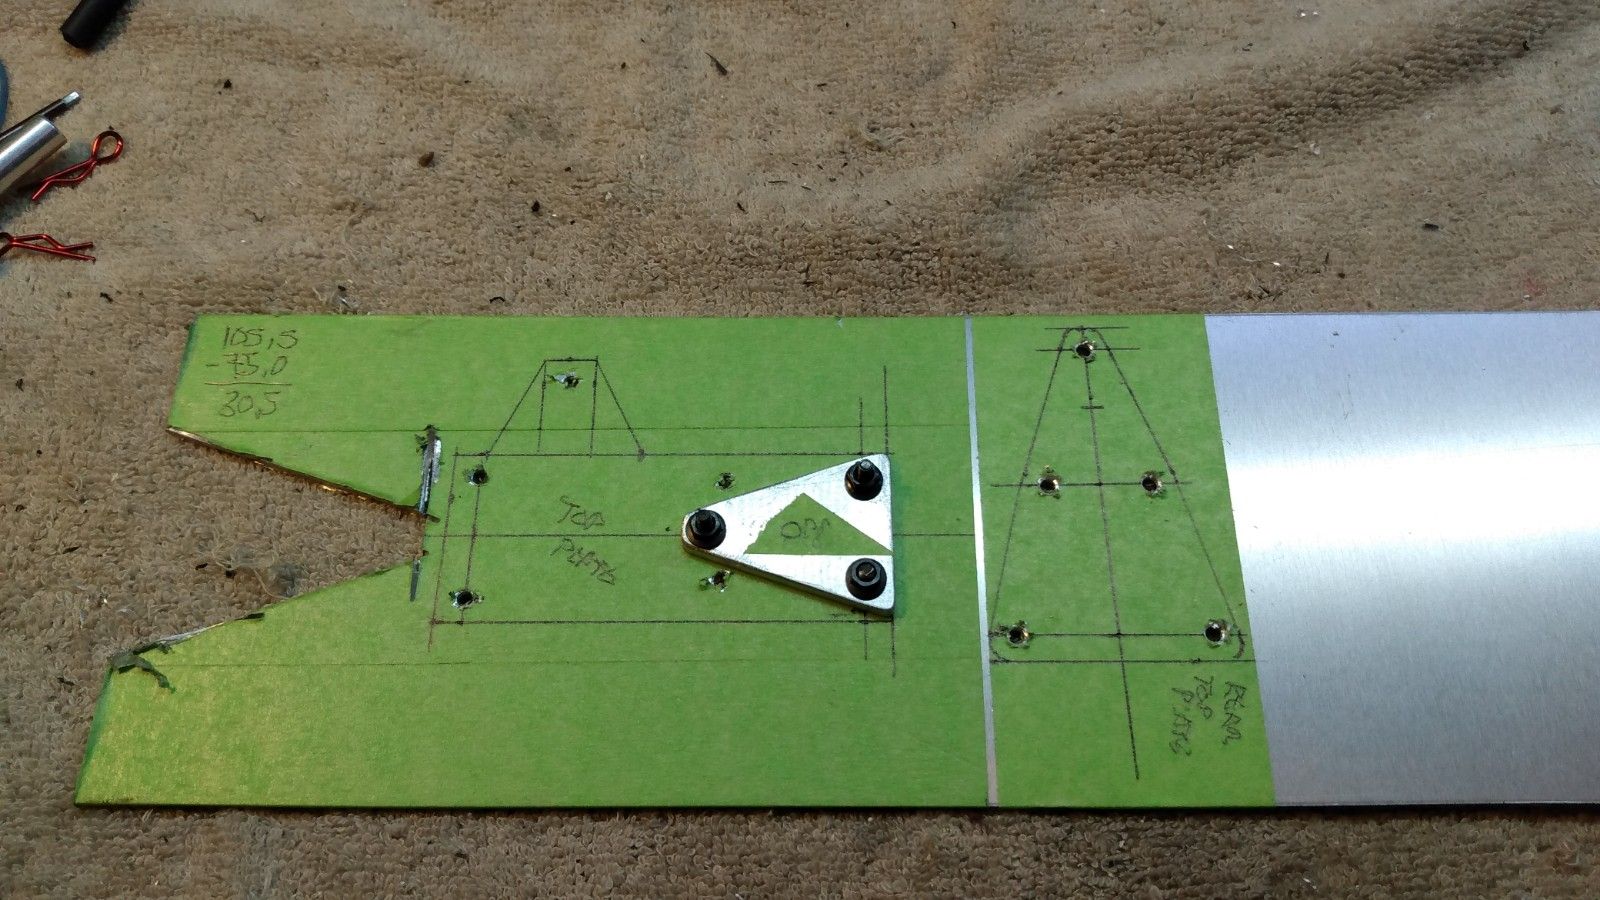
And then I started on the lower chassis plate out of 2mm aluminium sheet.
Here I have traced all the standard fitments, like front and rear gearbox and the steering bellcranck.


And this with the battery door locations and the Lunchbox gearbox holders.
Also traced the shape of the chassis itself, it may change a bit.


I also robbed the battery doors from my Lunchbox parts bin.
As you might know, one of the sides are not removable on a stock chassis, so I cut it off and have left it rought for now just for testing.
Made sure they will fit my Gens Ace battery which is a tad longer than a standard battery, so I have added 3mm to each side to be sure.
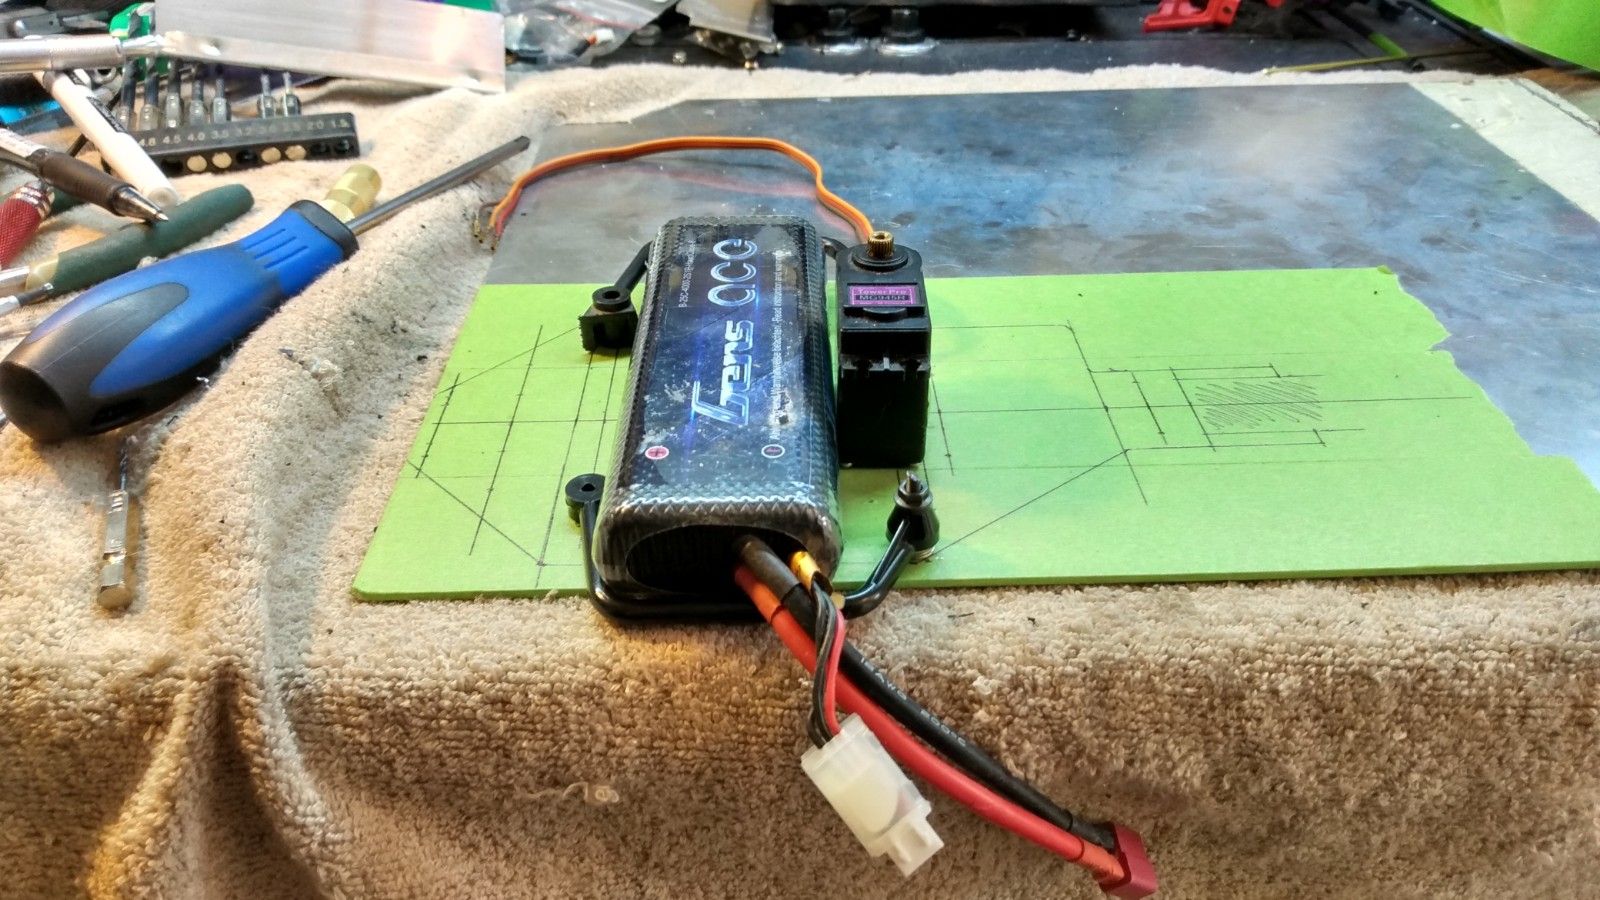
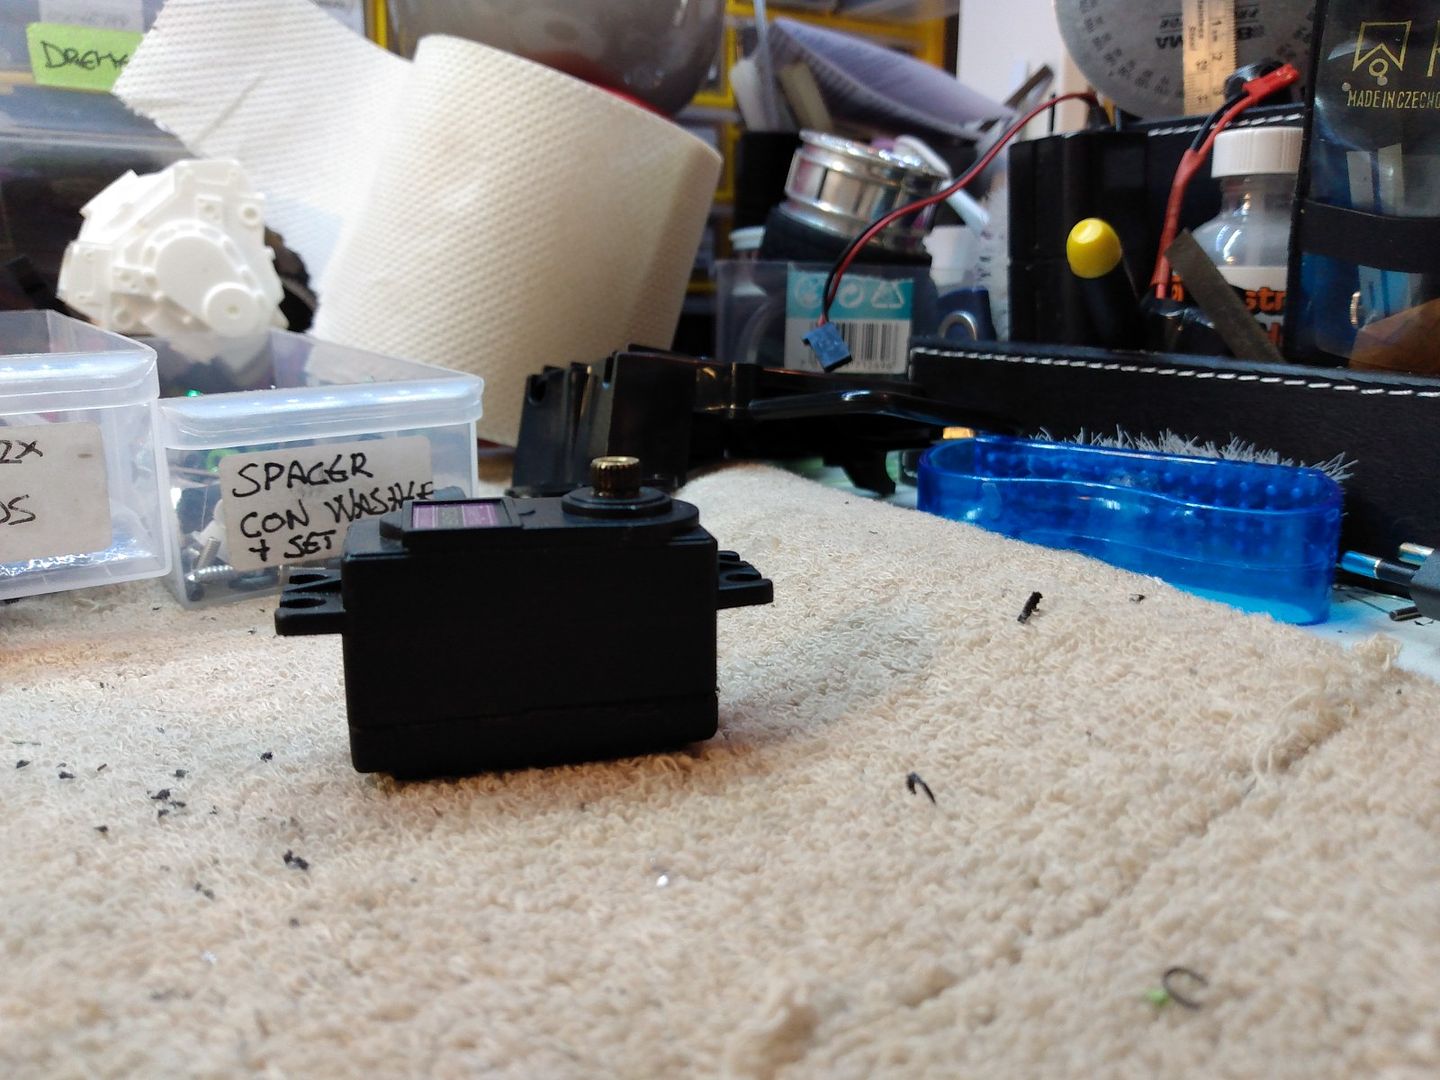
The servo is also placed to see if my plan works out regarding the servo placement.
I may have to fit a low profile servo to make it work.


When making chassis I like to use masking tape and trace the measurements.
Drawing straight onto the sheet can make the drawings vanish while you work on it, has happen to me before.
Some scribe onto the sheets, but there will be a lot of sanding later to remove the scribe marks, so for things like this I like the tape method best.
A handy tip if you will 

That's how far I got today.
Next will be cutting that lower chassis.
The following user(s) Liked this: Edou, stingray-63, silvertriple, jord001

Please Log in to join the conversation.

Last edit: by caprinut.

Richard's 4x4 Lunchbox with DF01 drivetrain. 3 years 2 days ago #65796

Very interesting and nice work
The following user(s) Liked this: caprinut, jord001

Please Log in to join the conversation.

Richard's 4x4 Lunchbox with DF01 drivetrain. 3 years 2 days ago #65799

Nice work. I hope to be able to scratch build something in the future. Still getting the parts to get my project started. 

Lee
Regards

Lee

Please Log in to join the conversation.

Richard's 4x4 Lunchbox with DF01 drivetrain. 3 years 1 day ago #65802

Thanks guys 
You can start by making a simple shock tower and go from there.
Don't need to be that difficult when you make your first thing   


Day 4 of the build.

Today was the day the main chassis was cut.
I clamped it to my garden table and cut it with a angel grinder with a aluminium cutting disc.
I strongly recomend using those when cutting aluminium as it cut far nicer than a standard disc.
Finished by hand file it.


And it fits!


Now I just need to find the correct spacers to adjust it properly.


And there is plenty of room to run a steering rod above the battery.
Need to use a 90 degree bellcranck to transform the side to side movement to fore and aft movement.
Or fit a belcrank that allready has a 90 degree fitment built into it, like a RC10 or Traxxas Rustler ones.
But I rather want to use something Tamiya. 
Any suggestion?


The last thing I did today was to mock up the DF01 bellcrank.


Rear transmission should really be moved back 3-5mm, but I don't want to make another chassis.
But I do have enough space on the securing point on the lower chassis to move the holes back a little.
Then I just need to make a new upper one.

Main constructiond the chassis is now made, just need to make a new bracket for the front shock tower to the Lunchbox tub as the current one is in styrene.

Now I just have to save some funds for these parts:
New gears - currently missing.
New propeller shaft that needs to be shortned.
4x Lunchbox tires.
2x New rear Lunchbox wheels or 4x GF-01 Dumper ones.
New WR-02CB suspension arms to shorten the track width.
New front shocks when I have worked out how long they needs to be.
Low Profile Servo.
Low profile servomounts to be bolted to the main chassis.
The following user(s) Liked this: stingray-63, Al, the11th, jord001

Please Log in to join the conversation.

Last edit: by caprinut.

Richard's 4x4 Lunchbox with DF01 drivetrain. 3 years 1 day ago #65819

Did some research this evening.

Traxxas #4843 Bellcranck for Nitro Tec 4 seems to fit my needs perfectly.
Also helps it's cheap and my LHS has them in stock.


And I'm on the search for a cheap ish low profile servo with 5-15kg area, but there is not much that fits both of the boxes.
Closest I have found is Hitec HS-77BB with spec of 5.5kg @ 6v. Comes in at £27.
Downside is it has plastic gears and I really want metal gears to make sure it last.
I could make a hole in the new chassis to fit a normal servo, but I won't do that as I don't like anything poking out from the underside.

The Hitec HS-77BB is also available at my LHS.

For now I will cut down a blown servo for test fitment, to make sure my calculations are correct.
The following user(s) Liked this: stingray-63, jord001

Please Log in to join the conversation.

Richard's 4x4 Lunchbox with DF01 drivetrain. 3 years 11 hours ago #65834

I wish all weeks could be like this, so I can get things done 


Anyway, I'm now on day 5 of this build 

First task today was to run some errands, among them I popped into my LHS and bought a Traxxas 4843 bellcrank
You see the one connected to the servo has the arm mounted 90 degree related to the arm pointing forward, excactly what I need.


The bellcrank have 5x8x2.5 bushings which is quiet common and rides on a 5mm shaft.
Wanted to use a 5mm threaded shaft to secure it to the chassis.
But I have no such thing at the moment, but I do have those threaded links which has a diameter of 6mm.
A little later I have shaved off 1mm using my drill and a file and then 240 grit sand paper.
After that I cut it to the length needed.


Fits like so and the black sleeve goes under it.


For this project I need a low profile servo, but I don't have one, never did.
In my parts bin I found a burned out servo that was perfect to mod into a low profile servo.
Cut off 10mm of the main housing and glued it together since I'm out of suitable bolts.
I know the servo I want has a body that is 17mm from the mounting tabs to the bottom, so I made this with the same measurements.


Found some 18mm tubes that was perfect as servo stays and slapped together my steering setup.
This proves that this is gonna work.


There is plenty of space between battery and the steering linkage.


Seen from behind.
Ignore my filing ability lol.
I have no vice atm so everything is done in my hands or on the table.


Fitted onto the Lunchbox.
Yes steering works with no binding and everything clears.


Seen from the left front tire area.


A bit hard to see, but the servo arms is between the upper chassis plate and the orginal Lunchbox gearbox holder.
Had to grind off the axle spring guide and the boss for the screw for the axle spring in the axle holder to give room for the servo arm.
But everything fits now.


How it looks now.
The rear gearbox needs to go up 3mm, but the current upper chassis plate is bolted on top of the gearbox casing.
So next will be making a new upper chassis plate. which will move the chassis up 3mm and backwards 3-5mm to line up with the rear arches.
Reason being I want the chassis plates to run parallell and the front of the lower chassis is 3mm lower than it should be atm, but the gearbox can not move as it sits tight to the Lunchbox tub, hence the rear gearbox needs to move up 3mm.
Thankfully there is loads of space-all relatively, to move the rear gearbox up and still have space for a new upper chassis.
The new chassis will be made like a Z most likely.


And this morning I ordered a set of WR-02CB suspension arms to narrow it to Lunchbox standard width.
I also missing 2 rear Lunchbox wheels to mock things up.
Gladly take a pair of used ones if I can.
The following user(s) Liked this: Jonny Retro, Edou, stingray-63, 1972 LeMansGT Jim, jord001

Please Log in to join the conversation.

Richard's 4x4 Lunchbox with DF01 drivetrain. 3 years 11 hours ago #65835

Perfect work .
The following user(s) Liked this: caprinut, jord001

Please Log in to join the conversation.

Richard's 4x4 Lunchbox with DF01 drivetrain. 3 years 11 hours ago #65837

Perfect work .

Thank you Flo!


I've just ordered a SPT 4412LV 12KG Low Profile servo, nearly 1/3 of the cost of the Hitec servo that I was thinking of buying.
2.5 times more poerful than the Hitec one as well.
Future will tell if it is any good.
It has good review from those who have tested it.
My non exist rc budget is defently spent for this month lol.
The following user(s) Liked this: stingray-63, jord001

Please Log in to join the conversation.

Richard's 4x4 Lunchbox with DF01 drivetrain. 2 years 11 months ago #65858

Day 6 and about 5 hours + work today.
Taking things off and on, measuring and testing takes time.
Most of the time today was spent sanding the metal parts being made.

I made these spacers.
The 2mm and 3mm small bits are gearbox spacers so the chassis is fitted to the correct hight related to the gearboxes.
Replaces J7 and J11 parts that is needed to fit FRP style chassis, or any flat style chassis.
The triangular bits are spacer for the upper deck, the longest one was made up wrong so have to remake it.


Upper and lower chassis is level with eachother now and front gearbox mounted with the spacer I made. 


Grabbed the wrong sheet of aluminium when I made this spacer, so instead of 2mm, it was 1.5mm. I just added a 0.5mm piece of styrene to give the right thickness.


All standoffs and spacers adjusted to the correct length.
I also lengthen the wheelbase with 4mm. 
All I had to do was to drill 4 new holes and move the gearbox back a little.
Rear gearbox got a 3mm spacer to replace the J11 thickness.


Viewed from the top.
Still have to fit the right side bellcrank and fit the draglink between those, but that is easy.
Steering rods needs to made as well, but have to wait till I get the new suspension arms.


The new upper deck in making.
The 3mm triangular bit is to lift the rear section of the deck up 3mm as needed to as I have the upper deck fitted to the top side of the gearboxes.
Have also marked it narrow enough so it clears all the stuff.
The new servo I have ordered is a couple of millimeters taller than the current mock up one, and that spacer also makes room for that.


Today I did run out of steam so cutting the upper deck have to wait till tomorrow.

So far this has been a cheap build.
About £32 for new servo, new suspension arms and bellcrank.
And I will receive a FREE lunchbox later this week, and hopefully it has one rear wheel that is missing for this project 

Really want GF01 Dumper wheels due the hex fitting and a bit narrower track (the Lunchbox wheel adapter add 6-7mm to the width pr wheel vs a hex wheel of same type like WR02 and GF-01 Dumper)


The following user(s) Liked this: Edou, stingray-63, silvertriple, jord001

Please Log in to join the conversation.

Richard's 4x4 Lunchbox with DF01 drivetrain. 2 years 11 months ago #65859

Have done a little research again.

The GF01 Dumper uses TL01 suspension arms and are 270mm wide.
Comical Hornet (WR-02CB) uses suspension arms that are 8mm longer at front and 10mm in the rear compared to TL01 arms.
So in therory, the with the WR-02CB suspension arms I have ordered, my custom Lunchbox/DF01 hybrid should be bang on 290mm wide as a stock Lunchbox.
That is with GF01 wheels.
I suspect my orginal Lunchbox wheels will add at least 5mm per side, so it will end up at 300mm wide with my current wheels.

Any bets if I'm right or wrong?? 
The following user(s) Liked this: stingray-63

Please Log in to join the conversation.

Last edit: by caprinut.
Moderators: caprinutstingray-63AndyAus
Time to create page: 0.353 seconds
Cookies are required to make this site work. If you continue to use this site you permit us to use cookies.