Keyword
  • Page:
  • 1
  • 2

TOPIC:

Blakbird's 58242 Wild Willy 2 Project 4 years 6 months ago #56798

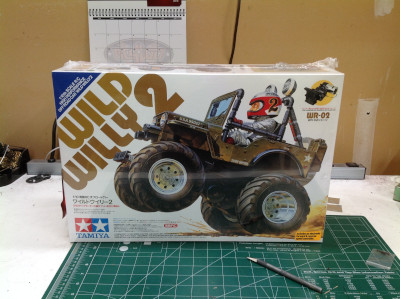
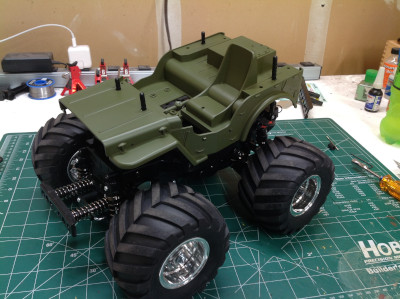
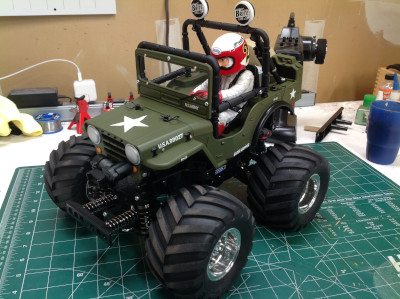
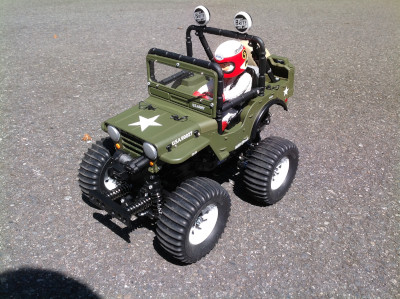
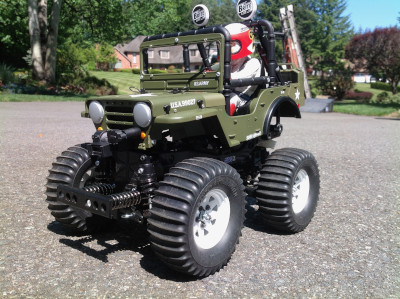
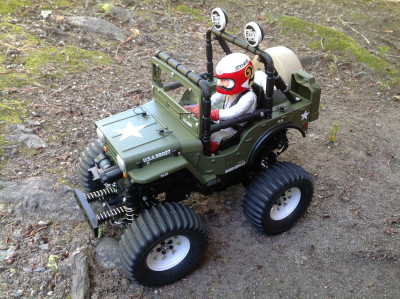
The original 58035 Wild Willy came out in 1982 and was really unlike anything that had come before it. It had the large tires of the 58029 Blazing Blazer but with a short wheelbase and a high center of gravity mated to a new wheelie chassis. The name "Willy" comes from the fact that this is a model of the M38 made by Willys as the second generation of the original military "Jeep". The body is scale accurate but placed on a crazy high 2WD stunt chassis. May as well name the driver "Wild Willy" and give him a giant head and a lot of detail. Willy would go on to pilot other vehicles over the years including the 58039 Willy's Wheeler only a year later. The 58242 Wild Willy 2 came out in 1999 as a tribute more than a re-release. Although the newer model bears a superficial resemblance to the original, virtually everything has been changed. The original chassis is gone and replaced by a more modern WR-02 wheelie chassis with balloon tires and chrome wheels. At first glance the lovely hard shell body might appear original, but for reasons that are not exactly clear subtle details (including the grille) have been changed which make this now resemble the M151 made by Ford as a successor to the M38. Maybe it was a licensing thing, or maybe Wild Willy 2 is the successor to the original just like the M151. Willy is still there driving. Although this model is still for sale (as of 2019), it is now marketed as Wild Willy 2000.

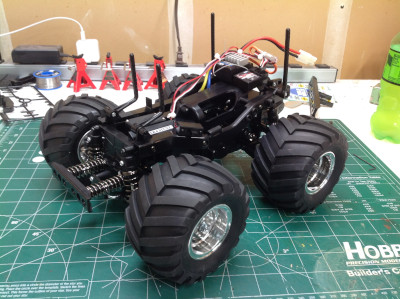
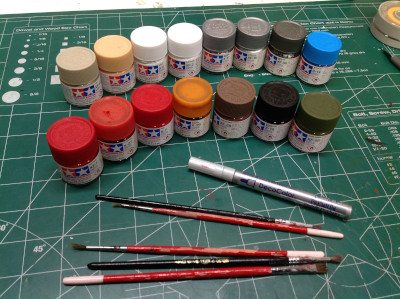
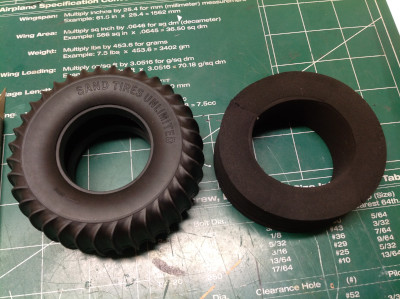
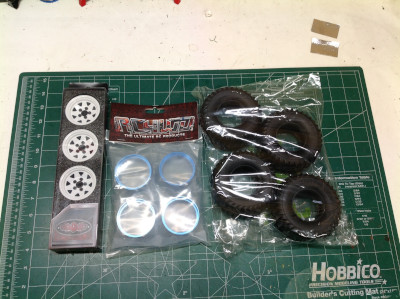
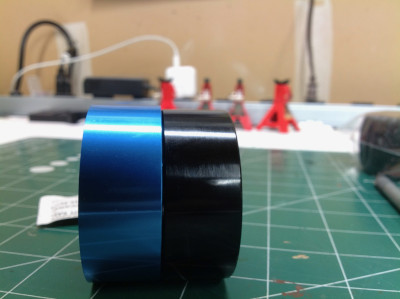
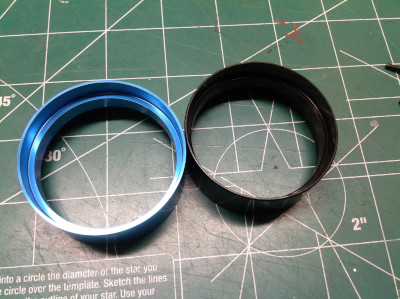
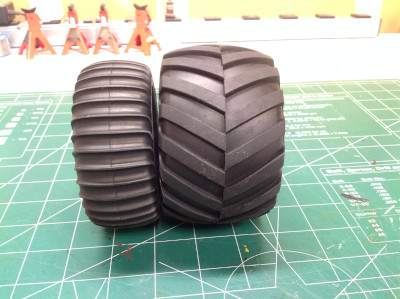
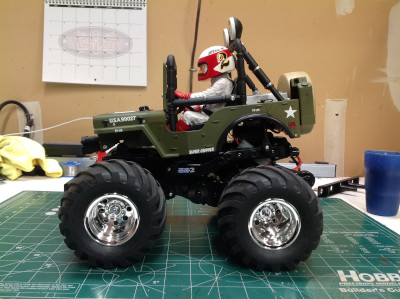
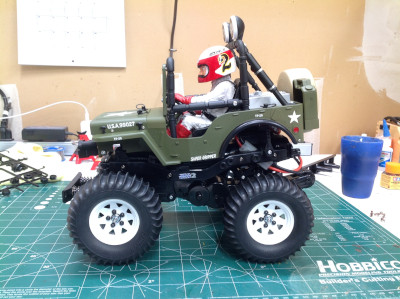
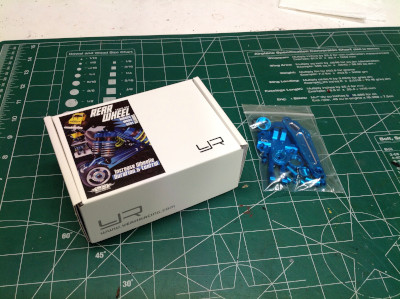
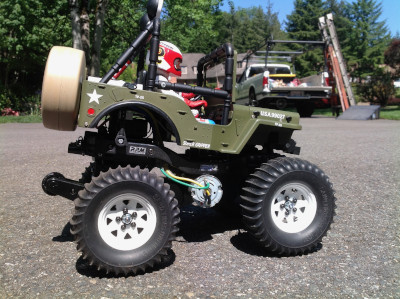
Personally, I felt that the new chassis lost much of the charm of the original mostly due to the use of the new tires. The track width is too large, the tires are too wide, and the tread pattern is all wrong. Of course "wrong" is subjective given that the real M38 didn't have tires even remotely like either of the Tamiya models. Still, I wanted to try to replicate the appearance of the original while maintaining the durability (and accessibility) of the new chassis. I was able to find a set of reproduction tires which I mated to a set of steel beadlock wheels. After some modifications to the suspension to make them fit, I came up with my own Wild Willy tribute. I think it looks way better than the modern version and, dare I say, almost as good as the original

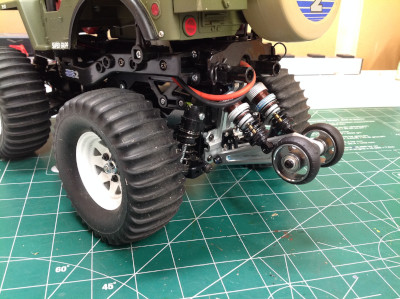
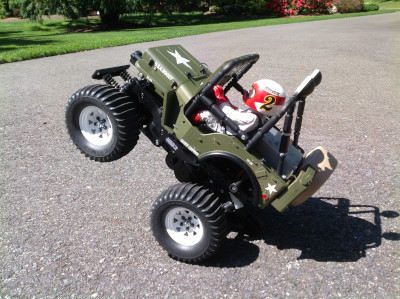
Having built models on the CW-01 wheelie chassis before and being unimpressed with the ability to hold a wheelie, my expectations of the WR-02 were not high. I was pleasantly surprised. This model holds a wheelie much longer than something like the Midnight Pumpkin. My addition of heavier wheels moderated that a bit, but I still love the way it drives. It is even reasonably capable in the grass.

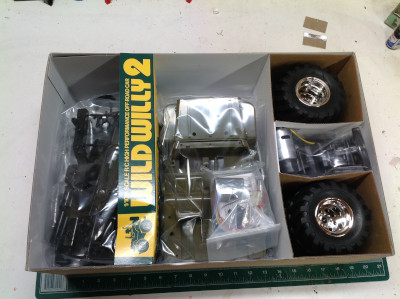
I've built a vehicle on the CW-01 wheelie chassis before, but this will be my first WR-02 so I am interested to see the differences. Wild Willy comes in a lovely box with classic hand drawn box art. The art is reminiscent of the original in pose and angle, but it shows the new chassis and wheels and the decoration on Willy's helmet has changed. Inside the box is a nicely organized mess of parts and the iconic olive green body.
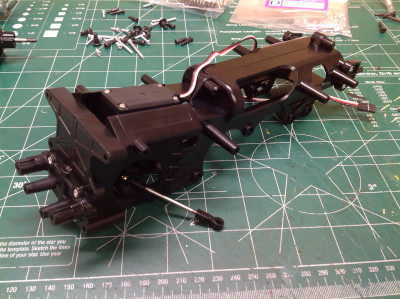
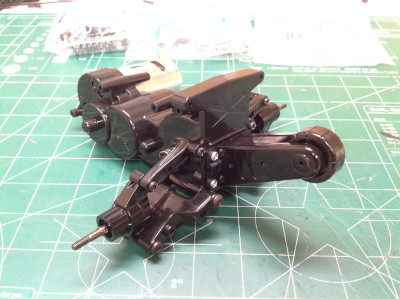
Here are the parts for the chassis laid out on my build table. As you can see, there isn't much to this chassis. It should be a quick build.
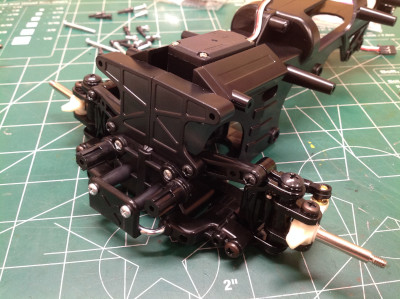
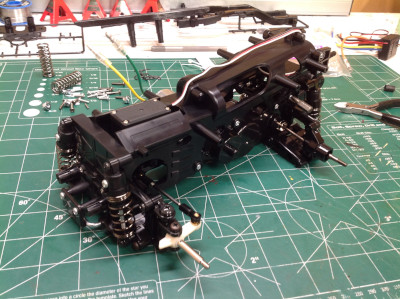
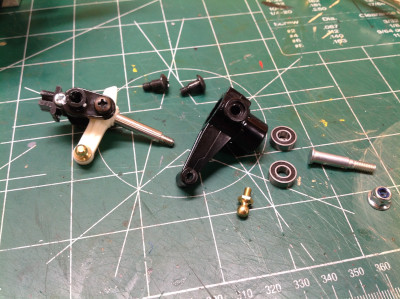
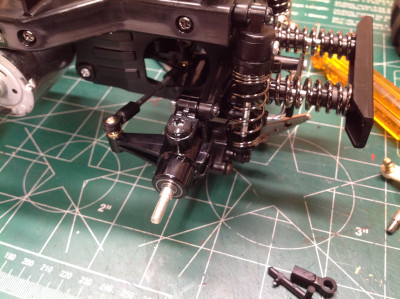
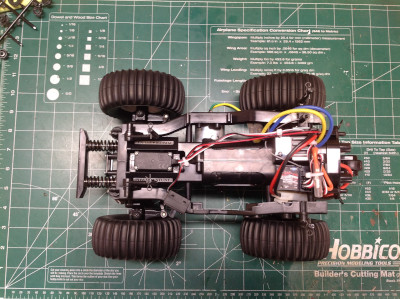
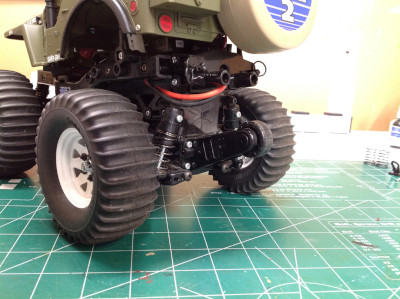
The build begins with the main frame which is composed of two halves screwed together. The steering servo is sandwiched between the two sides up front. If you look closely, you'd see the valve covers of a scale V engine surrounding the servo which faces down. The servo saver connects directly to the steering knuckles with no intermediate linkage. The front double wishbone suspension arms connect to the frame as shown.
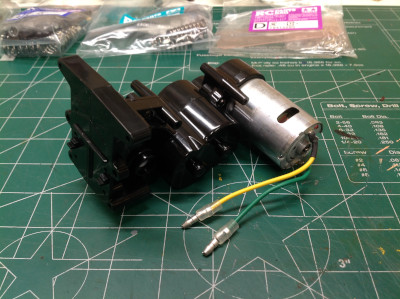
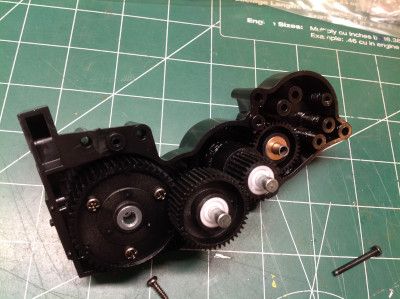
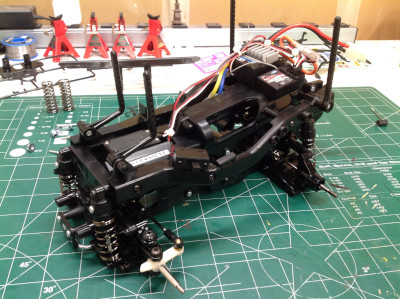
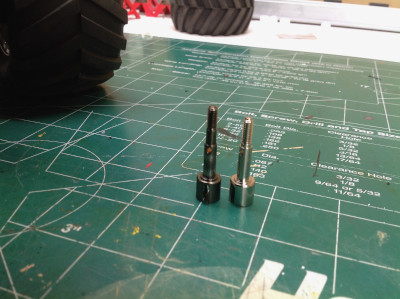
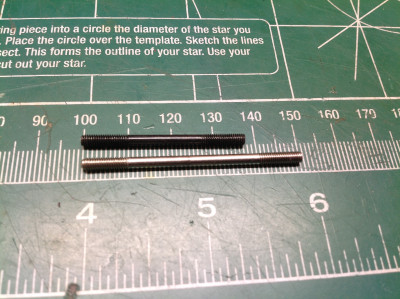
Unlike most Tamiya kits, in this one the gearbox and motor are pre-assembled for you as shown on the left. You could theoretically just use this as is, but I took it apart as shown on the right. I used the opportunity to replace the plastic bearings and metal bushings with ball bearings. I also added more grease to the gears. Note the extensive train of spur gears with no bevels or shafts. The big black gear on the far left contains the differential.
The following user(s) Liked this: jord001

Please Log in to join the conversation.

Blakbird's 58242 Wild Willy 2 Project 4 years 6 months ago #56799

The rear suspension arms connect directly to the gearbox as does the wheelie bar as shown. The shocks are "friction damper" type, which I hate, but at least they are not the worst kind. The rubber sleeve shown just above the spring does actually provide a small amount of friction and therefore some damping.
Once we connect the rear gearbox (which as you recall was pre-assembled) to the frame, the model is pretty much done! That was fast. All we need to do is install the electronics which sit on the rear. The battery inserts into a slot in the back. The rear, high center of gravity helps with initiating a wheelie.

The kit comes with two bumper options: large and small. The large provides protection to the tires while the small only protects the body. I found the small bumper to detract much less from the overall appearance so I used that. The balloon tires are same size as those used on the Lunchbox, Monster Beetle, Konghead, and other models. Because the wheelbase is so short the footprint is almost square.
The following user(s) Liked this: jord001

Please Log in to join the conversation.

Blakbird's 58242 Wild Willy 2 Project 4 years 6 months ago #56800

I was under the impression that this body would be dirt simple to paint because it is just all olive green, right? Wrong. In fact I needed all the colors shown. Many were used on the driver, but among the other items which need paint are the fire extinguisher, the nitrous bottle, the roll cage, the dashboard, the light lenses, the fuel cell, the seat, and the spare tire.
Here's a close-up of Willy with his huge head. I love the way he is posed perfectly for the vehicle with his feet on the pedals, a hand on the wheel, and another on the shift lever. The pattern on his helmet was tricky to mask and paint. In these pictures you can also clearly see the N2O bottle and the fire extinguisher. I used a black wash to bring out the oil detail on Willy's jumpsuit.
These photos show the body first after the initial overcoat of olive green and then with all final decorations. The rear fenders are now black and the minimal decals have been installed. I put a flat clear coat over the whole thing. You can see a lot of the other tiny areas of different colors if you zoom in.
Attachments:
The following user(s) Liked this: jord001

Please Log in to join the conversation.

Blakbird's 58242 Wild Willy 2 Project 4 years 6 months ago #56801

I much prefer the look of the original M38 Wildy Willy to the re-release version, mostly because of the tires. I thought the narrower tires on the original seemed way less ridiculous (although still ridiculous). These were the same tires used on the original Blazing Blazer. Luckily for me there is an eBay seller making reproduction tires for the Blazer, so I picked up a set. These are narrow, paddle style sand tires with foam inserts as shown. The wheels were a bit harder. The original wheels are very difficult to find and they wouldn't mount to the new chassis even if I could find them, so I ordered some steel 1.9" spoked wheels from RC4WD which look reasonably similar to the originals. Everything is shown on the right.
I had heard rumors that the reproduction tires didn't fit well on standard beadlock wheels, and I suspected this was because the rubber is too thick. This is a common problem with Proline tires as well, common enough that you can buy a set of Proline compatible center rings for the wheels. You can see the subtle differences in the pictures above. The black ring came with the wheels, and the blue ring is specifically for Proline tires. It is slightly larger in diameter and a bit wider. The tires fir perfectly with these.
Now that the tires are mounted we can compare them with the huge balloon tires that came with the WR-02 kit. You can see that the diameter is quite similar, but the new (original style) tires are much narrower.
The RC4WD wheels use a 12mm hex drive which is just fine in the rear, but doesn't work at all in the front. The kit uses a spindle which assumes the bearings will be mounted inside the wheel. We need the bearings in the steering knuckle. Luckily, the WR-02 kit happens to come with these knuckles on the B parts tree, they are just not used. Assuming you didn't throw your spare parts away, they bolt right on. In the image on the left the stock knuckle is white and the needed part is black. Use of this part also serves to narrow the track width which is a good thing in my opinion. You'll also need a spindle for the hub. I stole the front spindles from a Bush Devil II kit which worked perfectly. The wheels fit fine in the rear, but the wheel nut will not clamp tight against them because it bottoms out on the step of the spindle first. I was able to steal the rear spindles from the same Bush Devil II kit which worked perfectly. You can see in the picture on the right that even though the black part is slightly longer than the silver, the shank is shorter.
The following user(s) Liked this: Jonny Retro, stingray-63, jord001

Please Log in to join the conversation.

Blakbird's 58242 Wild Willy 2 Project 4 years 6 months ago #56802

Because the front track width has been narrowed, the stock steering links won't work. I swapped out the 50mm stock links for some 37mm links I had in my parts bin. These fit just right as you can see.
Here's an overhead view showing the footprint with the new tires and wheels mounted. The footprint is much more reasonable than it was with the balloon tires.
Here are before and after pictures of the wheels and tires. I think the updated version looks 100x better, though it is obviously a matter of opinion.
The following user(s) Liked this: Jonny Retro, jord001

Please Log in to join the conversation.

Blakbird's 58242 Wild Willy 2 Project 4 years 6 months ago #56803

The new wheels are quite a bit heavier than the old and the diameter is also slightly different. This changes the wheelie behavior a bit and tends to make the front end come down harder than it did. For this reason, and because I always do it anyway, I replaced the friction dampers with CVA oil dampers as shown. They don't look much different, but they sure do perform differently. I also saw a fascinating new product from Yeah Racing: a full aluminum wheelie bar with its own shocks. It only comes in blue which would look terrible with the green Jeep body, so I stripped the dye from the anodize. You can read about the method I use for this in my CR-01 build .
These pictures compare the original plastic wheelie bar with my new aluminum version. The new version looks incredible and I like the rubber tires, ball bearings, and shock absorbers. Unfortunately, the geometry is different which results in a lower wheelie angle with the new bar, and that in turn leads to shorter wheelies instead of longer. The upgrade was a bust and I can't recommend it even though it looks great. The shocks needs to be shorter to increase the angle.
Attachments:
The following user(s) Liked this: stingray-63, jord001

Please Log in to join the conversation.

Blakbird's 58242 Wild Willy 2 Project 4 years 6 months ago #56804

The Wild Willy is a good looking vehicle, especially when configured to look like the M38 original rather than the 2000 version with balloon tires. The body is a good scale representation of an old Jeep even if the wheelie chassis is nothing like one at all, and the driver is a classic for all time.
The following user(s) Liked this: Jonny Retro, stingray-63, AndyAus, jord001

Please Log in to join the conversation.

Blakbird's 58242 Wild Willy 2 Project 4 years 6 months ago #56807

Looks great on those wheels/tyres :y: B)

My understanding is that only the vintage Wild Willys (both short and long wheelbase) are based on the M38 (Korean War era); the Wild Willy 2 body is more like the Vietnam War era M151 ( www.tamiyabase....-willy-m38 , tamiyabase.com/...body-parts ) :)
The following user(s) Liked this: jord001

Please Log in to join the conversation.

Blakbird's 58242 Wild Willy 2 Project 4 years 6 months ago #56809

My understanding is that only the vintage Wild Willys (both short and long wheelbase) are based on the M38 (Korean War era); the Wild Willy 2 body is more like the Vietnam War era M151.

Yep, that's so. But I guess they didn't want to change the driver's name to Wild Ford.
The following user(s) Liked this: jord001

Please Log in to join the conversation.

Blakbird's 58242 Wild Willy 2 Project 3 years 3 months ago #63512

Excellent article ! Thanks you the front axel suggetion just ordered on eBay !
The following user(s) Liked this: jord001

Please Log in to join the conversation.

  • Page:
  • 1
  • 2
Moderators: caprinutstingray-63AndyAus
Time to create page: 0.309 seconds
Cookies are required to make this site work. If you continue to use this site you permit us to use cookies.