TOPIC:
8x4 MAZ/MA3 535A from Lunchkins 4 years 2 weeks ago #58836
|
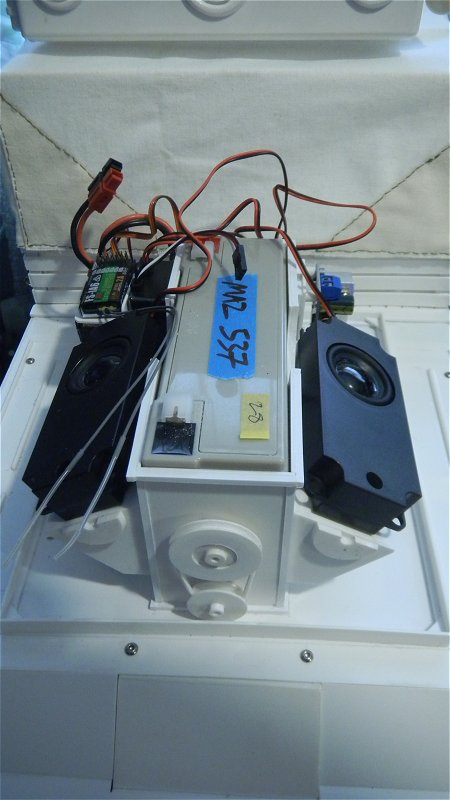
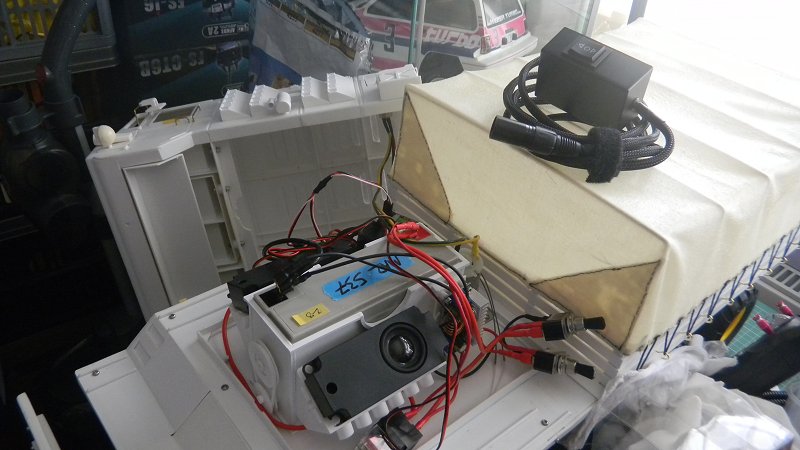
I needed to make some sort of cradle/holder for the battery, and I suppose I could have just stuck the speakers to that, but there was room for some sort of resonator box(es) for them – and it wasn’t much harder to make them angled … a few bits of tube & some leftover bits of machined styrene add to the look.
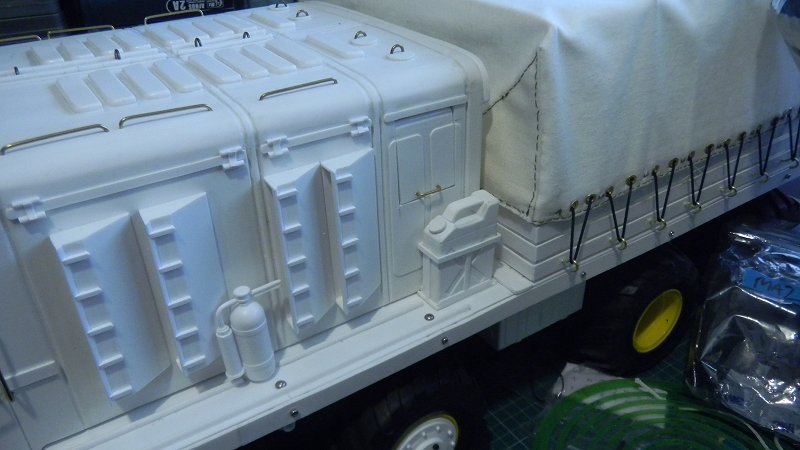
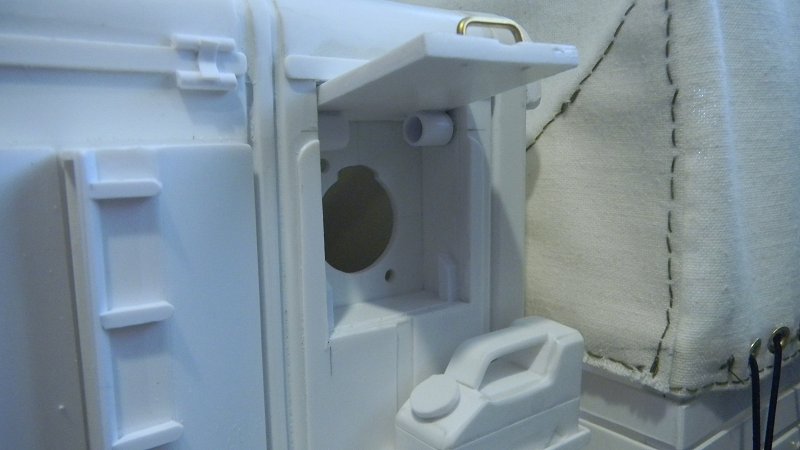
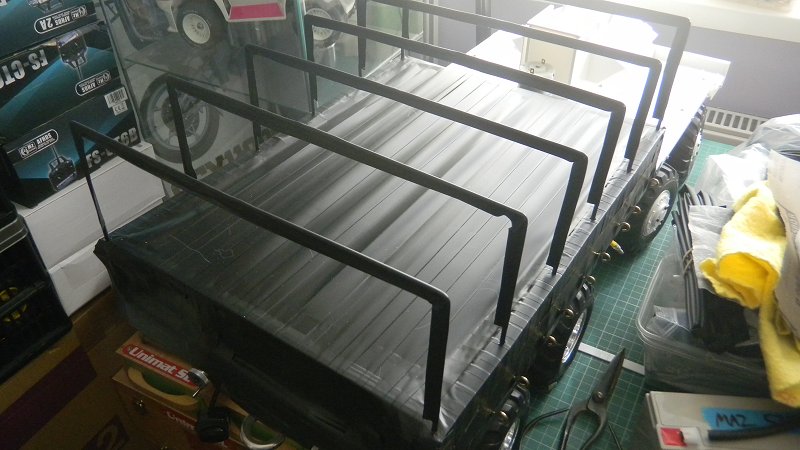
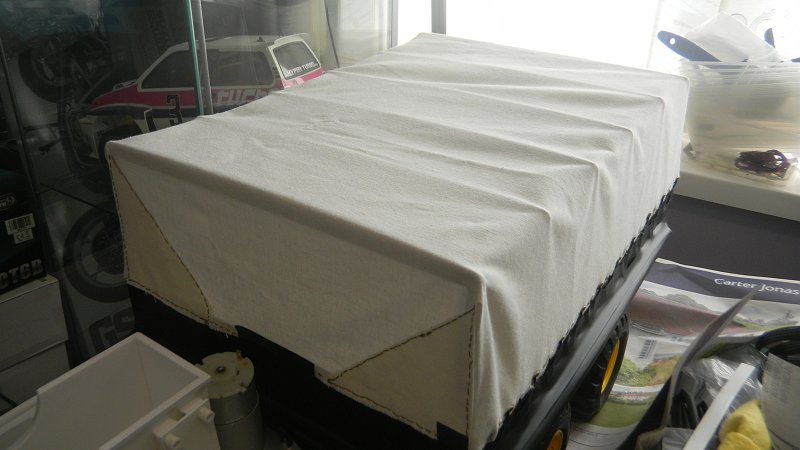
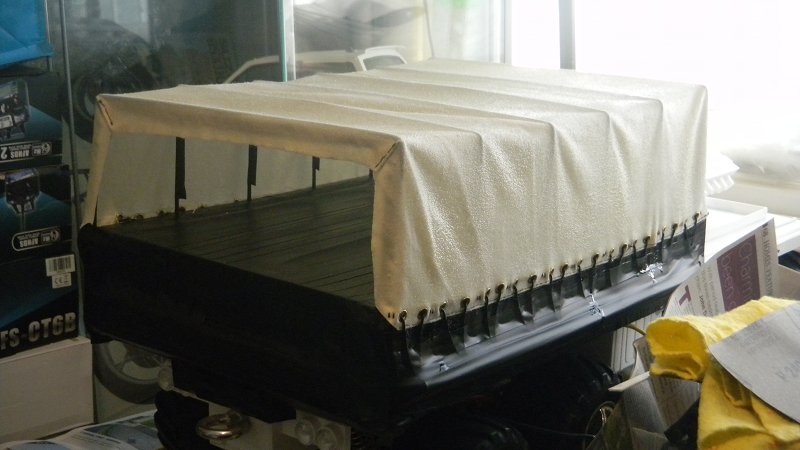
The 1:1 version is 12 cylinders but being a diesel is more likely to be an inline 12 than a V12, let’s just call it artistic license Note also the stitching on the front of the load cover: the top right (in the photo) corner and “left” folded over bit didn’t work quite as well as I would have liked, and it was 10-12mm too short at the bottom (so no proper edge was possible) but there’s no guarantee starting from scratch would turn out any better so I’ll stick with this one – once resin-ed, painted & mostly hidden but the cab I’ll be happy with it I’ve also been working on the hatch to hide the socket for the winch control, it looks ok from a distance but TBH the hatch is not quite square in the gap & there’s no adjustment possible in my “hinge” (tube fitting over an M3 cap head screw on one end, and M3 thread on the other)… If I’d made provision at the start it might have worked out better – but I wouldn’t have known where to fit it.
The following user(s) Liked this: stingray-63
|
|
Please Log in to join the conversation. |
8x4 MAZ/MA3 535A from Lunchkins 4 years 2 weeks ago #58839
|
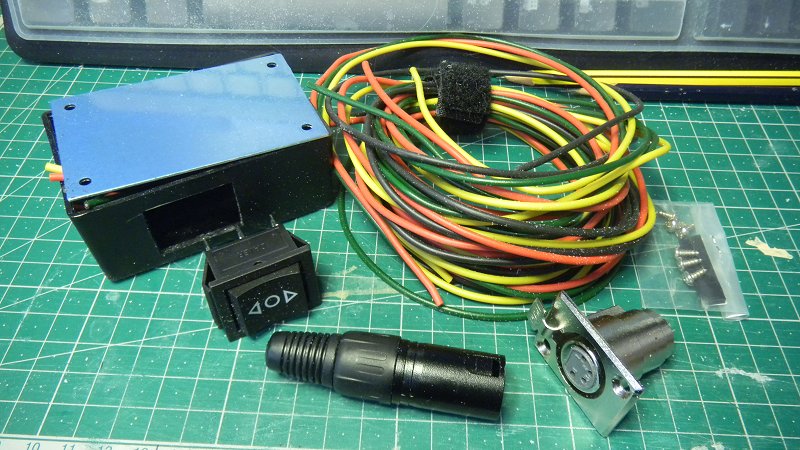
I’ve also been preparing to wire the winch control, this will be via a plug in box (hence the socket hatch in the previous post).
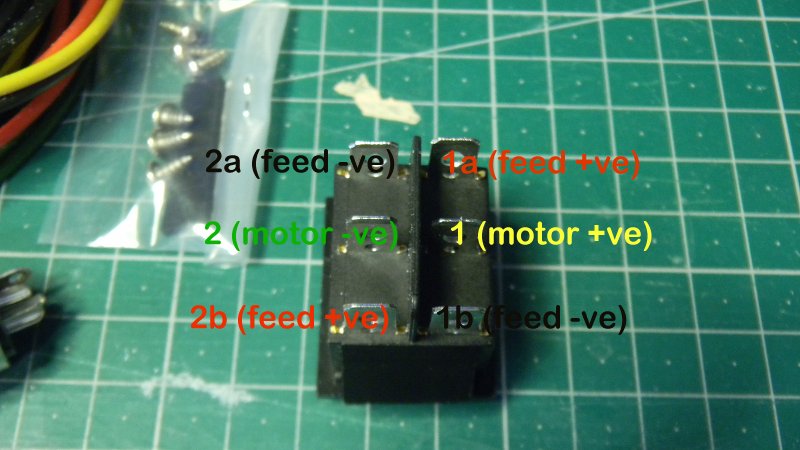
Apologies if this seems obvious, but I did expend a little skull sweat on it & don’t want to forget … +ve 6v on the battery will be wired (red wire, via a fuse) to the +ve IN on the 24v stepup board, battery -ve (black wire) to the -ve IN on the board. +ve OUT (red wire) and -ve OUT (black) on the board go to pins 1 and 2 on the socket, and then to terminals 1a and 2a on the switch. The switch is the key component here – it’s a momentary DPDT switch, “momentary” meaning it’s only on when held in position, DP meaning Dual Pole (2 independent sets of contacts), and Dual Throw (2 positions other than OFF – ON/OFF/ON in this case). The +ve feed from 1a also goes to terminal 2b, and the -ve from 2a to 1b. Terminal 1 (yellow wire) connects (via pin three on the plug/socket) to the +ve terminal on the winch motor, and terminal 2 to the -ve winch motor terminal via a green wire (and pin 4 on the plug/socket). The practical upshot of this is that when the switch is held in the “up” position, terminals 1a and 1 are connected (feeding +ve 24v to the +ve motor terminal), and 2a and 2 are also (independently) connected, completing the circuit, spinning the motor forwards. When the switch is held in the “down” position, terminals 2b and 2 are connected (feeding +ve 24v to the negative motor terminal), and 1b and 1 are also connected (so the earth is connected to the motor +ve terminal) – resulting in the winch motor turning backwards. |
|
Please Log in to join the conversation. |
8x4 MAZ/MA3 535A from Lunchkins 4 years 2 weeks ago #58840
|
That's awesome and crazy Jonny.
|
|
Please Log in to join the conversation. |
8x4 MAZ/MA3 535A from Lunchkins 4 years 1 week ago #59039
|
Still waiting on the blade connectors I need for the switch
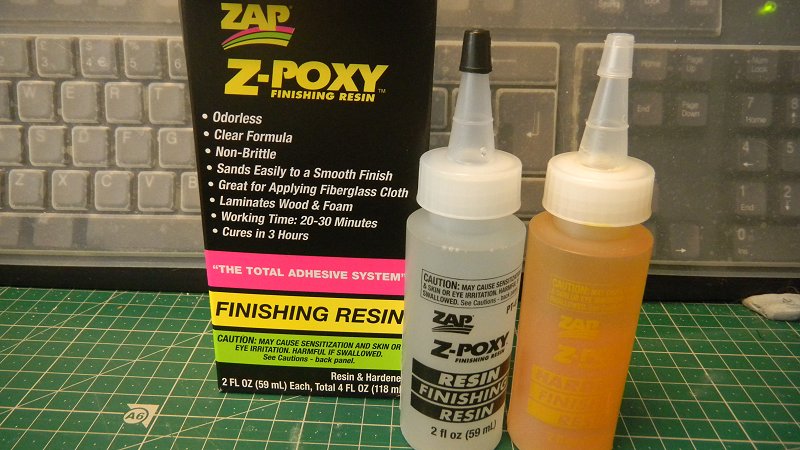
At least the Z-Poxy resin arrived - it cost a bit more than it did 18 months ago, but not unreasonably so. Until it arrived, when I realised I'd bought 1/3rd the amount (4 US fl. ozs vs. 12) for more money Using PVC tape for masking might seem wasteful, but I remember how much time I spent dremmelling off blue 3m paper based masking tape the last time. I have enough resin to do the touching up where I had to hold the topper down with tape (and where it's doubled up on the inside. Ps "odorless" ... only in the sense that Linden trees are odorless |
|
Please Log in to join the conversation. |
8x4 MAZ/MA3 535A from Lunchkins 4 years 4 days ago #59126
|
The brass terminals finally turned up, so of course I couldn't find either of the suitable crimping tools.
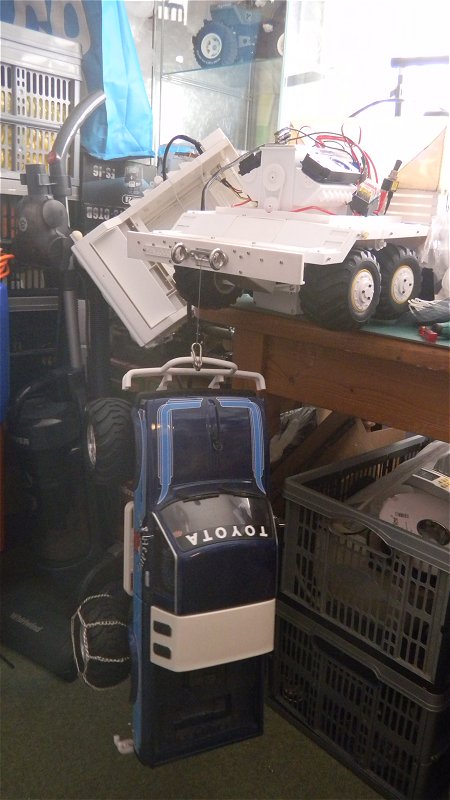
Cue several hours searching over 3 days before giving up & buying new ones from eBay ... then almost immediately finding the missing tools Even doubling up won't guarantee the same thing doesn't happen again, but in the mean time I've made some progress - all the power feed & winch wiring, so the engine sound & winch work. Obviously there's a lot more to do, starting with bracketry for the power switches & fuse box. Plus a lot of tidying. The winch will lift & hold up a Bruiser (3.6kg, just under 8lbs) but that's probably the limit without resorting to pulleys. |
|
Please Log in to join the conversation. |
8x4 MAZ/MA3 535A from Lunchkins 4 years 3 days ago #59164
|
Woo! Test drive
Wiring is now tidy enough that I can get the body on … I think it will improve – but not because anything I’ve planned Steering and Drive are both "working", the placeholder servos are plugged in via a Y-lead, and one needed a signal reverser (!?) The generic 540 motors are wired in series (a la Clod Buster "Economy" mode. I still haven't fitted the LEDs, but they are all wired so it should just be a matter of drilling a few holes & a bit of plugging in and/or soldering. Driving is best described as "interesting" - if you start on a grippy surface with the steering dead ahead, it will get going & move along at an adequate pace. Steering though, the 2nd axle is responsive enough, but the front axle is slow to respond & seems underpowered (or has extra weight on it), if you're lucky it will steer once, but will not centre up or steer a second time - meaning you can have both sets of steering wheels pointed in different directions. The only way to get the front axle to behave is to lift the front end off the ground. Both powered axles spin when unloaded, but in use the 3rd axle does nothing, and the 4th axle (which has the least weight on it) spins either one or both tyres. This seem like the electrical version of a geared differential – all the power goes to the tyre with least grip Most of the “fixes” would be things I would be doing on the final assembly anyway – matched, half decent MG servos; locking both diffs, fitting higher (55T IIRC) turn motors & wiring them in parallel (“power” mode). However – it really does look like the battery will have to move to the load area to help with the nose down, badword up stance causing excess load on the servos & traction problems. This does mean that there will be a bit more space in the front to tidy things up a bit |
|
Please Log in to join the conversation. |
8x4 MAZ/MA3 535A from Lunchkins 4 years 3 days ago #59165
|
Should also have mentioned that the weight is now 8.9kg (19.5lbs)
|
|
Please Log in to join the conversation. |
8x4 MAZ/MA3 535A from Lunchkins 4 years 3 days ago #59166
It's a little on the fat side And it may be useful to wire an external BEC to give to servos the most chance of steering. A video of the beast would be great |
|
|
Please Log in to join the conversation. |
8x4 MAZ/MA3 535A from Lunchkins 4 years 2 days ago #59171
|
Why not use a big servo with its own battery ? I had a twin wiring servo in my mess. Or use a 1/5 1/4 servo?
|
|
Please Log in to join the conversation. |
Time to create page: 0.240 seconds


