TOPIC:
Blakbird's 58085 Avante 2001 Build 4 years 4 months ago #57814
|
Here we have the inaptly named Avante 2001. The original 58072 Avante came out in 1988 and was called the Avante 2011 when it was re-released as 58489 in that year. You might assume then, that the 58085 Avante 2001 came out in 2001. Nope, it came out in 1990. I can only assume that "2001" seemed like a nicely futuristic name in 1990, but in hindsight it just seems strange.
So why release another Avante only 2 years after the original? Some of the answer can be found by comparing the models. The 2001 loses all the metal rod ends and the gold anodized shocks and replaces all those bits with plastic. It also loses the Technigold motor and replaces it with a Sport Tuned. The front shocks have been greatly lengthened and a shock tower has been added. The rear shocks have been moved behind the suspension so they don't block the body. The same DNA is there though. This model seems to have been built to make the Avante cheaper as well as address some if its more annoying flaws. It achieved that goal fairly well, though at the cost of some of the charm of the original. This is a shaft drive, 4WD buggy designed to be competitive at the racing circuits of the time, even though that didn't end up being true. It is a great looking and driving buggy, though some of the fragility of the original remains, especially in the front hubs. Most of my historic Tamiya fleet consists of model re-releases of classic models, but the Avante 2001 has never been re-released. I was so smitten by the Avante though, that I wanted to display as much of the family as I could find. I have the Egress waiting in the wings, but I still need to find a Vanquish. I could not find a model New in Box for any price I was willing to pay, and finding one in any condition whatsoever is not all that easy. I got fairly lucky with this one because, although it was already built, the original builder had painted it such a hideous color that it did not get many bids. This allowed me to swoop in and pick it up for a decent price with the intention or replacing all the ugly parts with reproductions. It came out excellent. Here is how I received the model. I have no idea what the previous owner was thinking. I understand the use of PC brush paints rather than sprays because they were available at the time, but why paint black over the clear window and why the hideous yellow? There is at least some attempt at shading the edges which produces an interesting effect. Still, this body and wing will have to go. 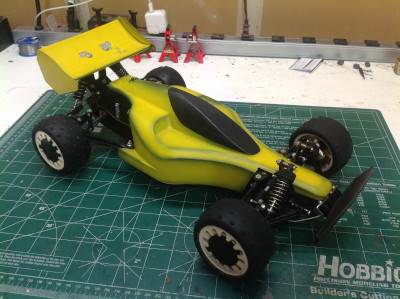
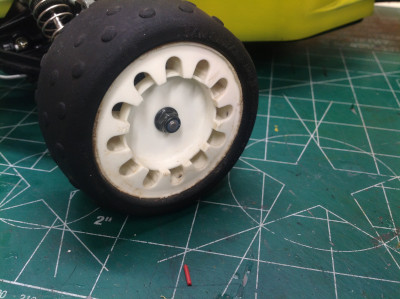
The tires don't look too good either. The fact that they are completely worn suggests this model was heavily used, so we'll see what kind of other wear and/or damage I'll find. You can also see that one of the cam-loc rings for the wheels is missing. The white camlock wheels are present though, and those are some of the hardest parts to find. The cam-loc ring itself is easy to replace because the re-re Avante uses them. The tires are common to the Manta Ray re-re so they are easy to get as well. 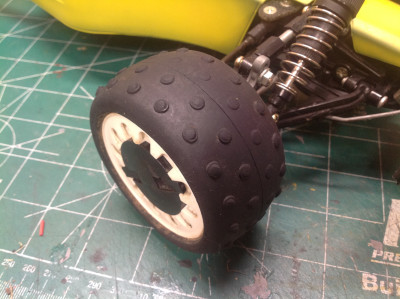
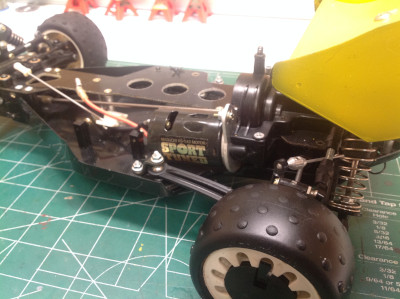
I was pleasantly surprised at the condition of all the chassis parts. At first glance, everything seems to be present and in pretty good shape. Even the original Sport Tuned motor is there. There is a bit of scratching on the bottom of the bumper but I don't mind that. At greater issue is the absence of the driver. While he is similar to the one from the original Avante, the mounting system is different and this part is near impossible to find. A less visible problem is with the hardware. The previous builder stripped the cross recesses from many of the screws, and also used self tapping screws instead of machine screws in the aluminum posts which mangled the threads. I'll have to try to re-tap them. 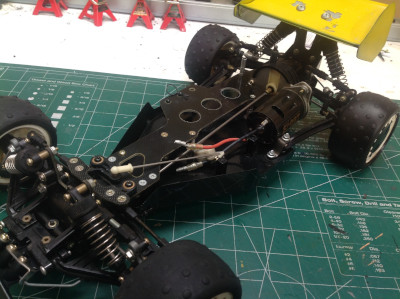
It sure is a lot faster to strip a car down to the nuts and bolts than it is to build it in the first place. I took every single thing apart that I could and separated the results into hardware in one bin and plastic parts in another. For the most part, everything looks pretty good with only some dirt and oil to remove. 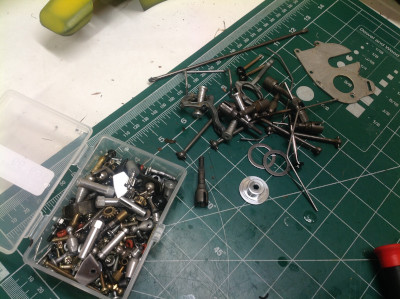

|
|
|
Please Log in to join the conversation. |

Blakbird's 58085 Avante 2001 Build 4 years 4 months ago #57815
|
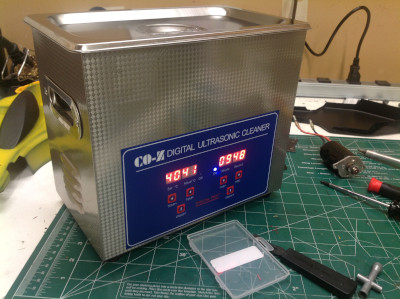
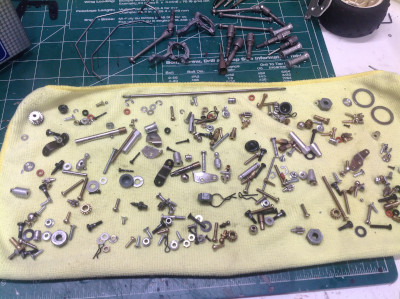
I'd been looking for an excuse to get an ultrasonic cleaner for a while, so the Avante 2001 became the one. I'd never used one of these before but heard they were great for cleaning small parts. You just dump them in a basket with warm water and a bit of dish soap, turn it on, and wait. It only takes a few minutes. On the right you can see all the freshly cleaned hardware drying on a towel. I repeated the same process in several batches for the plastic parts. The FRP plates didn't fit so I just cleaned and polished them by hand.
I have no box for the Avante 2001, but I was lucky enough to get the original color instructions so this photo shows what I started with. The plastic parts were in a bin at my side. 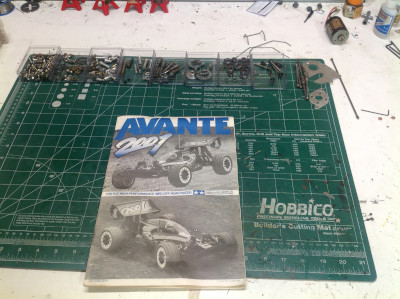
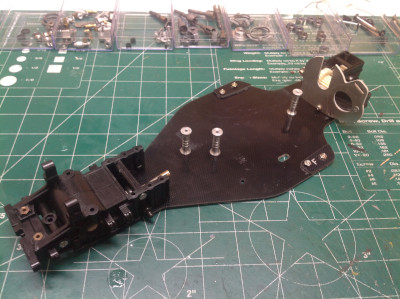
The build starts with an FRP (fiberglass) baseplate to which 3 aluminum standoffs are bolted. There are also a pair of doublers which are cemented (Shoe Goo) and screwed to the plate. This is where the rear radius arms attach and has presumably been added to address a weakness in the original Avante design. Note that the original Avante had the wider chassis plate in the middle and the lower plate was only as wide as a battery. Here, the wider plate has been put on the bottom. This is probably the single biggest difference in the designs. One advantage of this is that this plate no longer has to be cut out around the motor. On the right you can see the housing for the rear gearbox with attached aluminum motor mount which looks just like the original. 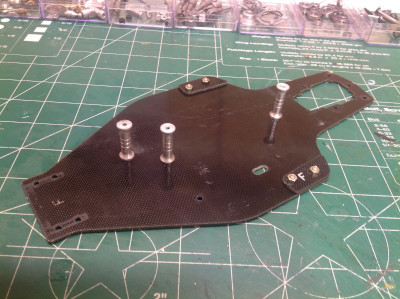
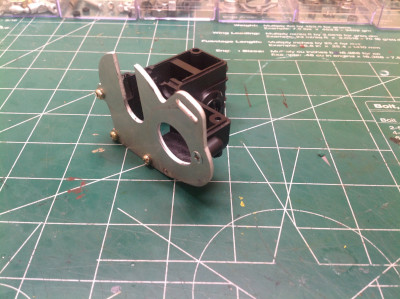
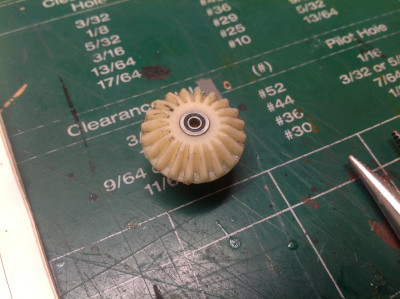
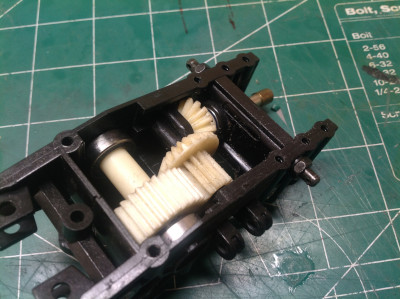
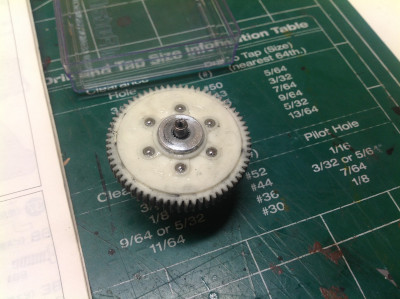
Here is the cool planetary differential which is used in both the front and the rear. There are four internal planet gears, but each pair only mates with the brass colored gear going to either the left or the right axle while also overlapping each other. All of that makes a lot more sense if you can see it moving. On the right the diff has been installed in the rear gearbox housing. This will be accessible from below the chassis for maintenance without removing the gearbox. 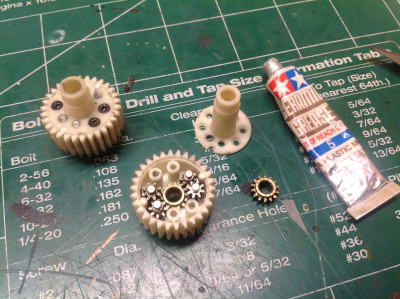

|
|
|
Please Log in to join the conversation. |
Blakbird's 58085 Avante 2001 Build 4 years 4 months ago #57816
|
Now we'll build the front gearbox. It looks a bit different than the rear because it includes a set of bevel gears to connect to the prop shaft. All of the gearing is just like the original Avante.
These pictures show the installation of the rear and front gearboxes, respectively. Both just bolt to the lower base plate with countersunk tapping screws. 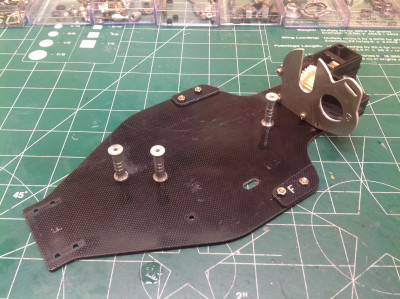
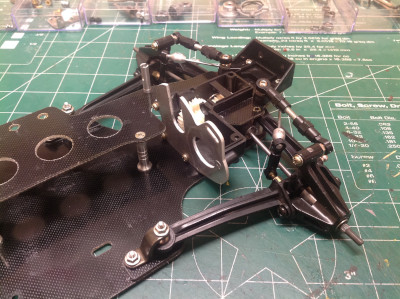
Now the upper FRP plate can be installed to span the front and rear gearboxes and greatly stiffen the chassis. Because of the swap of upper and lower plate shape since the original Avante, the battery access is somewhat different. 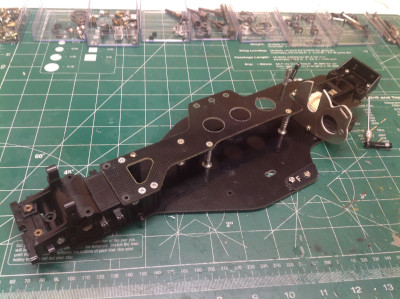
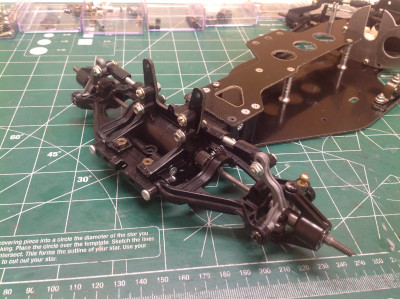
Now we'll start the rear suspension and we start to see some significant changes from the original Avante. All of the big adjustable aluminum rod ends are gone, replaced with plastic. The lower arm is now one piece, replacing the dozen or parts of the original. The upright is the same, but the upper link has been simplified. The way the rear sway bar attaches has also been modernized and is now driven by the lower arms instead of the upper. 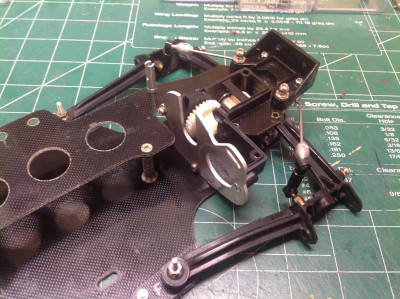
|
|
|
Please Log in to join the conversation. |
Blakbird's 58085 Avante 2001 Build 4 years 4 months ago #57817
|
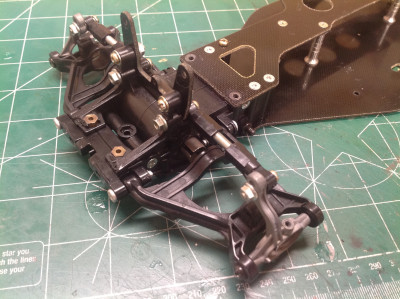
There are even more changes on the front suspension. The flexible system to absorb impacts to the front wheels is gone, as are the multi-piece lower arms which are now monolithic plastic. The one thing that I would have thought would be the most obvious thing to change is the cast uprights which are WAY too thin and the weakest detail on the buggy, yet these remain unchanged. The knuckles are original as well, but the upper links and steering links are simplified. On the old Avante, the front shocks lay down low and attached directly to the plastic front bulkhead, but here we have an FRP shock tower which makes the shocks much more vertical and allows for more travel.
The saddest thing to be lost from the original Avante are the beautiful aluminum shocks. These plastic oil filled shocks are not bad, they just don't have the panache of the originals. I bet they're a lot cheaper though. 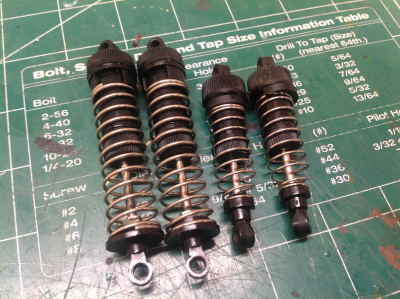
Now the shocks can be attached to complete the suspension. The rear shocks have been moved behind the lower arms whereas they were in front of them originally. This allows better access for removing the body. As previously mentioned, the front shocks are much more vertical (though still greatly tilted) than they were. The front bumper is much wider than the original. The front sway bar can be seen attached behind it. 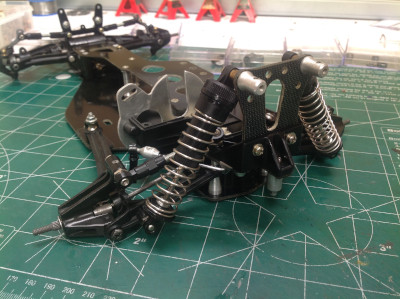
The center ball differential is built just like the original. The shaft on the left has a stack of what should be 5 disc springs but my copy only had 4 which explains why the drivetrain was so rough. Luckily they are easy to buy, but pausing my build whilst I waited for them to arrive was not easy. I attempted to substitute some washers for the single missing spring but it didn't work properly. 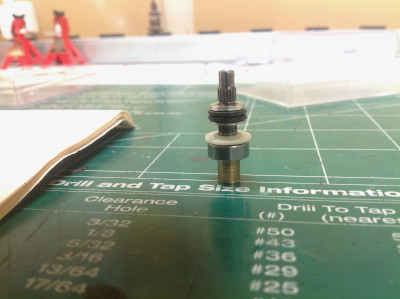
|
|
|
Please Log in to join the conversation. |
Blakbird's 58085 Avante 2001 Build 4 years 4 months ago #57818
|
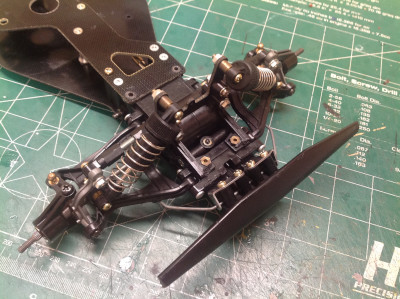
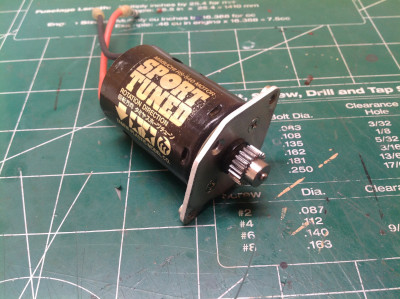
The Avante 2001 came with a Sport Tuned motor which luckily was in good working order. It drives the center differential directly as shown. The output of one side of the diff is a bevel gear which drives the rear gearbox. The other output is the prop shaft. Except for the choice of motor, all of this is identical to the original.

The last thing to do on the chassis is install the steering linkages. The original Avante used a convoluted longitudinal dual bellcrank system which made for somewhat sloppy steering, but the 2001 uses a more conventional lateral dual bellcrank system. 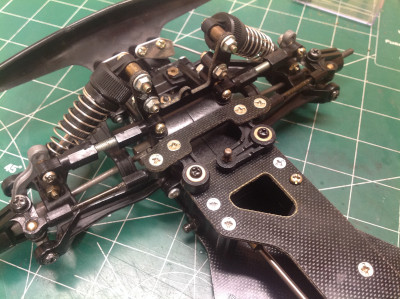
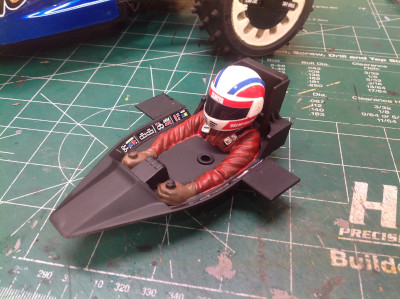
Once the electronics are installed we have a runner. There was never room for a mechanical speed control so the original used the Tamiya C.P.R. unit. I installed a modern ESC instead. You can also see the Cam-Loc wheels which are exclusive to the original Avante and the 2001, though standard wheels can also be used. My car didn't come with a driver and he is unique to the 2001 so I had to use a re-re driver from 2011 to which I glued some styrene plates. This allows the driver to be screwed to the body. As far as I can tell, he is otherwise the same as the original driver. 
Here you can compare the original badly painted body to my fresh new reproduction from Team Bluegroove. Sadly, the repro body is substantially smaller than the original: almost 1 cm. This makes fitting it hard, and it also makes my reproduction decals not line up properly. I ultimately made it work though. The same cannot be said for the under tray. Since it needs to fit the chassis so precisely, the smaller repro version wouldn't attach at all making it essentially worthless. Luckily the original was in decent shape so I was able to reuse it. 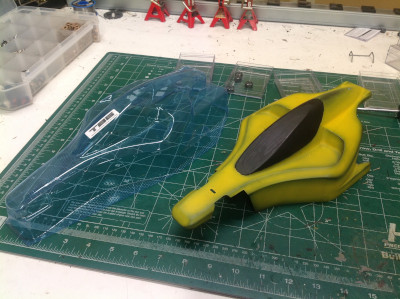
|
|
|
Please Log in to join the conversation. |
Blakbird's 58085 Avante 2001 Build 4 years 4 months ago #57819
|
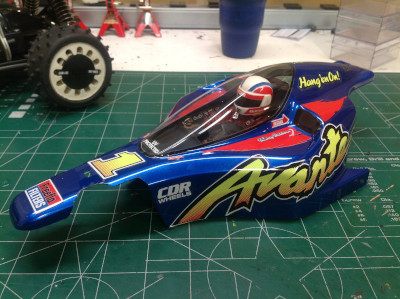
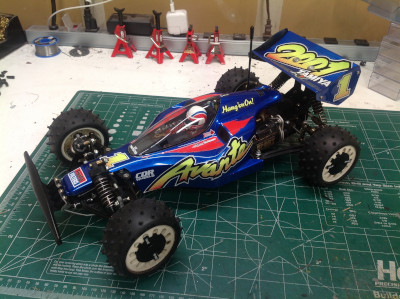
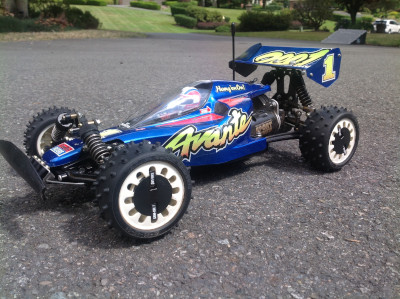
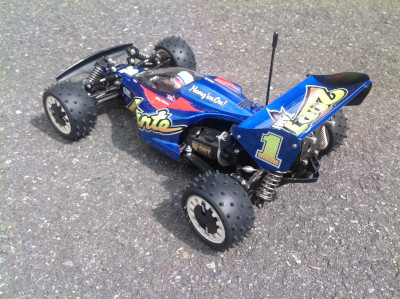
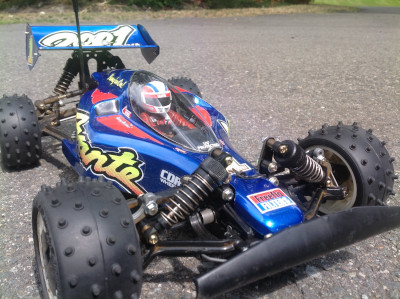
And we have the completely restored Avante 2001! Everything is pretty much like new. The new tires are installed, the missing cam-loc replaced, and the new body installed. Looks pretty fantastic. The obligatory picture on the right allows you to compare it with the (2011) original.
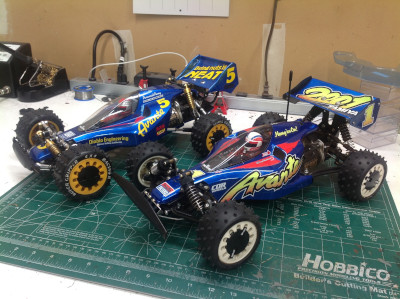
The Avante 2001 is, in my opinion, not quite as attractive as the original Avante. While it has the same basic body shape and the same base color, the fluorescence of the decals does not set off the metallic blue as well, and the lack of the gold anodized aluminum shocks is noticeable. Chartreuse should only be used for fishing lures. Still, it is a gorgeous buggy. Now I just have to try not to destroy it. 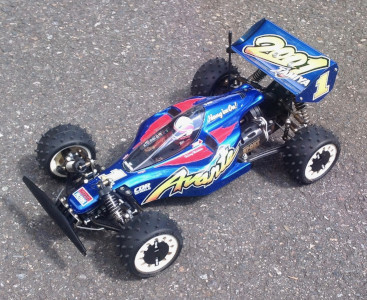
The following user(s) Liked this: stingray-63, Sam
|
|
|
Please Log in to join the conversation. |
Blakbird's 58085 Avante 2001 Build 4 years 4 months ago #57825
|
What a thoroughly enjoyable restoration commentary with a brilliant conclusion. Looks amazing.
The following user(s) Liked this: East_coast_rc
|
|
|
Please Log in to join the conversation. |
Blakbird's 58085 Avante 2001 Build 4 years 4 months ago #57836
|
Dude. Looks better than a modern building kit. You have here a pretty nice resto.
|
|
Please Log in to join the conversation. |

Time to create page: 0.303 seconds