Keyword

TOPIC:

Richard's journey in 3d printing 1 year 7 months ago #72561

Great to see a new section here!
I hope we can get a lot of tips regarding 3d printer setups, how-to sections etc.


My 3d printing journey actually started a few years back, but I never got anything printed as the printer at that time played up and there was not a great deal of info on the internet to find.
I got it for free (chime in if you want to step forward), which was fantastic and very appreciated.
But due all the troubles, I sold it later for parts.

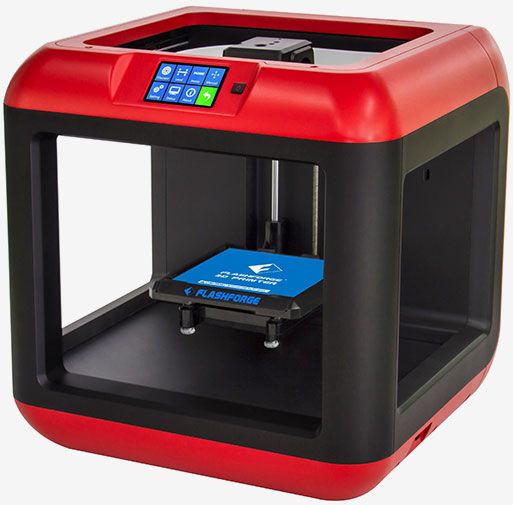
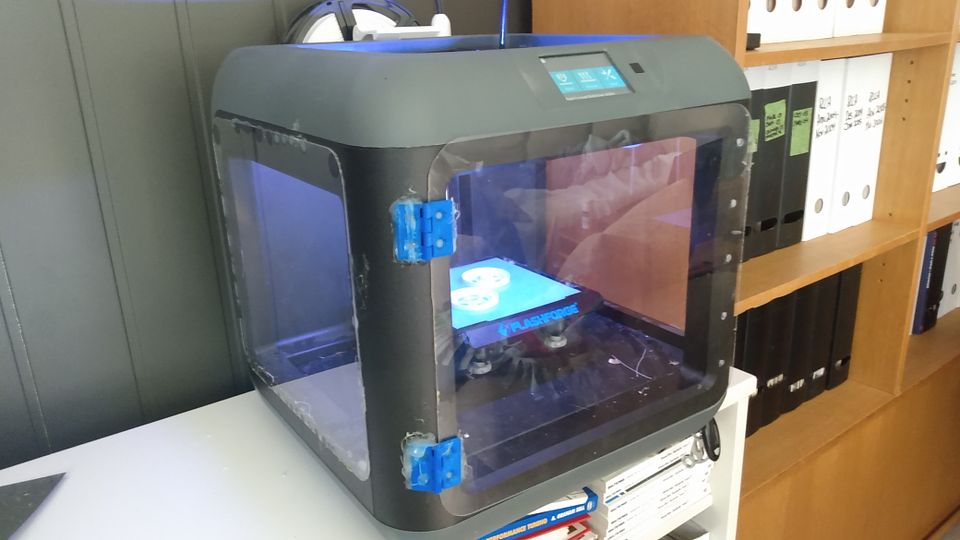
Not long ago I gott a Flashforge Finder 2.0 secondhand from a mate for cheap.
Only thing needed doing was to replace the nozzle as it was clogged and then set the bed leveling (I did both auto and manual as the new nozzle is different length than the orginal one)
The main things that made me buy it was at follows:
#1 He had over 1800 print hours on the machine with minimal fuzz.
#2 Modded with Micro Swiss all metal hotend which makes printing a lot easier.
#3 It is modded with plexiglass sides and doors so it can now print several types of filament, incl flexi filament and abs.

This is the same as mine, only mine has grey tplastic instead of red. Sold at Clas Ohlson here in Norway.


Downside is the small print volume at 14x14x14cm. So for now I have to stick to small bits to print. Ideal for wheels and scale items etc.

First thing I learned that you can not save in "Save as" then send the file to the printer.
My printer used FlashPrint slicer and after you have sliced the item you want to print, you simply save that file by the icon right by the slicer button at top.
My finished slicer files end with GX at the end and I then send the file to my USB stick ready for print.

Seen someone else has troubles with STL files.
These files can not be printed as they are, they need to go through your slicer software, add suppoerts, brim, speed settings etc, and then slice them and save.
Now the file is ready to print.

I'm still a totally noob at this, but I have just learnt the very basic to be able to print.
Mostly by watching youtube and talking to mate I bought my printer from as he has printed for many years already.

My current filament I'm using is PETG and at 220C.
Bed on my printer is not heated so I use gluestick to make the prints stay on the bed.
The bedsurface is glass with a material on top, this is now upside down so glass only on top, and the gluestick works every time.

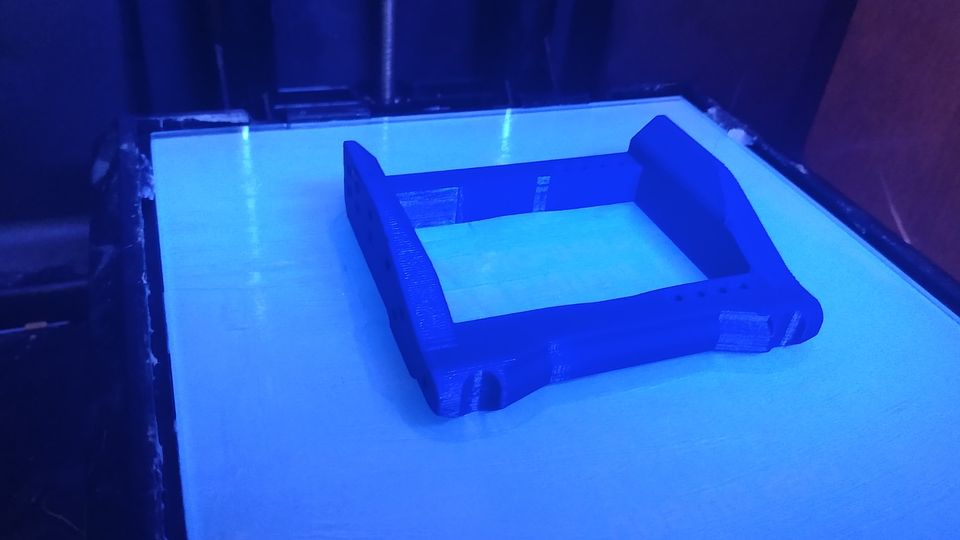
Stuff I want to make is mainly Tamiya and rc related, bunny, heads and other small figueres etc is of no interest to me.
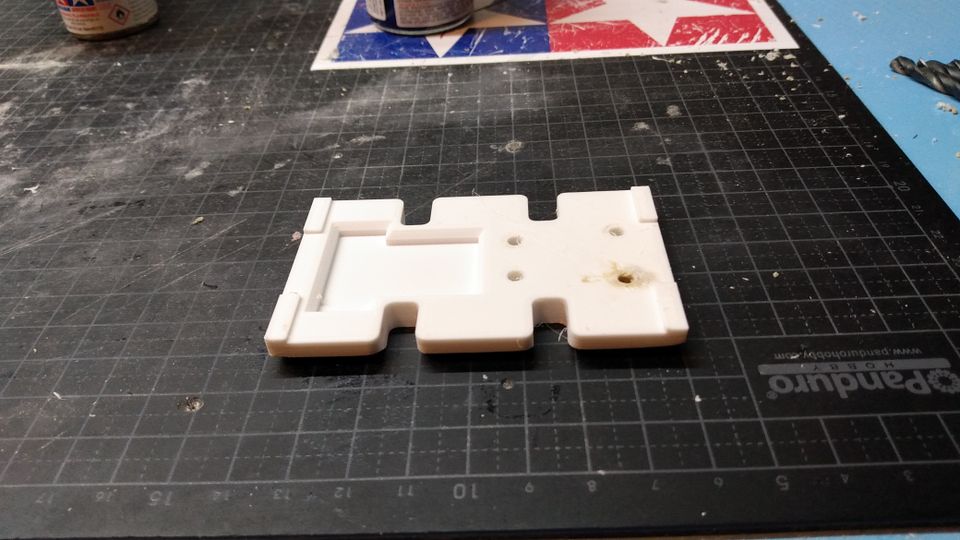
My parts so far:
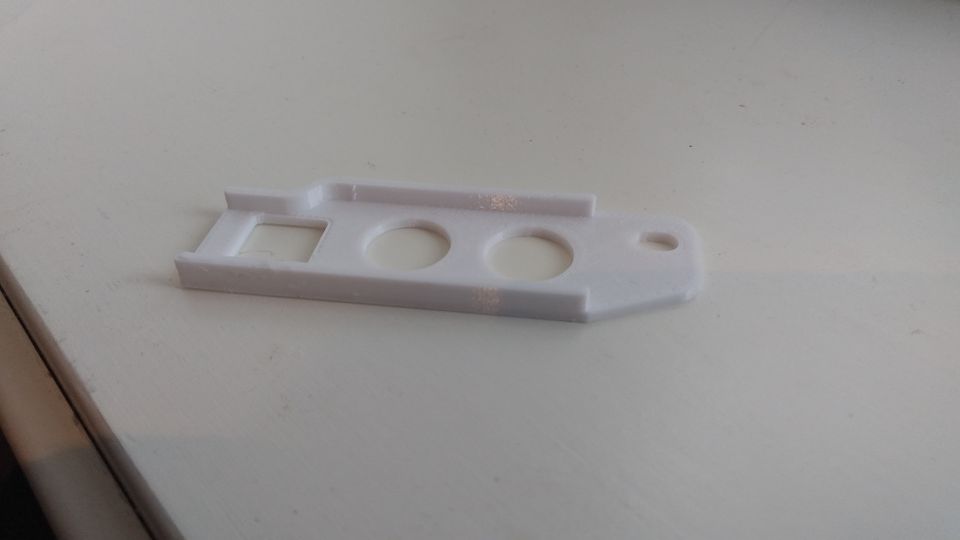
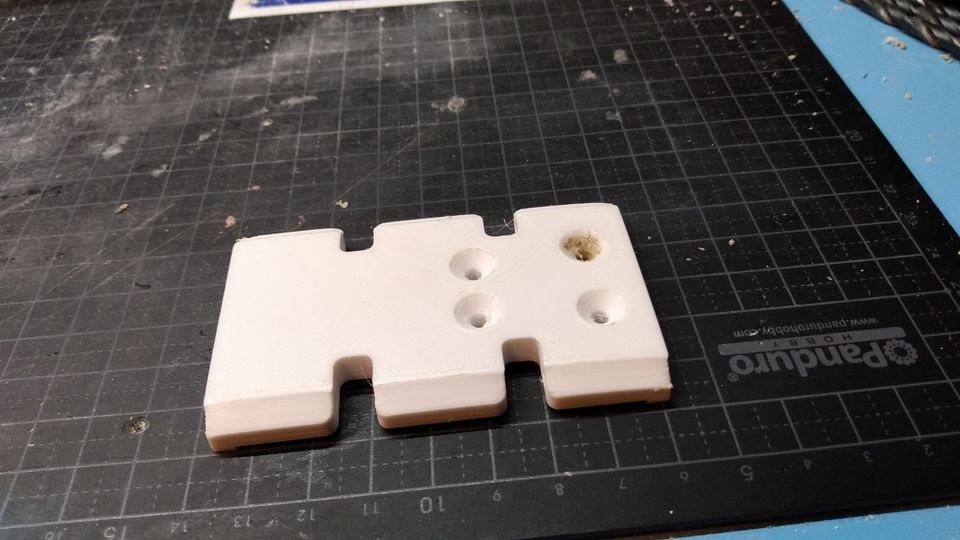
Falcon battery strap


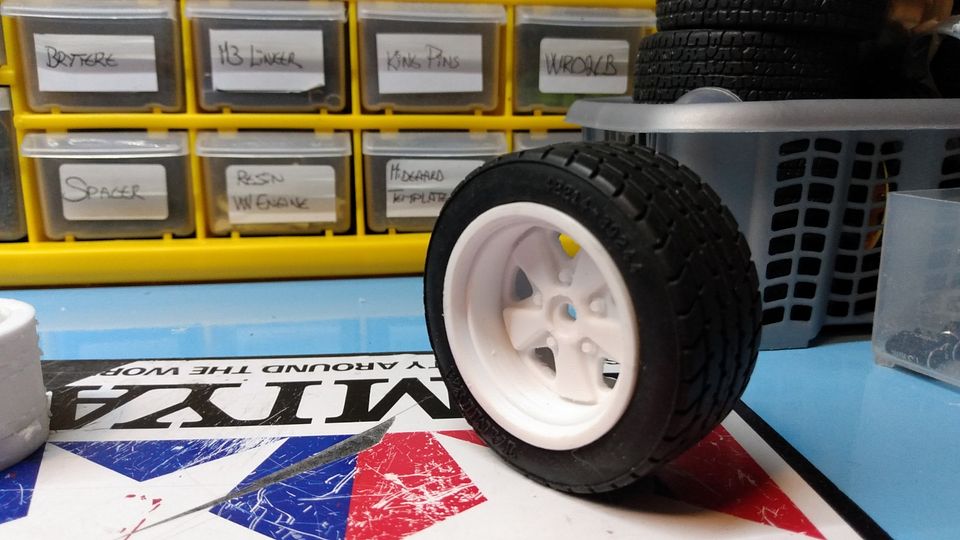
M chassis Fuchs wheels
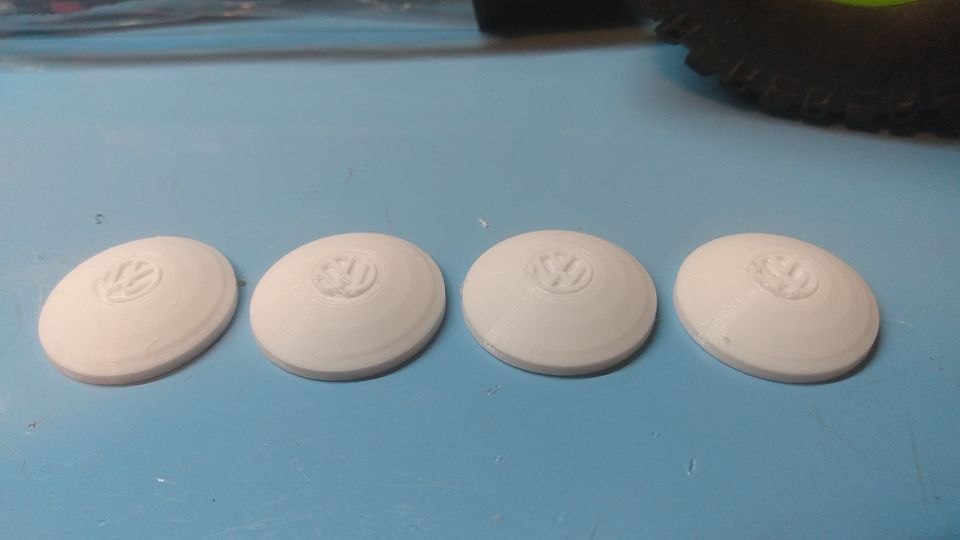
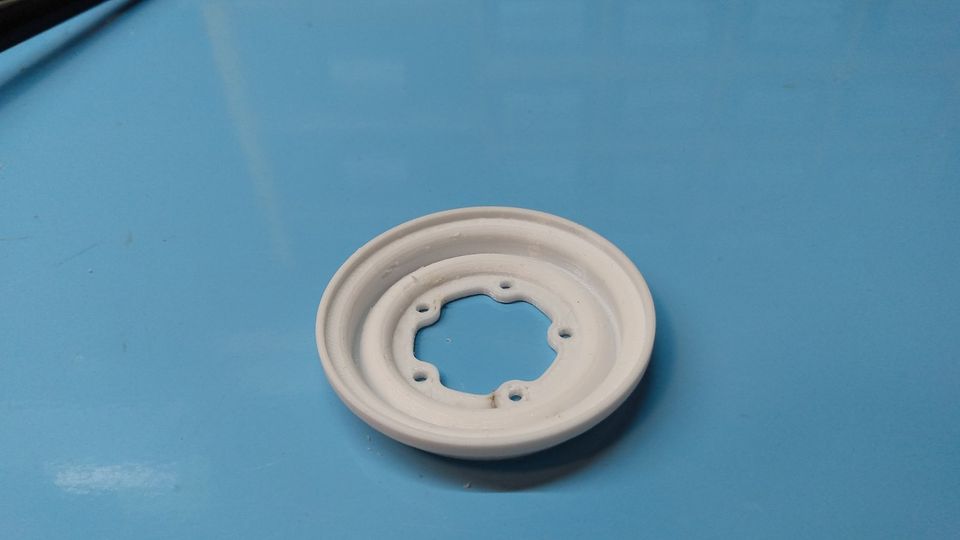

VW hubcaps


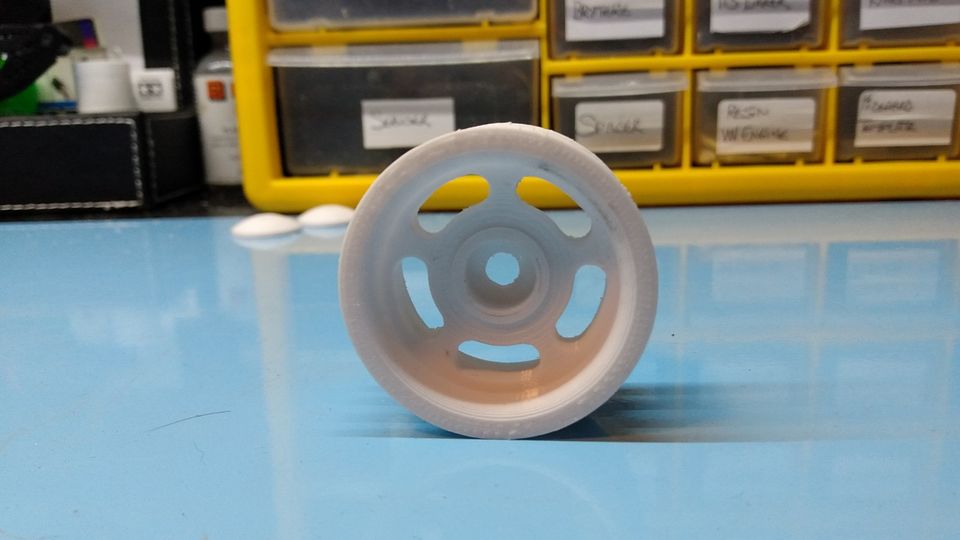
Ansen Slot Mag wheel 1.7"


Knight Customs 1.7" VW wheel covers to go on FAV wheels


Ansen Slot Mag wheel 1.5" for Hornet tire


Latest has been a FAV front wheel center piece (no picture yet)

Most of my prints have been at FINE setting at 0,2mm layer, takes more time but better finish.
Lately I have printed a few on normal and fast setting just to try it out.
How much you fill your part is also something that that can take much longer time to print, 20 vs 100% infill etc.


This is how far I have traveled into the 3d print world.
I have tried to 3d draw, but I suck big time on that part, as my brain can't figure it out.
Thinking and drawing 3d on paper is not a problem tho'

 
The following user(s) Liked this: stingray-63, Lemsko, jord001

Please Log in to join the conversation.

Last edit: by caprinut.

Richard's journey in 3d printing 1 year 7 months ago #72573

Today I printed this SCX10 skid plate at .0.2 layer which took 2h 31min with 100% infill.
Maker of this is mce076 on Thiniverse.

This is going as a test piece on my coming comp crawler rig.
Apart from a spot with burnt filament, it came out good enough


The following user(s) Liked this: stingray-63, Lemsko, jord001

Please Log in to join the conversation.

Richard's journey in 3d printing 1 year 7 months ago #72591

And here is my printer.
Former owner has hot glued some hinges for the front door and the side panels.
I would have done a neather job if I had done it.
But it works 
For filaments that needs higher temps as ABS etc, I have the option to close off the top with something.


Todays print was the FAV wheel center piece
On this printer the whole bed slides out in order to take off the parts being made.
Very handy.
Since it is glass (bed material is normally on top of the glass, but glass has been turned up side down), I just wash it under hot water with a scraper. wipe off with kitchenpaper and then lay a bed of gluestick in cross pattern. Holds very well.


For the next print I will bump up the retraction to see if the helps with the melted plastic bits (brown in color).
The following user(s) Liked this: stingray-63, Lemsko, jord001

Please Log in to join the conversation.

Last edit: by caprinut.

Richard's journey in 3d printing 1 year 6 months ago #72625

Cool Printer. I dont think the burned filament is a retraction issue. Might be more of a cooling thing or speed too slow.

Do you know Wings3D ? Its a sub-division modeller, very intuitive, everything works via context menue. It lacks the suite features of Blender or 3D Studio, it only focusses on the modelling part.
Give it a try!
 
The following user(s) Liked this: caprinut, jord001

Please Log in to join the conversation.

Richard's journey in 3d printing 1 year 6 months ago #72626

Cool Printer. I dont think the burned filament is a retraction issue. Might be more of a cooling thing or speed too slow.

Do you know Wings3D ? Its a sub-division modeller, very intuitive, everything works via context menue. It lacks the suite features of Blender or 3D Studio, it only focusses on the modelling part.
Give it a try!


Thanks for the tips on both regards!

I do lack the cover around the nozzle as I mounted the hotend 90 degre off, so that might be the problem.
Fan is 100% on all the time. Not found any point in the slicer that allows me to adjust the fan speed.

I will try the Wings3D. I did had the 123d, but that is no longer supported sadly.
The following user(s) Liked this: stingray-63, Lemsko, jord001

Please Log in to join the conversation.

Richard's journey in 3d printing 1 year 6 months ago #72630

What slicer are you using?
Nevermind, i just read it. Can you use other slicers?
The following user(s) Liked this: jord001

Please Log in to join the conversation.

Last edit: by Lemsko.

Richard's journey in 3d printing 1 year 6 months ago #72632

What slicer are you using?
Nevermind, i just read it. Can you use other slicers?

I don't know.
Have not seen anyone use a different slicer on this machine.
That said I find the slicer easy to use, which is good for my non technical head..
The following user(s) Liked this: stingray-63, Lemsko, jord001

Please Log in to join the conversation.

Richard's journey in 3d printing 1 year 6 months ago #72670

I have printed more stuff...

Front bumper for my comp crawler build, this time in Black PETG. Files was purchased from the Spare Time Hobbies site.


Today I printed a panhard mount and some spacers.
Up till now I have used PETG bought at Clas Ohlson which I belive is Flashforge's own PETG, just rebranded.
The blue one is PrimaSelect PETG Solide Blue bought at my LHS. I still printing at 220C, so seems thats about perfect for PETG on my printer.
Blue is recomended to print at 195-235.


Progress on my mock up so far...


I'm goingg to print a chassis specific skid plate (the white bit) for this chassis for SCX10 links and transmission.
Right now I'm printing a dual servo mount to go behind the front bumper.
In the end this will feature a Proline Power Wagon body.
The following user(s) Liked this: stingray-63, Al, Lemsko

Please Log in to join the conversation.

Richard's journey in 3d printing 1 year 6 months ago #72678

As siad I printed a dual servo mount (steering servo and servo winch) yesterday.
Fitted like a glove!

Ready to be taken out


Fitted


Plenty of clearance for axle etc


Had to test with a spare servo


This is going to be a kinda smurfmobile as everything except bumpers will be blue as far as the 3d printed items on this chassis.
Not sure what axles will be on it in the end as per now I have only TLT axles and they are not suited for comp driving.
I think they will be either Axial AR44 or AR45 axles.
Gearbox will be SCX10 as per first gen,but with forward low down motor mount. Basicly the motor will hang between lower front links to make the weight low down.
As I don't which axles to be used, I can't make links.
I do however have a sett of Boom Racing Phat (very heavy) SCX10 gen 1 axles in my parts bin. But those are really to heavy for comp rig. I want to keep the weigth under 2.5 kg in total.
2kg would be perfect.

Per nowI'mprinting a new skid to hold lower links and transmission.


Oh I guess I've found the source to the burnt bits while printing.
I use a non Micro Swiss nozzle on my Micro Swiss hotend, so they don't perfectly match eachother.
Will order a orginal Micro Swiss nozzle later on.
Meanwhile I will remove the burnt pieces while printing for now.
The following user(s) Liked this: stingray-63, Lemsko, jord001

Please Log in to join the conversation.

Last edit: by caprinut.

Richard's journey in 3d printing 1 year 6 months ago #72685

Too bad your bed isnt heated, else i would have said give HIPS a try. Its around 20% lighter than PLA or ABS.
The following user(s) Liked this: jord001

Please Log in to join the conversation.

Last edit: by Lemsko.
Moderators: caprinutstingray-63AndyAus
Time to create page: 0.212 seconds
Cookies are required to make this site work. If you continue to use this site you permit us to use cookies.