Keyword

TOPIC:

Monster Beetle rebuild & repaint 12 years 9 months ago #1780

My Sand Rover is still unfinished, and the temptation to handle the still soft paintwork & finish it today is near unbearable ... the only way round it that I can see is to start another rebuild :D


The first thing to say about this Monster Beetle was that I paid massively over the odds for it. The description was very limited & the pictures were poor, but thanks mainly to the “new” classification the owner put on it, what I _thought_ I was getting was a boxed Monster Beetle that someone had given up on before finishing –that is, a chassis that hadn’t been run, an unpainted, unused shell, and all the other required bits still in the box – and I paid a fair price for it - _if_ that had been the case.

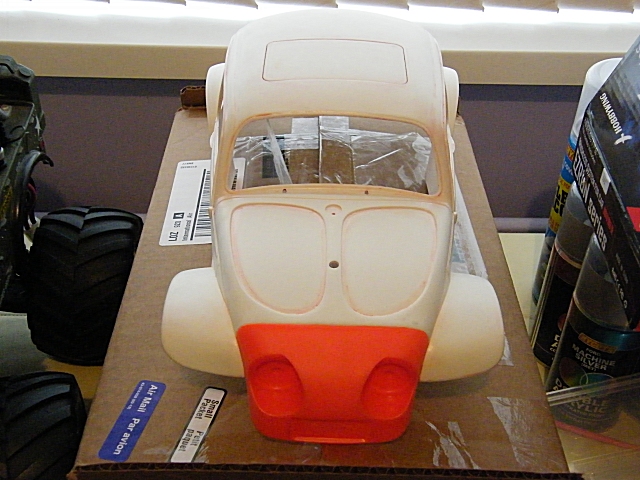
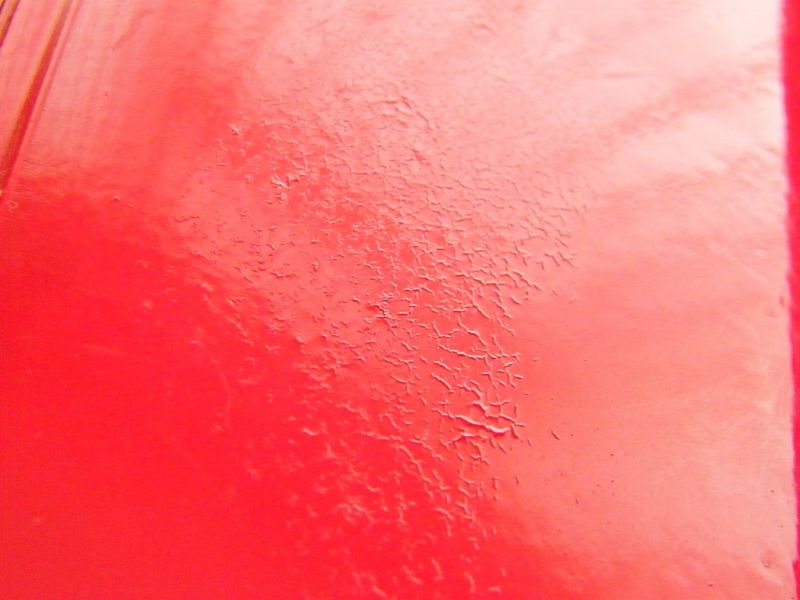
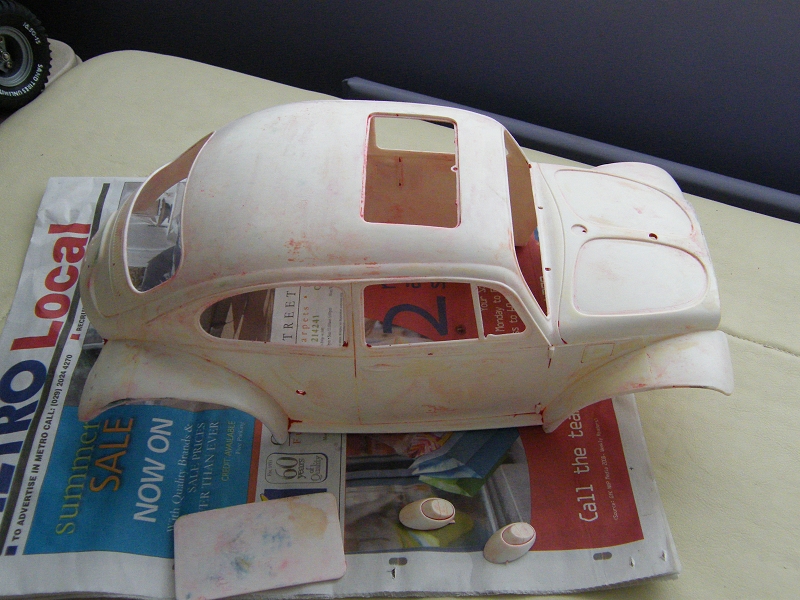
What I actually got was an MB that had been run, though not much, with a badly sprayed shell (there are brush marks on the inside, FFS!), one rotten, split & holed tyre (& the other three heading that way), no nose cone, a missing servo cover, broken “glass” and a very strong whiff of damp. The bottom half of the box was still wet & beyond salvage, I’ve kept the top, but it’s very, very poor.

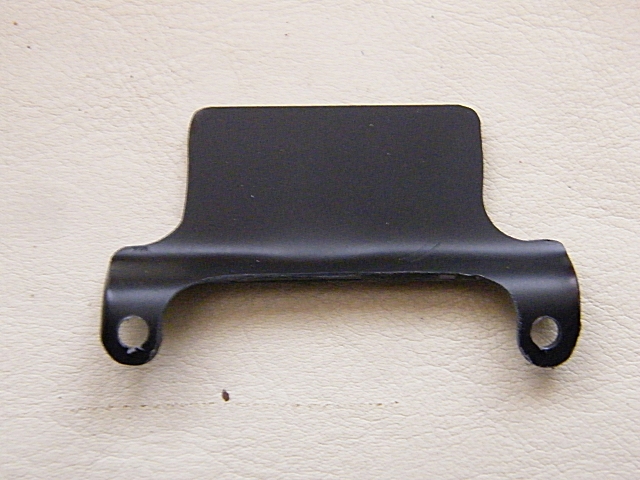
Trying to put that behind me (it’s not the car’s fault the seller was either a liar or an idiot), so it’ll be getting the full rebuild treatment – paint stripping is fairly easy with De-Solv-It Graffiti remover, I’ve bought new tyres & a Blitzer Beetle nose – the only real problem is the servo cover – I missed one that went for peanuts, another one went up to £10 shipped, at which point I bailed, and only new one I’ve seen so far is on a complete “G” parts sprue at £46 on a buy-it-now ...

I’m sure the smell will go with work, and on the plus side, there is a sheet of pukka decals – maybe I can sell that on to someone who cares about their car being 100% original to recoup a little of the cost – I’ll probably be using repros myself :D

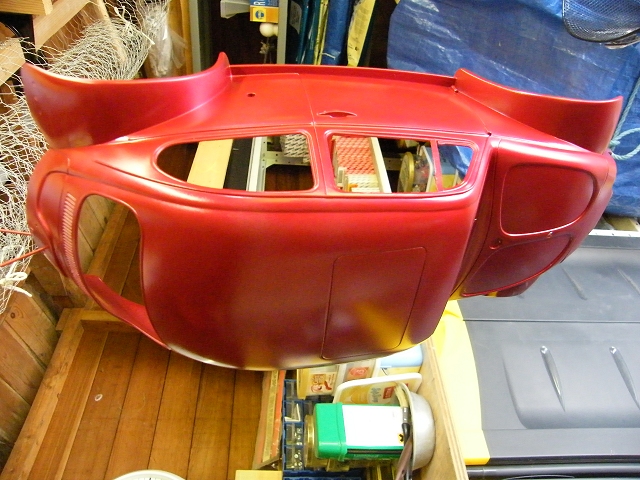
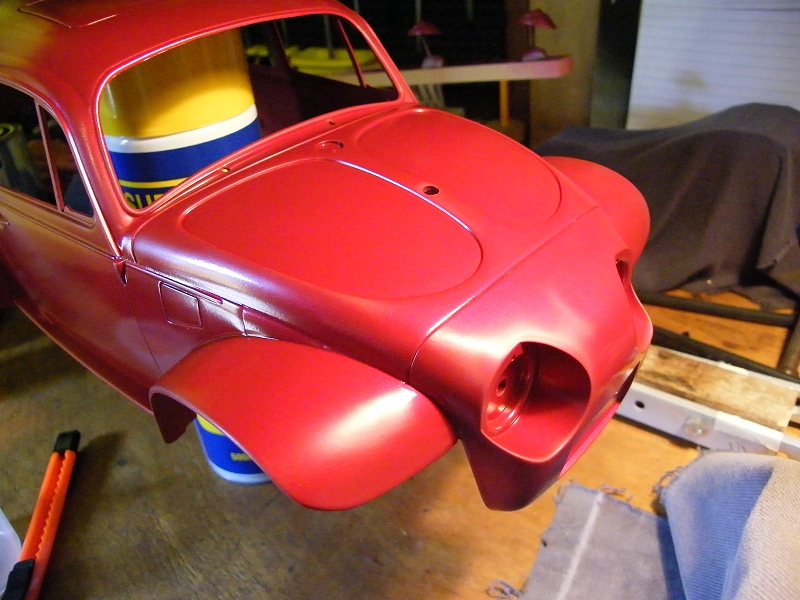
As with my last "red" car, this one will still be red, but a slightly more interesting red – this time I’ve gone for Citroen “Wicked Red” metallic, which to my eyes at least is a fairly dark red, tending to burgundy in poor light, and bright red in bright light.

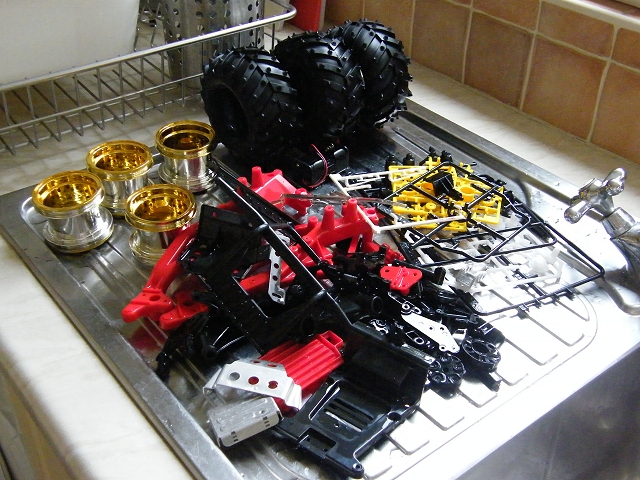
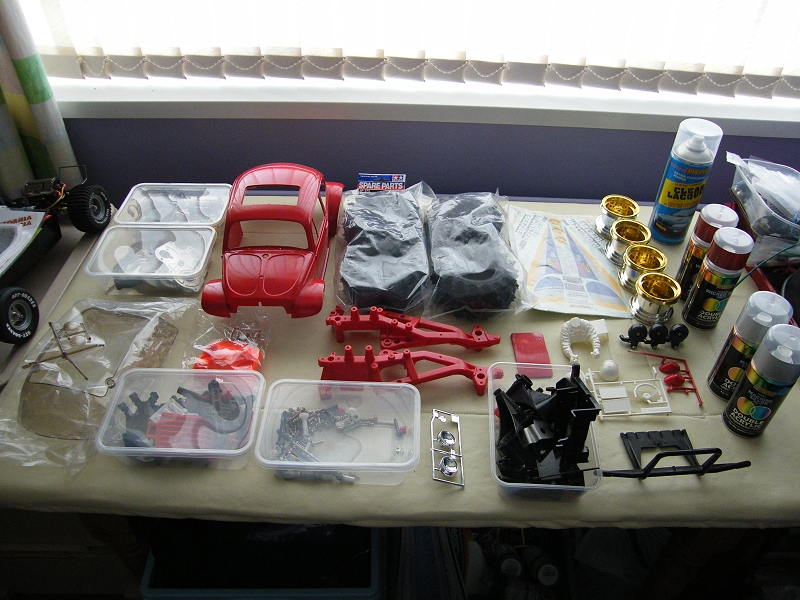
I’ve stripped the car down to components to check no other parts were broken, everything was in pretty good order, but it proved that some people should have their tools taken away from them – some of the fasteners seemed to have been installed with a torque wrench. I actually had to get out a socket set to undo one of the front suspension screws... there are also some stress marks & one split on the chassis from overexuberant tightening. Inexplicably, there were also a number of fasteners that were barely finger tight.

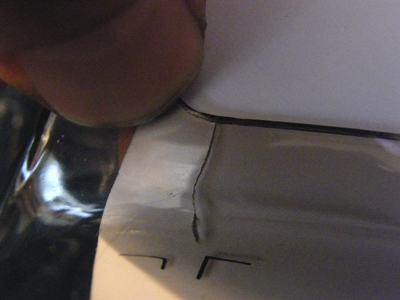
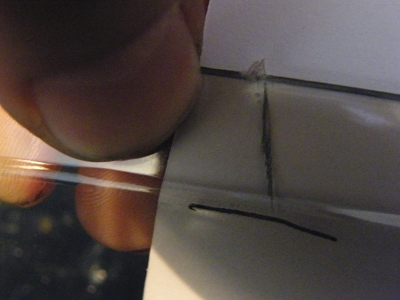
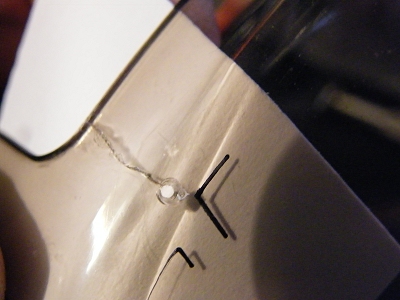
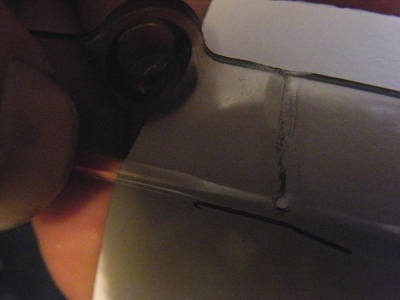
I’ve done some “first aid” work on the glass – I’ve Dremelled holes at the end of the cracks, to stop them spreading & glued what was already broken ... the pen marks show where the bodywork covers up to, so this won’t be visible on the finished car.

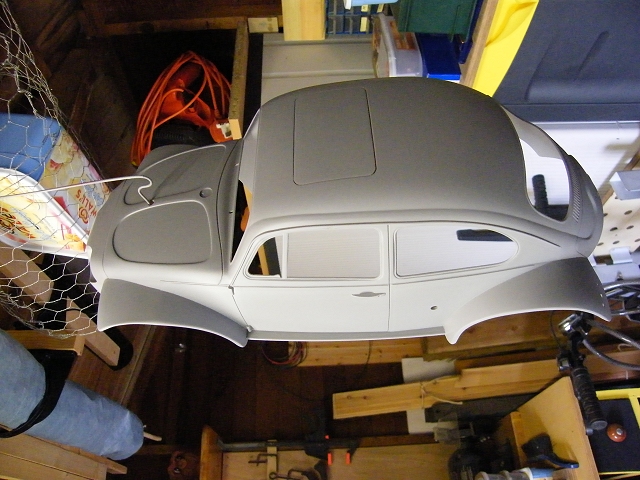
Next up ... paint stripping :)


Please Log in to join the conversation.

Last edit: by larbut.

Re: Monster Beetle rebuild & repaint 12 years 9 months ago #1785

After 5 minutes:


after four scrub & rinses:


Still needs a bit of work to scrape out the last stubborn bits & a little sanding here & there :)

Please Log in to join the conversation.

Last edit: by Jonny Retro.

Re: Monster Beetle rebuild & repaint 12 years 9 months ago #1787

Nice overview of the parts and great job on the body so far.
That De-Solv-It really is great stuff... :blink:

Please Log in to join the conversation.

Re: Monster Beetle rebuild & repaint 12 years 9 months ago #1789

Note to myself: "Find De-Solv-It in Norway"...
:laugh:

Great job so far, I look forward to the rest of it.

-Lars
Signature now gets correct formatting if you edit it in your Profile. Use normal BBcode if you want.
www.tamiyabase.com was formatted automatically.

Please Log in to join the conversation.

Re: Monster Beetle rebuild & repaint 12 years 9 months ago #1856

The body came out nice and clean. :cheer: This will provide a solid base to work from...

Please Log in to join the conversation.

Re: Monster Beetle rebuild & repaint 12 years 9 months ago #1873

A quick update ... I've done a little bit more sanding & scraping - I'n not going to strip a car on newspaper again - it sucks up the colour :(

I've fitted the nosecone - as you can tell by the colour it's off a Blitzer Beetle, which obviously _isn't_ 100% right - but it's no more wrong than the other easily available option - the Sand Scorcher re-re, IMO.

The big problem is that neither of them have the fittings needed for the lightbar - hence the 2nd pic - this a prototype of a fitting (although I may just get lazy & use it, after a little more tidying) which will be attached to the back of the number plate area & so will hopefully avoid the usual Monster Beetle problem - snapping the lightbar lugs off.

if anyone cares, it's 1mm black styrene sheet, bent one way, then the other (after heating with a lighter) to put in a "step" & shaped with a Dremel. I have to admit I struggled for soe time to come up with this - credit to "Chain Driven" over at TamiyaClub for putting me on the right track - see www.tamiyaclub....cid=109548 :)


Attachments:

Please Log in to join the conversation.

Re: Monster Beetle rebuild & repaint 12 years 9 months ago #1906

I’ve done a little more – 2 coats of primer, 2 coats of “undercoat” (Ford Machine Silver) & 2 coats of colour (Citroen Wicked Red metallic), also cleaned a bunch of bits – most of the rubber & plastic in warm water & bio laundry detergent, and the metal bits with WD40.

Also started work on the driver figure – getting rid of the awful mould lines on the drivers arms & helmet, and also trying to define the thumbs a bit better.

I was hoping to do a bit of reassembly today, but I found one of the diff bearing carriers was split, so I’ll have to wait until next week for a replacement.

I’ll be “retiring” the second servo & MSC, and the silvercan motor in favour of a TEU101BK ESC & a 23T Sport Tuned motor.


Please Log in to join the conversation.

Last edit: by larbut.

Re: Monster Beetle rebuild & repaint 12 years 9 months ago #1911

Again, your paint jobs look superb!

Regarding the mould line removing. How do you do it?

I use a mix of a knife and sand-paper, but it is very hard to remove mould line on the driver arm (access problem) and if using knife on helmets, I must use putty and sanding afterwords.

-Lars
Signature now gets correct formatting if you edit it in your Profile. Use normal BBcode if you want.
www.tamiyabase.com was formatted automatically.

Please Log in to join the conversation.

Re: Monster Beetle rebuild & repaint 12 years 9 months ago #1912

...

Regarding the mould line removing. How do you do it?

I use a mix of a knife and sand-paper, but it is very hard to remove mould line on the driver arm (access problem) and if using knife on helmets, I must use putty and sanding afterwords.

-Lars


Driver arms & hands i did with a 3mm cylindrical pink stone bit in a Dremel - and a very light touch ... the insides still need a little more work.

Helmets ... well, I cheat - I glue them together with a thin bead of poly cement, get the lining up right, but apply very little pressure. Before the glue has set, I squish them together much harder, which has the effect of filling any gaps & extruding a bit of plastic along the seam - although I suppose I do lose a bit of the size doing that. After that, wait for it to harden off, a light touch with a scalpel & sand, then spray with plastic primer & rubdown & respray if there are still any gaps :)

Please Log in to join the conversation.

Re: Monster Beetle rebuild & repaint 12 years 9 months ago #1918

I must have put the first coat of acrylic lacquer on too early this morning - just a little too cold & too damp to get a decent finish :( You can't really see it that well in the (first) pic, but although it was glossy in places, it bloomed really badly in others & came out matt.

It's been a warm, dry day though - so having left it to bake out for several hours, I tried again - much shinier now :D


Attachments:

Please Log in to join the conversation.

Moderators: caprinutstingray-63AndyAus
Time to create page: 0.183 seconds
Cookies are required to make this site work. If you continue to use this site you permit us to use cookies.