Keyword

TOPIC:

Bigwig rebuild/reshell 12 years 9 months ago #1939

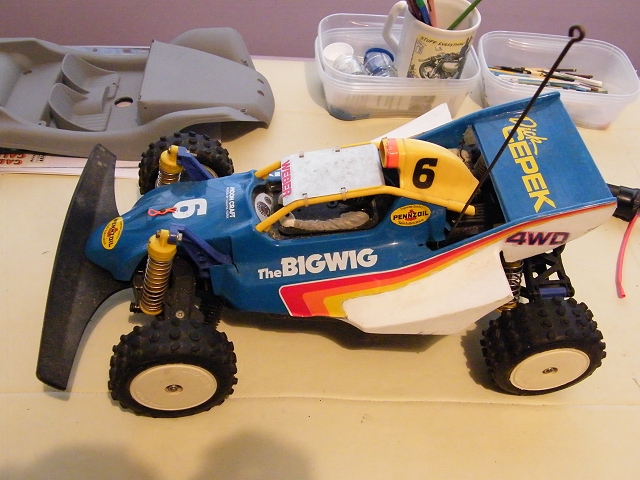
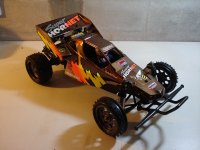
I bought this on the ubiquitous auction site – for quite a lot of money, considering the condition – but Bigwigs seem to be comparatively rare ... and the next one that sold went for nearly three times as much, and more recently, I've seen worse go for more...

In some ways I’m happier with what I’ve got – because although by the time I’ve added in the cost of all the new bits it won’t be any cheaper – it’ll be a lot more “mine” than one that was near-perfect to start with. I never feel really attached to a car unless I’ve stripped it down completely (including the paint) & started from a pile of bits :)


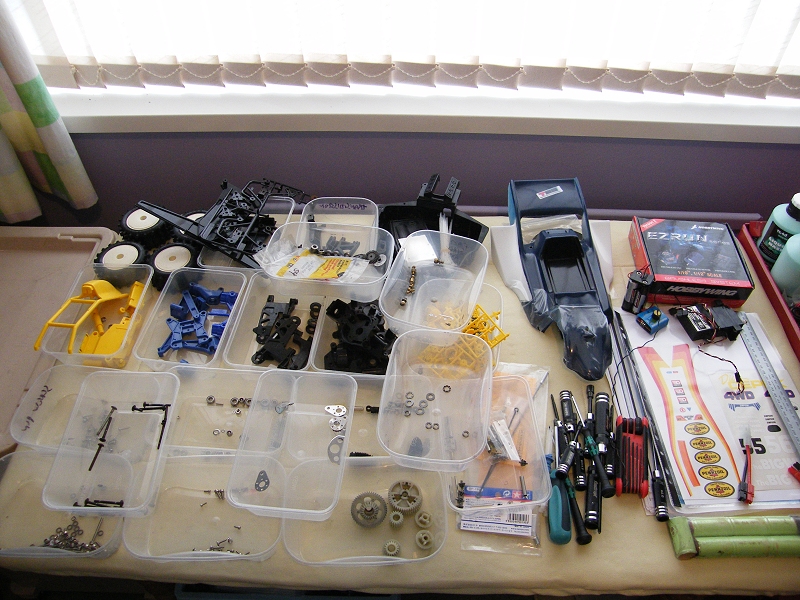
From the description & photos, I already knew a few things weren’t kosher, but working backwards through the manual, I stripped it down into a few takeaway tubs & a pile of bits – and found a few more issues ...

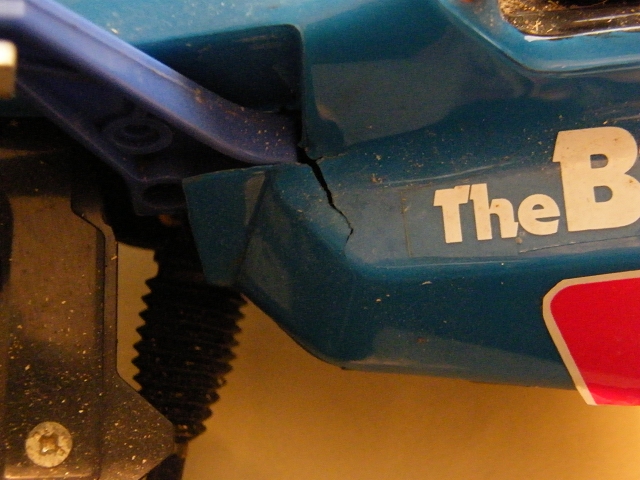
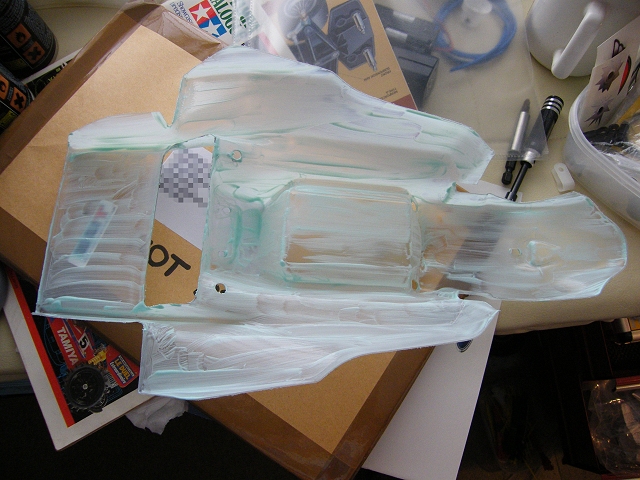
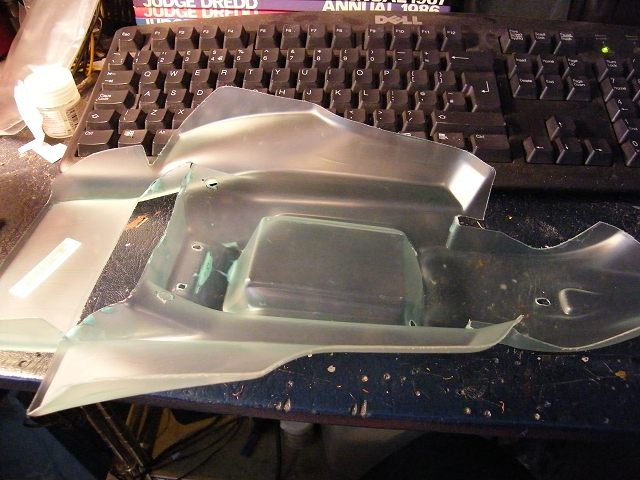
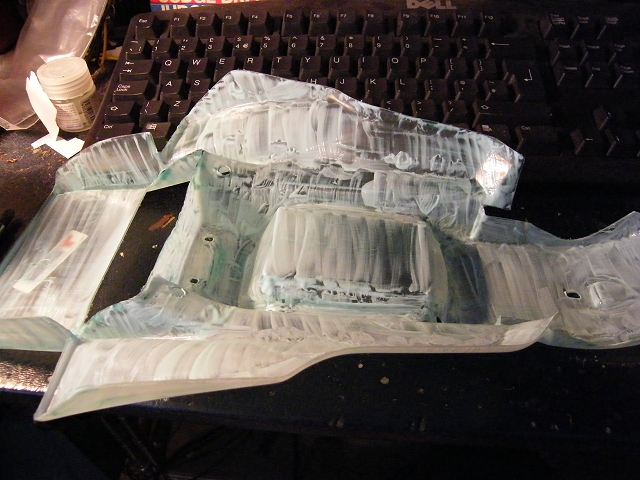
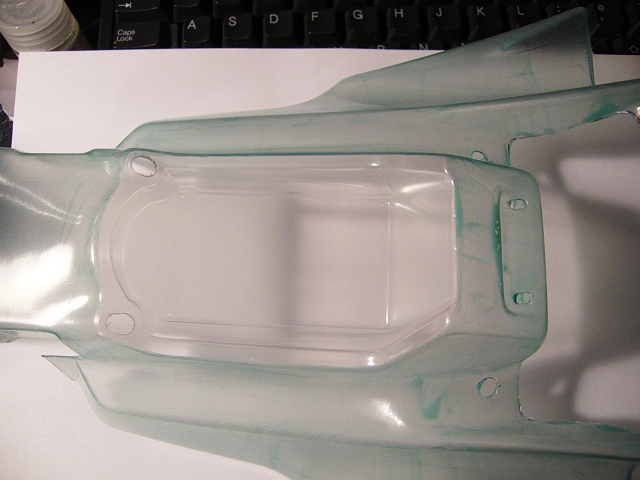
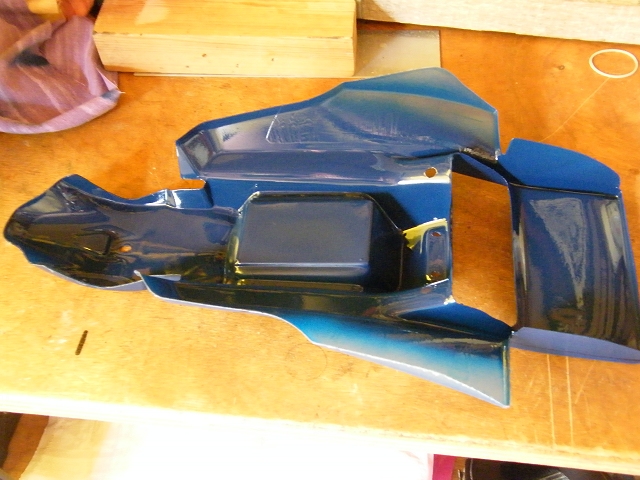
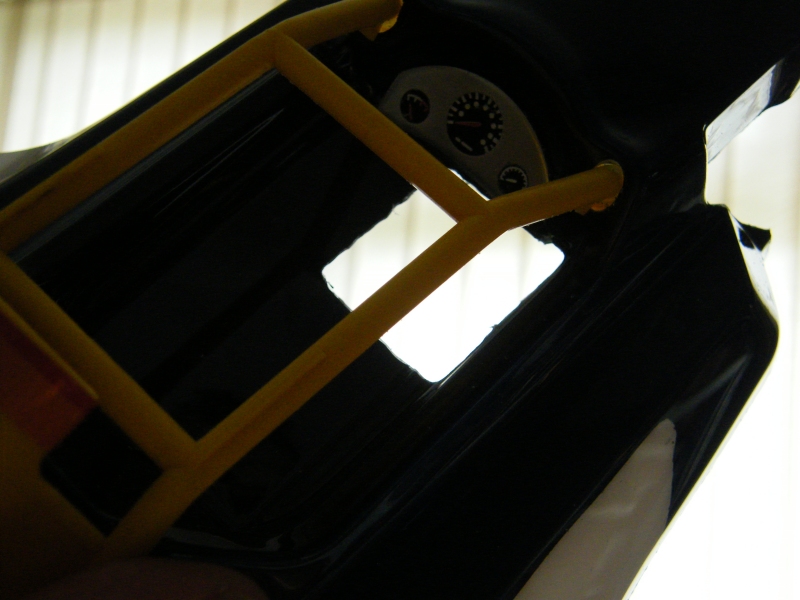
The shell: I could live with a few cracks, but this one has quite a lot of material missing around the antenna holes, the stickers are in poor condition, and the paint is the wrong blue. Bought a new (repro) one, and decals from places I won’t mention publically in case they get closed down ;)

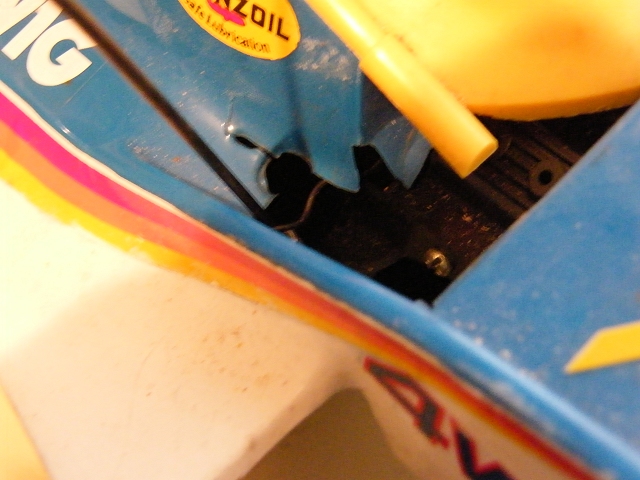
The “Fenders” (the ducts on underside of shell) are missing ... & new ones aren't part of the TBG vacform.

The bumper is incorrect, it may well be a period aftermarket part, but I’d prefer the real thing, so ordered one ... Then I found that to replace the three broken hubs, I had to buy a set of “B” parts ... which came with a bumper. Doh!

I should probably say “semi” real thing – the B parts & bumper are from the Boomerang re-re :)

Antennas – 1 missing, one bent ... I’ll try straightening the one I do have, but I bought a pair in case.

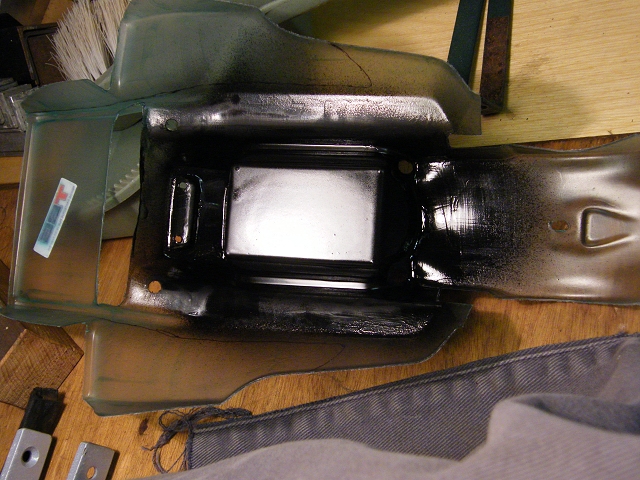
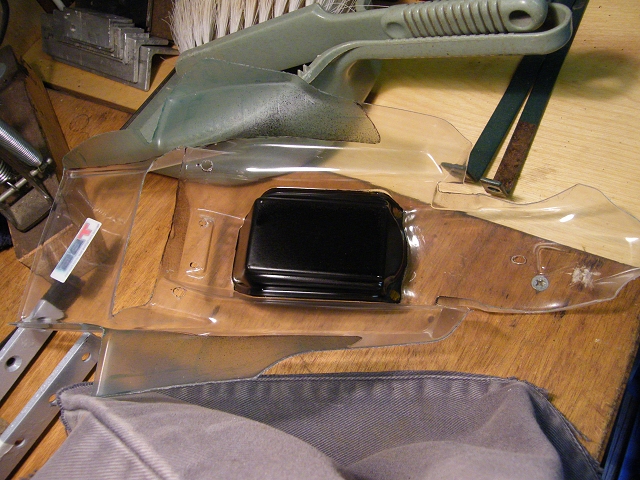
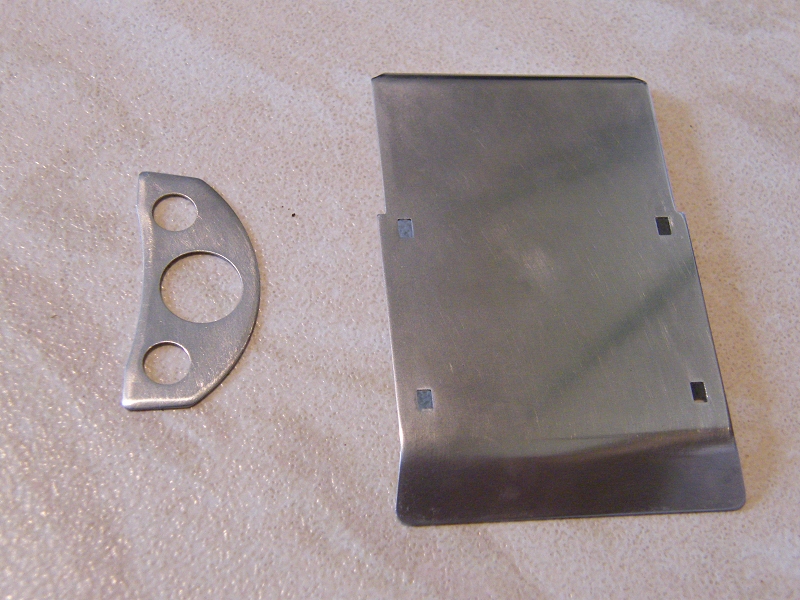
The “Sub Chassis” (the moulding that holds down the battery) was missing, but I found one on eBay ... _very_ expensive for what it is IMO;

The “C8” part (right hand front shock tower) must have broken in use as the correct fasteners were missing – not really a problem, as I’ll either raid my spares box, or get all new stainless fasteners, but I’m not sure about the crack – In the short term I’ll try fixing it, and look out for a replacement.

The rear shocks don’t seem to have any oil in them – I haven’t stripped them down yet to check, but I’m hoping new o-rings will do the trick. The “adjustment” collars are missing too – but I can pinch them off the Monster Beetle sprues I have.

The Prop Shaft is very bent (maybe due to running without the battery being restrained?) & twisted 90 degree ... I don’t really want that to break & flap about, so I bought a new one.

The front outer drive cups (part SA4) are a bit on the worn side ... but probably good enough considering how little running this will probably get.

Bearings are a mixture of proper ballraces & nasty nylon ones – all will get replaced with proper ‘races throughout.

One of the front uprights is cracked both sides, and has been broken (and Araldited) where the steering joint fits. Re-re Boomerang parts to the rescue...

There’s a big hole where the Technigold should be, and all the fittings, spacers & pinion are missing too. This is a bit of a blow – but looking back at the weasel-worded auction listing I probably shouldn’t have been surprised :(

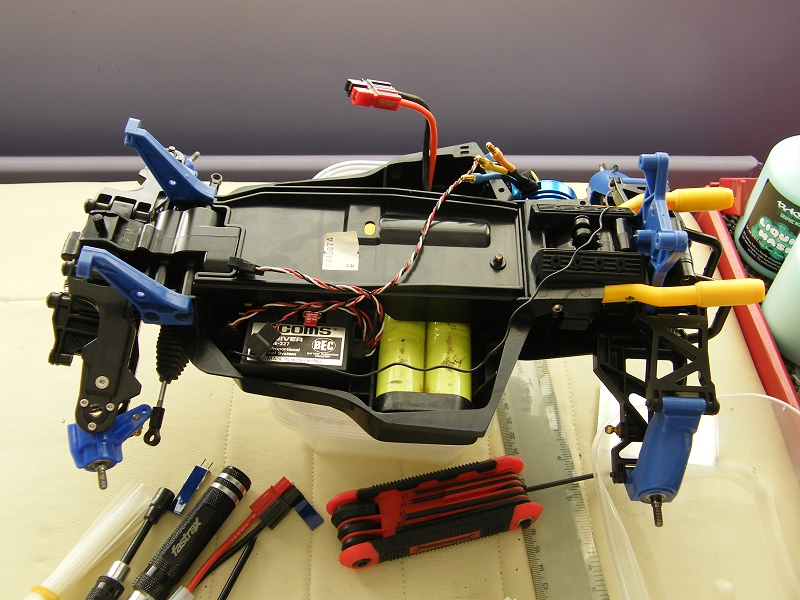
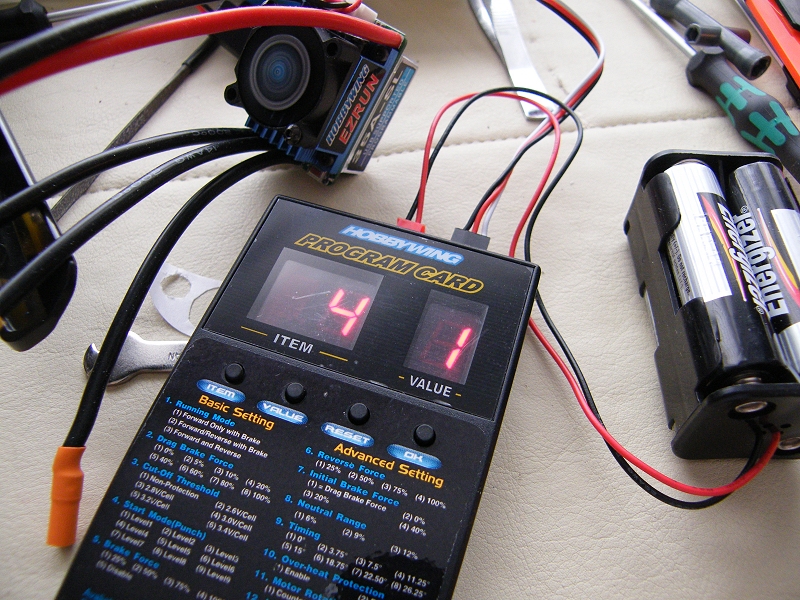
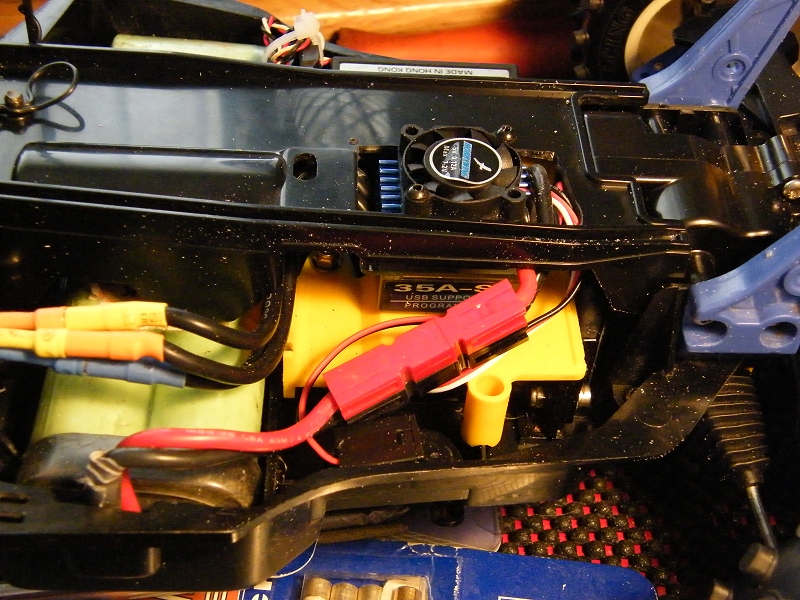
I want to use the car, and as I don’t think I could ever go back to 3-step speed controls, not only did I need a motor, but an ESC to run it too ... the best my spares box had to offer was a 23T Sport Tuned motor & a TEU10BK ESC ... which just weren’t going to cut the mustard; buying a new Technigold & a suitable ESC would just cost too much, the used Technigolds available looked pretty rough...

Re-re Boomerang bits will replace the missing spacers, and the C-clips in the same bag will replace the two I lost while dismantling the gearbox... so ... cheap power ... an EZRUN Brushless combo should offend the purists :D

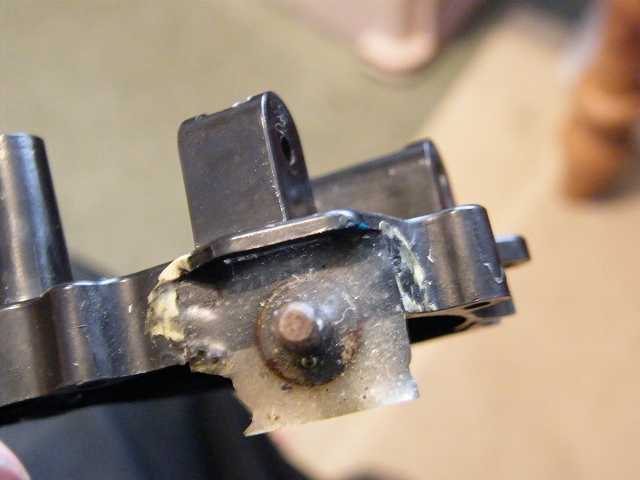
The front bodymount is missing, and has been replaced with a home-turned steel replacement, Araldited onto the gearbox. If I can’t find a replacement, I’ll make my own, just a bit more faithful to the original.

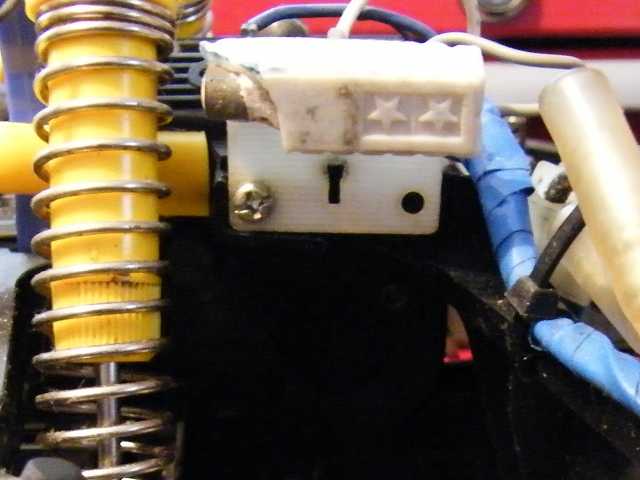
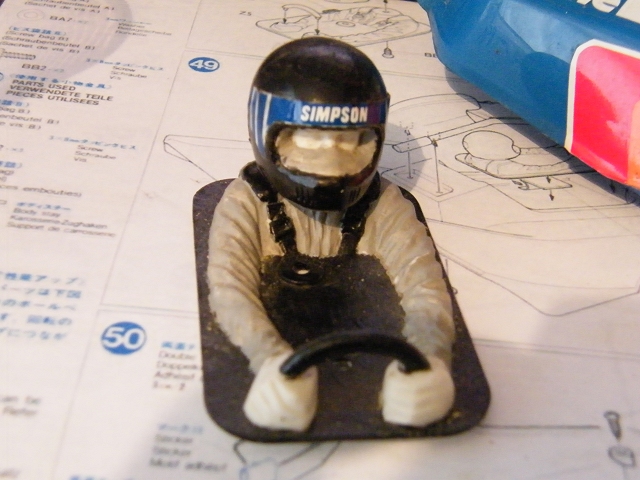
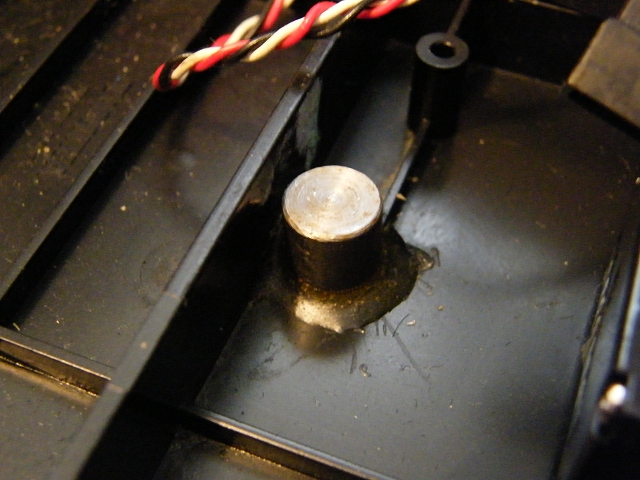
Anything else, well, the phantom epoxy-er obviously ran out of servo tape & used some resin instead, and has evidently been at the rear MSC plate chassis mount – I don’t want to fork out £40 for a new chassis, so I’ll try to fix it - and the driver figure ... I think the technical term is “incredibly badly painted” :D

And finally ... the tyres: they’re not rotten, they have a fair amount of tread left, but they have got very stiff... and they smell, well, “working class” – cheap perfume, stale Rothmans & chip fat :D

And if anyone gets offended by that, well, I have to wash my hands up to my elbows after work – I bet you work in an office :P


Please Log in to join the conversation.

Last edit: by larbut.

Re: Bigwig rebuild/reshell 12 years 9 months ago #1940

I’ve already done a lot of work on the new shell – a Team Blue Groove repro item, all the way from Canada, it’s not a bad vacform, but is very thin & wobbly behind the cockpit, and is smaller than it ought to be.

Cutting out was done with a mixture of lexan & straight scissors, a dremel with a sanding drum & straight metal burr cutter, and I finished the edges off with wet & dry paper.

Masking was done with RCS Graphic Worx “Liquid Mask”, brushed on vertically, left to dry & then a second coat, horizontally, then left to dry again. I scored around the cockpit area & peeled the unwanted mask off – easier said than done TBH – the bond with the polycarbonate is not much less than the bond the stuff has with itself.

Having sprayed 3 coats of Humbrol “Hobby Spray” Gloss Black, I scored the lines for the blue/white border & peeled again – this was even harder than before as the paint seemed to have weakened the mask… four coats of “Midnight Blue” later, time to peel again … this was harder still – I basically had to scrape it off with a flat screwdriver.

Overall, I’m not convinced by the Liquid Mask to say the least – I’ll try four coats next time to see if it improves peelability before I condemn it though.

I’ve finished off the whole shell with white, just to have an even colour all over & make sure the blue is the same shade all over. It’s had several more coats since the last photo & looks pretty good on the outside, even through the overspray film :D

My reason for using Humbrol paints… well, Tamiya aerosols weren’t available in this country for nearly three years due to a “labeling issue” … it’s not so much that I refuse to buy their paints any more, more that I _had_ to buy another brand – and having done that, bought more … now I have a considerable investment in one particular paint system I’m not about to start buying any from an incompatible one. It also works on both styrene and ABS/styrene.


Please Log in to join the conversation.

Last edit: by larbut.

Re: Bigwig rebuild/reshell 12 years 9 months ago #1942

Wow, this is certainly going in "Fast Forward" :cheer:

Good to hear about the Liquid Mask stuff. I have been tempted to try it out a number of times, but never actually bought it. Masking with tape inside Lexan bodies can sometimes be really difficult.

I'm interested in how the Liquid Mask turns out for you. If it remains too hard to peel off again, then it is maybe too much hazzle?

Have you tried the Liquid Mask with Tamiya Spray paints? Maybe the chemicals are different?

-Lars
Signature now gets correct formatting if you edit it in your Profile. Use normal BBcode if you want.
www.tamiyabase.com was formatted automatically.

Please Log in to join the conversation.

Re: Bigwig rebuild/reshell 12 years 9 months ago #1945

Hey Lars, I have tried the liquid mask with the Tamiya paint. I tried it with both the TS and PS paint cans (for lexan and for plastic) and the results where the same. perfect lines and shapes every time. It is very important to ensure the object you applying the liquid mask to is 100% clean, if not, it can peel off there.

Please Log in to join the conversation.

Re: Bigwig rebuild/reshell 12 years 9 months ago #1948

Wow, this is certainly going in "Fast Forward" :cheer:
...


If it's worth doing at all, it's worth doing to excess...
it looks like the Grasshopper I promised to build may turn up soon ... so I'll have three simultaneous build threads :D


Have you tried the Liquid Mask with Tamiya Spray paints? ...


The chances of me using Tamiya aerosol paint again I would say is zero squared - approximately the same chance of having a long term & meaningful relationship with someone you meet in a nightclub ;)

Please Log in to join the conversation.

Last edit: by Jonny Retro.

Re: Bigwig rebuild/reshell 12 years 8 months ago #2016

I hit the fast forward button again :D ... actually I've been working on the Bigpig pretty much all day - everything is as clean & shiny as it's going to get, I've got all the new bits it's going to get - with the exception of the driver figure which I've just primed (so I'm at least 2 days behind there), everything is ready to be put back together.

Bits I think went pretty well in the cleanup were:

1 - wheels - as they were damaged & had yellowed quite badly, I was planning on respraying them, but a lot of work with 240, 400, 800 & 1200 & 2000 grit wet & dry, the colour on the main dish at least is pretty good:


2- the rear gearbox undertray & the underside of the chassis had got quite badly marked & pebbledashed - they got the same treatment as the wheels, followed by waxing as they looked a bit dry ... they looked really good until I did that - the wax really brings out the imperfections ... good enough for a used off roader though :)


3- roof - wet & dry again, followed by metal polish.


No chance of spready everything out for an "exploded" view - there's just too many bits.


"We're going to need a bigger table"

Please Log in to join the conversation.

Re: Bigwig rebuild/reshell 12 years 8 months ago #2020

Packing up for the day - got the rack & pinion steering & rear gearbox done, front gearbox is almost done, but I need to cut down a couple more screws - 3 x 27 mm _means_ 3 x 27mm in a Bigwig, the two sizes of socket head screws you can actually buy - 25mm and 30mm are too short or too long - it doesn't matter on most cars ...

... any time I start getting frustrated or building becomes tedious, it's time to leave it for a while :)

Please Log in to join the conversation.

Re: Bigwig rebuild/reshell 12 years 8 months ago #2042

I've done quite a bit more to the car, I don't have photos yet for all of it, so here's a start:


... moved on to setting up & installing the ESC - firstly, dialling the "punch" down to "wuss mode":


The swoopy bodywork doesn't leave much room for upgrading to an ESC - especially one as tall as the Ezrun, which also needs some headroom for the fan to suck from ... I did briefly think about running it on a 6v (5 cell) pack so there was room in the battery compartment, but in the end I went for a more drastic solution:


Still not quite enough room, so part of the repro shell had to go too (edges still need cleaning up):


_still_ not quite enough room, so the driver figure got lifted slightly on two layers of foam tape, and a lot taken off the underside around the right arm/hand area:

Please Log in to join the conversation.

Re: Bigwig rebuild/reshell 12 years 8 months ago #2050

Really nice build, but as a "purist" I cry for the esc cutout.. :cry:

-Lars
Signature now gets correct formatting if you edit it in your Profile. Use normal BBcode if you want.
www.tamiyabase.com was formatted automatically.

Please Log in to join the conversation.

Re: Bigwig rebuild/reshell 12 years 8 months ago #2052

Really nice build, but as a "purist" I cry for the esc cutout.. :cry:

-Lars


Well yes, I know what you mean - but I was going to have to carve _something_ to get it in there - so carving a repro shell & two bits that are easy (and fairly cheap)) to get hold of - the "sub chassis" & the driver figure - doesn't seem so bad :blush:

Please Log in to join the conversation.

Moderators: caprinutstingray-63AndyAus
Time to create page: 0.253 seconds
Cookies are required to make this site work. If you continue to use this site you permit us to use cookies.