Keyword

TOPIC:

Vintage Manta Ray customisation quest 11 years 7 months ago #12836

  • Edou
  • Edou's Avatar Topic Author
  • Offline
  • Hopping Mad
  • Hopping Mad
  • Posts: 6135
  • Likes received: 483
So I'm gonna leave the FRP chassis on a side track for a while...
There's just too many little (and bigger) things I'd still like to do and not enough budget.
I'll start working on it again when I think I can make some real progress.
I also don't want to take it apart so many times...

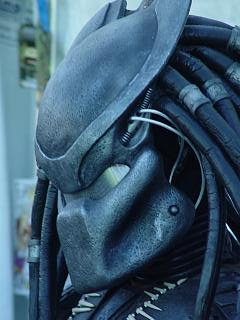
Got an awesome idea for the paint on the Terra Conqueror shell though.
Predator theme - PS-46 backed by PS-23.


B)

I think I'll also have to make another set of holes in the wing...
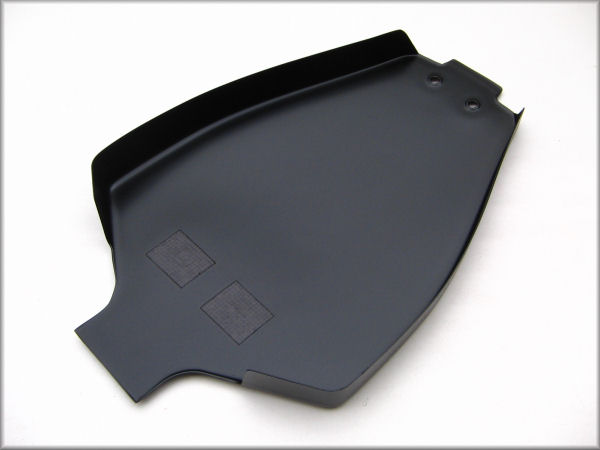
From the black Top Force bathtub I learned that it looks best if it's close enough to the body shell.
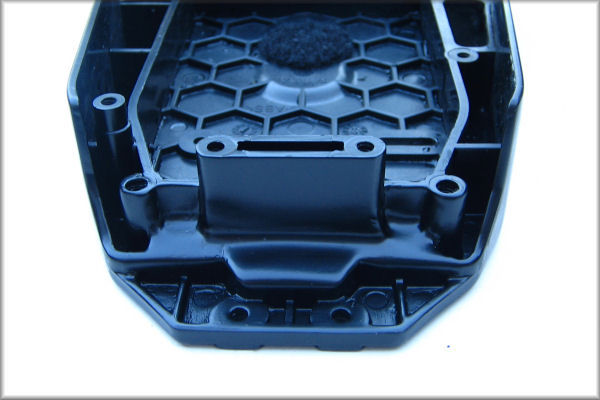
On the FRP chassis there's quite a gap between the shortest body (Dirt Thrasher) and the wing :


This will be the off road setting then (higher and more drag at lower speeds).
Something for a later point in time as well...

Leaving one car in this quest! :huh:
The TA01-TA02 with buggy suspension arms. Looked somewhat like this last time :


But taken to bits since then...
It'll be resurrected! Cooler than ever and with some fine new parts.
Making it as off road as I can. Probably use a 16T steel pinion and a silvercan for now.
Lock the rear diff and put the ball diff in front - or maybe even go with another locked gear diff.

I put quite some hours this week in preparing the body that'll go on it...
The one I got from waterbok :


I'll post the progress I've made right after I process the photo's. :)
Going for a quick respray (after a long prepping) to take advantage of what might well be the last warm days of summer.
Guess what colour it'll be (for now)?

:silly:
Attachments:

Please Log in to join the conversation.

Last edit: by Edou.

Vintage Manta Ray customisation quest 11 years 7 months ago #12842

  • Edou
  • Edou's Avatar Topic Author
  • Offline
  • Hopping Mad
  • Hopping Mad
  • Posts: 6135
  • Likes received: 483
Brake fluid and oven cleaner didn't do much on the silver paint...
But a bath of caustic soda did a good job :


White primer left - that didn't really come off with sodium hydroxide :


But it did dissolve with DOT 4 - the army green is shining through :


Lots of time, patience and repeated action needed to do all the sides :


Then there's just a white haze left - here I tried some sanding on the roof and it does come off :


Sanding, sanding, sanding...


I tried to be careful with the details on the body but accidentially removed some of the rivets on the rear nonetheless...
So I smoothened that all out.
Not touching the many details on the sides for now :


Going for a quick "sloppy" respray as long as the weather's still good...
I have a lot of plans for it but that may take a while.
For now I'll be satisfied when it looks pretty good for running.

Please Log in to join the conversation.

Last edit: by Edou.

Vintage Manta Ray customisation quest 11 years 7 months ago #12845

phew, glad I sold that one. :laugh: :laugh:

;)

nice job on the paint removal. :y:

cant wait to see what you will make out of that beauty

Please Log in to join the conversation.

Vintage Manta Ray customisation quest 11 years 7 months ago #12849

  • Edou
  • Edou's Avatar Topic Author
  • Offline
  • Hopping Mad
  • Hopping Mad
  • Posts: 6135
  • Likes received: 483
I'm taking a shortcut on the paintjob for now. :whistle:
But I'll be putting in much more effort at a later point.
If I have some money to burn, I'll go for a set of Novus bottles and make the windows scratch free as well...
Put about a buck of paint on it - yes, matt black once more :


:)
Attachments:

Please Log in to join the conversation.

Vintage Manta Ray customisation quest 11 years 7 months ago #12853

  • Edou
  • Edou's Avatar Topic Author
  • Offline
  • Hopping Mad
  • Hopping Mad
  • Posts: 6135
  • Likes received: 483
Even scored some original Hummer decals recently! :cheer:
I don't think I'll be using them but it's cool to have.
Probably the most modest sheet ever made :


If only the "new" scanner hadn't given up already. Not a long lifespan, even for a freebee. :S
Attachments:

Please Log in to join the conversation.

Vintage Manta Ray customisation quest 11 years 7 months ago #12856

  • Edou
  • Edou's Avatar Topic Author
  • Offline
  • Hopping Mad
  • Hopping Mad
  • Posts: 6135
  • Likes received: 483
Final result - for the time being...


Not bad at all. :)

Now I'll start reassembling the chassis which has been modified and reinforced so I can use proper slop free steering :


And it'll get a Top Force undercowl :


:cheer:
Attachments:

Please Log in to join the conversation.

Vintage Manta Ray customisation quest 11 years 7 months ago #12981

  • Edou
  • Edou's Avatar Topic Author
  • Offline
  • Hopping Mad
  • Hopping Mad
  • Posts: 6135
  • Likes received: 483
Sooo... actual rebuilding! With some cool new parts. :cheer:
First in line is replacing the Manta Ray gears with all plastic ones from the TA02.
Eddrick was kind enough to send them to me a while back. Thanks again!
It was missing the spur but I had a spare because I put a 69T Skyline speed tuned on the FRP car.


Also a "left over" - Top Force hollow aluminium gear shafts. The other build has the carbon hop up. B)


Ball diff gets a new spur gear... and ceramic diff balls! :woohoo:


It was pretty dirty - alloy grind I assume :


Old and new... looking very slick now :


Using a bit of teflon tape on the tension bolt, hoping it will somewhat prevent the diff from loosening :


A pair of scissors to check the tension on the diff :


Because this car will go off road, I tightened up the diff quite firmly.
Getting it to slip by hand is still possible but definitely not easy.
Also had some change of thought with TA-Mark (on TC) who recommended bolting the diff down as much as possible...
Anything less would quickly loosen it up in his experience.
This could of course have the ultimate consequence of melting it down.
I've left about a quarter stroke on the bolt though and will see what results this has, together with the teflon tape.

Anywho - because of the off road setting, this (tight) ball diff will go in the front gearbox.
The rear will get a locked gear diff - done by adding an extra (4th) bevel gear :


More to come...

Please Log in to join the conversation.

Last edit: by Edou.

Vintage Manta Ray customisation quest 11 years 7 months ago #12983

Really nice work Edou :y:
I am more and more liking the all black paint job :laugh:
You all must have balls of steel to put all those bodies to the test
With all the chemicals, ruined some nice bodies myself so i am
Not so fond of trying it out myself lately...

Cheers, bram
Restoring Countach 58005
Restoring 58015 RR
Restoring 58098 F40
Restoring King Cab and Monsterracer
Restoring Audi Quattro rally
Restoring Mk.1 Sand Scorcher
Restoring Porsche 936
The following user(s) Liked this: Edou

Please Log in to join the conversation.

Vintage Manta Ray customisation quest 11 years 7 months ago #12986

  • Edou
  • Edou's Avatar Topic Author
  • Offline
  • Hopping Mad
  • Hopping Mad
  • Posts: 6135
  • Likes received: 483
Thanks, trying to do this stuff on imperfect shells to avoid mistakes in the future as well. :unsure:
Nothing worse than seeing your rare vintage lexan shell shrink together from paint chemicals.
Gotta say they held up well with paint removal. Both with caustic soda and brake fluid.

:)

Paint has been a 2 euro "Action" spray can compromise lately but I'm pretty happy with matt black.
Seems to go well with pretty much anything and it sticks like " suikerspin ".

:silly:

Please Log in to join the conversation.

Vintage Manta Ray customisation quest 11 years 7 months ago #12987

Nice matt black on the hummer, really looking forward to see it being completed.
3 Old Tamiya's
The following user(s) Liked this: Edou

Please Log in to join the conversation.

Moderators: caprinutstingray-63AndyAus
Time to create page: 0.220 seconds
Cookies are required to make this site work. If you continue to use this site you permit us to use cookies.