Not my cleanest wiring, it will have a tidy up after I do some testing and get the set up near perfect. I'm also not happy with chassis flex so I'll be making a new plate once the mock set up is done. Rear sway bar helps a huge amount as the rear has most of the weight. ( 30 - 70 or 20 - 80 even. ) Almost a deltawing like idea though Porsche started it. The rear drives the front. It just feels like a lose slightly under steering CS car. I think a tiny bit of front weight and a lot of set up and this will be perfect. Just after around a 30 minute test drive it's much much faster than V3 and much easier to handle at speed. Starting to make all the little details now. Make: Tamiya/Homebrew Model: VDF V5 RR RWD Track surface: Carpet and tiles Tire: HPI A type & HPI T drift Motor & ESC: Speed Passion V3 MMM 13.5 and a Speed Passion GT2.0 LPF Blue star Servo: Savox 1251mg Front Camber: -7 Toe: -1 Kick up: 0 Caster hubs: 8 Ride height: 8mm Springs: Tamiya white ( Hard ) Bumper weight: 15g Sway-Bar: N/A Shock Oil: 35wt Rear Camber: -0.5 Toe: in 1 Kick up: 0 Ride height: 12mm Springs: Tamiya Red Sway-Bar: Tamiya TA05 Blue Shock Oil: 25wt Other: 1mm of pro squat Drive Train Rear: 36 Center: 18 Spur: 91 Pinion: 32 -Jeremy Team Bad Attitude
|
|
Please Log in to join the conversation. |
|
Mirrors: From the Tamiya M-chassis Alpine?
beautiful car! |
Please Log in to join the conversation. |
Thank you.
They're just the mirrors that came with the shell. Now I just need to finish off the body, all the little vents, engine etc. I'll tackle the interior once I have the rest of the car sorted. -Jeremy Team Bad Attitude
|
|
Please Log in to join the conversation. |
Drifting is not my top priority, but this one looks wicked!
Signature now gets correct formatting if you edit it in your Profile. Use normal BBcode if you want.
www.tamiyabase.com was formatted automatically. |
|
Please Log in to join the conversation. |
The details have been started.
Note I filled the holes on the front hood. Just a bit of CA glue used as filler. Also one headlight done. Taillights were brush painted and scored with a hobby knife while they were still tacky. Next is all the window trim with bare metal foil. Thanks for looking. -Jeremy Team Bad Attitude
|
|
Please Log in to join the conversation. |
|
Very nice indeed. It must be, erm interesting drifting a rear motor, 2WD RC car 
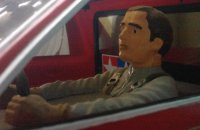
Much like drifting a real 911 I guess...
Can you explain more how you filled the holes in the hood? Is the hood still painted from the inside? |
Please Log in to join the conversation. |
Thank you both.
It's actually just like feeling a touring car slide and you're having to counter into the drift to hold it for a moment just you're holding out the slide. As for 2wd drifting, it's actually a big thing now, after CS and 50:50 we're moving to much more realistic set ups and actually having to really understand geometry, weight balance etc. rwdrcdriftworld.../index.php Is a site just for RWD drifting. Now these are some really old photos but they're the only ones I have that show this. When I first did this I used CA glue and a flat plate of Lexan. On the Porsche I used a Styrene plate with a Styrene disk that was almost the same thickness of the body, glued to the plate. The disk fits in the body post hole so you use less filler. That was then CA glued to the body. I use CA glue as it melts PS paint slightly, making for a very strong bond. The only risk is it melting through the paint and messing up the paint job. You have to make sure to have a few good coats on and they must be fully cured before this. To get a good smooth filled hole, I just use CA glue and kicker. Sand that down then use a little model putty then paint. As for painting inside. You can't. I actually used TS paints on the Porsche but I'm sure you can sand and buff the paint to get a good finish. I clear coated and put a slight wax on it just for it not to be super flat but I'm not that bothered. I'll try getting a good finish next time I do this. Anyway back on track for using TS paints on Lexan. You need a base primer coat for TS. PS clear flat or PS smoke works well as the TS paint will melt into that, giving it the ability to stick to Lexan like PS. You just do one or two smooth normal coats of the PS,then you just paint like you normally would for TS, normal model primer, colour and clear if you want to use that. For the first and 2nd coats, they must be done within 30 minutes - an hour of eachother. Do not let them cure fully or the paint won't slightly blend, the TS would just flake off otherwise. You can actually use this method on the inside of a body. PS flat clear on the inside will let you use any TS colour too. I hope that gives you an idea on how I did it. -Jeremy Team Bad Attitude
|
|
Please Log in to join the conversation.
Last edit: by bajaboy5b.
|