TOPIC:
Blakbird's 56336 King Hauler Build 5 years 1 month ago #54344
|
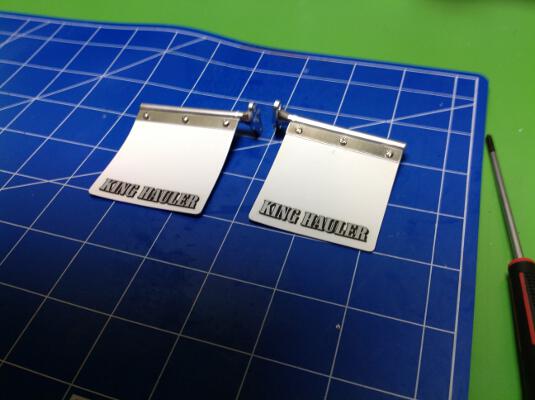
Step 28 builds the mud flaps which are actual sheets of rubber. The text is a sticker.
Step 29 builds the 5th wheel coupler plate. There is a hook inside to lock onto the trailer pin The tie rod is connected to a spring loaded lever which can be used to release the trailer remotely, but manually. 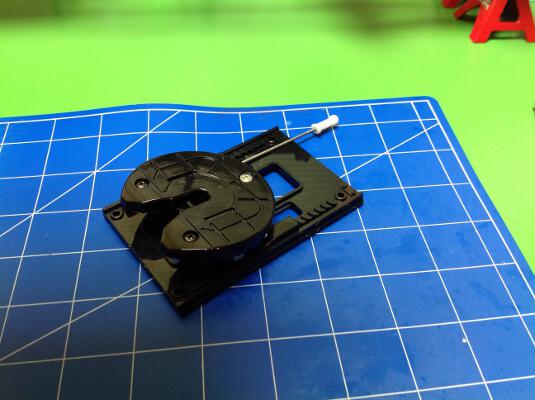
Step 30 installs the coupler, the mud flaps, and the fenders onto the chassis. 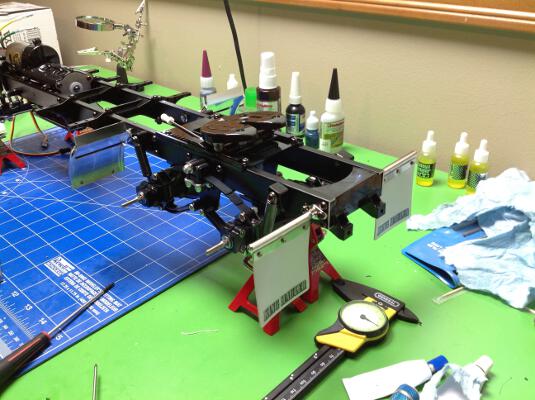
Step 31 builds the plated fuel tanks and battery boxes. Note that this is where the batteries would go in the real truck, but in the scale model they are empty. The battery will be in the sleeper. 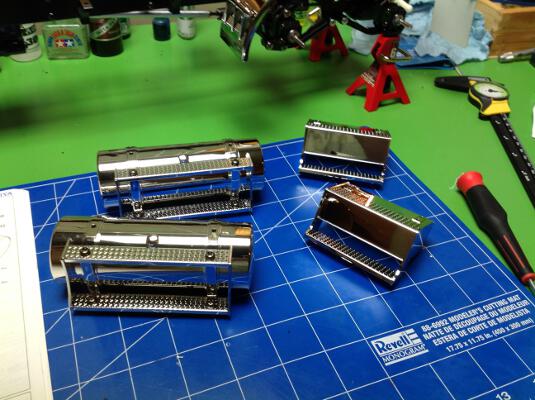
Step 32 installs all these chrome boxes onto the chassis. This is a good time to point out how good the chrome looks. These parts are plastic, not metal, but they have all the luster of real chrome. I'm not sure what the process is, but we can be pretty sure it is not real chromium. In any case, it looks great and attracts fingerprints like crazy. The parts needs to be polished with a soft, lint free cloth to look their best. Since all these bits are screwed to the frame, they are pretty sturdy. This is important since you will inevitably put some load on them when lifting the truck. 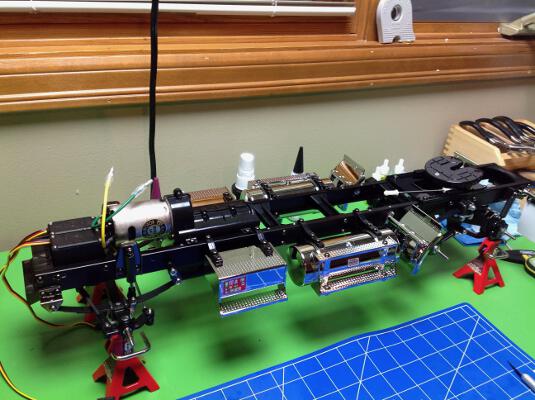
Step 33 prepares the battery tray, the seat pedestals, and the coupler switch. They don't look like much outside of the truck. 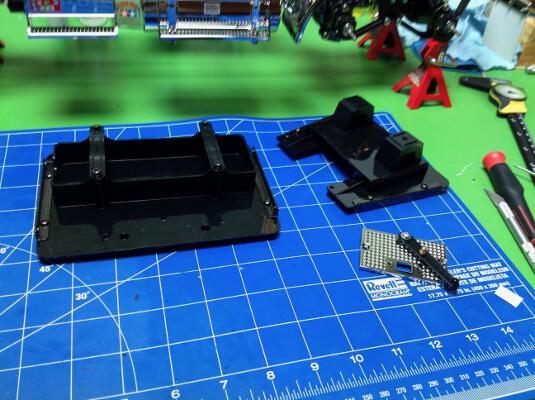
Step 34 installs the assemblies from Step 33. This does a good job of closing up the openings in the frame as well as stiffening the whole thing torsionally. There is a massive amount of empty space when this is built per the original instructions with no MFC. 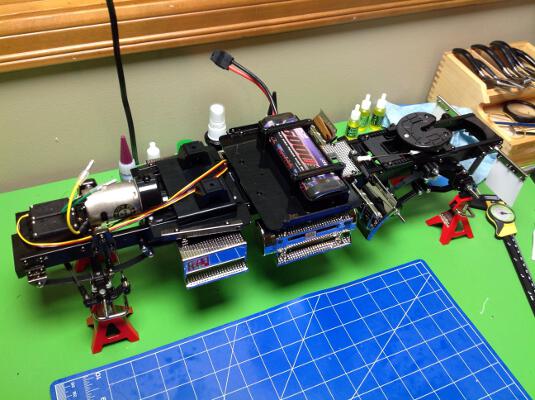
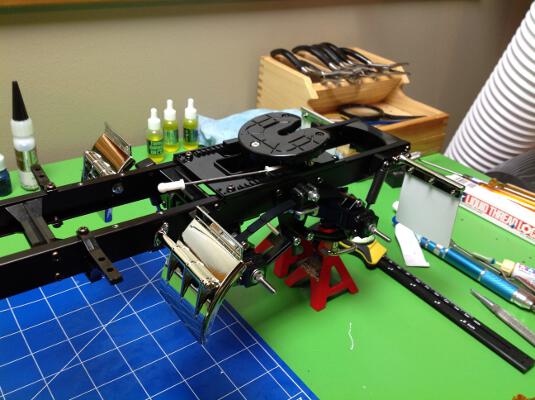
Steps 35-38 install the electronics, hook everything up, and set the trims and linkages. In this image, I am using a temporary speed controller stolen from another R/C just to test everything. Step 39 puts the wheels on the tires and they are installed in Step 41. The wheels look really good even though they are plastic. The tires are a pretty hard rubber with no foam insert. Per Step 39 you are supposed to glue the tires to the wheels. I am not very good at this and I felt that the model would probably not have enough power to spin the tires in the wheels anyway. As a compromise, I glued only the side of the tire facing inward toward the frame. This way my bad gluing would not be visible. It seems to have worked out fine as I have had no trouble with the tires. 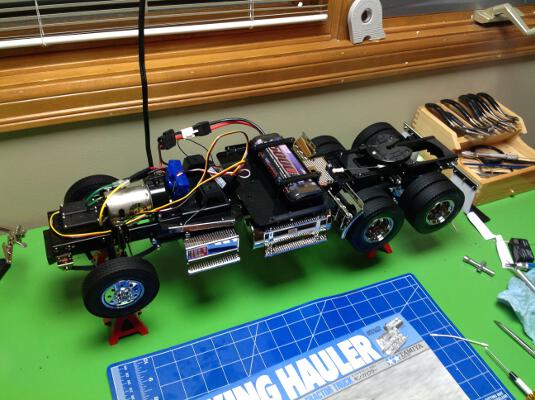
|
|
|
Please Log in to join the conversation. |

Blakbird's 56336 King Hauler Build 5 years 1 month ago #54345
|
My intention had been to build the whole truck stock and only install upgrades after I was done. However it occurred to me that I had no speed controller because I had intended to install the Multi-Function Controller in this model. So what is the MFC? It is a combination speed controller, lighting controller, and sound system. This is an expensive option, costing as much as the whole truck and therefore doubling the price. I didn't really know what to expect, but I had to give it a try. This system is much easier to install now during the initial build than later.
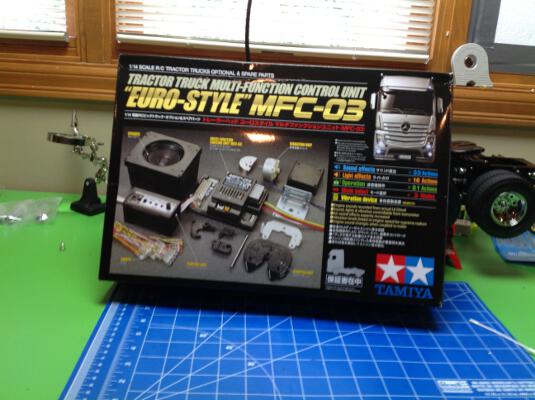
Inside the box you'll find quite a pile of parts. There is the controller, 21 LED lights, a speaker, a vibration unit motor, some switches, and a bunch of plastic parts which make it possible to install this kit in any of the Tamiya 1/14 scale trucks, even an old truck like this which existed before the MFC. 
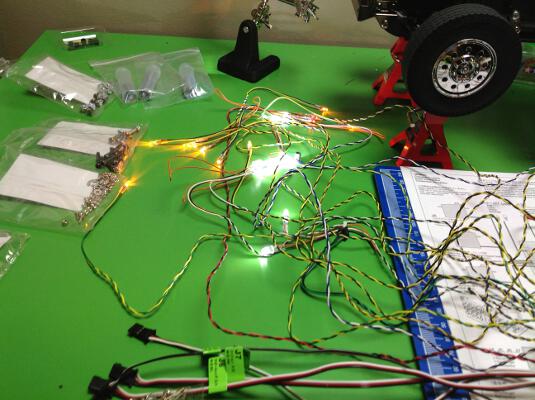
Now everything is connected. The MFC controller needs to be connected in series between the radio and the servos so that it can react to transmitter input. You need to study the provided complex wiring diagram pretty closely to get everything right, but all the important bits have unique connectors so you can't really screw them up. After you've connected the lighting, there are no too many connections left. There are 3 harnesses (a 3-wire, a 5-wire, and a 7-wire) that go to the control box which has switches to turn everything on and off and adjust settings. There is one connection for the speaker and another for the vibration motor. Finally, there is one for the remote switch which will sense when a trailer is connected. There is also an empty slot which can be used if you connect trailer lights later. 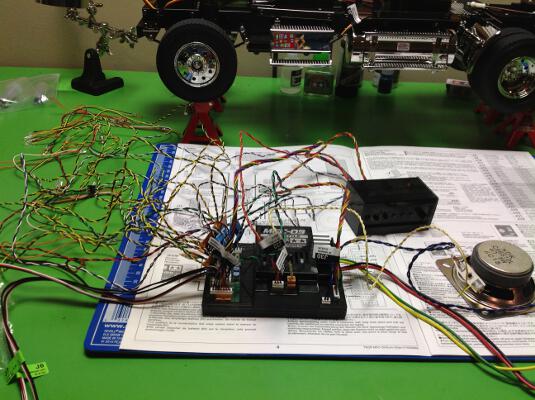
Here I've installed the vibration motor. This is a little electric motor connected to an offset mass. It is most noticeable right when you start the "engine" because the whole trucks shakes. It also runs continuously as long as the model is on and it's speed is proportional to throttle position. The vibration it produces is significant and hard to miss. You can adjust the relative speed of the motor with a little switch on the controller. This is important if you have anything that might be resonating and causing a problem. It goes without saying the vibration motor needs to be mounted solidly in a strong location. 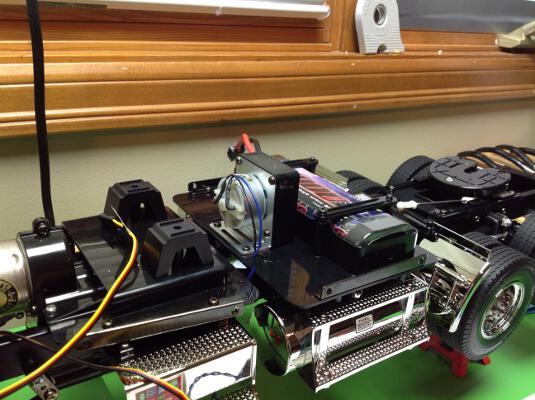
|
|
|
Please Log in to join the conversation. |
Blakbird's 56336 King Hauler Build 5 years 1 month ago #54346
|
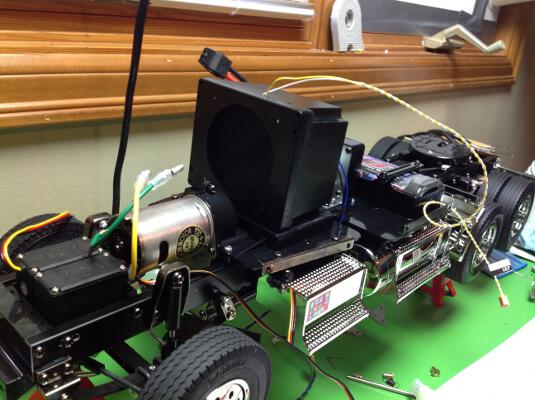
Here is the speaker box. This is a sizable speaker and it gets much louder when enclosed in the box. The speaker goes inside the cabin so you can't use the seats, pedestals, dash, or steering wheel when using the MFC. In order not to see the MFC and all the wires when the model is finished, the instructions recommend painting the windows with "smoke" which is a dark translucent color. I followed this advice and it worked very well. You can control the volume of the speaker from the control box. The speaker is loud enough to be heard far down the road and to drown out the sound of the electric motor.
A micro-switch has been installed in the coupler. This allows the MFC to know when a trailer is attached. It makes a "clunk" sound as you hook up, and then the sound of the engine pitches down when towing to reflect the higher strain on the truck. 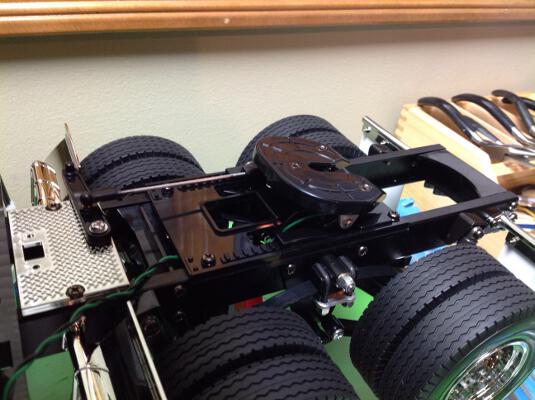
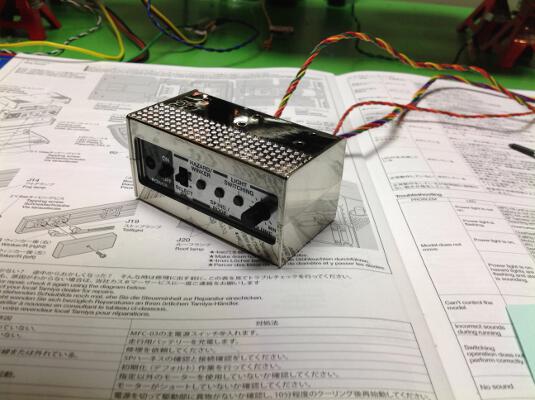
The is the control box which takes the place of one of the battery boxes under the driver's door. I was a bit surprised to see that there are three separate wire harnesses connecting this controller to the MFC; it seems like they could have all been combined into one. From the control box you can switch on the system, switch between modes, control the lights, and set the volume. The 3 modes are:
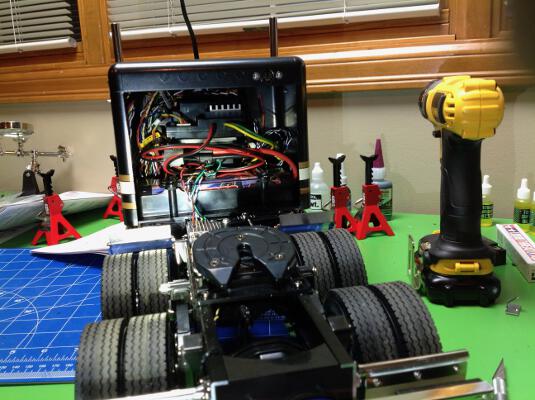
Now I've installed the MFC in the truck. There was a pretty big problem here. The MFC has instructions for how to install the unit in various truck models, and it says to see the truck instructions for more specific details. For the King Hauler, there is just an overhead view but it doesn't say how to install anything. The vibration motor obviously needs to be screwed to the deck, and the speaker gets connected with Velcro, but from above all you see is that the controller goes on top of the battery and there are no further details in the truck manual. I checked the Grand Hauler manual which is a very similar truck and it showed how to install a mounting platform above the battery. However, the King Hauler does not come with the parts for this mounting platform. I had to make my own platform by making some supports from chunks of sprue and using a surplus coupler plate as a platform. After an hour of work and a lot of CA I got something that works OK. I am surprised that Tamiya missed this though because they generally think everything out very thoroughly. As you can see, there are a LOT of wires here. Most of them are for lights. Only 6 of the 21 lights attach to the chassis, the rest all connect to the body and therefore have to be connected only when the body is attached which is far from easy. 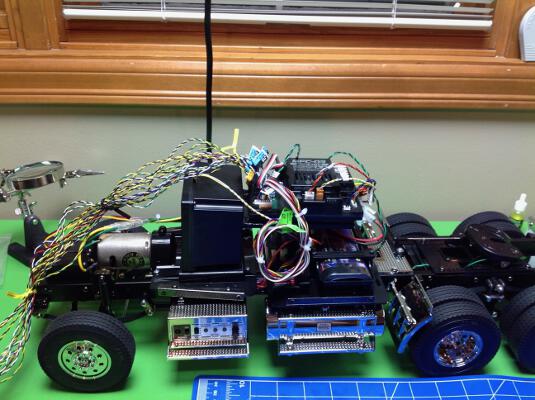
Step 40 installs the front and rear bumpers. I went ahead and installed the LEDs at the same time. Here you can see the tail lights and turn signals. The tail lights get brighter when braking. 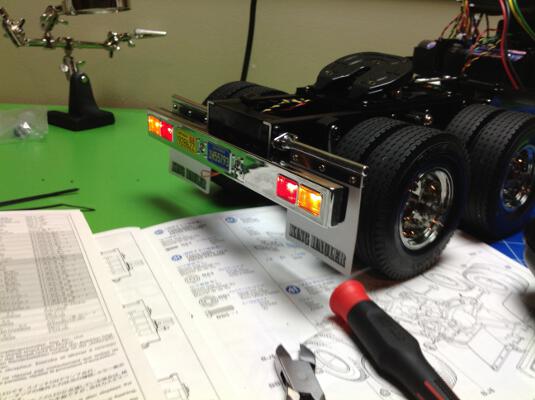
Although it is not time to install the body yet, I couldn't help but dry fit it onto the chassis to see how it looks. It is still pretty dark and featureless without the stickers and trim. Of course, the room is also pretty dark because I do most of my building between 9:00 p.m. and 1:00 a.m. 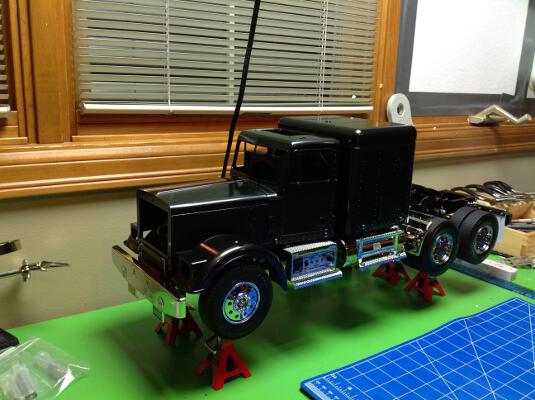
|
|
|
Please Log in to join the conversation. |
Blakbird's 56336 King Hauler Build 5 years 1 month ago #54356
|
Nice thread
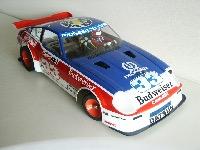
 I've built the 6x4 Scania 620, which I lifted and added the Shell tank trailer and some option parts. Due funds I had to sell it before it got finished. Had a couple of drives and I found it more fun to build and thinker with than drive. Back then there were several in my area with those trucks. These days I building a lifted 6x6 Scania for one of my friends. A really long time project as I was ment to start the build in 13' or so. I don't think my mate is still in rc's, so not sure how the build gonna end. Never got any MFC units, but fun to see how much is involved with that. Nowdays there is plenty of options if you don't go Tamiya, Servonaut is one of the biggest names for electric gizmos for these rigs. Thanks for posting ") |
|
|
Please Log in to join the conversation. |
Blakbird's 56336 King Hauler Build 5 years 1 month ago #54403
The Scania is on my build list. Can't decide which one to do next! I'm still waiting to see the details of how you pull that off. I have an RC4WD hydraulic folding crane that I want to add to one of my trucks, but I think it will need a stretch to make it work. Ideally it would be 8x8. I looked into Servonaut but I find it quite intimidating. It is really hard to know what would be needed without having any experience with the brand. |
|
|
Please Log in to join the conversation. |
Blakbird's 56336 King Hauler Build 5 years 1 month ago #54405
|
At this point all the mechanical and electrical construction is done and it is time to do the detail work and painting of the body. This is a whole different kind of work, and I like that this model combines both in the same project.
Step 42 takes longer than any other step in the instructions because it involves painting and decorating the entire body. The body comes as one part and the "black edition" that I'm using is pre-painted in metallic black. The quality of the paint is really good: no orange peel or dog hairs like when I do it myself. I had to manually paint the silver around the wheel arches with a brush as well as the door and storage handles. I wasn't sure whether the decals were water slide or sticker, but it turns out they are stickers. With big stickers, it is tricky to get them straight without any wrinkles or bubbles. I spent a lot of time getting these just right. The stickers are not pre-cut so you need to trim them with an X-Acto knife or scissors. The closer you can get to the edges without leaving any transparent film, the better it looks. As long as you don't go over. I thought it looked a little strange to have the striped stickers going over the door hinges, so I carefully trimmed them away in this area. 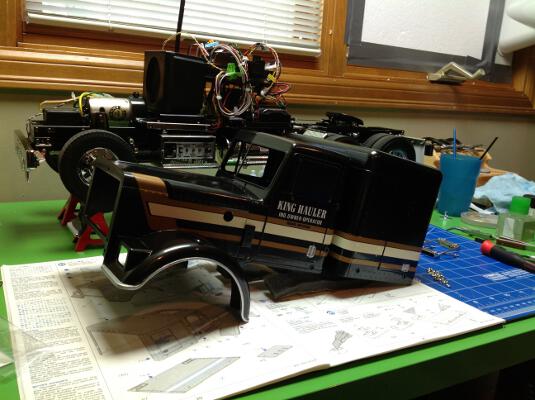
Step 43 is the side mirrors. The supports are threaded metal wire but the mirror bucket is plastic. There are also 5 metal rails here. 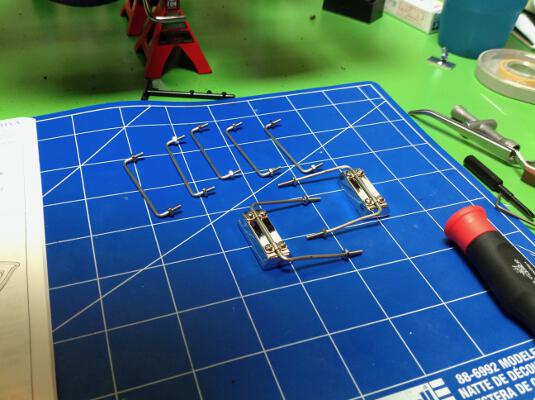
Step 44 installs the mirrors and handles to the body and also inserts the darkened windows. In this picture they look pure black, but in good lighting it is easy to see that they are translucent. 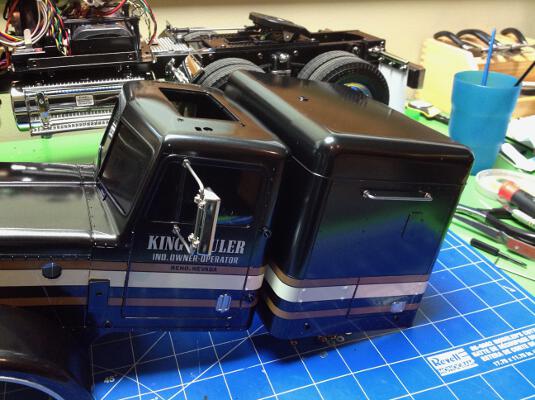
Step 45 builds the grille. Although it doesn't show up very well in this photo, there is a photo etched black metal part representing the radiator behind the chrome face. You can also see the chrome light buckets which will make up the headlights. Each has a 5mm white LED installed. 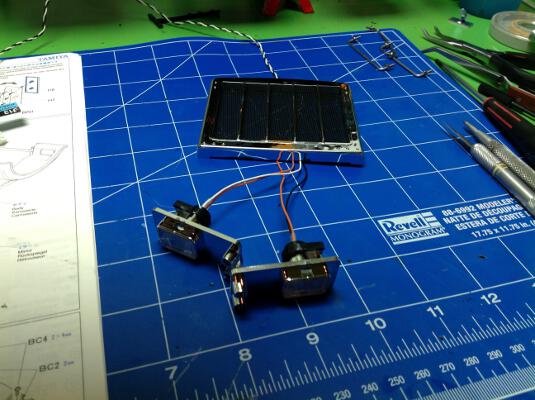
Step 46 involves the side air filters. The parts are chrome plastic, but I've painted the hoses black. 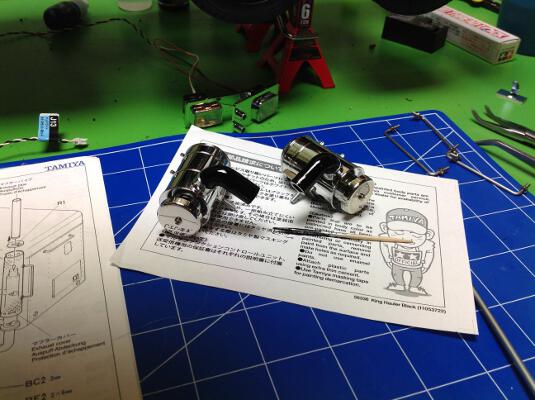
Now the filters, grille, headlights, and exhaust stacks are installed onto the body in Step 47. From the side, the body looks pretty well complete but we still have to work on the top. 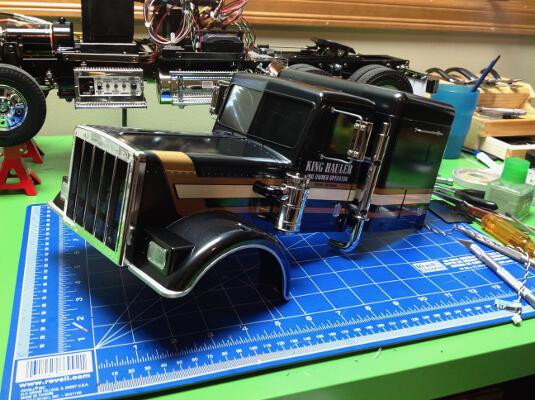
The roof has 5ea 3mm amber LEDs. The 2 on the outside light up any time lights are on, but the 3 in the middle are special. Depending on which lighting mode you have enabled, these 3 lights can visually indicate which gear the transmission is in. You can also see the blinkers which will mount to the fenders and the metal baffles for the exhaust stacks. All these bits are made in Step 48. 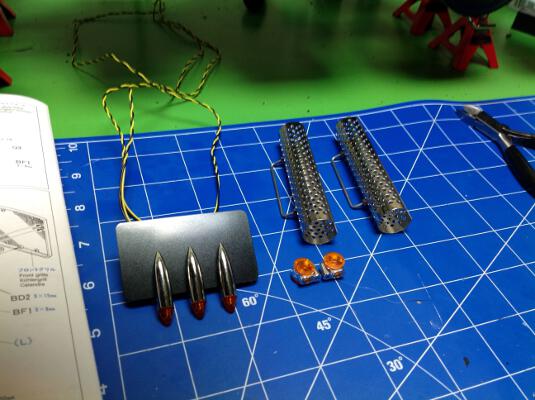
Step 49 installs everything from the previous step. We'll be skipping Steps 50-52 because they involve the dash, the seats and the antenna which we aren't using. The dash and seats were replaced by the speaker of the MFC, and the old style metal antenna is no longer needed with modern 2.4 GHz radios. 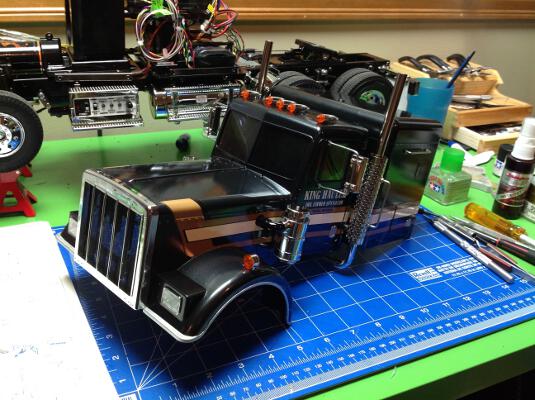
|
|
|
Please Log in to join the conversation. |
Blakbird's 56336 King Hauler Build 5 years 1 month ago #54406
|
I took a couple of photos to show my attempts to organize the mess of wiring. Of the 21 lights included with the MFC system, the King Hauler doesn't use 6 of them. Among these are 4 AUX lights and 2 reverse lights. I couldn't very well just not use lights that I had lying around, so I added some custom spots for them. The AUX lights I installed two on either side of the sleeper as marker lights. The reverse lights couldn't be accommodated on the rear bumper so I put them on the back of the sleeper which actually works really well for illuminating the trailer while hooking up in the dark.
I used black duct tape to secure the wires to the underside of the body and group them. I separated them into 3 bundles which need to be attached to the MFC when the body is installed. Reaching inside the body from the back to attach all these wires in the right place while installing the body is really hard. There is either no room for my hand or no visibility of the ports. When I realized how difficult it was going to be to attach the body, I resolved not to have to do it again. With that in mind, I installed the port for the trailer lights (upper right of second photo) and an extension for the 4th servo which will later be used to control the later legs. Of course, I ended up removing the body again anyway because the AUX lights turned out to be white which looked all wrong. I ordered some amber lights and retrofitted them a couple of weeks later when they arrived. Much better. At some point in the future I plan to replace the pure white headlights with the more realistic halogen colored versions which have recently become available. 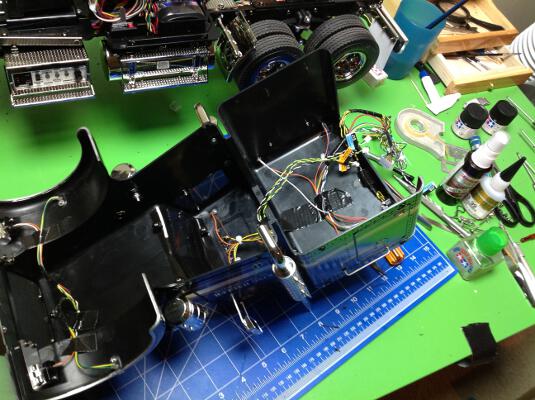
Step 53 is the horns and the sun visor. Not sure why these weren't attached before installing the body, but this is how the instructions are sequenced. 
Step 54 is the final step of primary assembly and installs the rear cover of the sleeper. This panel is removable to access the battery compartment for charging. My 5000 mAh battery lasts a long time, but not forever. 
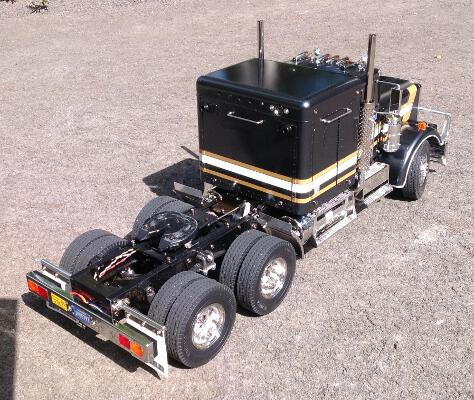
Done! Well, kind of. I still need to build the trailer and make some mods to control the motorized legs, but at this point the truck is ready to be driven. The MFC only works well with an older style 2 stick radio with analog trims. It can control more than 4 functions with only 4 channels by using small inputs from the trims for some functions and large inputs from the sticks for others. The sticks control throttle, steering, shifting, and coupling. The trims control all kinds of light modes and sounds including a horn, blinkers, flashers, reverse beep, and engine revving. You can rev the engine in neutral without driving to hear the sound and watch the vibrations. Reverse lights and sounds are automatic, but blinkers are manual. Both the throttle and the shifting are on the left stick. You need to hold the stick left for 1st gear, middle for 2nd, and right for 3rd all while controlling the throttle in the vertical direction. It is hard to keep them independent and takes some practice. I would have preferred a 3 position switch for the transmission. Another thing I noticed right away to my surprise is that the truck was WAY too fast for scale, even in 1st gear. I thought the single 540 sized 27-turn motor would be working pretty hard, but on pavement it moves right along. I felt the speed was too far out of scale to leave alone, so I picked up an Axial 55-turn motor which cuts the speed roughly in half and looks MUCH better while still having plenty of power. I didn't document the motor conversion, but you can see the black motor at the edge of this picture. There was virtually no glue involved in this entire project; everything is mechanically fastened and therefore can be disassembled and repaired. One spot there should have been glue was on the headlight lenses. The first time I took this out driving I got back to the garage only to find that the fog light lenses were gone! They had rattled out. I had to order a replacement transparent parts tree from Tamiya and replace them. This time I used some thin cement. Don't use CA because it will fog the lenses as it cures. It looks strange for the desk to be clean and free of loose parts! 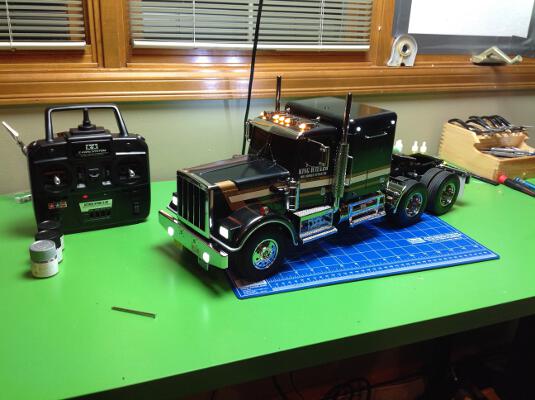
|
|
|
Please Log in to join the conversation. |
Blakbird's 56336 King Hauler Build 5 years 1 month ago #54407
|
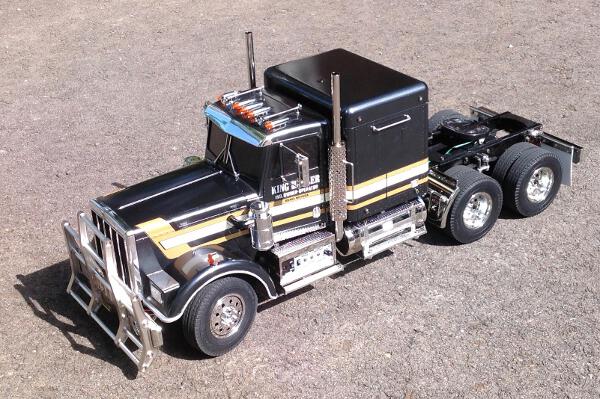
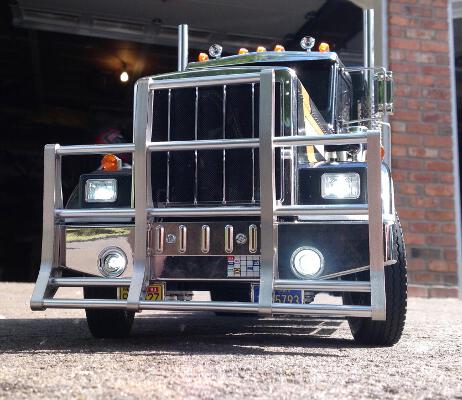
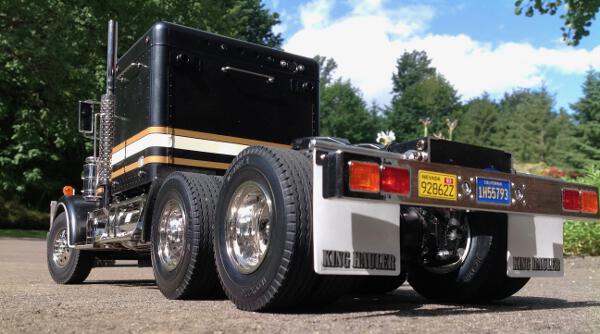
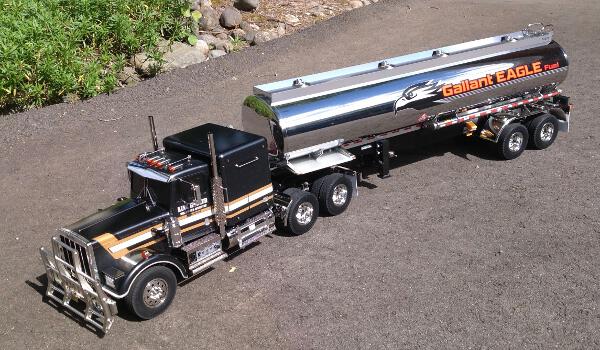
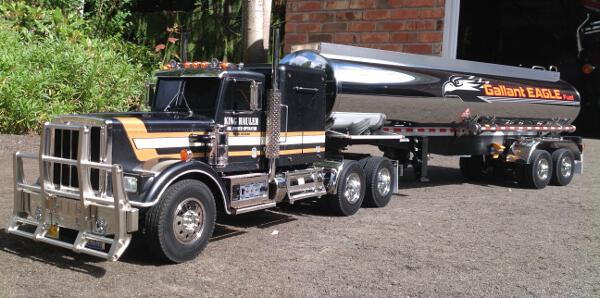
It took a few weeks to get a nice sunny day to take some outdoor pictures, but I really need the sun to see the full effect of the chrome. You may also notice that I've added an aluminum animal guard to the front bumper. Wouldn't want to damage the truck hitting a squirrel.

The following user(s) Liked this: stingray-63
|
|
|
Please Log in to join the conversation. |
Blakbird's 56336 King Hauler Build 5 years 1 month ago #54410
|
Nice looking rig you've build. I love the chrome and black combination too!
Now you can learn how to park backwards ... my son was much better in it then I was 
The following user(s) Liked this: stingray-63
|
|
|
Please Log in to join the conversation. |
Time to create page: 0.251 seconds