Keyword

TOPIC:

58088 Sauber Mercedes C11 double rebuild 12 years 9 months ago #1943

  • Edou
  • Edou's Avatar Topic Author
  • Offline
  • Hopping Mad
  • Hopping Mad
  • Posts: 6135
  • Likes received: 483
Hi to whom is reading this,

Had a case of Group C fever lately and that is why I gathered (more than) all the parts to rebuild two vintage C11s. :)

One will be rebuild fully original. I have a good looking box and manual in completion to the shelf condition.
The other car will become a runner that I plan to race at the local track! :woohoo:


It will get some cool upgrades to optimize it's capabilities...
Yesterday most of the parts for this arrived and today it's almost ready to run already!
Not a very extensive build of course but I love the uncomplicated ingenuity of it.


I will go into more detail later - takes some time to work on all the pictures...
But note how I've played around with blue A parts and lock nuts. B)
Still coming this way is an awesome upgrade - a TRF special damper for an F103GT!


To be continued (soon)...

Please Log in to join the conversation.

Last edit: by Edou.

Re: 58088 Sauber Mercedes C11 double rebuild 12 years 9 months ago #1944

You really like the color blue... :laugh: 
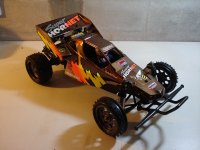
But I must just say, "That is one beautiful looking car and chassis. Show us more... Thanks for sharing...

Please Log in to join the conversation.

Re: 58088 Sauber Mercedes C11 double rebuild 12 years 9 months ago #1947

  • Edou
  • Edou's Avatar Topic Author
  • Offline
  • Hopping Mad
  • Hopping Mad
  • Posts: 6135
  • Likes received: 483
True - I think blue on black is pretty cool... :cheer:
But on this car it is more of a coincidence since I received a car with all blue A parts when I was expecting black :


So I got some new (black) A parts. Keeping some of the blue was very tempting of course.
Btw - I'll finish my Manta Ray soon with silver hop ups. And yes - a bit of blue! :laugh:

The chassis and plates I used on this car started out like this :


After many hours of sanding and polishing restored to this state :


Most probably only to be scratched again soon... :S

Please Log in to join the conversation.

Last edit: by Edou.

Re: 58088 Sauber Mercedes C11 double rebuild 12 years 9 months ago #1950

Top work buddy...
The following user(s) Liked this: Edou

Please Log in to join the conversation.

Re: 58088 Sauber Mercedes C11 double rebuild 12 years 9 months ago #1952

Excellent work on the underside :)
The following user(s) Liked this: Edou

Please Log in to join the conversation.

Re: 58088 Sauber Mercedes C11 double rebuild 12 years 9 months ago #1953

  • Edou
  • Edou's Avatar Topic Author
  • Offline
  • Hopping Mad
  • Hopping Mad
  • Posts: 6135
  • Likes received: 483
Thanks guys - I'll try and set up a good report of it all too. :)
Have some nice pictures of the details I did. Hope they came out right...

It's got some cool (but subtle) hop ups already. Should be a very tight drive :


Reckon it's up to my driving skills now... :dry:

Upgrade list :

- Kawada F103 carbon drive shaft
- Optional 99T spur for F103
- 3Racing titanium turnbuckles
- F103 FRP steering knuckles
- High torque servo saver
- Full set of ball bearings
- One piece ball thrust bearing
- TRF ball adjusters (have to replace the wheelside still)
- TRF special damper F103GT (yet to arrive)
- Yeah Racing blue alloy lock nuts

Check the unbelievable difference in weight between the steel and carbon shaft :


An incredible 22 out of 27 grams lighter! :woohoo:

Please Log in to join the conversation.

Last edit: by Edou.

Re: 58088 Sauber Mercedes C11 double rebuild 12 years 8 months ago #1957

  • Edou
  • Edou's Avatar Topic Author
  • Offline
  • Hopping Mad
  • Hopping Mad
  • Posts: 6135
  • Likes received: 483
This is a more technical post about how I decided what length turnbuckles to use and how I installed them.
Had some mishaps with these not fitting right on other projects...

No data available for customizing the steering to a double ball adjuster linkage so I photoshopped the manual a bit.
This way I could make a design of it and be more accurate in estimating what lengths to order :


The overview at the bottom of the picture is what is printed in the manual.
I copied the two original tie rods to the drawings above...
Then is duplicated and mirrored only the ball adjuster and placed this over the center where the servo would be linked.
Now I have a drawing of (turnbuckle) tie rods that would look like the ones I will be using.

The blue arrow representing the 39 and 58mm lengths I also centered underneath the new design for reference.
Using slightly longer TRF ball adjusters (2mm each) I estimated using 32 and 52mm turnbuckles.

Glad to report this was right on the spot. Seems to be a length that matches very well. :)

Of course I could have also chosen the path of centering the servo to be able to install rods of equal lengths.
That way I would have ended up with 42mm each but I did not want to change the servo set up.

So this is how I put together the turnbuckles according to the plan :


But that didn't really work out because the adjuster on the wheel side needed a 4mm fit and these TRFs are 5mm.
So I made a compromise for now by dying the original parts black.
They have a 2mm thread though which doesn't fit without force and they turned out more brownish. :whistle:
But it's holding it together for the moment...

Another change that came with the new steering linkage - with high torque servo saver - is that the connection on the servo side is now done with 5mm ball ends. A bit hard to see here because they are coloured in dark gun metal :


This changes the spot where it all connects a few millimeter in the direction of the rear of the car.
Consequently changing the angle the steering rods make :


I usually stick to the method the manual says but in this case I think I'll have to change Mr. T's plan and go with the second hole in the steering knuckle - this will work better in this case I suspect... :silly:

More to come of the rest of the builds...
Attachments:

Please Log in to join the conversation.

Last edit: by Edou.

Re: 58088 Sauber Mercedes C11 double rebuild 12 years 8 months ago #1994

  • Edou
  • Edou's Avatar Topic Author
  • Offline
  • Hopping Mad
  • Hopping Mad
  • Posts: 6135
  • Likes received: 483
Found a great carbon fiber decal sheet in the US from the classic Parma brand :


That will certainly give the car some good looking details...
Also - the TRF damper has arrived!

:cheer:
Attachments:

Please Log in to join the conversation.

Last edit: by Edou.

Re: 58088 Sauber Mercedes C11 double rebuild 12 years 8 months ago #2001

Edou,
Your posts here are always of a high class! This is just another good example.
Thank you for sharing :)

-Lars
Signature now gets correct formatting if you edit it in your Profile. Use normal BBcode if you want.
www.tamiyabase.com was formatted automatically.
The following user(s) Liked this: Edou

Please Log in to join the conversation.

Re: 58088 Sauber Mercedes C11 double rebuild 12 years 8 months ago #2022

  • Edou
  • Edou's Avatar Topic Author
  • Offline
  • Hopping Mad
  • Hopping Mad
  • Posts: 6135
  • Likes received: 483
Thanks for all the thumbs up, guys. :)

The special damper arrived yesterday and since then I've been putting quite some work in the car.
Even fixed the transmitter and did a lot of wiring and soldering. Up to the point where it is now ready to run!
I will give more details later but I thought I'd place a picture (without electronics) of the result already :


Made some changes in the meantime too. Who can spot the subtle vintage difference? :huh: ;)

Please Log in to join the conversation.

Last edit: by Edou.
Moderators: caprinutstingray-63AndyAus
Time to create page: 0.211 seconds
Cookies are required to make this site work. If you continue to use this site you permit us to use cookies.