Index
Page 1: "wooden" crate, cooler box, "barn" style toolbox, basic instrument case
Page 2: Ammo boxes & more crates; weathering - dry brushing & washes; mk.1 Tool chests
Page 3: finished tool chest; shelving unit & bench; mk.1 oxy-acetylene kit & TIG welder
Page 4: finished mk.1 oxy-acetylene kit & TIG welder[/url]
Page 5
Page 6: Fuel Cells started
Page 7: Radiators started
Page 8: Radiators continued, mk.2 welding kit started
Page 9: Radiator epic fail, mk.2 welding kit & fuel cells finished, pallets
Page 10
Page 11: Axle stands, trolley jack, cable & hose reels, Haynes manuals
Page 12: Bench pillar drill
Page 13: Lathe started
Page 14: Lathe finished
Page 15: Bench Grinder, beer cans & fridge started
Page 16: Fridge finished
Page 17: Henry Hoover, Compressor started
Page 18: Compressor finished, fire extinguishers & stand, pile of wood, grease tubs, air filter/oil filter/disposable gloves boxes
Page 19: Garage started
Page 20: Garage construction finished
Page 21: Garage sprayed
Page 22: Garage door & walls detail painted/weathered
Page 23: RIB (Rigid Inflatable Boat) started
Page 24: RIB construction finished, paint (incl. wood & rubber effects)
Page 25: Skip (dumpster) & fill
Page 26: skip fill finished, starter trolley & pressure washer started
Page 27: bungees, office chairs started
Page 28: lockers & desks started
Page 29: laptops; + lockers & desks painted
Page 30: TARDIS, plank outhouse, simple canoe
Page 31:Outhouse barrel (& contents

), Engine hoist, mechanics creeper & stool + tyre rack started
Page 32: Beetle shell started (plus narrowing/reducing radius on tyres)
Page 33: Beetle continued (front suspension assembly, door inners, chassis)
Page 34: Beetle continued (primer, not entirely succesful salt effect)
Page 35: Beetle finished
Page 36: Ramps, Batteries started. Engine hoist, mechanics creeper & stool + tyre rack finally finished
Page 37: Strip lights, batteries finished
Page 38: More barrels (& manual lift pumps), oil drain setup, oil pouring jugs, tyre balancer started (but never finished), battery rack, 4-post lift, mocking up Willy's business diorama (and same in MDF), smaller axle stands, pneumatic nut drivers, buckets, trolley jacks, railings, more filter boxes, ceiling tiles & architrave/skirting boards, posters & banners, more euro pallets, reel rack & filter storage
Page 39: Mk.3 tool chest, small mechanics stool, fire extinguisher mods, basic spanners, bulkhead lights, inspection lamps, starting on exhausts, desk phones
Page 40: Carpet, office finished, painting of page 38-39 items, filling fire buckets, basic dirtying of floor, lighting wiring & test
Page 41: final setup of Willy's Garage
") edit ends
edit ends
Not sure if this is the right place, but here goes ...
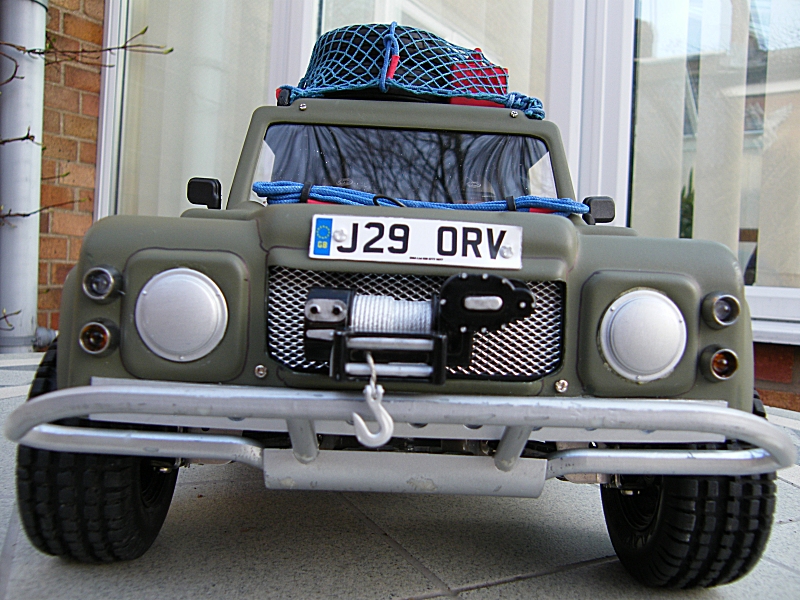
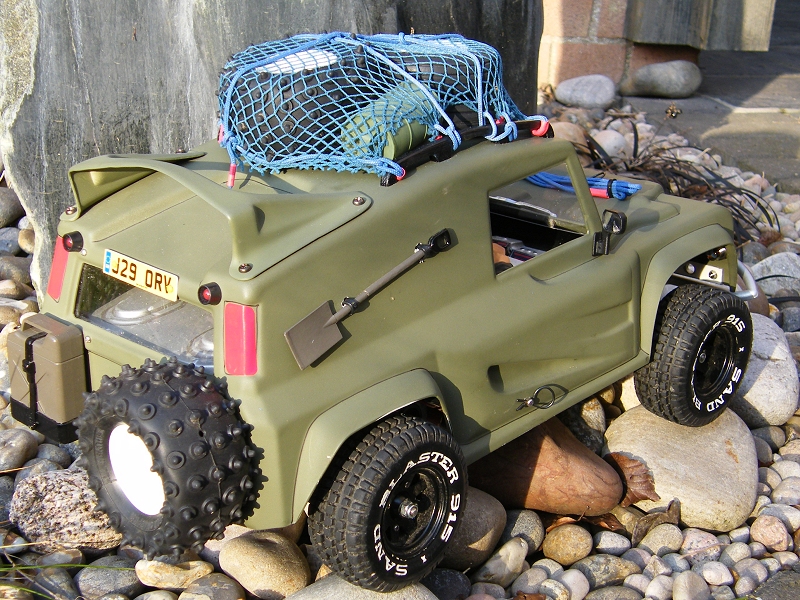
I like to see bits & bobs on the roof of a scaler - but I don't want to pay the huge amounts the few bits available cost - which will then look the same as everyone elses... at the moment I have a "cheap" cast resin oil drum, toolbox & inappropriate set of spare wheel on the roof of my Frog-based (really) Bowler Wildcat - but having a big pile of styrene sheet & some time on my hands, I thought I'd have a go at making some boxes - this is where I've got to so far:
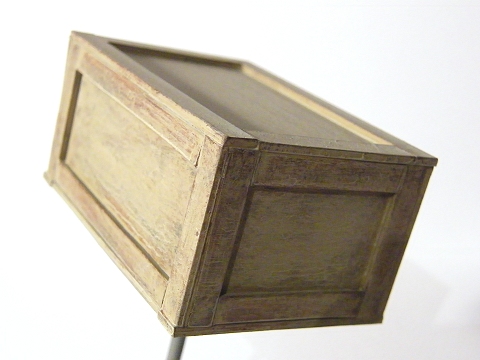
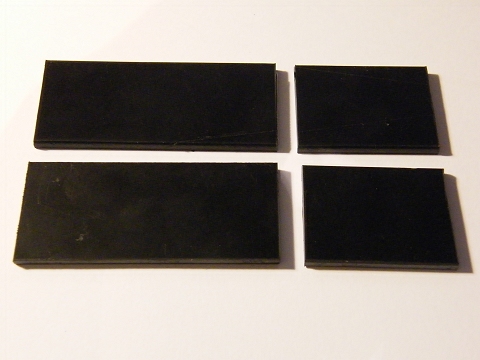
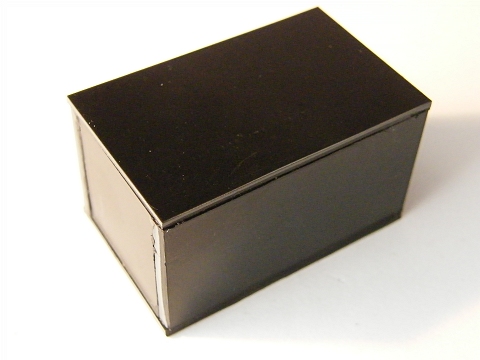
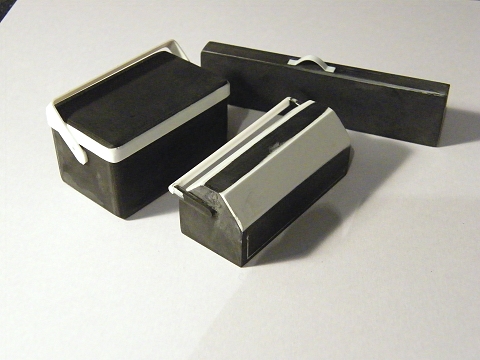
First up, a "wooden" crate ... I cut up some sheet for the "plywood" sides - 3mm, for strength ... probably over the top - it's resulted in a crate that I (or any two regular people) could stand on ... added 1.5mm sheet top & bottom, sanded it with 240 grit wet & dry in one direction, the idea being I'd get some wood grain effect going on, then added strips of pre-sanded 1.5mm sheet for the "wood":
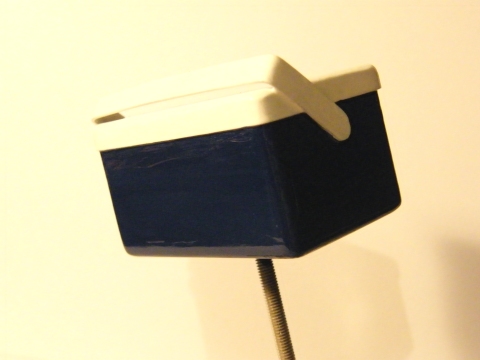
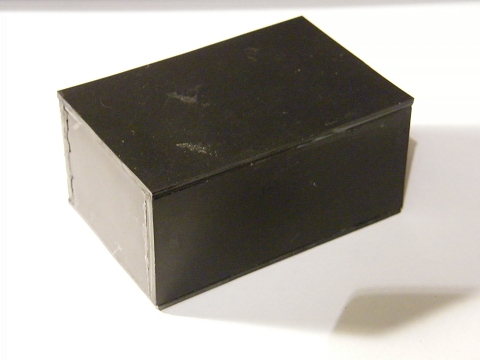
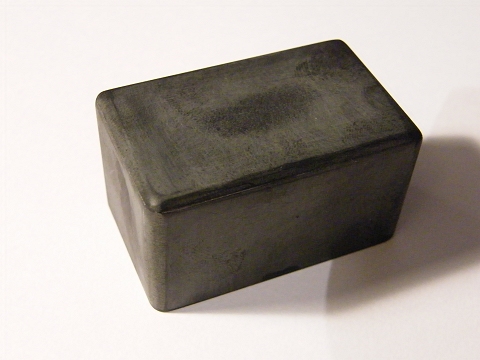
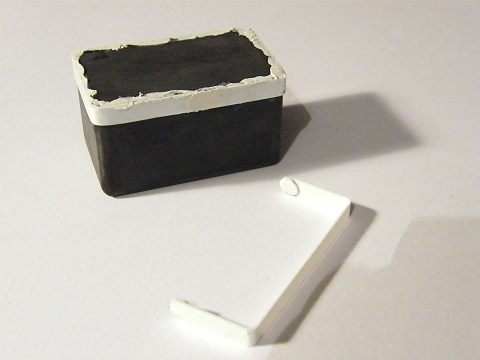
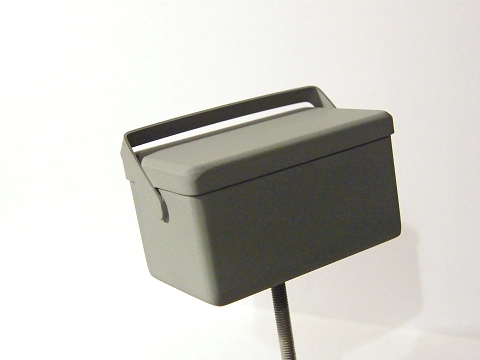
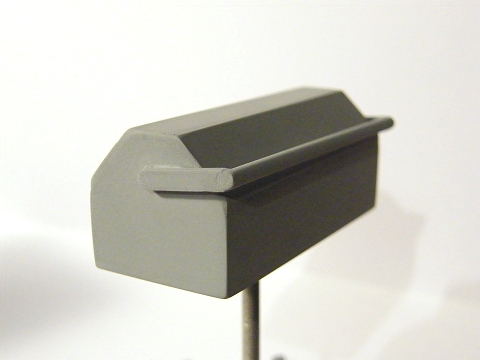
I thought I'd also try a "plastic" cooler box - construction was the same as the crate to start, but with careful attention to getting rounded edges on the sides & base (used 240 grit then 800 grit) - then used "Squadron White" putty to fill any gaps ...
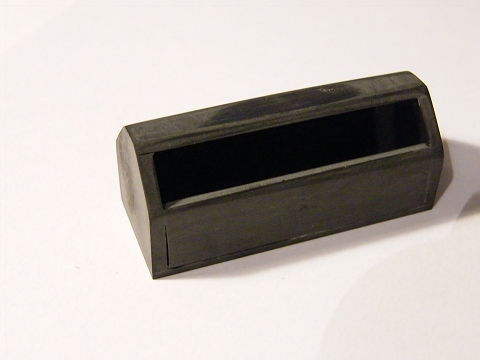
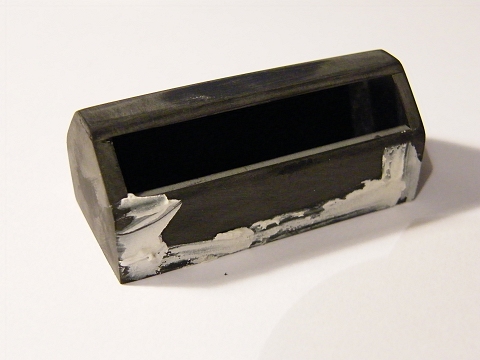
I wanted to try a guitar case (think "Desperado" rather than James Blunt

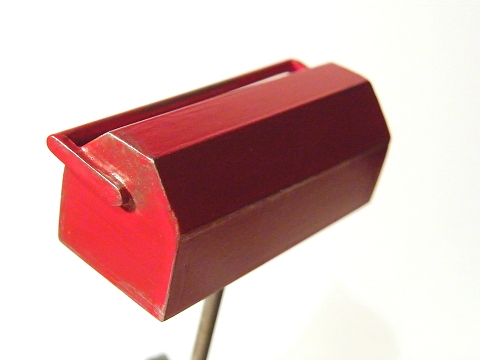
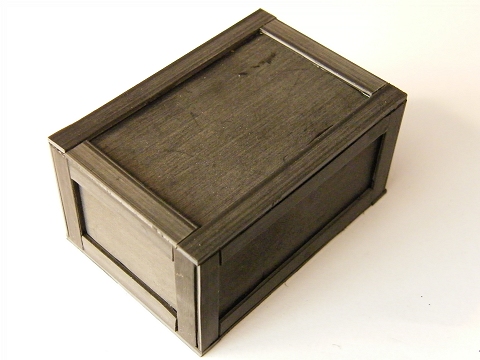
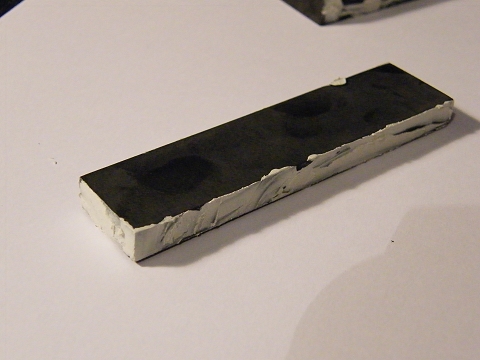
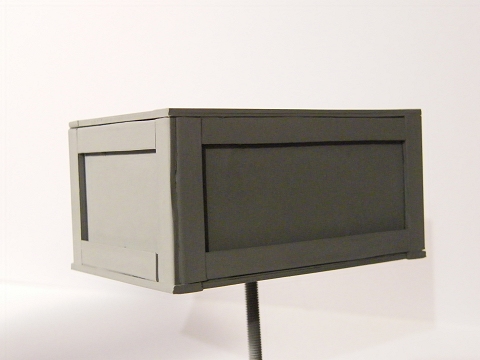
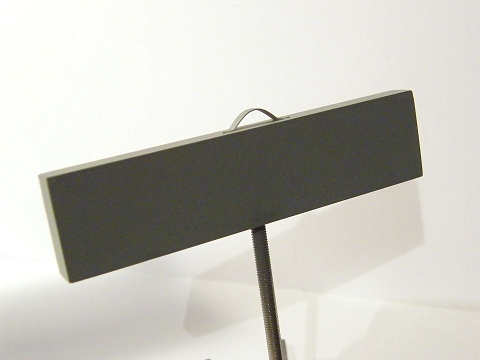
), but thought that might be a bit ambitious for a first try, so started on a "barn" type toolbox - doors (roof?) will come later - and a nondescript instrument case ... again, basic construction is as per the crate, sanding & filling as per the cooler ...


")