Keyword

TOPIC:

Re: Carbon Group C - F1 Ferrari F40 12 years 2 months ago #6628

  • Edou
  • Edou's Avatar Topic Author
  • Offline
  • Hopping Mad
  • Hopping Mad
  • Posts: 6135
  • Likes received: 483

it looks like I can easily use a Group C (front) bumper

Never as easy as you'd like of course. :side:
The holes to attach the bumper match - but the slot is quite different :


So I held the bumper and chassis together and drew a more fitting outline :


Never mind the bashed bumper btw. More or less came from the scrap heap... :whistle:
Attachments:

Please Log in to join the conversation.

Last edit: by Edou.

Re: Carbon Group C - F1 Ferrari F40 12 years 2 months ago #6645

  • Edou
  • Edou's Avatar Topic Author
  • Offline
  • Hopping Mad
  • Hopping Mad
  • Posts: 6135
  • Likes received: 483
The new outline has now been dremeled and the bumper sanded, sprayed and polished. :)
I could have done a smoother job, I admit :


Getting a bunch of parts together from my Group C stash and the treasure chest I recently received :


Doing the front is pretty straightforward - the bumper fits quite well :


I could set up the servo now but I think I'll go for the gearcase first. And the aluminium motor mount. B)
And also start restoring the FRP plates...
Attachments:

Please Log in to join the conversation.

Last edit: by Edou.

Re: Carbon Group C - F1 Ferrari F40 12 years 2 months ago #6734

  • Edou
  • Edou's Avatar Topic Author
  • Offline
  • Hopping Mad
  • Hopping Mad
  • Posts: 6135
  • Likes received: 483
I've finished restoring the FRP plates... here's the 'before' picture :


A lot of sanding (with consecutively finer grids) and then the polishing :


And the final result :


Now for some building again...

Please Log in to join the conversation.

Last edit: by Edou.

Re: Carbon Group C - F1 Ferrari F40 12 years 2 months ago #6752

Nice work :y:

Please Log in to join the conversation.

Re: Carbon Group C - F1 Ferrari F40 12 years 2 months ago #6757

  • Edou
  • Edou's Avatar Topic Author
  • Offline
  • Hopping Mad
  • Hopping Mad
  • Posts: 6135
  • Likes received: 483
Thx, I rubbed some WD-40 on these for some extra shine as a final treatment. Seems to de them well.
I have a whole theoretical story coming about the build but I saved that in Notepad for now... :pinch:

Please Log in to join the conversation.

Re: Carbon Group C - F1 Ferrari F40 12 years 2 months ago #6791

  • Edou
  • Edou's Avatar Topic Author
  • Offline
  • Hopping Mad
  • Hopping Mad
  • Posts: 6135
  • Likes received: 483
Got a lot done on this car... :cheer:
The whole theoretical story I mentioned is about the similarities and differences between the Group C and F101 to F103.
I had no choice but to look into this because I was missing a vital bit of plastic (D11) to assemble the battery holder :


Also, fixating the battery on the upper FRP deck with tie-wraps (F101-F102) doesn't seem like the best solution...
Neither for stability nor for the centre of gravity :


So I spent the day yesterday figuring out how to put the battery tray from a F103 on it.
Because I found quite a fancy one with the parts I got...

The setup from an F103 is quite different from the previous generations though.
I was going to limit myself to the cars that all have the damper directly connected from the motor case onto the chassis :


An F103 on the other hand uses a friction plate with a damper attached on the chassis :


As can be seen on the image above, the later model uses an actual tray for the power source.
Putting a friction plate on this build was not an option because I am bound to a (symmetrical) Group C (F102) shaped T-bar.
The one from the F103 is quite different - the motor case also has an offset because of that :


Another difference is the placement of the hole where the battery tray is screwed onto the T-bar.
For an F102 this is because of FRP part BP5 in the first image of this post.
But the T-bar I received, already seemed to have that custom feature...
On this picture 'A' is for a Group C and F102 (F101 is slightly different) and 'B' is for an F103 :


The red arrow shows (in abundance) where the battery should be tie-wrapped to the FRP. :pinch:
So the previous owner must have used F103 parts on the car!
Luckily the other overall measurements of the battery holder are the same with all these F-chassis.
So bolting it on shouldn't be a problem. Or should it...

To be continued...

Please Log in to join the conversation.

Last edit: by Edou.

Re: Carbon Group C - F1 Ferrari F40 12 years 2 months ago #6797

Dribbling with anticipation after reading this! Chop chop, get it finished!
I'd skipped over this post cos I've never really been a fan of the F40 (Or the 959), but this FRP chassis is really getting the juices flowing!

Please Log in to join the conversation.

Re: Carbon Group C - F1 Ferrari F40 12 years 2 months ago #6799

  • Edou
  • Edou's Avatar Topic Author
  • Offline
  • Hopping Mad
  • Hopping Mad
  • Posts: 6135
  • Likes received: 483
Cheers, eddrick. I'm further ahead with the build than the progress in this thread...
And the fact that the F40 body will fit it mostly coincidental. Although there seems to be some intriguing pattern.
But I could actually fit many bodies on this size chassis I think :


Build details will be posted soon! :cheer:

Edit - there's a whole lot coming up. Working on it momentarily.
And the picture is now uploaded to TB so zephyrin can see it... ;)
Attachments:

Please Log in to join the conversation.

Last edit: by Edou.

Re: Carbon Group C - F1 Ferrari F40 12 years 2 months ago #6804

  • Edou
  • Edou's Avatar Topic Author
  • Offline
  • Hopping Mad
  • Hopping Mad
  • Posts: 6135
  • Likes received: 483
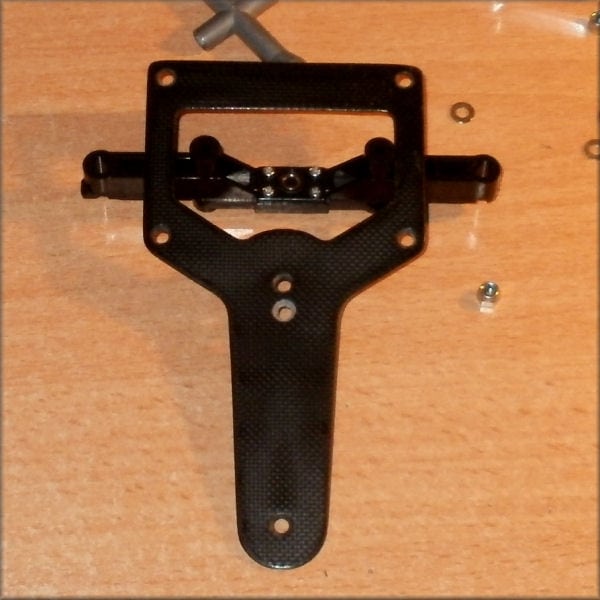
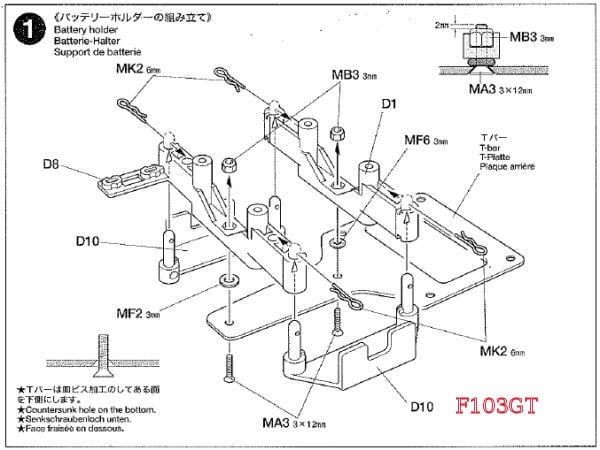
Picking up the build again at the F103 battery holder...

Luckily the other overall measurements of the battery holder are the same with all these F-chassis.
So bolting it on shouldn't be a problem. Or should it...

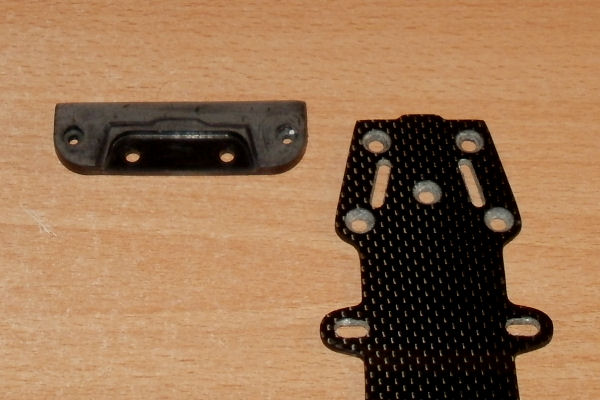
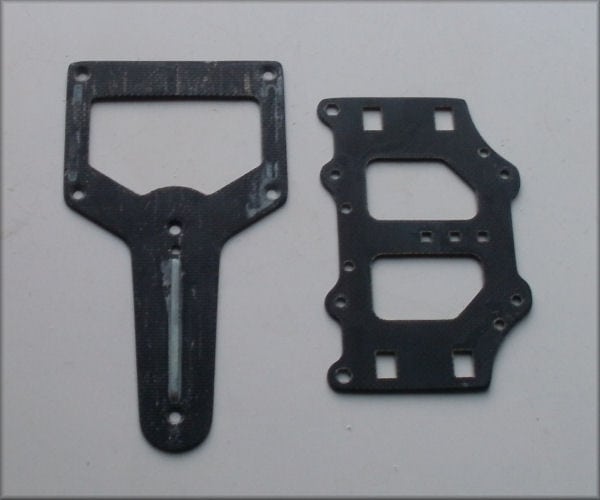
It took me a little while before I realized I did not have the standard parts from an F103. :huh:
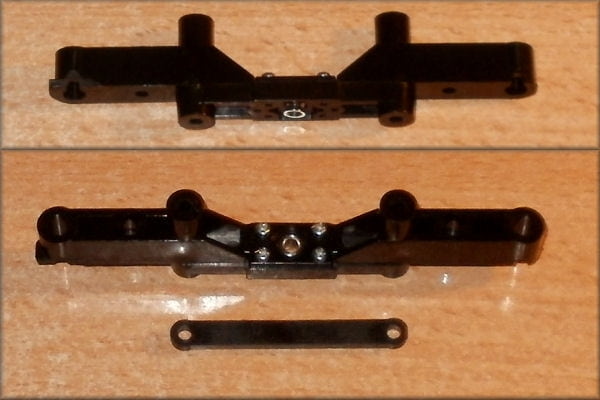
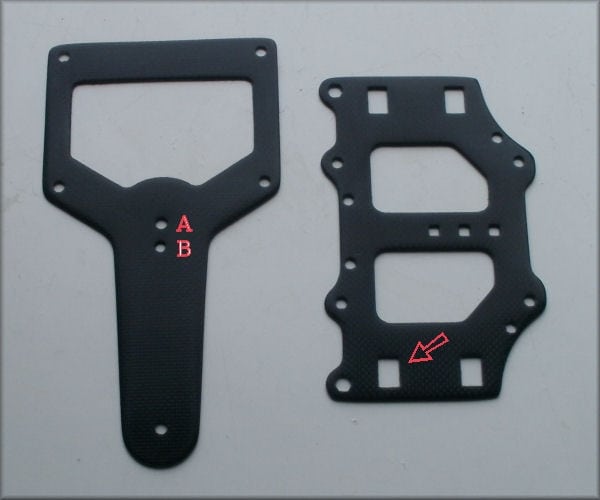
Those should be flat on the underside and the tray I wanted to put on had a different form - and flexible joints in the middle :


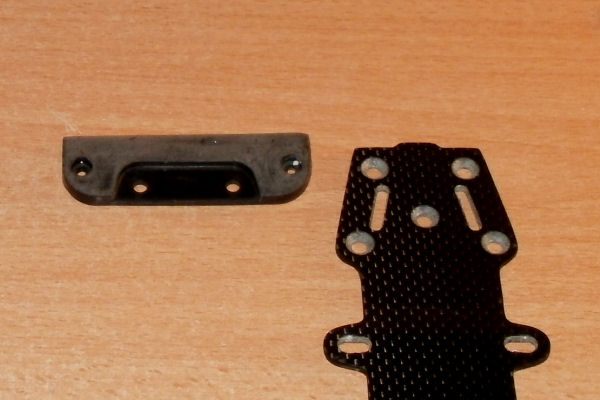
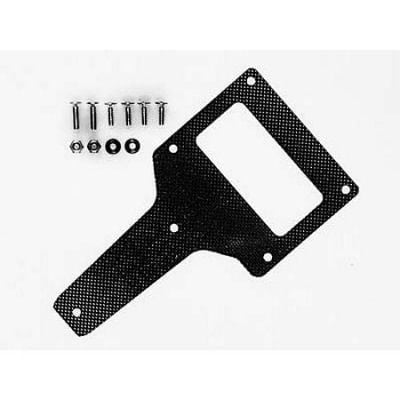
Luckily there's some F chassis fanatics on the Dutch forum - turns out it's a hopped up Tamiya 53273 tray! :woohoo:
But not one that will fit straight on or work without modification since the F103 uses that friction plate...

A small side step btw - the other bit of plastic at the bottom of the picture above doesn't belong to the battery tray.
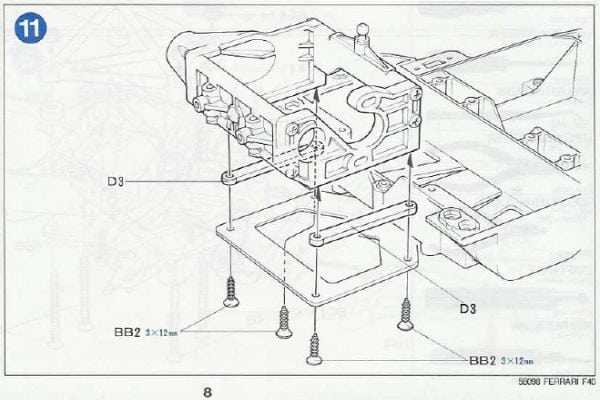
It's actually a spacer for adjusting the height of the motor case (D3 below) which was discussed earlier in the thread.
I just happened to notice the dimensions matched and thought I might be able to use this as a modification tool.
Which I didn't do in the end...


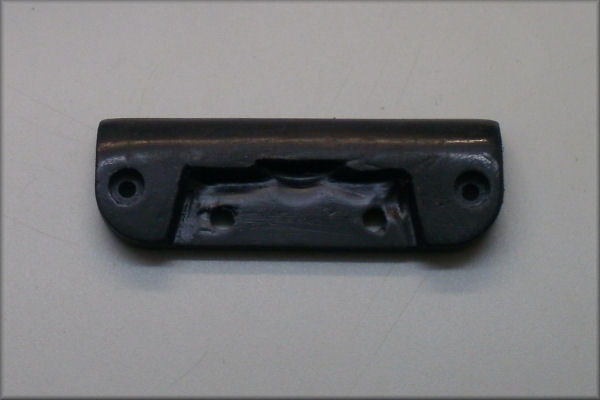
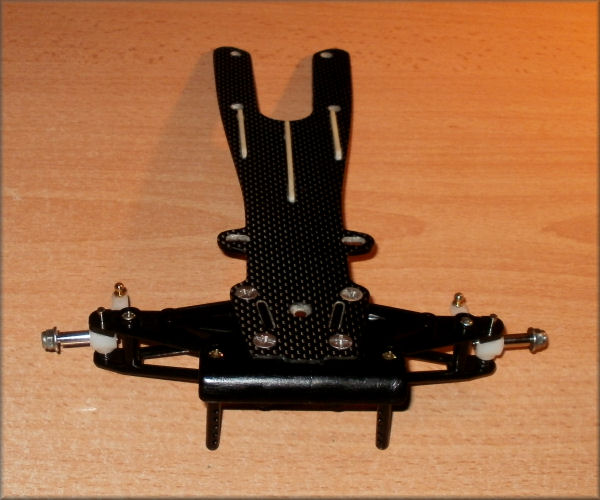
I still had to overcome the height difference of the battery holder - because of it not being flat on the underside.
Bolted on like this, the chassis and T-bar would not be in the same plane...
And the flexible joints would make the setup far to loose without an F103 friction plate.

But while I was fiddling around (thanks to ducdennis 
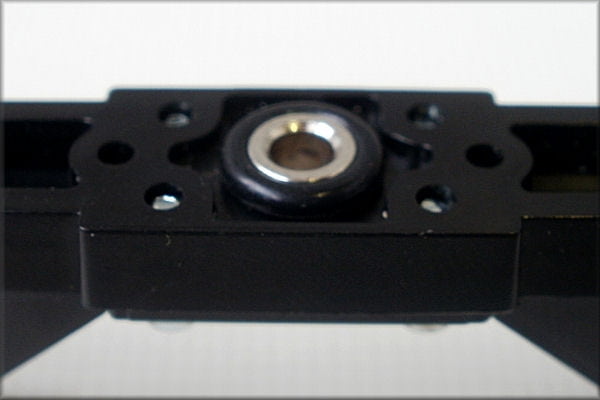
' on line manuals) I suddenly noticed that a 3mm O-ring could be pushed over the outer edge - changing the characteristics of the inner bits from loose to flexible :


Putting a ring like this on either side (of both cross parts - much more than originally intended) makes the whole 'suspension' of the battery tray quite ridig... but still flexible. And a good point to start from.

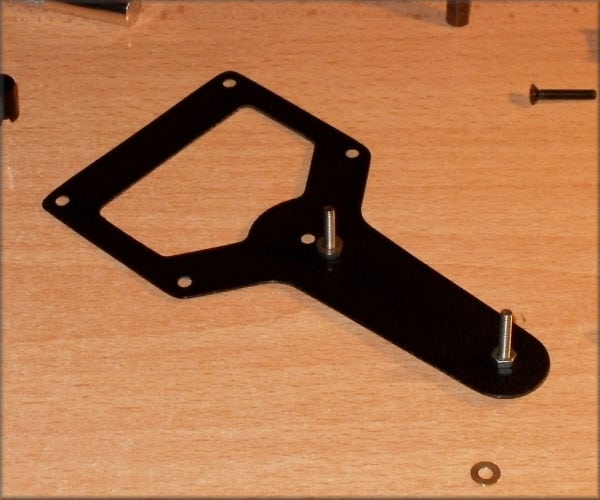
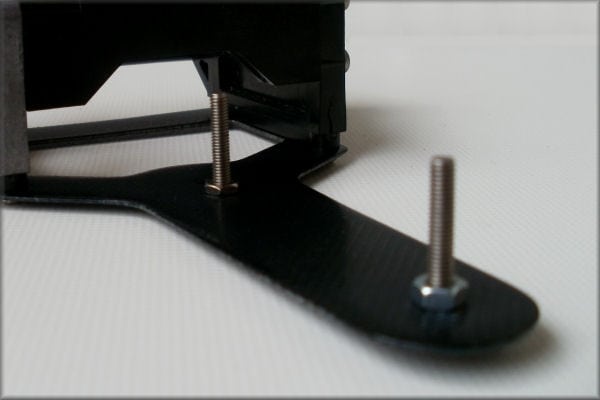
The first simple plan for putting it a bit heigher were just two nuts - on titanium screws that is :


On top of that a metal washer (to keep the rubber rings of the inner joints in place) followed by the cross member parts of the battery holder - then another metal washer before a lock nut bolts everything down.
But this setup wouldn't leave any room for adjusting the flexibilty of the roll of the T-bar...
Which is a very important issue for giving the car understeer (loose setting) or oversteer (rigid) so another step was needed.
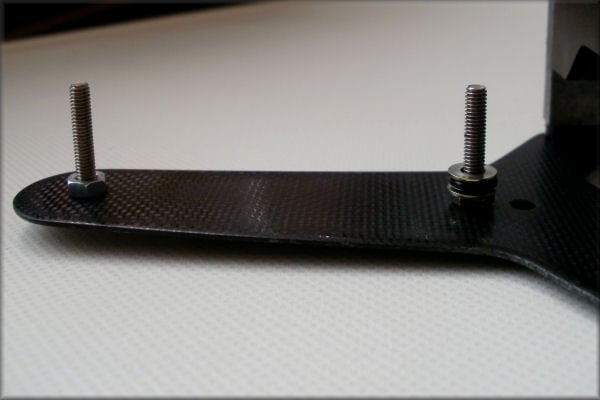
Next evolution was to use a smaller nut (not bolted down tightly) on the side of the motor :


With two washers and a rubber ring on top :


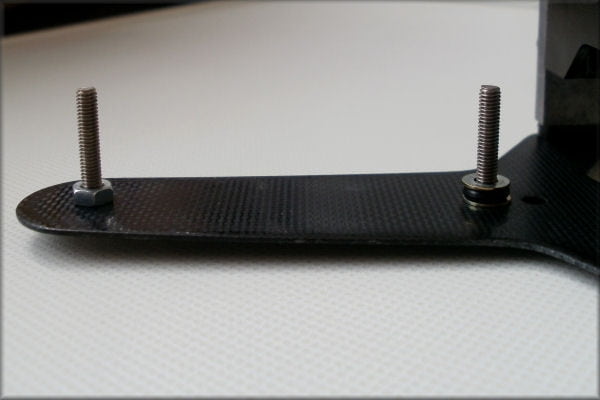
But that seemed to be too high - although I later found out it would have been alright...
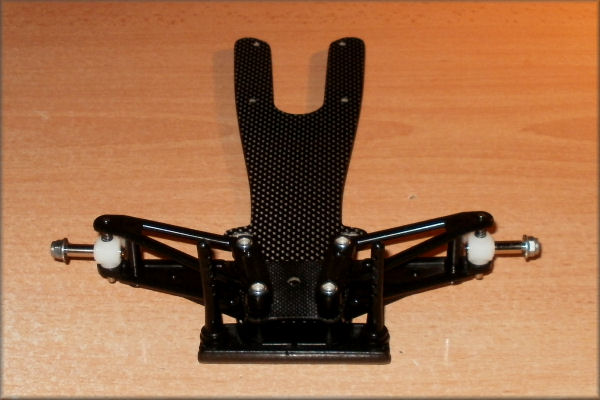
Leaving the nut out altogether was the last stage :


When the battery holder is put onto this, I can regulate the flexibilty on one end!
But I think I will still be looking for a better solution.
It's already much more hi-tech than what's done on a Group C though - one side fixated and the other with a simple O-ring :


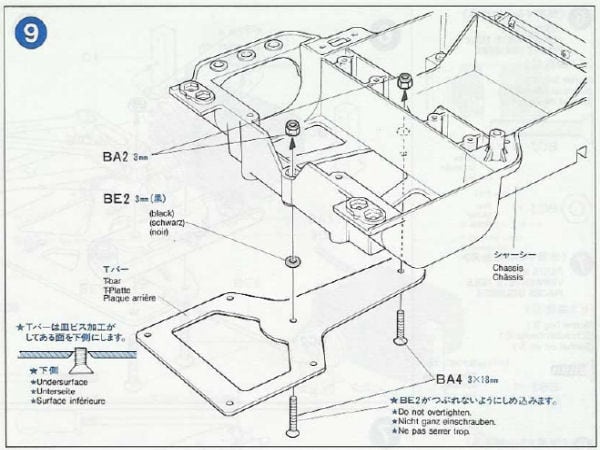
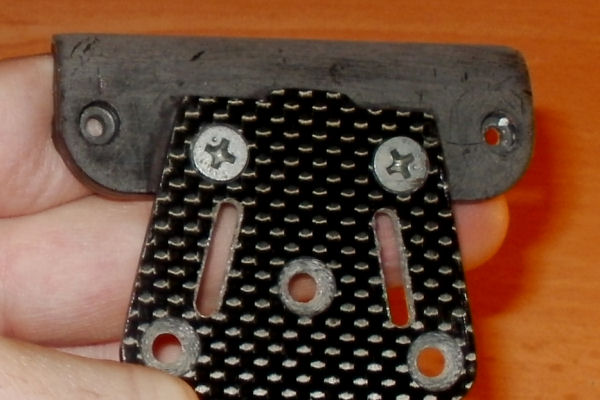
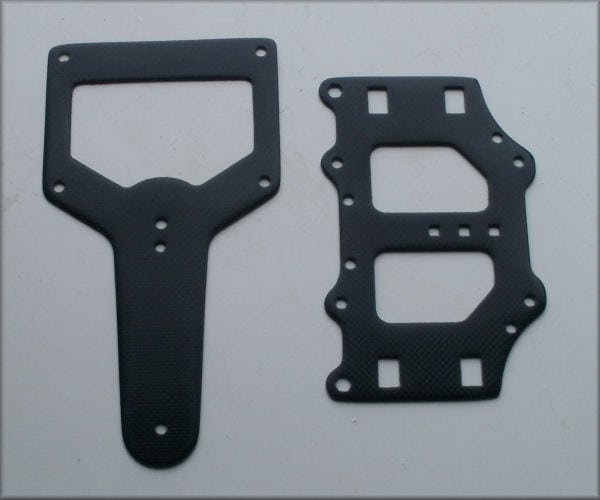
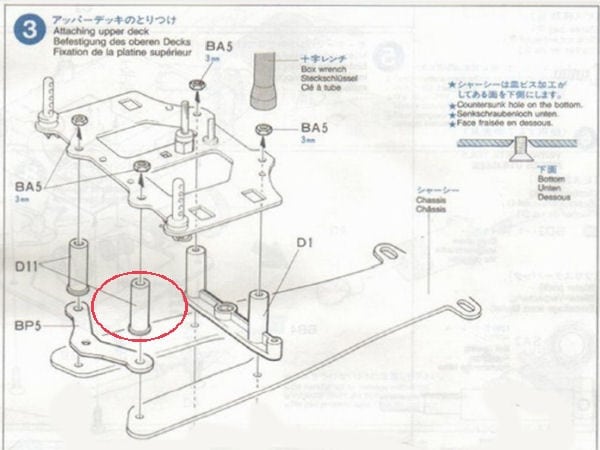
Last detail - make the extra hole in the T-bar (for F103) countersunk so the titanium screw falls in nicely :


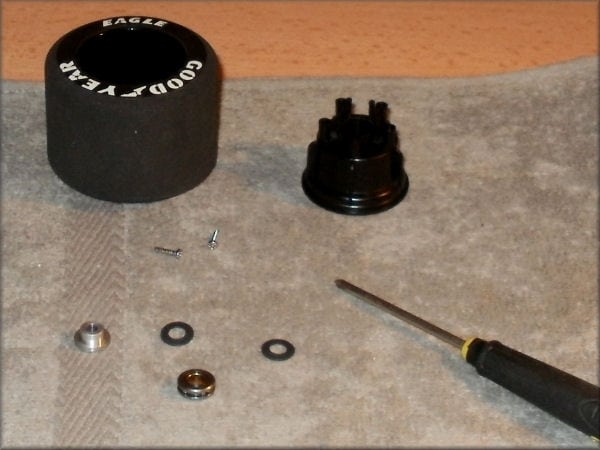
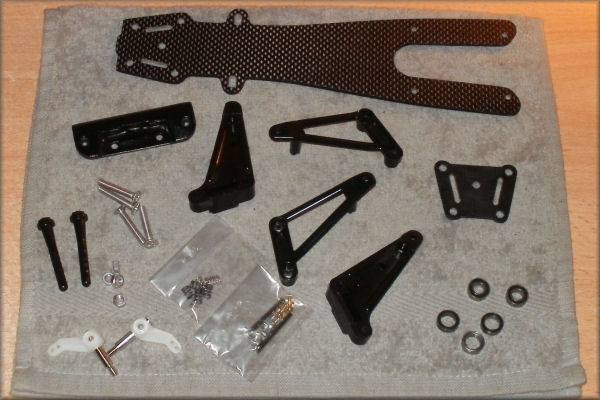
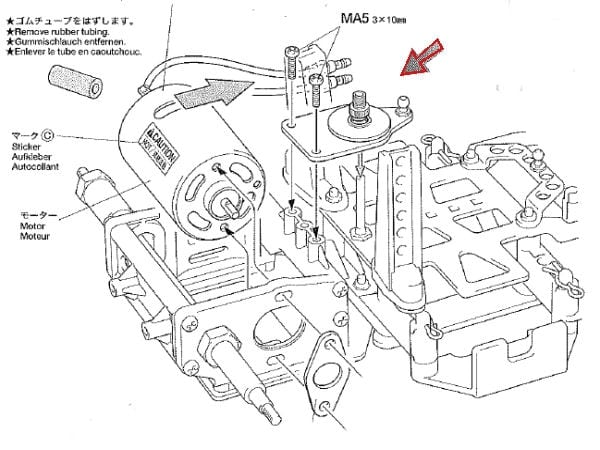
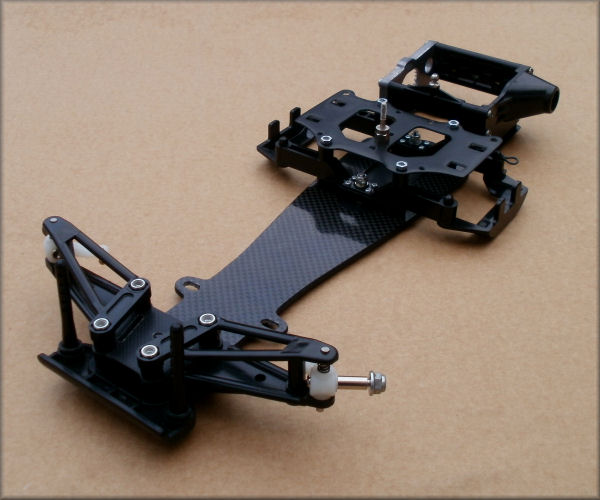
Then I gathered all the parts for the motor case (with Lars' aluminium motor mount!) and bolted everything together :


Soon to be continued again...
Attachments:

Please Log in to join the conversation.

Last edit: by Edou.

Re: Carbon Group C - F1 Ferrari F40 12 years 2 months ago #6830

  • Edou
  • Edou's Avatar Topic Author
  • Offline
  • Hopping Mad
  • Hopping Mad
  • Posts: 6135
  • Likes received: 483
I'm considering hopping down the C11 chassis and 'borrowing' the carbon rear axle from it. :whistle:
Before today I could only fit the Group C wheels which differ quite a lot from the F1 versions.

I have a set of F102 wheels here but did not have a specialized (small) screw driver for it...
But I went to a bargain store and got a cheap but very effective set.
And when I opened the wheels I found another nice surprise... a one piece ball thrust bearing! So another hop up.


I think I'll put on these wheels for now and switch to a Group C setup later.
Of which I will show the differences in another technical post that is coming up...

Please Log in to join the conversation.

Last edit: by Edou.
Moderators: caprinutstingray-63AndyAus
Time to create page: 0.444 seconds
Cookies are required to make this site work. If you continue to use this site you permit us to use cookies.