|
Still chasing flatness on the superstructure ... a big sanding, two coats of white primer, more filling, sanding, two more coats of primer ... I think it's about ready for the colour coats, weather permitting ...
First skim of filler on the hull ... ... that would appear to be an Austin Maestro on the tin ... 2nd skim of filler - I used a whole 250 "ml" tin 
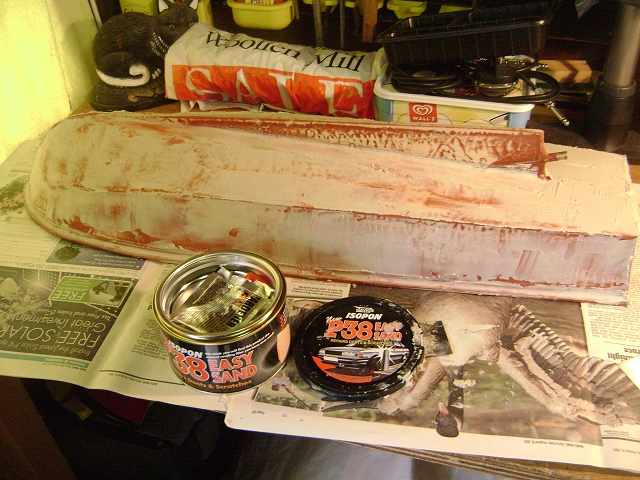
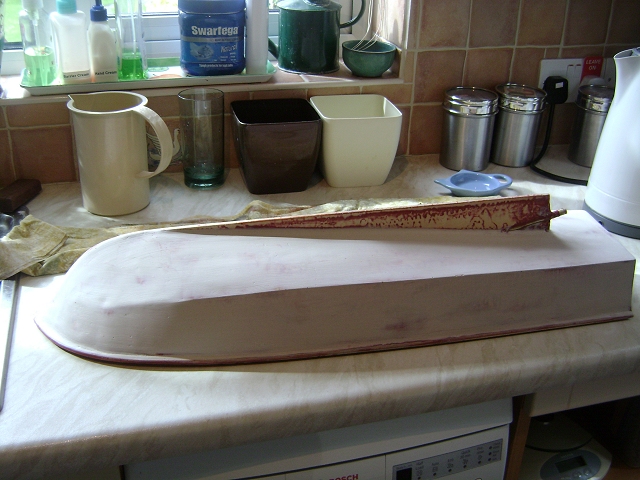
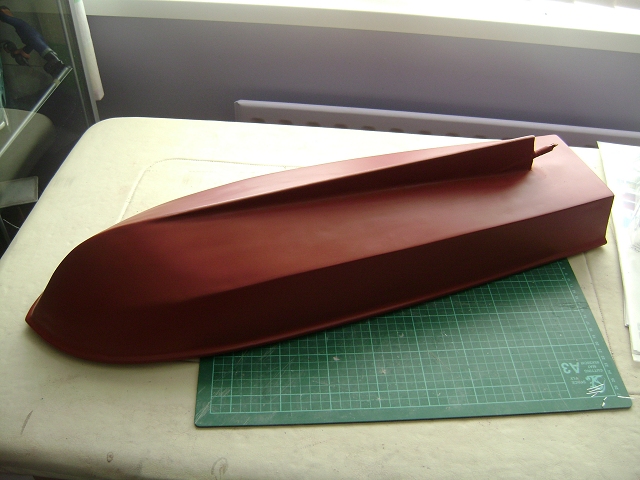
& didn't have enough left over for the keel ... |
Please Log in to join the conversation. |
|
Rain stopped play on spraying the superstructure yesterday; I started sanding the hull be quickly realised that even 120 grit wet & dry would take forever, now I'm waiting on some 60 grit paper. It was either that or get out the belt sander
Next time, I am _so_ cheating & buying a premade GRP hull. |
Please Log in to join the conversation.
Last edit: by Jonny Retro.
|
Jonny, you sure put a lot of effort into this!
I really enjoy following this thread, much because of the nice work, but also due to the amount of good pictures. It's probably been discussed earlier in the thread, but why did you add the glass fiber layer on the hull? -Lars Signature now gets correct formatting if you edit it in your Profile. Use normal BBcode if you want.
www.tamiyabase.com was formatted automatically. |
|
Please Log in to join the conversation. |
|
|
Please Log in to join the conversation. |
|
Paranoia really - I was fairly confident it would be watertight, but because of the way it's constructed (butt joints on the hull skin) I didn't think it would be tough enough if I hit something - a hole anywhere on about 80% of the hull would mean 80% of the volume between the outer skin & the balsa mechanism box would flood |
Please Log in to join the conversation. |
|
Two hours with 1/2 a sheet of 60 grit paper has smoothed things out considerably ...
... although it's a bit rough close up ... ... so I also gave it a tickle with 400 grit: Still an awful lot of holes to chase though: I should have weighed the hull before and after - there was about an inch of gound filler in the bottom of the sink when I got through |
Please Log in to join the conversation. |
|
|
Please Log in to join the conversation. |
|
Can't really remember where I'd got to on the superstructure ... it's had sveral coats of white plastic primer, then more of VW Alpine white. I wanted to do something with the windows, but my ability to paint a fine straight line freehand was laughable, so I masked the borders instead:
Paint was Tamiya (see!) XF85 Rubber black ... Of course, I did get a bit of bleed, but don't worry - I have a cunning plan ... ... edging them with thin slices of "silver" self adhesive vinyl sheet: I also had a crack at the RAF roundel on the roof, made from vinyl sheet again - a large dot of red & a ring of blue, then cut up (I think into 13 pieces) to fit around the roof ribs ... I'm glad I only had to do one of them I've also painted the plinth in XF20 Medium Grey, that will need some edging too ... Hull has has 3 coats of red oxide primer ... so I'm back to where I was a week ago, just a lot flatter
The following user(s) Liked this: AndyAus
|
Please Log in to join the conversation. |
Dude, the hull looks awesome. Worth the tennis elbow.
The following user(s) Liked this: Jonny Retro
|
|
Please Log in to join the conversation. |
Jonny, for finer black edging/lines (eg window surrounds) I use a black permanent fine pen eg CD pen or OHP pen - it's easier & quicker than paint, doesn't bleed through paint or masking & if it goes wrong it's easily removable with meths etc.
Update on waterslides - once set they don't come off with water. In fact, they don't come off after an hour immersed in brake fluid either.... (Just finished laquering a body then was reminded why I don't ever use "Plasticote" paint - wretched stuff won't dry properly & their laquer attacks their paint... currently stripping it all off to start again, a week's work wasted)
Custom F2
...
Hilux crossmember drawing
...
F2 axle drawing
...
Quattro radio lid
...
Holiday Buggy motor bracket drawing
...
Quattro resto
...
HitnMiss engine
...
Wild Willy resto
...
Mardave Cobra resto
...
Thunder Dragon resto
...
Grasshopper resto
...
XR311 resto
...
Modded XR311
...
Carbon 25th scratch build
|
|
Please Log in to join the conversation. |