TOPIC:
Sand Scorcher repaint 8 years 10 months ago #34877
|
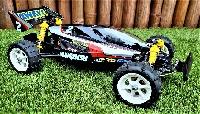
Respect, Jon!
Awesome build and result! Signature now gets correct formatting if you edit it in your Profile. Use normal BBcode if you want.
www.tamiyabase.com was formatted automatically. |
|
|
Please Log in to join the conversation. |
Sand Scorcher repaint 8 years 10 months ago #34931
|
Santacruz picked the Scorcher shell up yesterday, and left me something else to fiddle with - a Mk.I Rough Rider, boxed with a few odds & sods that might come in useful. The plan is to give the chassis a thorough going over & Scorcher wheel/tyres out of my spares box, and the body will go on the shelf, maybe getting another SRB chassis at some point in the future.
In the meantime it does need a bit of attention.... it looks basically sound: ... but does have some significant damage on the left hand top corner of the white bit: ... plus similarly ground in dirt on the right side. Lower rear corners are better. Now, if it was mine, because of the damage & the fact the white is just bare plastic & the red has been put on with no surface prep, I'd be probably be looking at a full strip down, repaint & repro decals - though it's a tough call, I've never had any used car in that good a condition to start with What I'm going to try is a less invasive fix of the just the break on the left top corner. First step was a wipe down, followed by removing the roof. Initially I had thought to just sacrifice the JT logo & work around the Bell & Auto Haus decals - but the more I thought about it, that just wasn't going to work, so they needed to come off, but still be useable again. Heating with a hair drier & some delicate work with a chisel pointed craft knife got them off, and stuck on some double sided tape. Unfortunately the big Auto Haus one suffered a bit - but they was a spare one in the box (stuck to a Scorcher sunroof) that came off better. Adhesive residue I cleaned off with IPA - which fetched off some more dirt... After a sand with 120, 240, 400, 1200 & 2000, the surface was looking a lot better so I glued up the crack, clamping for a couple of hours to be sure it had set. The spare Scorcher roof came in handy again - this time providing shavings to make a filler (mixed with DCM). Next time I'll make it thinner - I'd started with the consistency I thought it ought to be & by the time I'd got it on the body it was drying really quickly ... I'll leave it to set overnight, hopefully it'll sand back a match & I can put the decals back on. |
|
Please Log in to join the conversation. |
Sand Scorcher repaint 8 years 10 months ago #34933
|
Jonny is the dead bodies Doctor
|
|
Please Log in to join the conversation. |
Sand Scorcher repaint 8 years 10 months ago #34935
|
If you can't fix it with a hammer, you've got an electrical problem mate
The following user(s) Liked this: stingray-63
|
|
|
Please Log in to join the conversation. |
Sand Scorcher repaint 8 years 10 months ago #34939
|
I suppose it was wishful thinking the join would be invisible, I think what's happened here is that dirt in the joint that I couldn't get to without dremelling the break right out & has leached into the fresh plastic... oh well, it was a bit of an experiment...
The question is where I go from here: 1 - call it done & put it back together 2 - clean up the other corners with the same techniques (less the filler) 3 - peel all the decals from the white area + prep/prime/paint 4 - full strip/repaint/repro decals. Given the brief & that it still looks miles better than it did, I'm buying into #1 |
|
Please Log in to join the conversation. |
Sand Scorcher repaint 8 years 10 months ago #34943
|
for me, keep the original decals (as possible) and #4 method. But I am not the Doctor...
|
|
Please Log in to join the conversation. |
Sand Scorcher repaint 8 years 10 months ago #34944
|
I'll take a slight bit of artistic licence with that, but I think that's very doable
I see where you're going with that, but I found removing 35 year old damaged decals time consuming and difficult, plus they do suffer a bit in the process ... it's ok for a very small number, but there's no way I'd want to do the whole body that way. |
|
Please Log in to join the conversation. |
Time to create page: 0.235 seconds


