TOPIC:
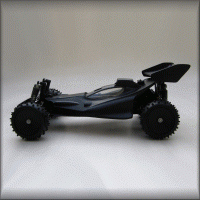
Vintage Manta Ray customisation quest 10 years 8 months ago #23705
|
The following user(s) Liked this: Edou
|
|
Please Log in to join the conversation. |
Vintage Manta Ray customisation quest 10 years 8 months ago #23817
|
But your J parts, willingness on eddrick's side to make two short chassis mounts and an e-mail to fibre-lyte and... Okay, a bit of self control now. |
|
|
Please Log in to join the conversation.
Last edit: by Edou.
|
Vintage Manta Ray customisation quest 10 years 8 months ago #23818
|
|
|
Please Log in to join the conversation. |
Vintage Manta Ray customisation quest 10 years 8 months ago #24139
Phase 1 completed on the Hummer : |
|
|
Please Log in to join the conversation.
Last edit: by Edou.
|
Vintage Manta Ray customisation quest - rod mod 10 years 8 months ago #24156
|
Rear mounting point - 3x15mm titanium screw, blue lock nut, ball pivot and ball nut :
Rod has not been threaded yet but it's nicely parallel at least... It could use some hollow carbon to look right as well : Tower stabiliser has been adapted in length and moved to the middle to create a continuous line : The angle of the adjuster is on the edge of what it can take but it won't flip off easily... |
|
|
Please Log in to join the conversation.
Last edit: by Edou.
|
Vintage Manta Ray customisation quest - rod mod 10 years 8 months ago #24157
|
I see dead gearbox-covers
|
|
Please Log in to join the conversation. |
Vintage Manta Ray customisation quest - rod mod 10 years 8 months ago #24158
|
Warning: Spoiler!
And the one that seems to be alive, has been dead all the time as well.
Finally got the shocks fitted again too. I'm now using 70mm (instead of 60mm), with two O-rings on the piston shaft. This makes them a few millimeter shorter... Additionally, I've mounted them on the most outer screw hole in the suspension arms. They have enough length for that - and for off road a bit of an angle on the shocks (less vertical) is quite a good thing. Can't believe I've been fiddling around for days, trying to optimise the flow inside the dampers. Then I thought it was the shock caps I switched with the shorter model... Stingray even send the dampers back from France so I could put the correct ones back on. But in the end I think it simply came down to me screwing on the caps too tight... The thread inside is a lot longer than is necessary to tighten the oil seal. So against my nature, I just stopped this time around whenever I could feel the seal had enough pressure. Works like a charm now. |
|
|
Please Log in to join the conversation.
Last edit: by Edou.
|
Time to create page: 0.141 seconds


