TOPIC:
Re: Cheetah wreck resto 12 years 8 months ago #2280
|
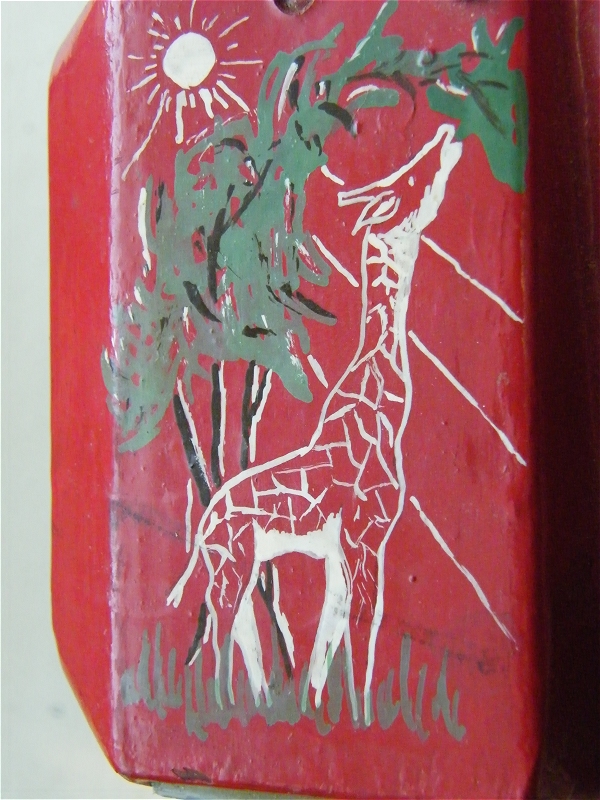
You can certainly see the hand of an artist in the drawings... Wonder what this person would be able to create with an airbrush - and maybe some practice with that. No matter what it looks like now, it must have been a lot of work to create all the details. Looks like the car needs a lot of work. But I'm sure you'll be able to make it a beauty... |
|
|
Please Log in to join the conversation.
Last edit: by Edou.
|
Re: Cheetah wreck resto 12 years 8 months ago #2284
|
Done a bit of dismantling ...
I was pretty sure that was an Action Man jacket (think I had one the same mid/late 1970's) ... I knew the bodywork was going to get worse before it'll get better - it had to come apart for paint stripping, repairs, filling, replacing broken bits, etc, etc - but that did mean breaking the glue joints - which was always going to cause extra damage ... ... shame that included the back lights - including one of the lenses - though ... the jerry can cage refused to come off cleanly - predictably enough at the most difficult point ... Doesn't show up that well in the photo, but the "Parcel Shelf" has been melted & warped by glue ... The rear valance didn't suffer any extra damage - but it was toast to begin with ... By comparision, the RX antenna needing replacement will be so easy ... Drivers seat has pretty much been ruined by glue melting/rotting it - I just finished the job Accidentally took a bite out of one of the sills ... Also managed to break off this bracket ... Wheels have been cracked by paint ... I may get to start on the paint stripping, but the Grasshopper I promised to build/upgrade in part payment for my Sand Rover has finally arrived, so that will have to be my priority ... |
|
Please Log in to join the conversation.
Last edit: by Jonny Retro.
|
Re: Cheetah wreck resto 12 years 8 months ago #2488
|
|
|
Please Log in to join the conversation. |
Re: Cheetah wreck resto 12 years 8 months ago #2490
|
Had a go at paint stripping today:
After 10 minutes - looks like Humbrol Enamels are quite resistant ... ... gave everything a good "agitate" with a toothbrush, added more Graffiti Remover & left another 10 minutes ... ... then scrubbed off under the tap ... No photos of the 2nd and 3rd "cycle", but I did discover multiple paint layers - most of the body was red over green over bare plastic, but the middle third was white over red over silver over green over the plastic - and the white was very resistant to the remover - it didn't get melted at all, just flaked as the paint underneath sucked the remover in from the edges ... I used a small knife to speed things along a little by doing some judicious scraping... Finished stripping: |
|
Please Log in to join the conversation. |
Re: Cheetah wreck resto 12 years 8 months ago #2491
|
Before moving on, I have to make a hard decision - I can either:
A - glue everything back together, reinforcing & patching where necessary, fabricating new body sections, struts, seats, tools, jerry can holders, rear lights, do lots of filling, sanding, more filling, priming, more sanding, more filling etc etc - and still end up with a car that although it'll probably look like a I tried hard, is not as Tamiya intended (wrong driver for a start) ... _ or _ B - do all that gluing, filling, sanding etc, but not bother with the interior or driver, smooth over where the exterior details should be -i.e. go for a "civillianised" look (or "Rambo Lambo" look I'm leaning heaving towards "B", myself ... "C", a "restoration" with new parts isn't an option due to the cost - TBH if I wanted a boxart Cheetah I never would have bought this one in the first place ... This is not a poll as such, but I would like to hear some other inputs |
|
Please Log in to join the conversation. |
Re: Cheetah wreck resto 12 years 8 months ago #2492
|
Wow, you have really set off on a troublesome route
If I were to do anything with that body, I would go for the "B" option. I can't see this project returning to original state (which is always my preference), but I am sure you can make a really cool, alternative looking body based on what you got. Regarding the torsion bars: Original ones are really hard to find in one piece, but have you looked for torsion bars from the reissue XR311? I know there is a difference in wheelbase between the Cheetah and the XR311, but maybe you can get it to work? -Lars Signature now gets correct formatting if you edit it in your Profile. Use normal BBcode if you want.
www.tamiyabase.com was formatted automatically. |
|
|
Please Log in to join the conversation. |
Re: Cheetah wreck resto 12 years 8 months ago #2493
|
Hey JR, I say go with option "B" I think you can pull off a really nice custom Cheetah. Besides, the cost of finding replacement parts will be crazy. "B" is my vote.
My Projects:
Bullhead Rebuild ... Ford F350 Mods ... Manta Ray Revival ... Custom Super Hornet Build ... TL-01 Crawler ... CC-01 Pick-up ... CR-01 With Hop ups ... Project Unknown ... Clod crew cab ... Other: Custom Display cases ... Limited Slip Diff(LSD) ... |
|
|
Please Log in to join the conversation. |
Re: Cheetah wreck resto 12 years 8 months ago #2498
|
I do have a set of 4 unbroken torsion bars, but seeing how rare & fragile they are, I'm not inclined to use them for actual running (I always plan to have my cars as runners, it doesn't always work out that way, but I always _plan_ to) ... my backup plan is/was 4mm square "key" bar (plus a hacksaw & file), but there's no twistability on a 300mm length, let alone the much shorter pieces that I'd need ... I have another plan, but it's way more fiddly & awkward that I'd hoped for
Yep, I think it has to be "B" ... I don't really believe in omens, but I just picked up the underside of the body, & the back third just fell off - I guess it must have been cracked & the remover & handling must have finished it off |
|
Please Log in to join the conversation. |
Re: Cheetah wreck resto 12 years 8 months ago #2550
|
Have made some more progress - after a lof of Dremelling I attacked my stash of 1.5mm styrene sheet ... first up was the bit forward of the winch, I addded a patch to the broken mount & made up three new wee brackets, unfortunately one of the loops was missing, so I've just put in a simple bar made from heated & stretched plastic kit sprue:
Three words: ... Bad ... Mother ... Hubbard "Windscreen" is styrene sheet, as are the bits in the headlamp apertures, the white bits under them are thinner styrene to give me something to fill up to, the base of the windscreen is 3mm x 5mm rectangular styrene tube, window surround bar hopefully looks like the original ... ... but is in fact 2 sections of sprue culled from a Tamiya "Ford Mutt" 1/35th kit: The back end is pretty much all new - rear "window", engine cover & the three sections that make up the rest are all styrene sheet... Right side is a patch where I damaged the sill getting the shell apart, more styrene sheet, + three sections on top of it to try & give it some detail ("A" pillar, door with the "window" cut out, "B" pillar & back) ... I did try the "fixed" panel with a "window" in it, but it just didn't look right ... pity I only decided that after leaving it overnight so I had to chisel the panel off ... Left side is the same arrangement for the aperture infill - the door will have to wait until I've filled the gap left by overly enthusiastic Dremelling... Now the _really_ hard bit starts - filling & sanding. I've got two choices - Milliput epoxy putty, which can be wetted & smoothed by hand, but (being epoxy) is really difficult to sand; or car body filler - which you really don't want to touch, can melt styrene, but is easier to sand ... |
|
Please Log in to join the conversation.
Last edit: by Jonny Retro.
|
Time to create page: 0.221 seconds


