Keyword

TOPIC:

Richard's 4x4 Lunchbox with DF01 drivetrain. 2 years 11 months ago #66723

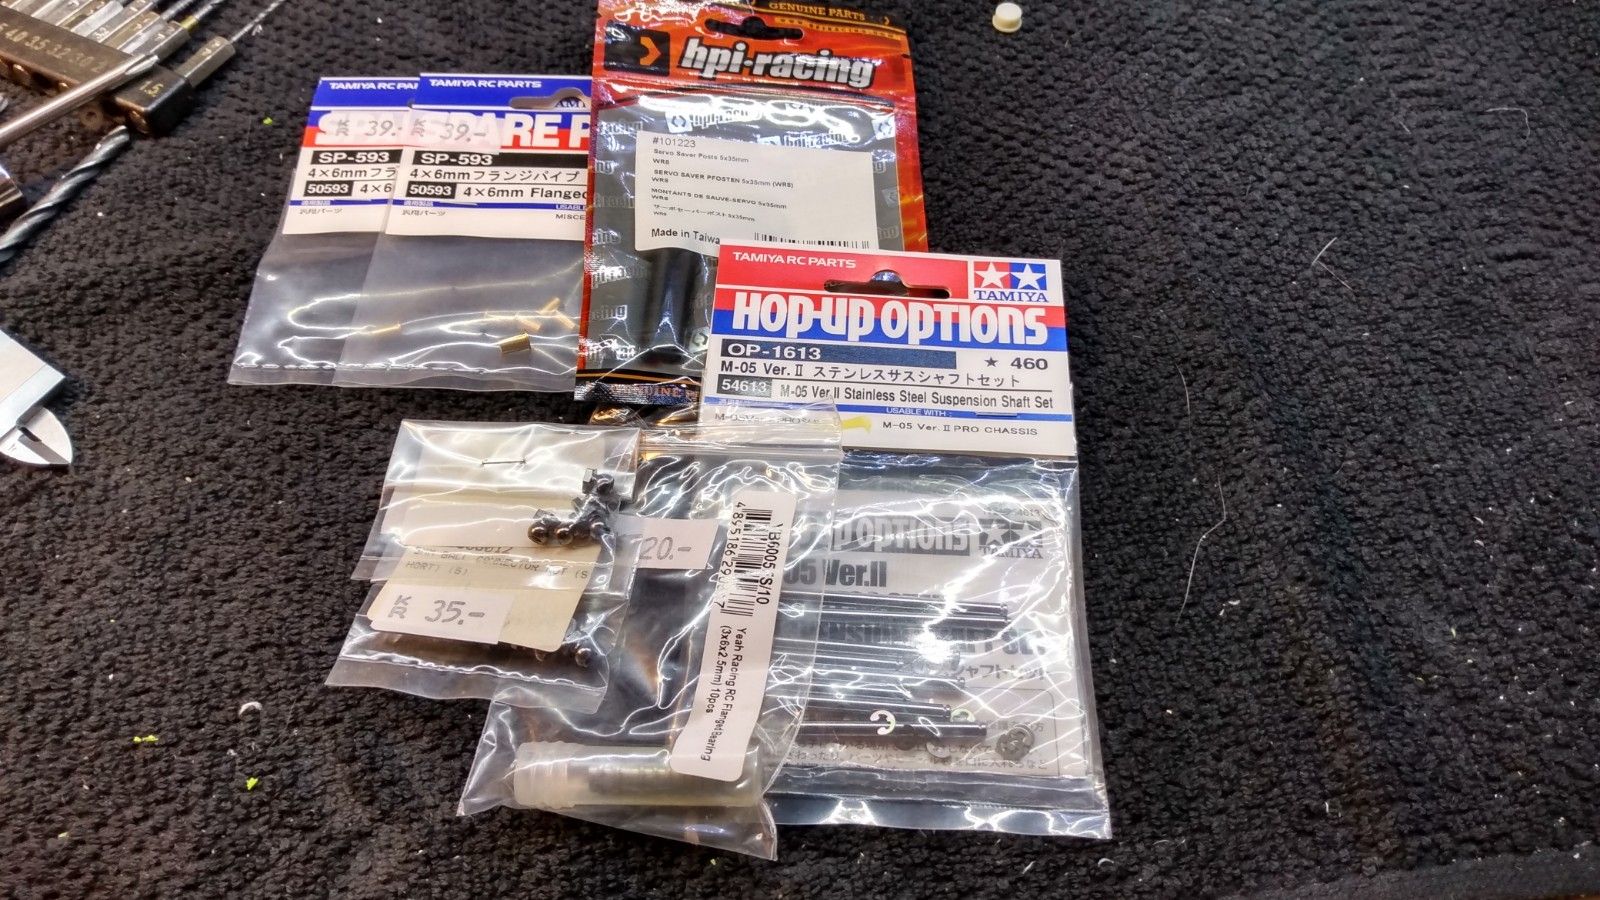
A few parts arrived today...


Sadly the HPI Servo Saver Posts did not work as they was only threaded about 10mm in each end.
And since they are hardned, non of my drillbits was able to chew into that stuff.
My plan was to drill them with 2.5mm drillbit, cut them to length and then tap them with M3 tap.

So had to come up with something else.
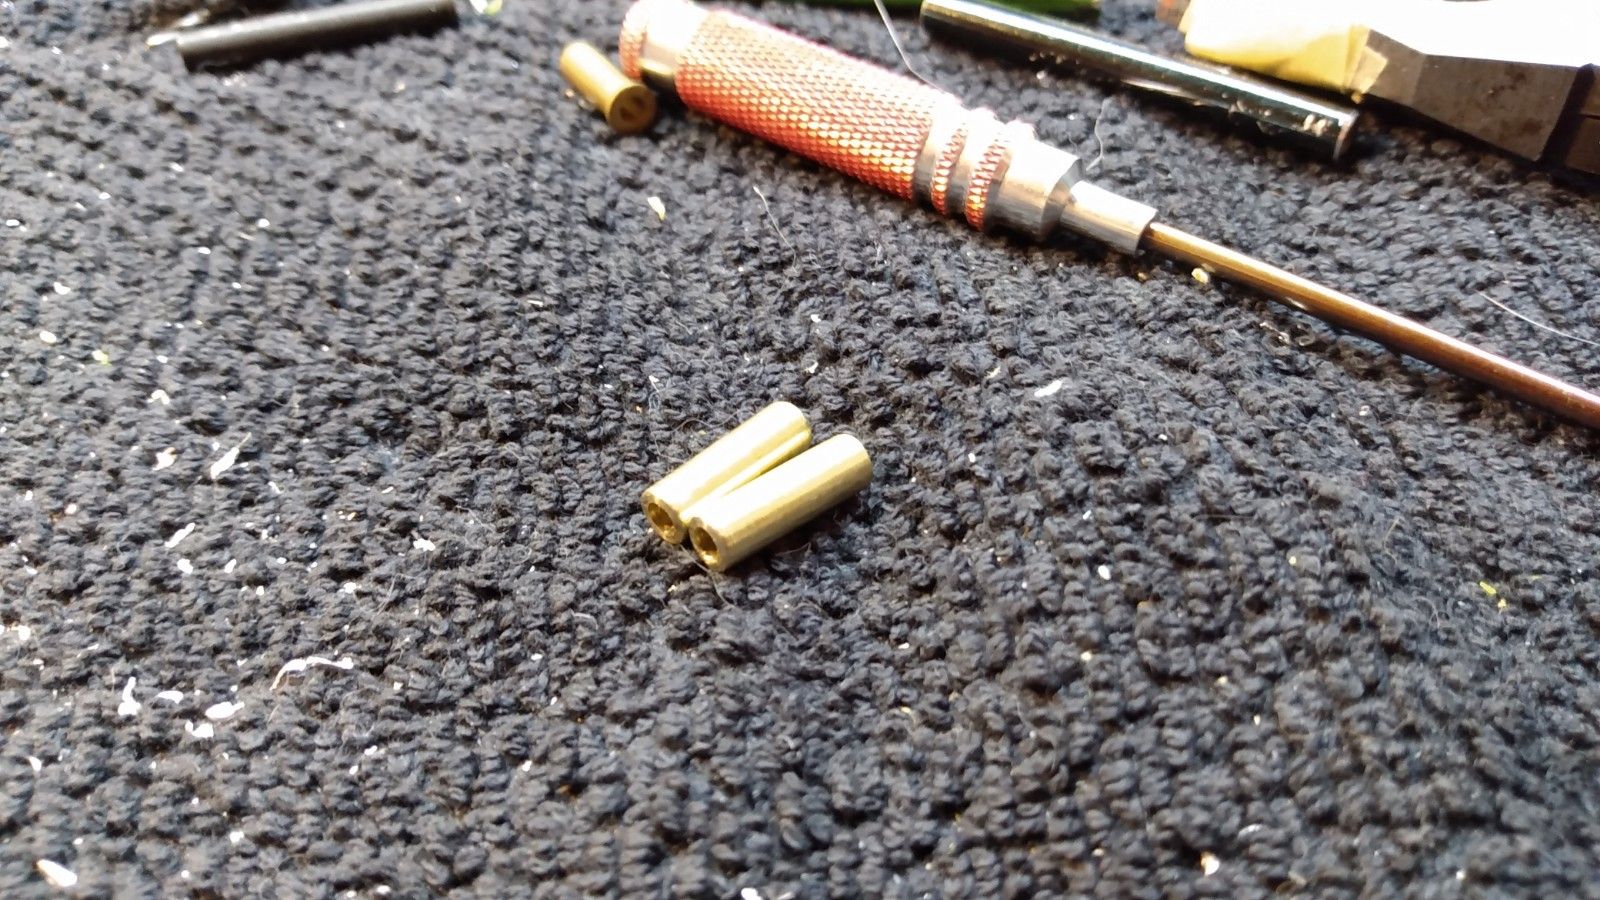
I needed standsoffs with 5mm diameter and 3mm hole or threads.
Happend to have some brass 5x3mm shafts in my link box, that just needed a touch of sandpaper to make a 5mm bearings slide on it as it was just a tad amount over 5mm.
Took the brass tube and turned it down in my drill with some sandpaper. cut them to length, drilled them with 3mm drill bit, sanded the ends after cutting, and this was what I got.


Installed those bellcrank posts, along with the correct shims etc
Seems like I forgot to take a picture of that.

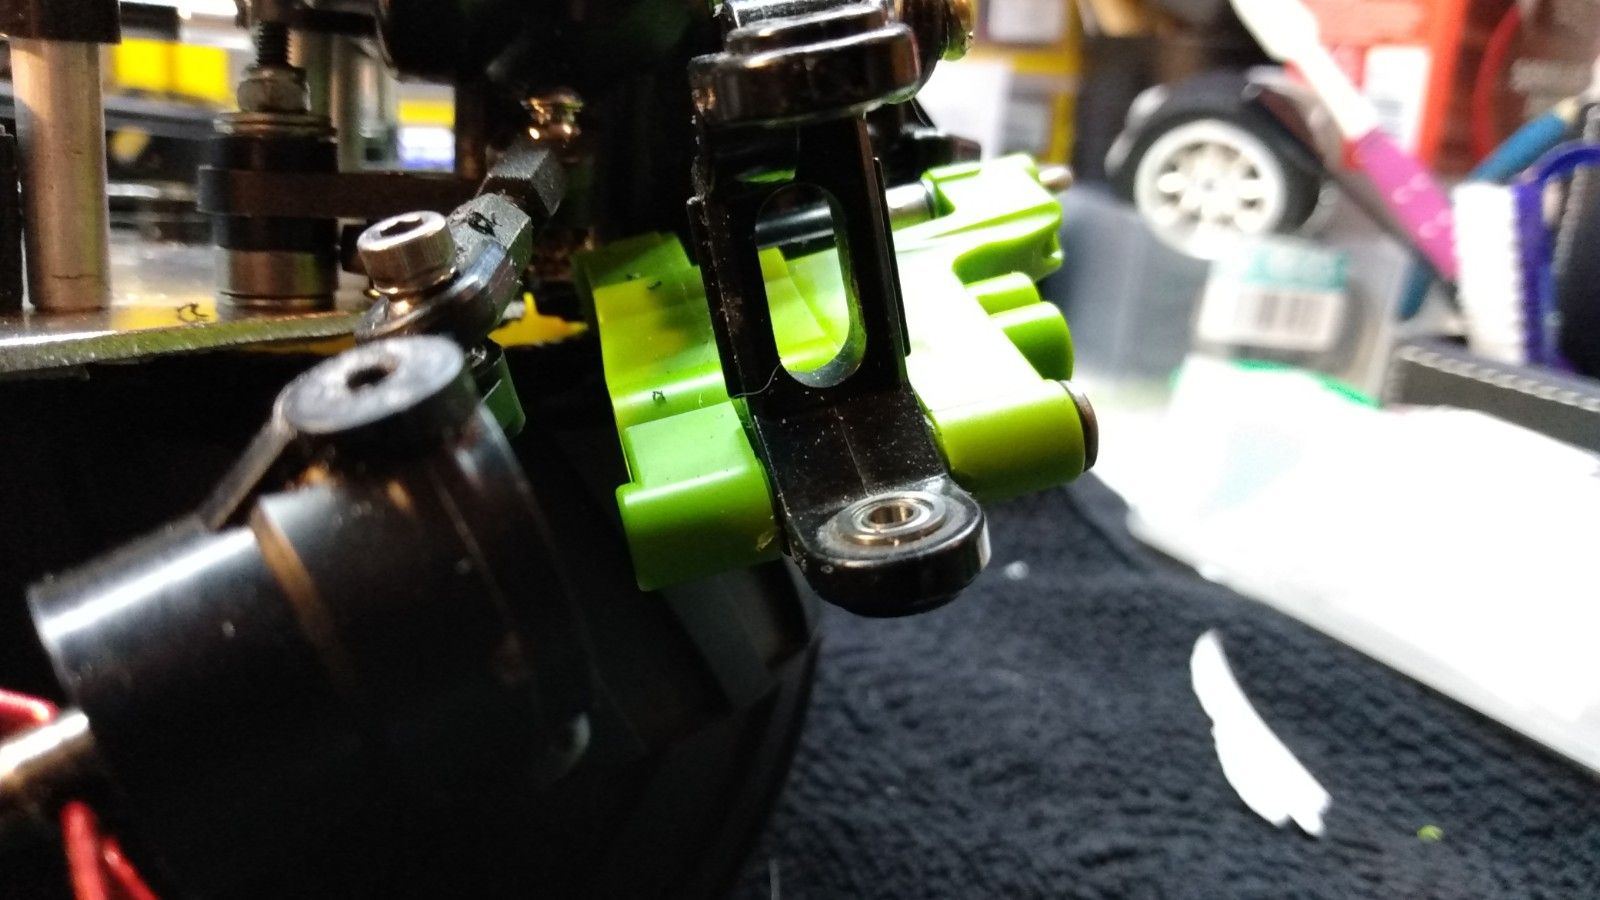
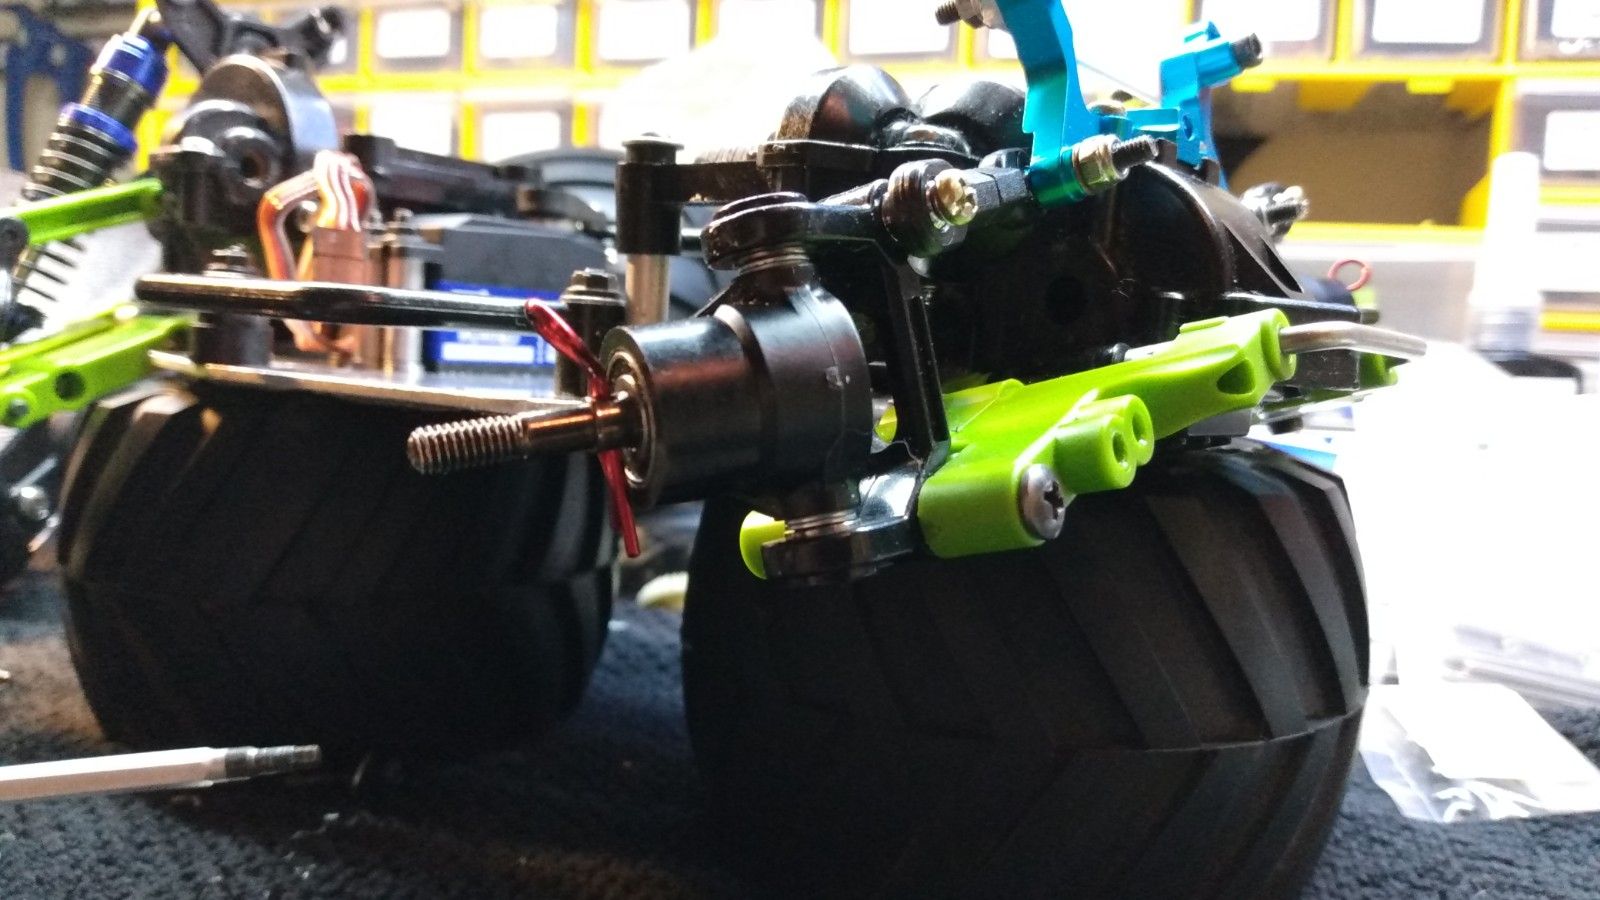
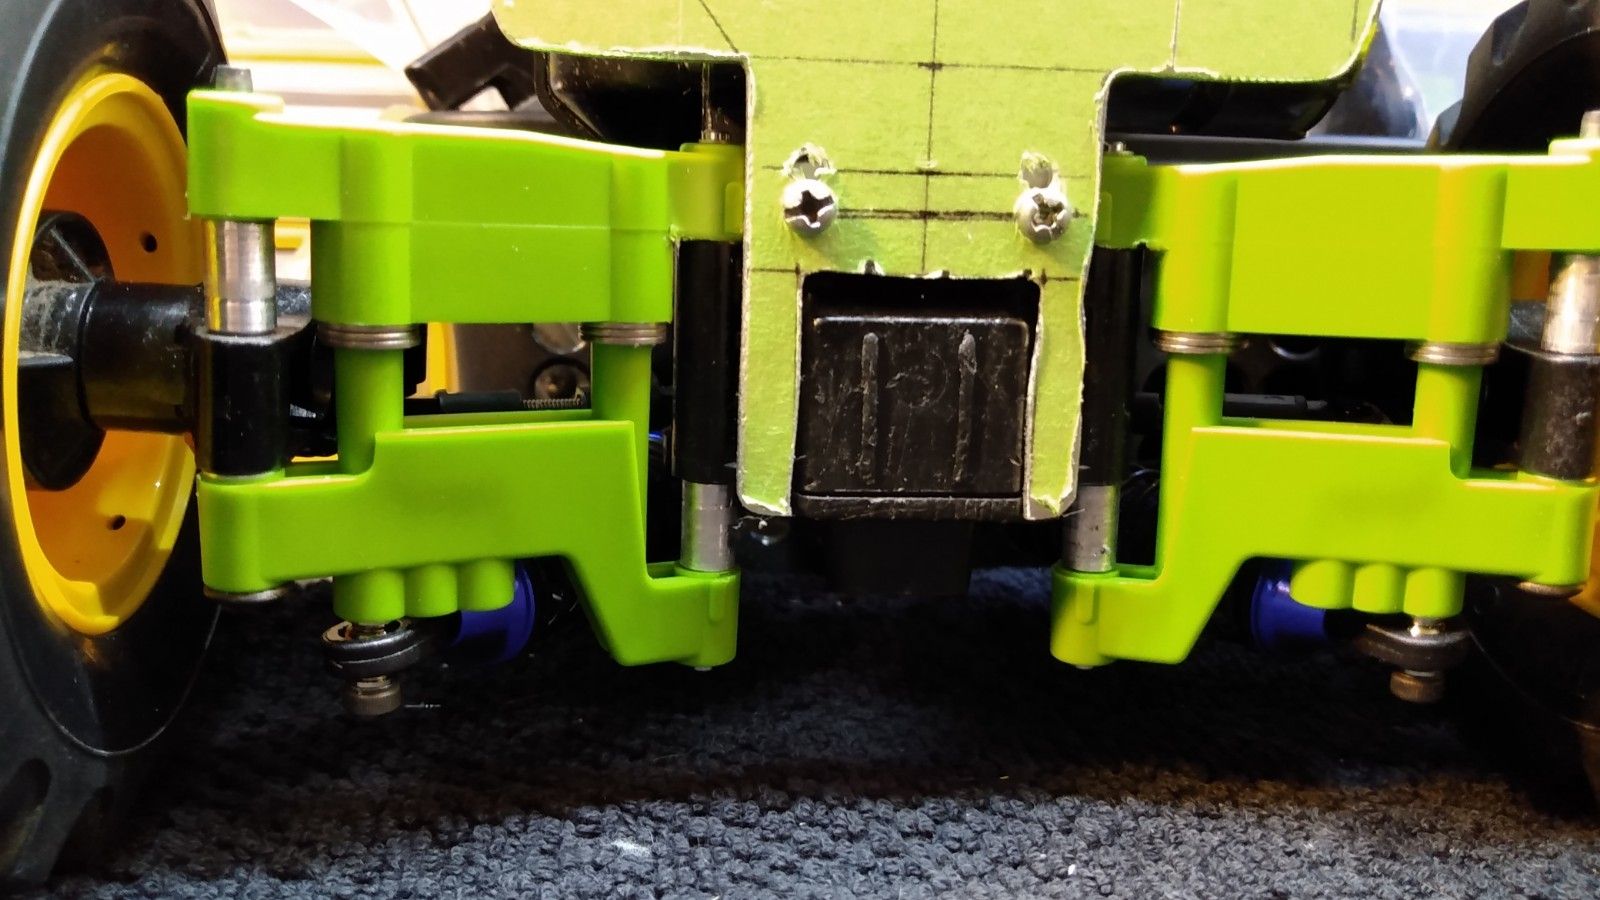
Next I a bearing mod in the c-hubs. 
Simple job really as all it takes is drilling them with 6mm drillbit and then instal the flanged 3x6x2.5 bearings on the inside.
This frees up the steering and prevent wear on the c-hub where the kingpin rides.


3x8mm cap head bolts fits perfectly in the king pin hole.
If your uprights uses M4 king pins, you need to use 4x7x2.5mm flanged bearings.


On my setup I needed to add 2x small 3mm washers on top and bottom of the upright to take up the space needed as the TA02 uses uprights that are narrower in thickness than the TL01 c-hubs I'm using.


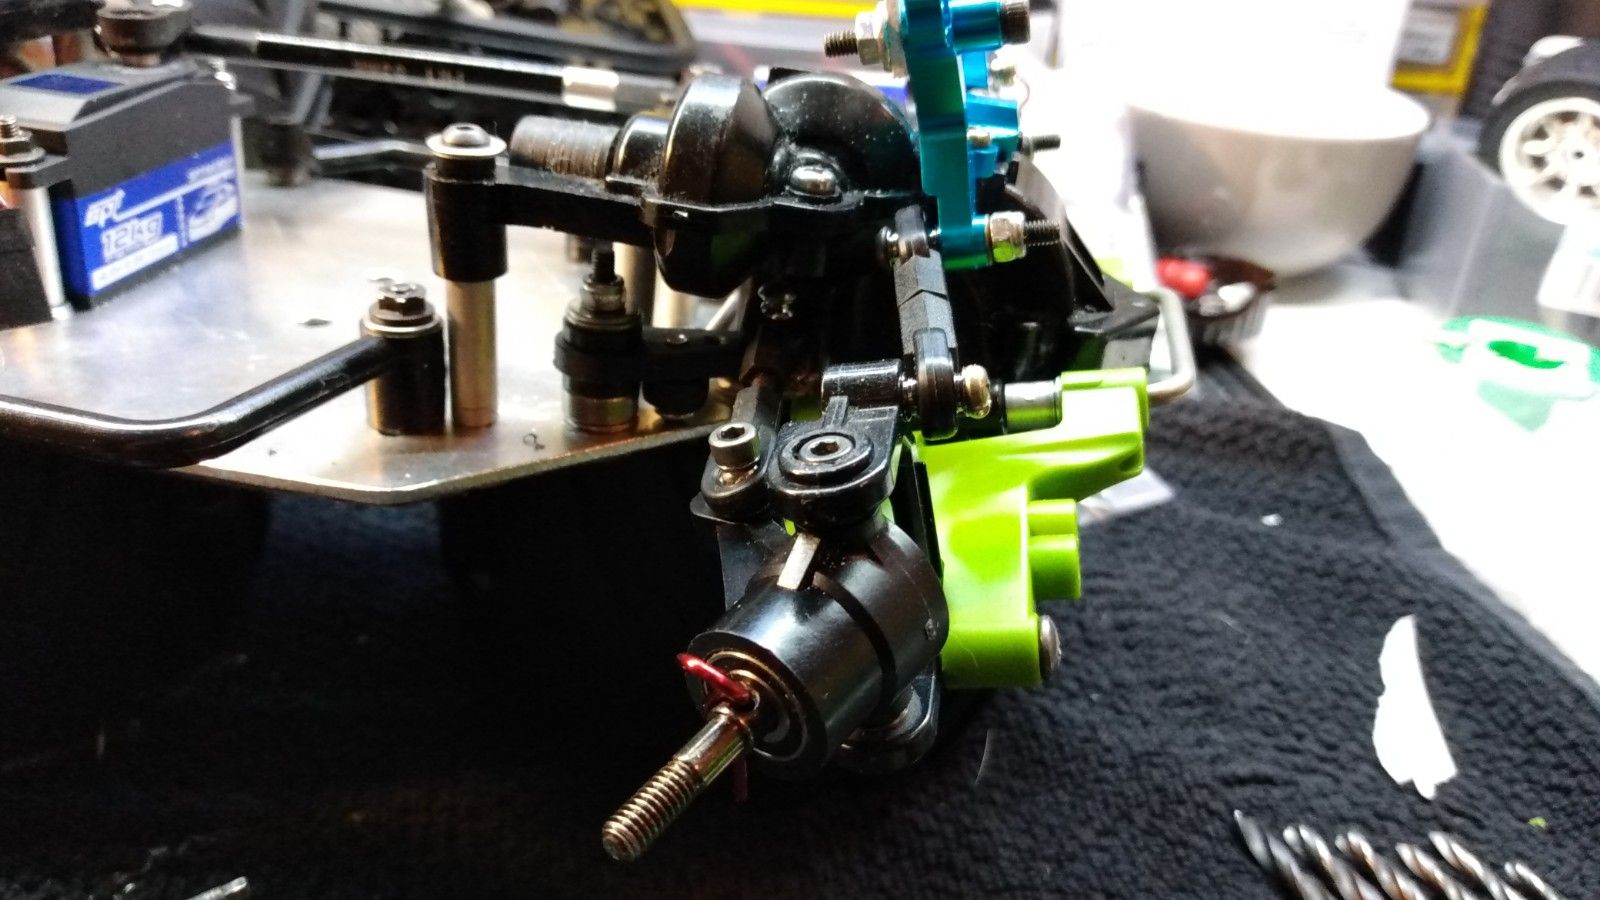
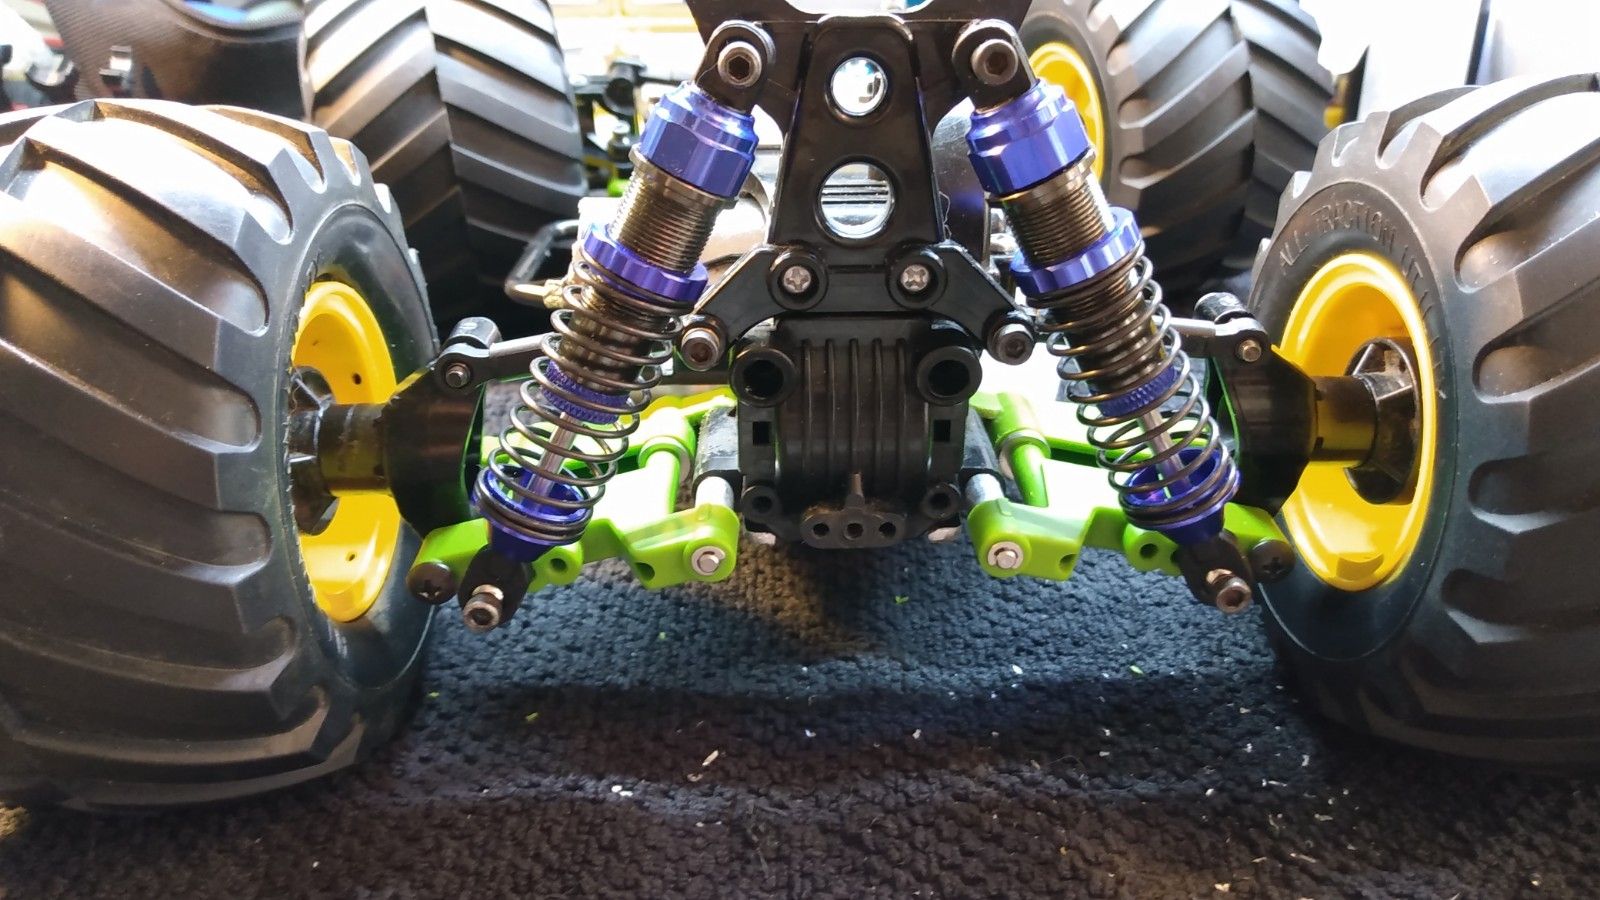
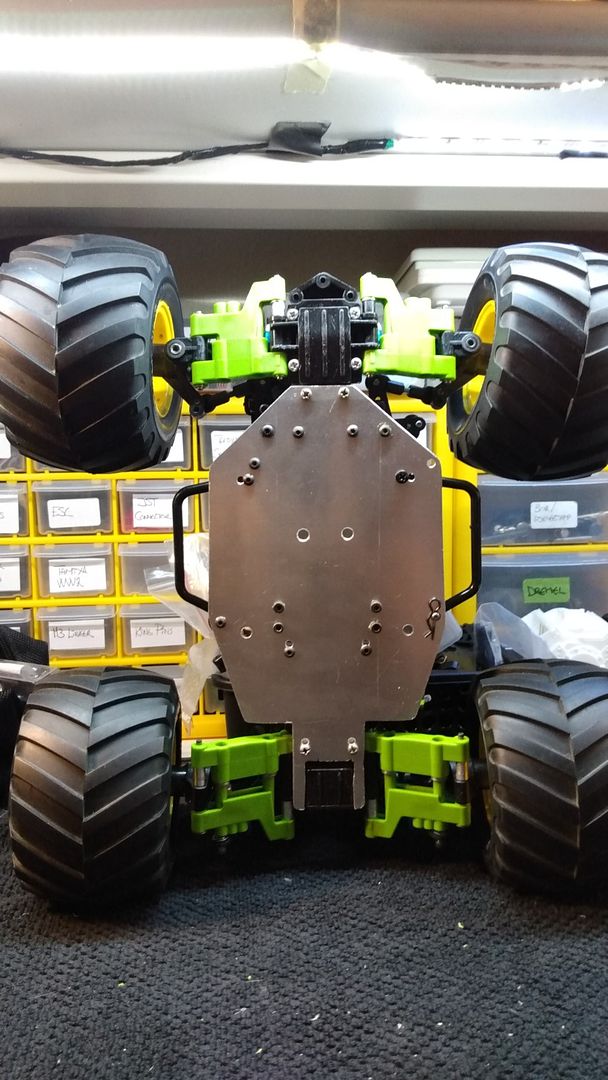
This is how I left it today.


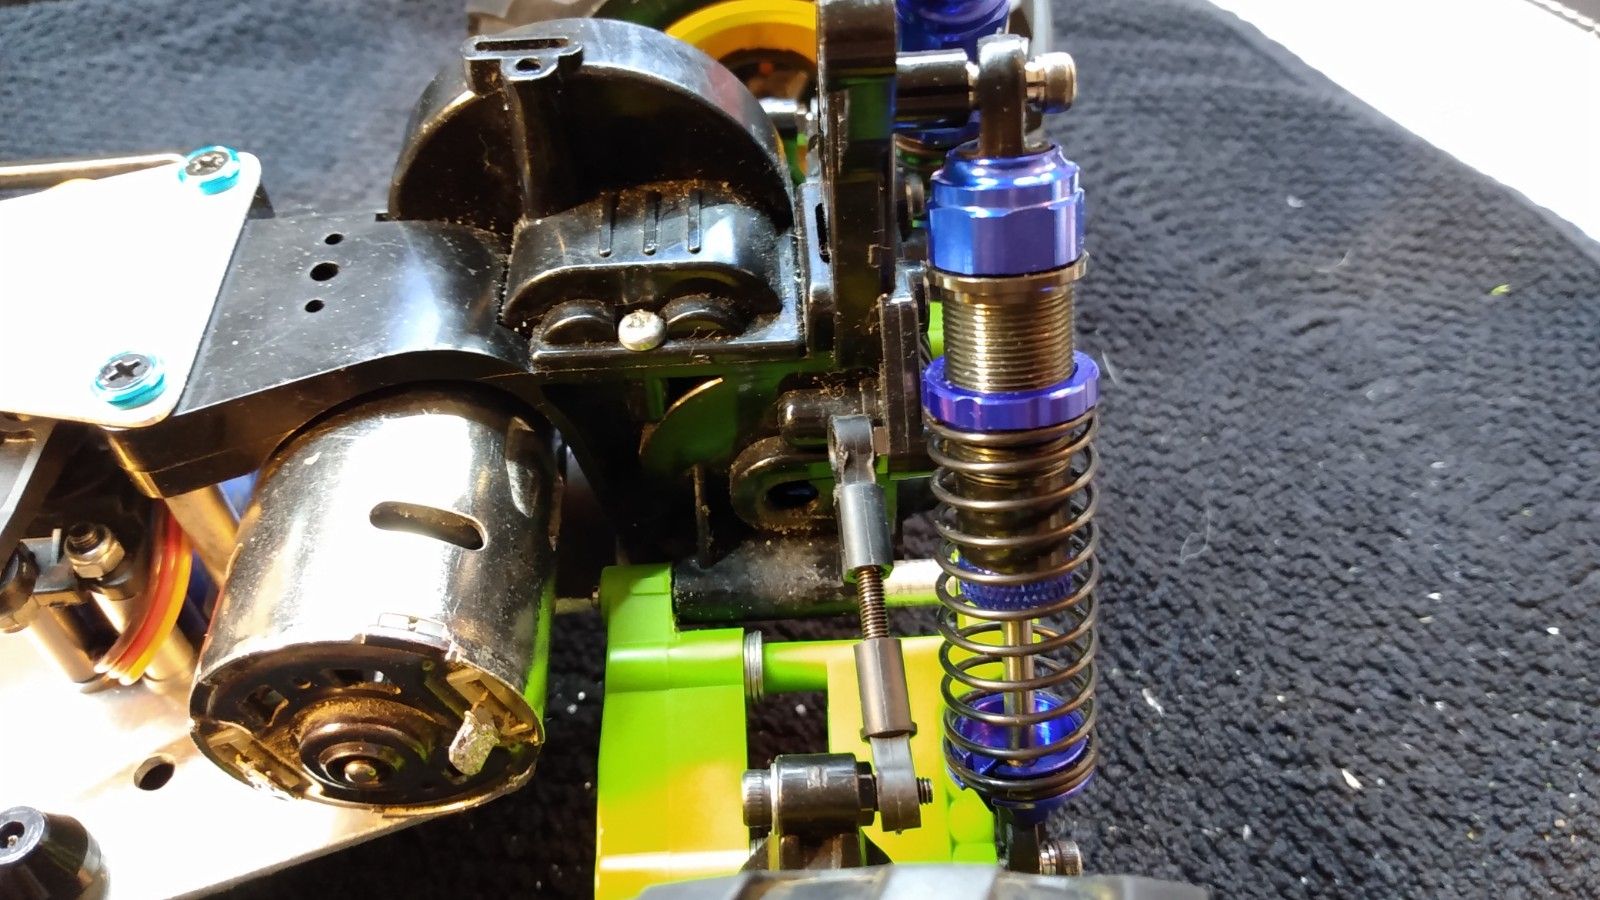
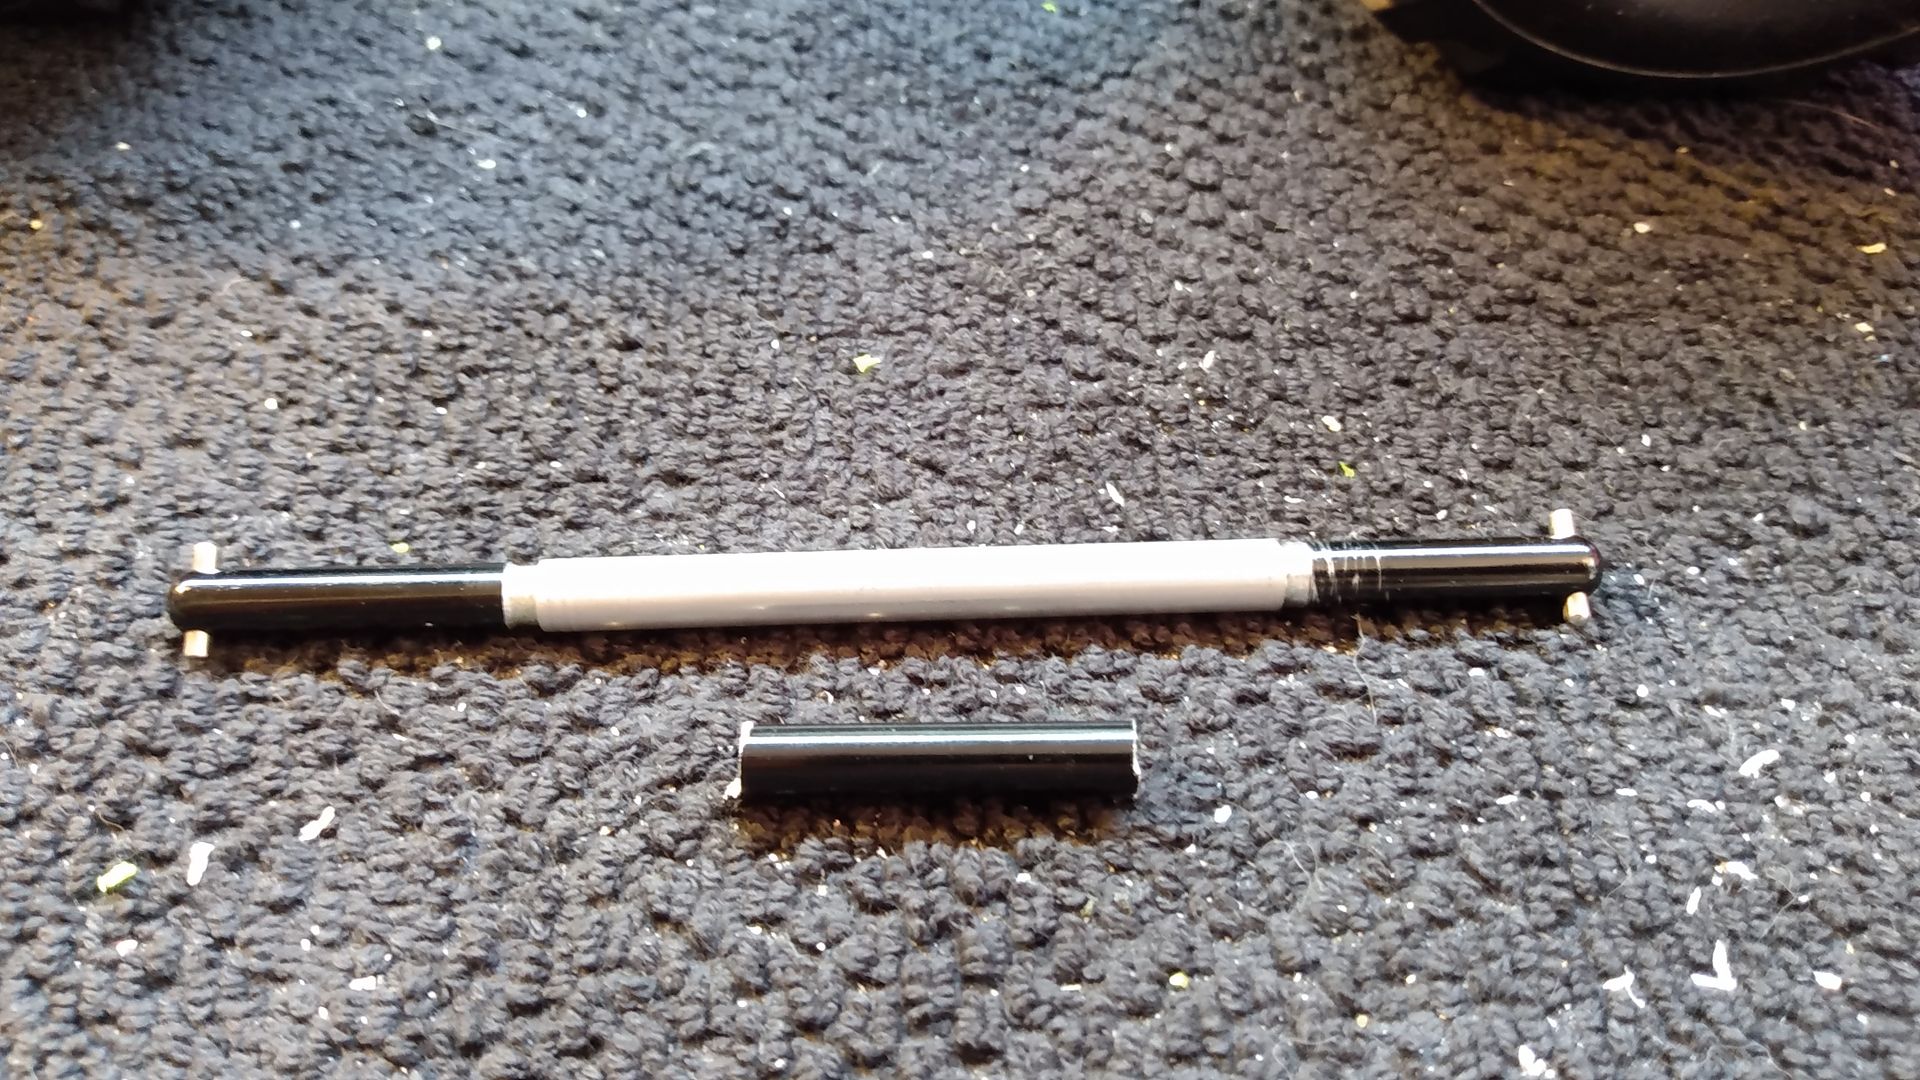
Sadly the short 5mm ball nuts did not work for me.
There was no pivot angle in that setup with standard Tamiya 5mm ball ends.
Hight of the ball from the "base" was far too close to make it work.
So for now I'm still using Traxxas rod ends as they give more angle than most regular ball ends.
In fact I need a tad more angle of the steering rods as they now are being bent when the suspension arm reaches full travel in both directions, when steering angle is added.
Reason is because the bellcrank ends is pointing outwards of the hinge pin point so the steering rods are shorter than the suspension arm itself.
This would have not been a problem if I used the stock steering bellcrank as they are shorter than the end of the gearbox, mine goes past that point and are ending between the end of geearbox and the drive cup location.
This one downside of creating something custom as one problem creates another one.

But I do like problem solveing, and with budget in mind, the task is to solve the problems as cheap as possible, but still work 
The following user(s) Liked this: stingray-63, Al, jord001

Please Log in to join the conversation.

Richard's 4x4 Lunchbox with DF01 drivetrain. 2 years 10 months ago #66857

After a little sunbath for 35 min, that was enough to make me feel cooked enough in the 24C weather I wanted to do some rc stuff again.

First I made new upper new camber links for the rear, using 25mm setscrews, 5mm ball connectors and 5mm ball nuts.
I also fitted the new hinge pins, which made the suspension move much more freely 


They are mounted like this.
I also fitted 4x6 flanged tubes to convert to the chassis end to convert the screwpin holes from 4mm to 3mm hole for the hardware.


Hinge pins fitted to the front as well.


With the hinge pins installed it looks more neather now


Same for the rear
I have ordered some nylon spacers that will fit a bit better than my homemade spacers.


And lastly I removed the masking tape from the bottom of the chassis.
Most of the stuff is now on its place, so don't think I need the guide markings anymore.


I still need to order these items to finish this build, or at least make it driveable:
# A pair of 65mm dampers for the front.
# Wheelbearing kit.
# Motor pinion - I may have a spare one kicking around.
# Paint for the body.

RC progress may come to a halt soon as I will be moving to my new place 1st of September, and I need start packing soon.
Funds will now be forwarded to my apartment stuff.


The following user(s) Liked this: stingray-63, Al, silvertriple, jord001

Please Log in to join the conversation.

Last edit: by caprinut.

Richard's 4x4 Lunchbox with DF01 drivetrain. 2 years 10 months ago #66858

I have the shocks for you
The following user(s) Liked this: Al, jord001

Please Log in to join the conversation.

Richard's 4x4 Lunchbox with DF01 drivetrain. 2 years 9 months ago #67336

I finally did something rc related.
A bit tired of only doing household dutys before the move.

The new propeller shaft was cut shorter before they was turned down to fit into a 6x5mm aluminium tube.
I used my drill and files to turn them down to the correct diameter before the bits was glued to the tube by green machine glue (like Locktite green permanent glue).
Now it needs to harden at least 24h before it can be handled.
The following user(s) Liked this: Al, 1972 LeMansGT Jim, silvertriple, jord001

Please Log in to join the conversation.

Last edit: by caprinut.

Richard's 4x4 Lunchbox with DF01 drivetrain. 2 years 9 months ago #67338

Perfect custom axle. 
The following user(s) Liked this: jord001

Please Log in to join the conversation.

Richard's 4x4 Lunchbox with DF01 drivetrain. 2 years 9 months ago #67353

Thank you Flo   


Today I test fited it.
The parts must have slide a couple of millimeters, because there is no slope between the gearbox outputs.
Infact it binds a little evert turn.
So because of thise I need to heat the tube next time so I can manipulate them to be a tad shorter.
May pull them apart and sand down one of the ends.
Apart from that it is good to go, just needs a bit of epoxy on the end of the tube, sanding and then paint it.

There is still heaps of space for the battery  


A bit closer look.


I also fitted the aluminium motor mount.


Strangly my hobbyroom was hotter today. Outside temp yesterday was 27C, today 21C.
Had to quit after I had done these two things since my hobbyroom was like a sauna.
The following user(s) Liked this: stingray-63, silvertriple, jord001

Please Log in to join the conversation.

Last edit: by caprinut.

Richard's 4x4 Lunchbox with DF01 drivetrain. 2 years 9 months ago #67356

I like that. A futur lunchy crawler
The following user(s) Liked this: caprinut, jord001

Please Log in to join the conversation.

Richard's 4x4 Lunchbox with DF01 drivetrain. 2 years 9 months ago #67359

I like the "Missing Picture"s :-D
I buy kits to built and ru(i)n them :-)
The following user(s) Liked this: jord001

Please Log in to join the conversation.

Richard's 4x4 Lunchbox with DF01 drivetrain. 2 years 9 months ago #67361

I like the "Missing Picture"s :-D

I'll take the blame for that... Trying to fix e problem Caprint reported. 
Signature now gets correct formatting if you edit it in your Profile. Use normal BBcode if you want.
www.tamiyabase.com was formatted automatically.
The following user(s) Liked this: silvertriple, jord001

Please Log in to join the conversation.

Richard's 4x4 Lunchbox with DF01 drivetrain. 2 years 9 months ago #67365

I like the "Missing Picture"s :-D
I'll take the blame for that... Trying to fix e problem Caprint reported. 

Some of the threads with pictures seems very slow to load, That might be linked?

On my side, I generally put my pics on imgur and that doesn't seem as long to load than others (just give my observation in case it is of any help).

​​​​​​​(and sorry for the off topic, but it seems related to the missing pictures :-) )
I buy kits to built and ru(i)n them :-)
The following user(s) Liked this: jord001

Please Log in to join the conversation.

Moderators: caprinutstingray-63AndyAus
Time to create page: 0.193 seconds
Cookies are required to make this site work. If you continue to use this site you permit us to use cookies.