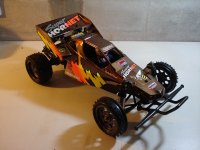
TOPIC:
Re: Bigpig #2 resto 11 years 9 months ago #10920
|
A little bit more building ...
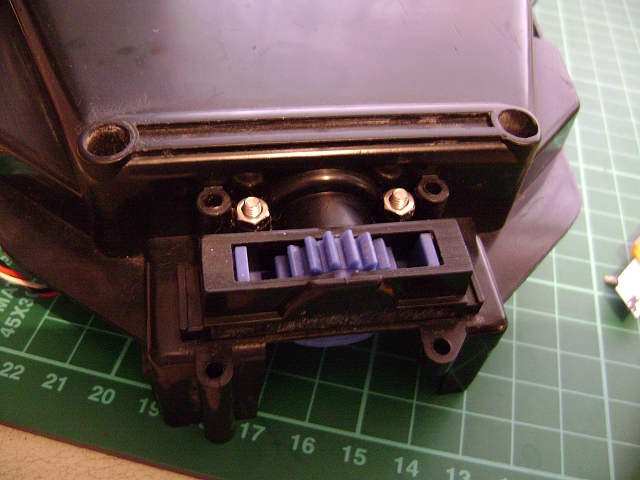
Step 24 again - I found the remains of a B sprue from my last Bigwig, so used the bumper rails off that: Back to the beginning of the manual ... Step 1 is fitting the 8.4v/7.2v adaptor (really)... Step 2 is connecting the battery, RX, MSC plate, on/off switch & servos ... Step 3 is entirely in Japanese, but looks to be turning the TX on, presumably get the servos to neutral ... Step 4 - servo saver & steering pinion; cheapo servo tester saves quite a bit of faffing about Step 5 is cutting down & fitting a servo horn to another servo ... Step 6 is fitting the resistor, base plate & heat guard to the MSC loom ... Step 7 is building the MSC, Step 8 is testing it.... Step 9: Fitting steering servo. Fitting per the manual lets it flop about, so I put a 3 layers of servo tape underneath too. RX should also go in at this point, but TBH I haven't worked out what I'll use yet... The holes in the chassis where the steering pinion retainer screws in were stripped, so I used longer screws & fitted nuts underneath: Step 10 is fitting the MSC - instead I've put in an Mtroniks 20T, which may be a bit of an ask, considering the 19T motor, 8.4v & the lardy 4WD chassis Step 11 is building the steering rack; the bellows are stiff as anything due to age & years of exposure to too much & the wrong kind of grease & oil Step 12 is fitting the rack retainer/guard; you can't see it in the photo, but the leading edge has a few scratches & a bit of staining/discoloration, so that'll come off again for sanding & polishing: |
|
Please Log in to join the conversation. |
Re: Bigpig #2 resto 11 years 9 months ago #10928
|
Sanded & polished some yellow bits ...
But my new balls have yet to arrive, so progress is a bit all over the place ... Here's a photo of my misshapen balls: Step 19 is putting all the shafts, gears & bearings in the front gearbox halves ... seems a lot for one step when you consider what the first few steps in the manual cover Bumper stay thread is completely FUBAR, so will be replaced with a re-re Boomerang part, left over from my last Bigwig build: Step 20 - front gearbox bolted up: Step 29 - rear gearbox & fake exhausts: Step 35 - fitting rear shocks: |
|
Please Log in to join the conversation. |
Re: Bigpig #2 resto 11 years 9 months ago #10930
|
|
|
Please Log in to join the conversation. |
Re: Bigpig #2 resto 11 years 9 months ago #10931
|
|
|
Please Log in to join the conversation. |
Re: Bigpig #2 resto 11 years 9 months ago #10933
|
Also tried some paint stripping - DeSolvIt Graffiti Remover again.
Cat was no help with glove choice - vinyl seem to stand up fairly well but are very porous to one or more of the active ingredients, Nitrile provide a much better barrier but don't last very long. I haven't tried the latex with the Graffiti Remover yet. Wheels, tyres & driver came up pretty well: Shell was ok after the first application, but the second started to cloud the lexan on the inside... ... which showed up quite badly when I painted the cockpit area. I know I could theoretically paint the outside of the shell, but I'm determined not to spend any more money on this car & to use paints I already have - and for the scheme I have in mind that means using brush paints, which have to go on the inside... |
|
Please Log in to join the conversation. |
Re: Bigpig #2 resto 11 years 9 months ago #10934
|
Pretty awesome resto work again JR you never cease to amaze me
The following user(s) Liked this: Jonny Retro
|
|
Please Log in to join the conversation. |
Re: Bigpig #2 resto 11 years 9 months ago #10939
|
Thanks - I think it's going quite well, considering the starting point ... I have been tempted to say sod the expense & get the bits to fix it up properly - TBG shell, new decals, new tyres, new metal antennas, maybe even find a pukka Techigold motor ... but sanity prevailed & I totted up the costs before I went on an eBay spree - "ouch" is all I'll say I'll stick to my plan of making the best of what I've got without spending any more money if I can help it - I'm working on an "alternative" paint scheme & redrawn logos that isn't in the manual |
|
Please Log in to join the conversation. |
Re: Bigpig #2 resto 11 years 9 months ago #10943
|
Hey JR, there is a saying "no matter how much you polish a badword, it remains a badword. But you can always roll it in Glitter.". But honestly my friend, you once again managed to polish a badword into a rough diamond... I little more polish, and you'll have a real winner on your hands. Superb work buddy.
My Projects:
Bullhead Rebuild ... Ford F350 Mods ... Manta Ray Revival ... Custom Super Hornet Build ... TL-01 Crawler ... CC-01 Pick-up ... CR-01 With Hop ups ... Project Unknown ... Clod crew cab ... Other: Custom Display cases ... Limited Slip Diff(LSD) ... |
|
|
Please Log in to join the conversation. |
Re: Bigpig #2 resto 11 years 9 months ago #10947
|
Balljoints still haven't arrived - grrrrr!
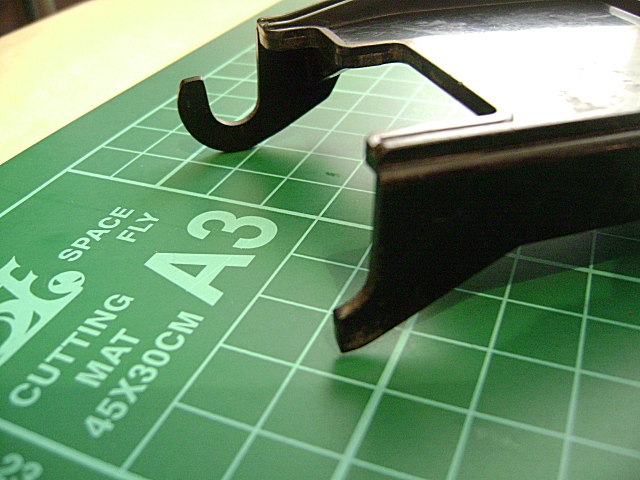
I've been working on the shell & homemade decals - no pics of that yet as I don't want to spoil the surprise I've also sanded the wheels (same process as earlier in the thread), they look a lot better, but I had to take off a lot of material to get rid of the gouges, yellowing & paint staining - spraying would cover up the colour left in the lettering, but would obscure the lettering itself ... BEFORE: AFTER: I've also sanded the sub chassis - both the new hook, and the scratches on the top; I'll leave waxing that until I've painted the hook. I've sanded the rust off the antennas; straightening and a _cunning plan_ to restore the colour will come tomorrow. |
|
Please Log in to join the conversation.
Last edit: by Jonny Retro.
|
Re: Bigpig #2 resto 11 years 9 months ago #10952
|
Hooray! I have a new ball bag:
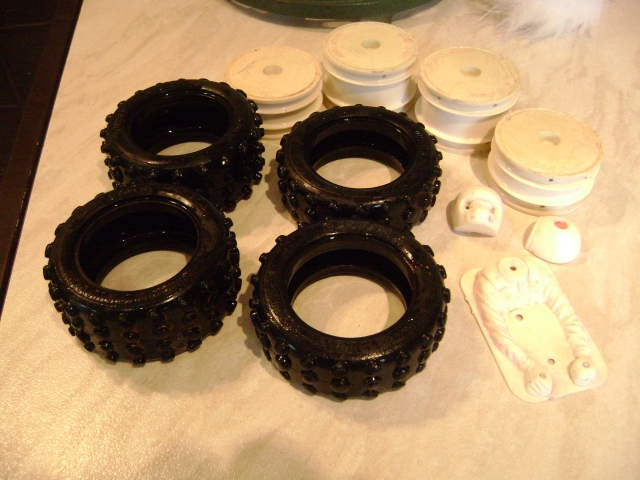
Moving on ... Polishing the antenna ends with 1200 & 2500 grit wet & dry: Also thought I'd have a go at the subchassis retaining pin, which in hindsight I should have done before.... Having sanded the rust off, I treated the bare metal with two coats of Bilt Hamber "Hydrate 80", which is a modern, high-tech equivalent of using Phosporic acid ... from past experience on 1:1 cars I know it stops rust & dries a semi-translucent black - so close to the original (oil blued?) finish I dug out the vintage tyres I didn't use on my last Bigwig build (now on some re-re Hotshot wheels) as they were too worn & stiff - I decided to use them for this one as they were so much better than the ones that came with this car... This is what I meant by taking off a lot of material from the wheels: |
|
Please Log in to join the conversation. |
Time to create page: 0.252 seconds


